Kaleidoscope Creations

thecutstudio @ gmail . com

Showing posts with label tricks and tips. Show all posts

Tuesday, January 21, 2025

Acid/acid-free glue test

 I did this a few years ago and found my old post from a message board so I could save it on my blog. It's from March 2022.  I had been mulling over the issue of acid-free (or not) glue for scrapbooking.  My conclusion is we've been 'had' and it's not necessary to spend a lot of money for glue.  Some people don't think it's scientific enough (like the fact that the pen was designed for paper) but as far as I'm concerned, seeing as there's different results with different products, I'm not sure the 'testing equipment' used makes all that much of a difference. (Like, do you people really think there'd be totally different results if I'd used litmus paper instead because they are liquids?)  You're free to consider these results I got or blow it off and do your own thing. Makes no difference to me but thought I'd share for the sake of others it might matter to. 

For reference (as you can see in my note below about the package being definitely acidic) - the more yellow, the more acidic. Purple is considered 'acid free'. (the package actually said yellow or clear is acidic but I've never seen anything I've used it on be clear.)


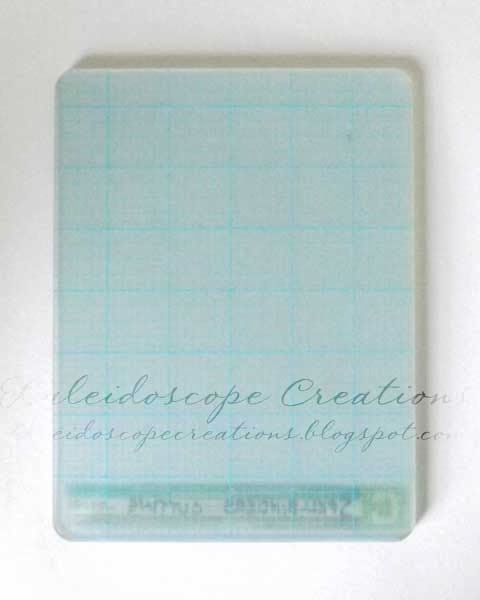
I have an OLD pH pen from Fiskars but it still works. I started scribbling on different stuff. Then I made a little blob of the Aleene's original and their (supposedly) acid free. Let it dry and tested the pen. Tried it again, same results. 
I made an 'official' swatch. 😉 
Here's the results, with the back of the package sampled, too. (Definitely acidic.) 
My camera coloring is off but the results are obvious. The Aleene's 'acid free' is the worst.


This was my original sampling on copy paper above the 'official' swatch. I'm still not over the Aleene's 'acid free' being the opposite!


Sunday, February 20, 2022

When is a flower not a flower?

 When you look at a die in a different way! The dies I used are part of a Sizzix stamp and die set. They are meant to be individual petals that are arranged to form flowers. But the shape reminded me very much of ornaments and I used a die from an actual ornament set I have for the tops. I think the center cutouts give them a retro vibe.


Monday, March 6, 2017

DIY sticky picker upper

I made this using a dried out/won't work anymore gel pen. I just added a little Aleene's tack it over and over to the tip of the pen and let it dry. When dry this type of glue is tacky. Just lightly tap the end to the small item you're trying to pick up.  I added the glue just a tiny bit and let it set/dry a bit before adding more to build up the tip nicely. The glue is white when wet and clear when dry.


Monday, December 22, 2014

One die, many doilies

With one die, you can stretch it into many doilies of varying designs and sizes. Just a careful snip of the scissors (or slice of a craft knife) will give you many options.
You could come up with even more than these, but here are 10. Starting with the original die cut straight from the die (Lifestyle Crafts).


Monday, July 21, 2014

Getting your Quickutz/Lifestyle Crafts doily die to cut....

I recently bought a very nice doily die from Lifestyle Crafts at Michaels but it did not want to cut in my cuttlebug. I had to really shim it up so that it was almost impossible to crank. And it cut thin paper better than cardstock.
I finally came to the realization that the ejection foam in the die was probably interfering with the ability to cut well. Unlike other wafer dies, these dies are entirely closed so there's no open space or holes to poke out your cuts and the bits and pieces. That's what the foam is for - to push the paper back out after it cuts it.
So I removed the foam from the outside of the cut and from the die cut shape. I left the foam in all the little places that would be the open areas in the die cut shape. I did NOT want to try and pick all those out of the die after!


You will likely have adhesive residue left behind in spots. You'll need to go back and clean that off. Or if you're lazy like me, rub cornstarch all over it and then use and old toothbrush to brush the excess cornstarch away. Worked pretty good for me - yours will depend on how much sticky got left behind.

Then I found that trying to pick the diecut out with a needle and not tearing it could get tricky (and a hassle). So I went back and grabbed a scrap of the foam, stuck it down in one little spot on the edge of the doily, and ran it through the machine to cut the foam inside the edge of the die shape. Throw away the excess and you will have this. A little spot where the edge will pop back up so you can grab it and peel out your diecut!


Friday, March 21, 2014

Special ordering products at JoAnn....

Recently there was a DCWV stack that I really wanted but it turns out my local JoAnn wasn't going to be carrying it. It had been several years since the last time I had asked and based on what I saw people post on the internet (whether or not there's a shipping charge), I wasn't sure how it worked anymore. So I asked the manager about how special ordering.

There is NO charge if the item comes from the warehouse. They will be able to tell you this but also here's a tip if you see a shelf tag. There are 2  letters on the bottom right side of the shelf tag. The letters DC means it comes from the warehouse (Distribution Center) and there is NO shipping charge for a special order. If it says DS, that means it comes straight from the vendor and a shipping charge would apply.


Now, I thought I'd share that tip with other people about special ordering and emailed with Erin at DCWV to let other customers know how they can get the stacks their stores may not have been selected to carry.
Erin recently posted a video on youtube about how to order the stacks at JoAnn and I thought I'd take the credit I deserve ;)  and say I gave her that tip. (She never mentioned that someone had emailed her about this problem and shared how to solve it.) Here's the video:

How to special order [stacks] at JoAnn

While I didn't save the full email, I do have her response since I shared it with some other people on March 4.


Hi Tammy,
Thank you, thank you for your email! I have spent some of today looking into this. I had no idea that this was an issue! I found out that yes, not every single store will get the releases. We will try and do a better job and relaying the information on which kind of stores will receive the stacks, but sometimes we don't know either! We are working hard on getting our products up on the joann.com website so people can order online too! So sorry for the inconvenience!
E

I believe in giving credit (in some form at least) where credit is due and so I'm claiming mine. LOL

Monday, January 27, 2014

DIY die positioner

When I saw that Little B was coming out with a positioner for wafer thin dies for manual cutting machines I thought, hey, that's easy enough to make! Also, no price had been stated at that point (I have since found out it's $4) and I was pretty sure it could be done cheaper. It's just an adhesive mat with a grid (and additional markings).

You can find gridded quilting templates in stores such as JoAnn (where I got mine) that sells a lot of quilting supplies. This is what I picked up - with a 50% off coupon it was $2.14. It's very thin and easy to cut. It's probably about the thickness of lightweight cardstock.
The mat made by Little B is 6 x 12 inches. This template material is 12 x 18 inches. This will give you enough material for four smaller mats (such as Cuttlebug sized) or three 6 x 12 mats if you so desire that many!


For the cuttlebug, cutting mat C is what you'll be using. It's the adapter plate for wafer thin dies. You will cut the mat 7 5/8 in length (longest side) and 5 7/8 in width.  Do NOT rely on the measurements on your trimmer. Follow the markings on the template. (Sorry, I should've gotten a full pic - both the template and cutting mat are positioned in the landscape orientation. This is how you'll be able to cut 4 pieces if you want to.)


As you can see here after I cut the material the edge of the template goes slightly over the edge of the cutting mat and beyond the rounded corner.


You are going to trim this to the edge of the outside marking.


Next, you can round the corners. I found that the green paper shapers corner rounder (EK Success) was pretty much the right size. Here's the mat all trimmed and rounded.


Now you're going to cover it with repositionable adhesive.  I actually applied it to my cutting plate and one side of the template but you can apply it to both sides of the template. Don't get heavy with it - particularly on the side the dies are going to be stuck to! Your paper will also stick when it's rolled through and you'll want to be able to pull it off.


Here's an example where I used it to make a Polaroid frame. (I didn't have the right size rectangle but it was easy enough to trim the bottom after.) You will notice in the second pic my mat was a bit too sticky in one spot and my paper got left behind a bit.  


I just used a damp cloth and gently rubbed the paper off. No problem and didn't take all the tack off either.


One last thing.... it's hard to determine which side is the printed side with the grid! If you find out after the fact like I did - I had a small spot where the paper had stuck and lifted the adhesive and print off in the center - simply remove the grid and flip it over. (Apply adhesive if necessary - since I had applied it to my plate the first time, I had to put some on again when I had to flip the template.)
And be sure you use this with the die's cutting side up. If you put your die face down on the grid you will be cutting yourself some masks/stencils!


Wednesday, December 18, 2013

dies with matching stamps....

Using your die to cut craft foam is a great way to make matching stamps. These were cut from a sizzlits set. I used a craft knife to cut out the windows fully so they won't get inked.
Using a stamp press helps to align the stamp with the diecut almost perfectly!


Monday, December 16, 2013

Making little gift bags with a score board....

WRMK has come out with some convenient punch boards for different projects including gift bags. But why spend money on them if you already own a score board? And different boards for different purposes take up more space. Making gift bags is pretty simple. I have also marked the score lines with a pencil so they'd be easier to see in the pictures (you don't need to draw the score lines yourself!)
Hopefully my directions are fairly easy to understand. Sorry, I don't do videos. LOL

First, you will have to do a little math. Decide how wide you want the sides of your bag to be and how wide the front/back will be. Add the measurements together and add 1/2 inch for the tab. Your paper will need to be this wide. My bag is 3 inches front/back with 1 1/2 inch sides.
 3 + 3 + 1.5 + 1.5 + 0.5 = 9.5

Now you need to determine the height. How tall do you want your bag to be? To this you will add the next measurement (the bottom of the bag).  Mine is 6 inches.
The bottom of your bag will be the same as the width of the side. Subtract 1/4 inch from this measurement. My bag is 1 1/2 inches wide on the side. 1.5 - 0.25 = 1.25
6 + 1.25 = 7.25

My paper needs to be 9 1/2 inches wide by 7 1/4 inches high.

Begin by scoring your paper for your width measurements. Side (1.5), front (3), side (1.5), back (3). Your 1/2 inch tab will bet the remainder on the right.


Turn paper and score your bottom measurement. (1.25)


 Turn paper upright again and draw a tick mark 1/4 inch from edge. Make tick marks 1/4 inch from each vertical score line.


Fold/crease all scored lines.


Trim off section on the bottom right. This will begin your tab.


Trim off a corner at the top and bottom of the tab from the score line to the outer edge.


Make your bottom flaps by cutting on a diagonal from your tick mark to the bottom (horizontal) score line.


You now have your 4 bottom flaps.


Add adhesive to the front side of your tab and fold bag so your left side overlaps your tab.


Add adhesive to one of your larger flaps. Fold in side flaps first, then the one with adhesive and fold over last flap.
 

Tuck sides in and pinch top. If you want, pinch top together and cut with decorative edge scissors.


Punch holes in top and thread with ribbon.


I hope you found this simple enough to follow. You can make various size bags simply by doing the math!

.


Monday, July 1, 2013

DIY stamp press

I made myself a stamp press by using the acrylic sheet from a stamp positioner and some foam that something had come packed in. A cheap synthetic sponge would probably work as well, one that has some good thickness. Simply cut a few squares and attach with double sided tape.
Any sheet of thick and sturdy clear plastic will do. Perhaps you have a bit of plexiglass lying around. Or maybe an acrylic frame.
 

Sunday, March 17, 2013

Punching notches for envelope making

We R Memory Keepers came out with a new envelope punch board, which is nice, but if you already have an envelope maker/scoring board it seems like a waste of money to buy another just for the handy punch feature. However, snipping out the notches on your envelope with a pair of scissors isn't very fun. A bit tedious actually.
So.... my little brain thought about how I might be able to punch the notches out. It's just a triangle - but you can't find a right angle triangle punch - and certainly not one that faces the way you need it! However, a square is just 2 right triangles that got married. :) You just have to turn it a bit. A large square will give you enough 'triangle' to punch out your notches. The one I used has sides that are approximately 1 1/2 inches. Smaller squares may not give you enough 'triangle' for punching.

Here's the paper after it's been cut and scored for an envelope.
 
Now what you want to do is flip over your punch and line up the corner of the punch just outside your score lines. (I should've use pencil so you could see the lines better but I was hurrying to show you! Oops just noticed a scrap of paper still in my punch!)
 
 
Go around and punch out all 4 notches.

Voila! Neater and faster! Just fold up your envelope now. You can always use a corner rounder on your corners if you want to. Or a border punch on the flap like in this post.


Tuesday, January 29, 2013

Command hooks for organizing/storage

These hooks are a great invention. They hold well yet they're removable. The ones I'm using in my scrap space are called wire hooks. (I think they are size small.)

I have one for a mini trash can and a place to hang my scissors. Best thing - I'm never losing my scissors in a mess on my desk.


I have one on the inside of each door of this little cabinet - holds my Martha Stewart large circle cutter and my ring of embossing folder samples.
.

 
I also have one on the wall at the side of my desk which hold my cricut mats. And another one next to my sewing desk that holds my self-healing rotary cutting mats and ruler.

Saturday, April 28, 2012

Durable plant markers

I have come up with another use for old cutting mats used in electronic die cutting machines. In my case, it would be cricut mats. Sturdy plant markers! I didn't even concern myself with cleaning the sticky side. I see no need to waste water, cleaning supplies, and time doing that. You can use the lines on the mat as your cutting guide. I used an old 6 x 12 mat. You can cut off the ends if you wish, or use the whole thing. A good, sturdy guillotine cutter works great. Or you can cut by hand with scissors.
If you cut it in half inch strips (mat laid horizontally as pictured above)and then cut those strips in half you can get 2 small pieces. Cut a point at one end. Those are good for marking pots like this.
If cut the mat in 1 inch widths, they make good garden markers. My mat was curled on the edges so I trimmed off one end.
Then I cut the other end into a point. I used the back side to write the label with a Sharpie marker.
Now you have a sturdy, durable way to mark your plants and another way to recycle those old cutting mats!

Friday, April 6, 2012

Washi tape

This is the new hot thing. It's paper tape. Original washi tape is from Japan and a type of masking tape. You can buy it from a store or you can make your own. You can find tutorials on it but basically, you take your paper of choice and put it on some double-sided adhesive. Voila. Washi tape. I didn't make it because it's the hot new thing. I'm not into trends. It's actually for layout challenge. You can use mulberry paper like I did in one of my pieces. You can use tissue paper like I did in the other pieces. Use pre-printed tissue paper or stamp your own. The tissue paper gives a nice, translucent quality to your tape. Some people also use scrapbook paper or wrapping paper. If you want to use your homemade washi tape in your scrapbooks, keep in mind you want to use adhesive and paper that's acid free. Also, if you want the adhesive to last you need to keep that in mind because some tapes adhesives don't. So use those on cards that you don't care about them needing to stick for years. I chose to stamp my tissue before I ran it through the xyron, but you could also stamp after. Unfortunately, I ran out of adhesive before I could make all my tapes! I did the mulberry paper to see how it would look but I love the look of the stamped tissue paper! I haven't used them yet - I made them and then came to post. LOL

Tuesday, January 10, 2012

Use your paper challenge...

Have some old paper that's been sitting around? Don't love it anymore but feel you have to use it? Or maybe your stash is just huge and you want to find a way to whittle it down but actually DO something with it....

A quick way to use up your old paper is to make cards with matching envelopes. I started with this paper.


What you want to do is make the envelope FIRST. You can put your pattern on the outside or inside - just keep in mind that to mail it, you may need to use a white label for the address area if you use the pattern outside. These are A2 sized. I made one envelope with an 8 1/2 inch square cut from the paper. There was plenty left for 2 cards and to line the flap of the second envelope. I also like to punch the flap with a border punch.


Then you use whatever scraps are left on the card. If you've got enough don't just use it on the front, use it on the inside, too!


Voila! Some not-so-great paper becomes some pretty good cards with matching envelopes!

Wednesday, November 2, 2011

Card designing template

With the last cards I made, I came up with this idea to help me design my cards. It helps me to know how much space I have to actually work with (the size of the card front) and what it might look like vertically or horizontally. It allows me to figure out what part of a patterned paper I might want to use or how much of more than one piece. I measured and trimmed the clear plastic from a set of spellbinders dies and used a sharpie to write the card size, mark off the halfway point both vertically and horizontally, and around the edge of the clear plastic so it is easier to see the edge of the 'card'.


Here I can pick out part of a patterned paper. This is especially useful with word paper and some designs.


This shows how I can pull together more than 1 piece of paper to create a design and see how it will look. I can move the paper and/or template around so I have more or less of a paper showing.


If you turn the template, you can decide if you like it better horizontally or vertically, too.