Showing posts with label valentine's day. Show all posts

Wednesday, January 29, 2014

Card Concept Seize the Sketch

So I sat down today to try out a new challenge blog
called The Card Concept.  My style for this card is

Clean and Layered.

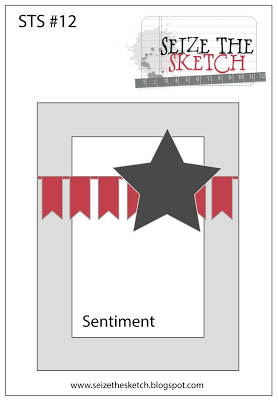
And I really liked the sketch at Seize the Sketch.
But once I sat down to create it didn't seem to come together for me.
Anyway, this first card is my entry into these challenges,
but the one below was another one I tried.


You see, this one below didn't seem to photograph well, and that
little flower embellishment just looks too vanilla compared to the other whites
in the card.  I could NOT get it to stop standing out, so I decided to try again, and the 
one above is my final card.


For seize the sketch, I changed up the star medallion to a banner.
It just seemed to work better with the heart banner.
For the card concept I started with red, because of the cute 
little red cabin in the inspiration photo, and decided to make a
Valentine's card.  I embossed the red card stock to 'add texture' for
the card concept, as well.


Most of the product on my card is from Stampin' Up! except for that cute heart banner from Basic Grey and the "us" sentiment sticker from Little Yellow Bicycle.

Thursday, February 14, 2013

Happy Valentine's Day!


Last week, while I was making a card for the Muse challenge, I made this card at the same time.  Click here to see my other card. 
 
 
I like this little lace ribbon.  I didn't want it to be too big and take over the card,
but at the same time, I wanted it to stand up and be noticed.

 
The hearts are cut out with the Hearts Aflutter framelits and matching stamp set.
The paper and the "love you" sentiment are from Crate Paper

 
Here's the finished card.  I think this might be the perfect one for hubby this year.

Monday, February 11, 2013

Love Card

 
This card was fun to make - I love stickers,, and I love felt.
These cute stickers really drew me in, so I made a little card from them.
 
 
I tried to match the colours with my Stampin' Up! product.  The colours I used were Melon Mambo, Raspberry Ripple, Early Espresso, and Certainlly Celery.
 
 
I used the two pinks and my colour sprizter tool with this hexagon mask, to make this cool background.  I also pulled out some retired ribbon and voilla!  Cute dontcha think?
 

Wednesday, February 6, 2013

Stampin' Royalty Challenge #162

It's Wednesday!!!  We have a theme challenge for you over at Stampin' Royalty.
 
 
Show us your
 
VALENTINE'S DAY
 
creations! 

I pulled out all my fun stuff from the Spring Catalogue.  I just love all the vintage accessories!  I made this cute little collage for my hubby!  I know it's a bit girly, but I just couldn't resist.

I tore a strip of the Print Poetry from the mini pattern stack .  I distressed the edges with some Soft Suede, and Primrose Petals ink.

 This cute little ribbon was in the Artisan Embellishments Kit.  The cute little clock charm is from the Tea Time Trinkets kit.
The little LOVE ticket, the heart shaped doily, and the clear button is also from that kit.  The heart was stamped and die cut with the Hearts Afflutter set.
So here it is, I hope he likes it!
 

Tuesday, January 29, 2013

Colour Q Challenge #174


We have a Fabulous colour Challenge for you at the Colour Q this week. 
Hop on over to check out the fab samples by the design team.
 

Muse Challenge #2


Today I thought I'd try out a new challenge blog called Muse. 
Hop on over and check it out.
You need to create a card using their selected muse as your, well, your Muse. 
 
So here's the inspiration that I drew from this fabulous card by Suzanne Dahlberg.  First I looked at the colour palette and found this fantastic paper from Crate Paper.  Some of the colours are different, but most of them are the same as in her sample.    I started to copy the layout of her card, and realized that I actually didn't want to COPY her card, but be INSPIRED by it, so I reversed the layout and put the sentiment on the top and the images on the bottom.  I also was inspired by her "XOXO" sentiment and made a Valentine's Day Card.

 
Muse

Friday, August 3, 2012

Affection Collection In Colour

Here's another card made for the display boards at Convention.


I'm pretty sure this one was up on the boards.
I tried to use the InColours on this card.
\

I used the 2012 In Colour patterned paper and some paper from Comfort Cafe.  I also stamped some images from the Affection Collection using the In Colours, and then punched those shapes out.

So if you look carefully, you can find the word LOVE near the bottom.


 Overall this card too a long time to make, and honestly, I can't remember how I lined up all the hearts, but I think I used a ruler to mark up a strip of cardstock.  Anyway, enjoy!

Tuesday, February 14, 2012

Valentine's Day Projects


When my daughter's daycare told me that they didn't want to pass out Valentines this year, I was really sad because I had plans to use up all my retired Stampin' Up! Valentine's Day paper.  But then I decided to make projects for the teachers.  Rosette Wreaths are really trendy this year.  So I decided to make some for her teachers.  


 I went to the dollar store and bought some cheap tacky hearth wreaths.  Then I pulled off all of the tinsel and glued on the rosettes.  It's hard to tell from the photos, but there are two wreaths.  One is larger than the other.  Below is the back view of the large one.


I went through all my retired accessories and placed them in the middle of the rosettes.  I added a few current ones for more contrast.


 Here's another closeup of the smaller wreath.

Saturday, February 11, 2012

Stampin' Up! Artisan Wall Facebook Project

One of the cool things about being an Artisan Award winner this year is that we get asked to create special projects for the Stampin' Up! Facebook page.  Click here to check out what the other Artisans have created.  There are some fantastic projects up.


Originally I cased a card that I found over on Kristina Werner's blog.   I rearranged the elements a bit and used brighter colours.  First I ran the Rose Red Cardstock through the big shot with Whisper White Craft Ink.  .  Next I ran the Crumb Cake cardstock through with  no ink at all.  I roughed up the edges and added some ink to soften the look.


The pennants were made in various ways.  The centre pennants were made with whisper white cardstock.  First I used the Sale-a-bration stamp sets to stamp my own DSP.  Then I cut out the bottom V.  The centre one was punched with the small heart punch.  I added a Rose Red heart cut out with the same punch to the other 2 flags.

This flag was created with the postage stamp punch.  First I punched out a whole square.  Then I attached a skinny long scrap to the back of it to use as a shim.  Next I ligned it up halfway in the punch and punched it again.  Viola!  I added the Large Pearl for more detail.
I glued the twine along the top by draggin it through a little bit of Crystal Effects and then attaching it.  Once it was dry, I trimmed down the ends.  Next I tied tiny bows out of the same twine.  Finally I used tweezers and dipped them in Crystal Effects and placed them where I wanted them.  When the bows were dry I attached the flags with Stampin' Dimensionals.

Friday, January 27, 2012

Leadership Display Samples - Take SEVEN


This was such a simple card to make.  First it started when I stamped the sentiment on a piece of Pink Pirouette.  I coloured around the sentiment with a Cherry Cobbler marker.  Once I was happy with my colouring I punched it out with the Modern Label Punch.  Then I mounted it on Whisper White and carefeull fussy cut around it for a white Matte.  I added a few mini pearls, some Twitterpated DSP and a strip of gathered Cherry Cobbler seam binding ribbon and voila!  Elegant, yet to the point!

Wednesday, December 28, 2011

Stampin' Royalty Challenge #104


 Yes, you don't need to rub your eyes and look again, it's a Valentine's Card.  This week at Stampin' Royalty we have a colour challenge.  These colours really said Valentine's Day to me.  Besides, Christmas is over right?   There are a few soon-to-be-retired items on this card.  Firstly the Stamp Set "You are Loved" is in the Holiday Mini.  I really hope that it turns up again in next year's catalogue.  This is the first time I have inked it up.


And the Designer Velvet Ribbon in Very Vanilla is going too.  I have to say that I'm a bit sad that I didn't use very much of it.  But it was a natural addition to this card.  


Saturday, February 26, 2011

Vancouver Swaps!

I made this card as soon as I learned about the Vancouver Regional, which I am going to today.  At a Regional, it's like a conference for Stampin' Up! Demonstrators.  You get free stuff like stamps, and there are make n takes and tons of swaps.  PLUS there are demonstrations on the big screen and workshop ideas.  You also get business advice and sneak peeks at upcoming product.   I CAN'T WAIT!!!!!!    Anyway, back to the swap - I cased this from last year's catalogue.
The Recipe:
1.  Paper - Whisper White, Crumb Cake, Baja Breeze, Blushing Bride DSP
2.  Ink - Whisper White Craft Ink and Blushing Bride Classic Ink
3.  Stamps - En Francais Background, I (heart) Hearts
4.  Accessories - Distressing Kit, Stampin' Dimensionals, Whisper White 1/8" Taffeta Ribbon,  Paper Piercing Tool and Mat Pack 

Thursday, February 10, 2011

Stampin Royalty Challenge #58

This week we have a theme challenge over at Stampin' Royalty.  We'd like to see your projects with HEARTS, HEARTS, HEARTS!!  This card is a hybrid card made with MDS and real life embellishments.  The hearts were made using punches in My Digital Studio.  I filled them in with colour and paper swatches in Cherry Cobbler, Pink Pirouette, and Blushing Bride.  I printed it out on Whisper White cardstock.  Then I trimmed it and put it through the Big Shot with the framed tulips embossing folder.  The ribbon is taffeta ribbon in Basic Gray.  I frayed the end and gathered the ribbon around a middle thread for this effect.  The sentiments are from the Tiny Tags set and, of course, the punch is the tiny tags punch.  I mounted it all on Basic Gray cardstock. 

Wednesday, January 26, 2011

Stampin Royalty Challenge #56

     Well this week we have a sketch challenge at Stampin' Royalty, designed by yours truly.  I seem to be on a Valentine's Day kick right now - must be because of the fabulous Occasions Mini we have going on.  Anyway  the heart is framed with the Tulip Frame Textured Impressions Folder.  I found a tutorial on this somewhere on the web and can't figure out where from.  Once I figure it out I'll post up the link for you.  It's really easy.  The only problem for me is that once I sanded it down to do the texture, it started to look uneven.  I'll have to try again seeing as I'm teaching a tutorial on this to a group of Demonstrators this weekend. 
     The sentiment comes from the 'Be My Valentine' single stamp from the current Occasions Mini.  I stamped it on some DSP and carefully cut it out and popped it up on dimensionals.  The heart and flowers were also stamped on DSP and punched out with their coordinating punches - love that Punch Potpourri set.  I then mounted the heart on some Cherry Cobbler cardstock and cut it out to matte it.  Then I used the distressing kit to rough up the edges and add some colour texture.  I really like how this hides my uneven cutting.  The Flowers were stamped on Cherry Cobbler and punched out.  Then I turned them a bit and mounted the vanilla flowers over top.   
The Fun Stuff:
1.  Paper - Botanical Gardens DSP, Early Espresso, Cherry Cobbler cardstock
2   Ink - Cherry Cobbler, Early Espresso
3.  Stamps - Be My Valentine, Punch Potpourri
4.  Punches - Large Heart, Boho Blossoms, Scallop Trim Border
5.  Accessories - Small Pears, Tulip Frame Textured Impressions Folder, Distressing Kit