Showing posts with label free pattern. Show all posts

Friday, January 9, 2015

Some UFO Finds and Finishes. Fabric Box Tutorial

As I continue to look through all my sewing boxes I have discovered some projects from quite a while back.
I had some pot holders and a double glove and two single gloves made with puppy fabric and I used wool fabric as the heat resistant insides. When they got too grubby and were a few years old I picked them apart to get the wool fabric out and started making them over with owl fabric. I finished the pot holders and one glove and nearly finished the double glove. I found the double glove again with the long piece in owl fabric and the two single pieces still with puppy fabric. I decided that out of the box and into the kitchen again was better than thinking about changing out the puppy fabric. It was a done deal when I found a good length of bias strip all ready to go in my little box of binding left overs.


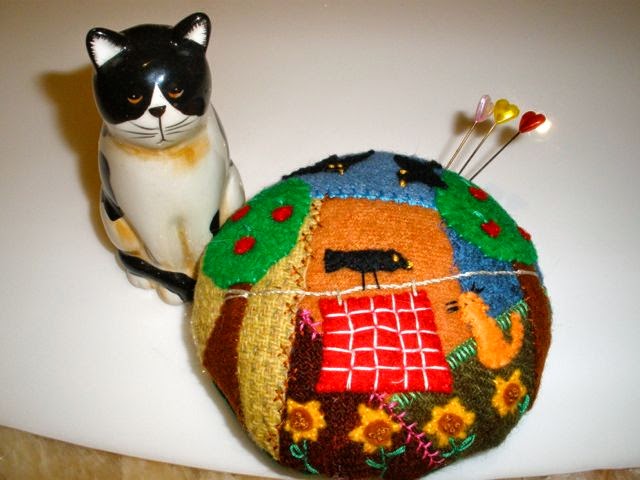
Then I found a cute little scissor holder that I made several years ago. You can get the free pattern from my blog post of Jan 2012.
I used sticky velcro dots to velcro it to my sewing machine. I had to sew the dot on the fabric. Now I can look at it all the time.


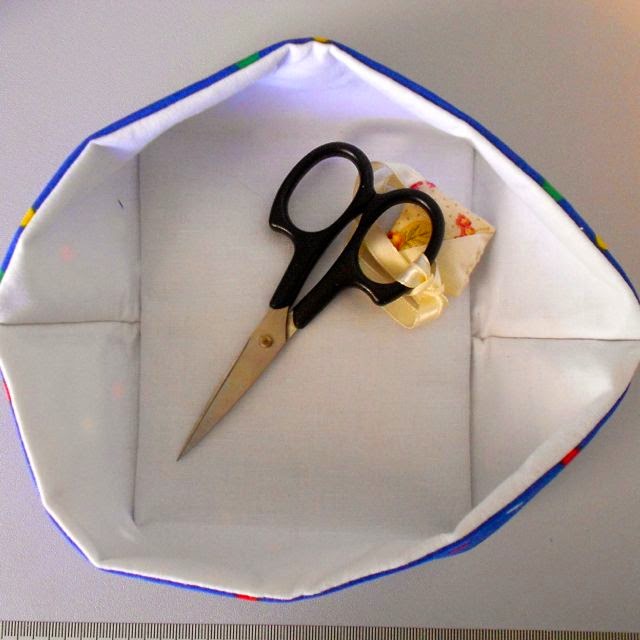
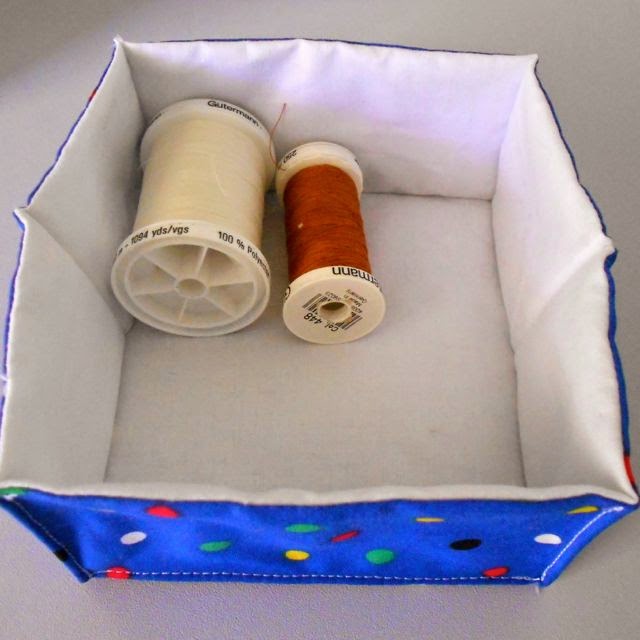
Next was two sets of 10" squares ready to make into little boxes. The original boxes turned out very little but I decided to make these two a bit bigger so they would be more useful. I now have a pretty thread catcher and a reel saver (I tend to knock them off or they roll off). I like to have my most used cottons just next to me.


Start with two 10" squares and put interfacing on the back of each.


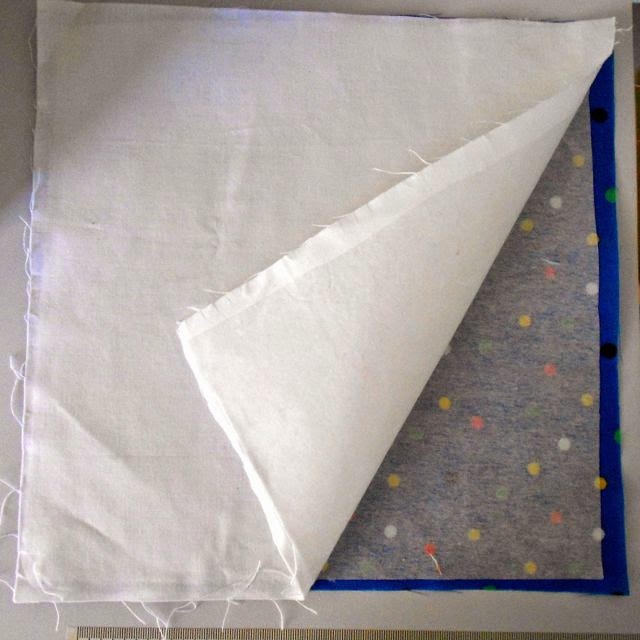
With right sides together stitch all around except for a gap on one side for turning. Press the seam allowance down along the gap. Trim the corners.


Turn and press.


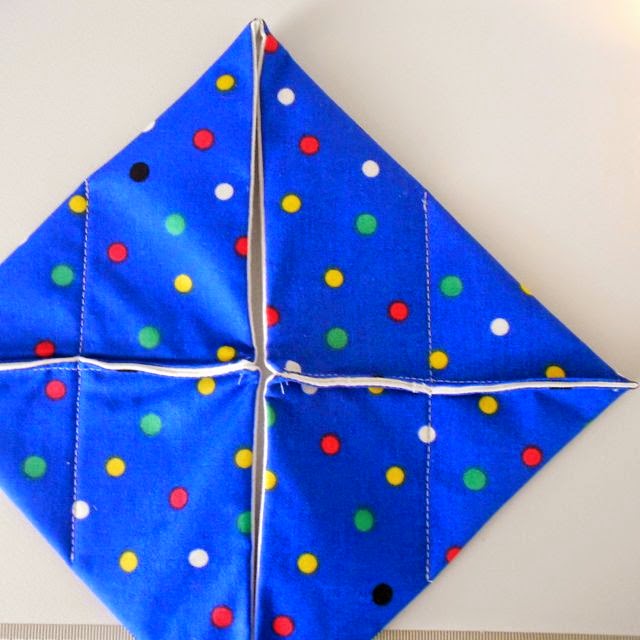
Fold up and pin the gap side and the other side.


Stitch close to the edge.


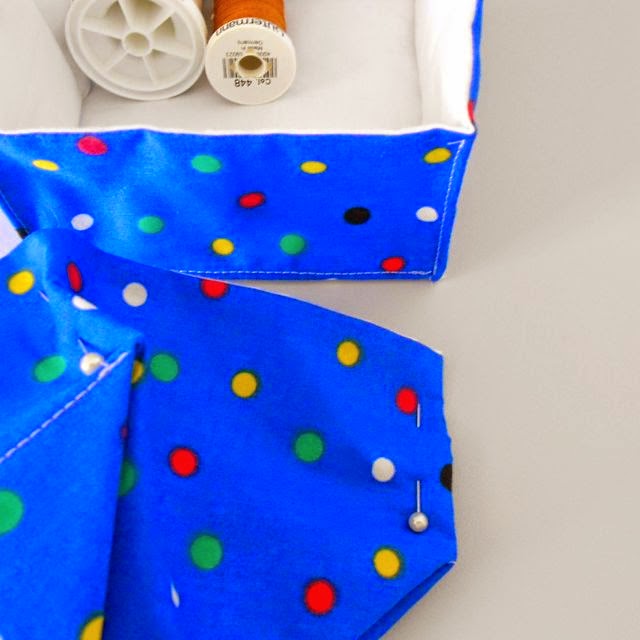
Bag the corners. Measure down the seam lines from the corners 2 1/2" and put in a pin. I then ruled a line in pencil.


Stitch straight across the corners level with the pin.


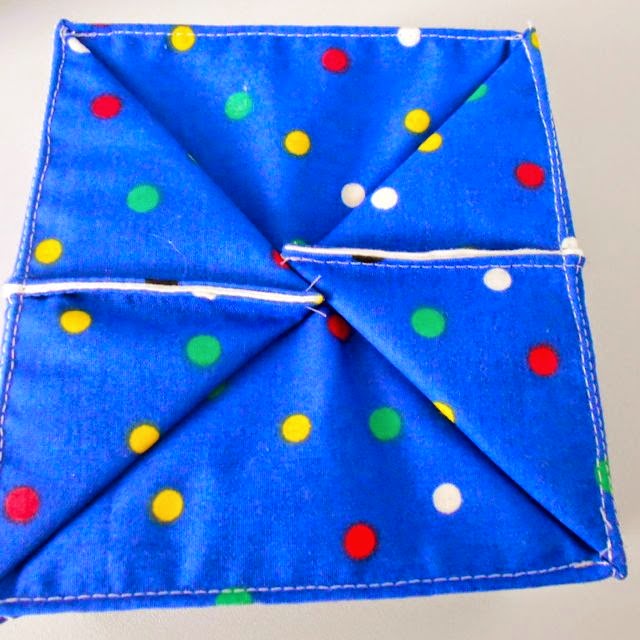
Stitch along the edges at each corner.


Stitch along the bottom edges and this holds the bagged corner pieces flat.


I am thinking a strip of rick rack braid sewn around the top edge will look nice as well as make the top edge a bit firmer. I will do that when I find my rick rack braid. I found the ribbons but now I can't remember where the rick rack is. I am starting up a big box for ribbons and braids and laces. Soon they will all be in one place. Yay!

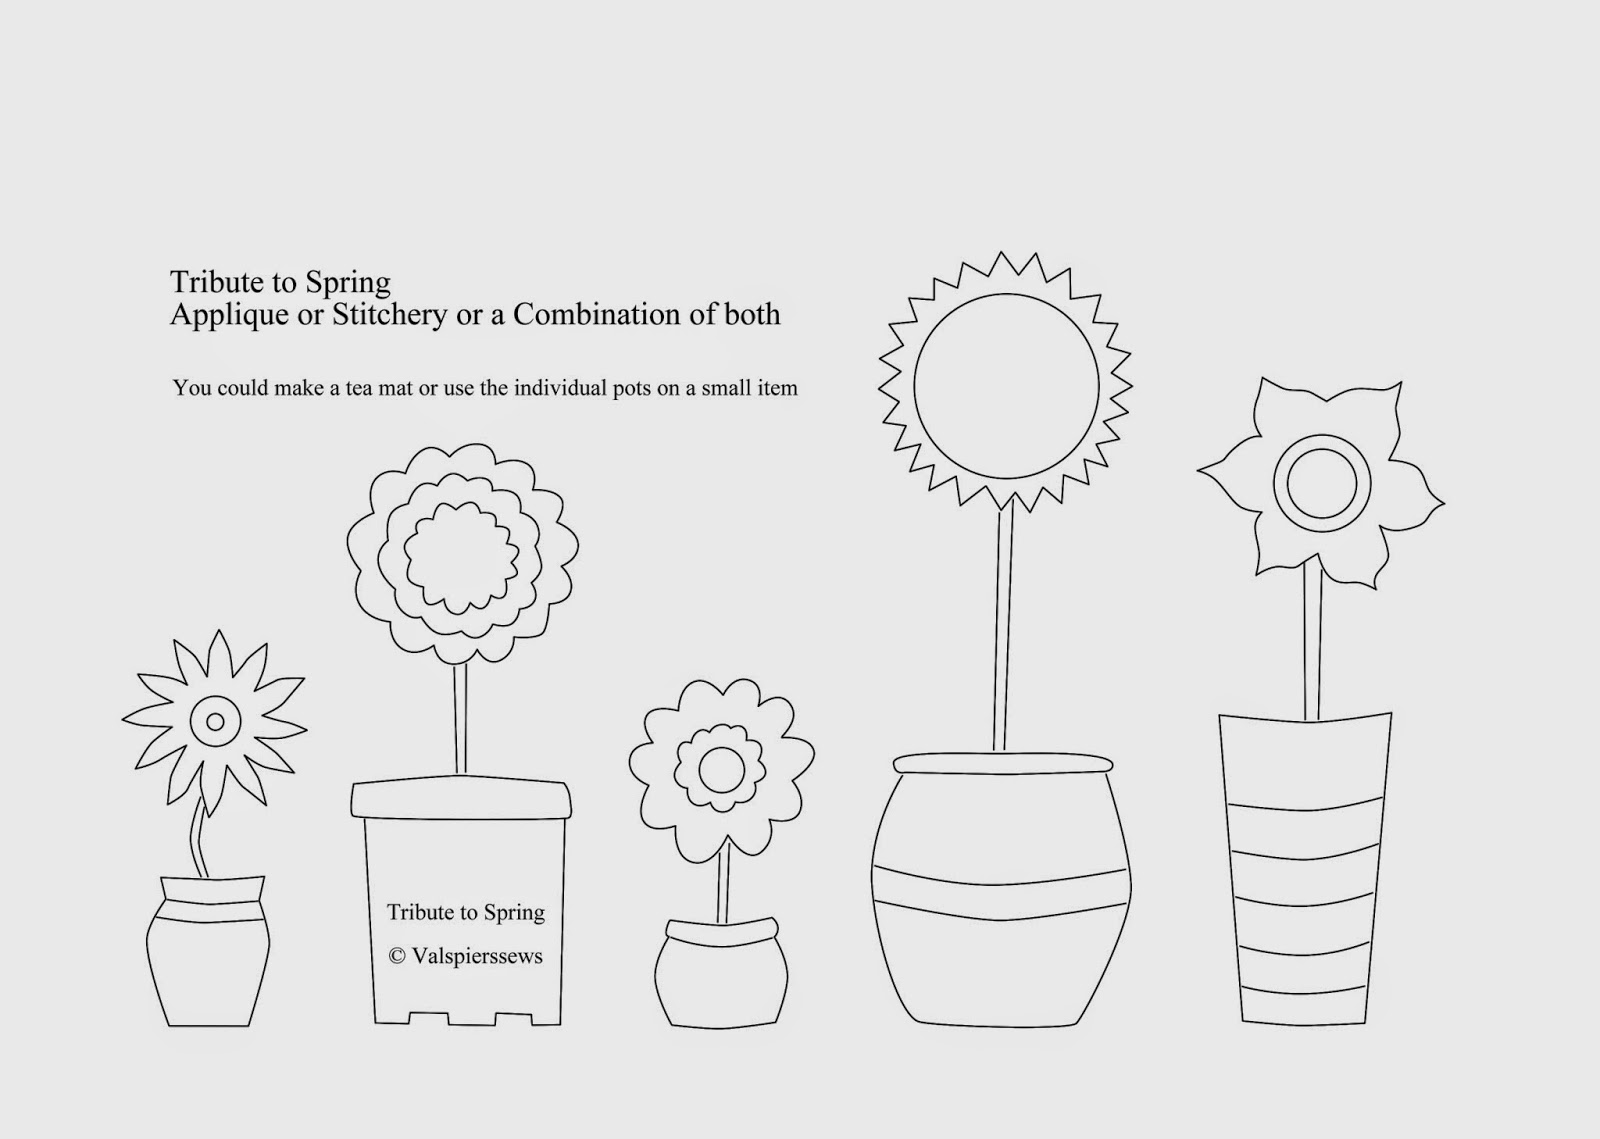
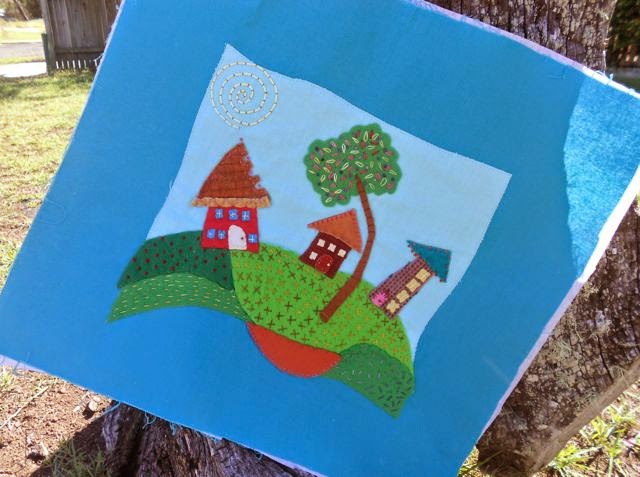
When I was looking for the carrot scissor holder pattern I realised that I have quite a few free patterns from over the years. Have a look through. Here is the link to all my posts with the label 'free pattern'.

Happy Quilting and Crafting,
Val


Wednesday, August 27, 2014

Welcome to the North Pole SAL August 2014

I have started to pack up some of my sewing things in anticipation of the big move early November. The house will be locked up today when the garage door goes on and the kitchen will go in next week. I love the kitchen. I will post a few pictures soon.

I feel like a bit of a poor hostess not working on my Welcome to the North Pole blocks but I do hope some of you have managed to get a bit done this month. It is quite exciting to see some of the quilts started last year almost finished now.

I hope you will post some progress in the linky at the bottom of the page.

In keeping with the applique theme at least, I have created a small Tribute to Spring with some flower pots and flowers that could be used for applique or stitchery but I think it would look great with a bit of both.


It is so easy to put patterns in my Craftsy store so that is where I have put this one. It is free to download. If you are not a member of Craftsy yet please sign up through my affiliate link in the left hand side bar. I get a small commission when new members sign up.

I have just been down to Brisbane for a visit with my mum and we went up to Tea and Niceties (32 Eagle Heights Rd Tamborine Mountain). What a lovely high tea we had. Well worth a visit. Especially now they are in their new garden location. It was $55 each. My favourite thing is the tiny scones. We even bought a teacup and plate set like the ones they use. It is a design they had made just for them. I haven't got a picture of the cup design and I scoffed most of the goodies before remembering to take a photo. Pathetic I know, but you will just have to visit for yourself.


Happy Quilting and Crafting,
Val


Friday, May 16, 2014

Make your 18" doll a patchwork tote

I found a link to this lovely tote bag made in regular size and thought it would make a cute doll bag. I wrote the pattern for an 18" doll size.
There is a mixture of inches and cm in the instructions because of the way I converted the measurements but a confident sewer should have no trouble with it.


The instructions for making the Moda Bake Shop bag may be useful for helping with the basic construction so I have included the link here.

Mill House Inn Tote Bag

Download you free instructions for the doll tote

Make sure you sign up for my newsletter. You get free patterns for 18"dolls and some tips on how to stay on top of things as well as interesting links. Of course, if you like a bargain you get some exclusive offers and first go at the sales.

Happy Quilting and Crafting,
Val

P.S. I don't have sales very often because I offer you my best price all the time. Visit my Etsy Shop for 18" doll clothes patterns and 20" doll clothes patterns that fit Australian Girl Doll.

Thursday, April 17, 2014

Woolly Thinking


Woolly thinking is a super power isn't it? I am really good at it sometimes. But this time I mean thinking about wool and felt and being creative with it.

Wool fabric and felt is so nice to work with and so forgiving of my stitching skills.

Thanks to Madame Samm and Pauline for this great blog hop.  
Thanks to DMC for sponsoring the hop.

I would like to share some of my woolly work with you today.
I made this one especially for the blog hop. I intend to make it into a cushion cover to place in my favourite places so I can look at it.


I had a lot of fun with this design. It is from the book  Fanciful Stitches Colourful Quilts by Laura Wasilowski. I used variegated stranded DMC threads for all the stitching. I love my collection of DMC embroidery threads. I bought the whole lot a while back when cross stitch was my favourite thing. I needed the variations of one colour for the shading affects so I decided I needed them all.

Another felty piece I just finished is the the little scene I blogged about here.


I am also working on Summertime a lovely felty quilt. I have a separate blog for this quilt. The link is in my sidebar.


My first attempt at designing my own little scene is this pin cushion I made. Blog post and free pattern.


I love it when there are give aways on these blog hops but instead of one winner I thought I would finally upload a pattern I have designed onto Craftsy and make it free. I hope you like it.

Applique Sheep Farm
If you are not already a member of Craftsy please join up through my affiliate link below. Craftsy give me a small commission if new members sign up through my link. It is free to join up.
(The easiest way to get the pattern is to come back here and click the Visit my shop link)

Join Craftsy here

If you have already joined you can download the free pattern from the link below.
When you visit my Craftsy shop please click the follow button to follow me. This means you can see when I put up new patterns or project ideas. Some I will charge for but I love to make free designs.

Get the pattern from Craftsy

There are lots of great super powers out there. Visit today's blogs below. Clicking on the Blog Hop button will take you to the complete list for the hop.

THURSDAY APRIL 17


Not into Google + ?
Comment on:
Flickr
Pinterest

Happy Quilting and Crafting,
Val

Sunday, December 29, 2013

Sewing is such fun

I still have the little bits sewing bug. Yesterday I made a yin yang cat mat, a fabric pen cup and a pillow cover front. I think I feel a HST frenzy coming on too. I love the 8 at once method!


The yin yang cats were inspired by a pendant I saw on Pinterest made by Loja Yarr. I made some adjustments so it was suitable to use for applique. It is easy. You just make two bodies and two tails in contrasting fabrics using fusible applique paper. The image is already reversed for tracing. They slide together and overlap. The tails go on last.

Save as and print. Vary the size as you like.
Layout

The fabric pen box has thick bag interfacing and a big metal washer in the base so the pens don't make it fall over. I used this tutorial as a starting point.


The pillow cover is made from HST pieced using this design. I left out the petal pieces and will bind the front to the back with the red fabric instead of doing a seam. I used the 8 at once HST method from here. It worked well because I used a 1/8 inch seam each side of the pencil line rather than 1/4 inch (2/8 inches).


Today Pixel Scrapper started up a free mini kit a week thing. I already get several free elements every day just for registering for free. It is great if you like scrapbooking. The mini kits are here.

Comment option:
Flickr

Happy Quilting and Crafting,
Val

Saturday, December 21, 2013

Christmas Little Bits 20


I can't believe I went a head with this one. Common sense kept telling me to stop and wait until I had suitable fabrics. I really wanted patterned background blocks but I don't have any plain looking patterns. It was either solid or busy. Maybe I could have used solid letters. Anyway, it is done now and the doll is not going to complain.


Mainly I am posting this doll quilt because of how well the wool backing worked. I had 5 yards of a loose weave pure wool from Pendleton Woollen Mills in Oregon that I bought for $20 a yard. It gives weight to the mini quilt without unusual bulk for its size. It folds up just like a life size quilt.


I do like this design with the letters on the blocks. I had to fit it onto 24 inches x 16 inches so I had to make them rectangular. The other blocks I have seen have been square.
I am thinking that 20 inches x 14 inches would be a good size for the next doll quilt.

Here are the rectangular letters as PDFs

CHR
IST
MA

and this is the layout.
Flickr Link

Happy Quilting and Crafting,
Val

Thursday, December 19, 2013

Little Christmas Bits 19


I was very pleased with the Christmas dress I made for my 18 inch doll so I looked up the scale used for accessories. The scale of the doll is 1:3 or 1 inch in doll size represents 3 inches in human size. Apparently the AGD type of doll is meant to be based on an average 10 year old human.


I got out my hobo bag pattern and and scaled it down so I could make a Christmas bag in doll size. It worked out really well. I even put in an inside pocket. Her pocket book is a needle book I had handy. The measurements made it easy to divide by three and draw up the new pattern. I made it exactly the same way as the big one in Little Christmas Bits 12.

If you like this small one why not download the pattern I drew up. You will probably need to at least read through the instructions that come with the large pattern. You can find them here at La Tee Da Kids.


You can comment on Flickr if you are not a google+ fan.

Happy Quilting and Crafting,
Val


Thursday, December 12, 2013

Little Christmas bits 12

Yay! Caught up today. Trouble is tomorrow I won't have much sewing time. I will have to find something tiny and simple.
I will be going out a few times before Christmas so I thought a Christmas bag might be nice. I found a great hobo bag tutorial and pattern at La Te Da Kids. It is not a kids size bag.
I thought I could use up some more Christmas fabric scraps for the front. One patchwork side was enough so two big pieces for the back. I found I had to be careful that the fold went on the short side not the long handle side. I nearly cut it wrong.
Quick and easy sewing.


Happy Quilting and Crafting,
Val

Little Christmas bits 10 and 11

No wonder I get behind in my posting. I got up at 6am and have just spent an hour looking and pinning in Pinterest. I only went there to get the link for the pouch pattern.

Two projects today for catchup. The one more tonight. Hopefully.

The felt snow globe turned out really nice. I just traced the photo from my Christmas Ideas Pinterest.  I can't provide patterns when I have just copied them from someone else but they are easy to trace. The original is from the flickr photostream of Priscila Cunha Arte & Mimos . She has some nice felt things in her photostream.
I have some plastic stuffing beads (thank you Fiona) and I just add a spoonful or two before closing the stitching for the backing. It makes the felt hang nicely.


This little pouch pattern was easy to follow. It was free from Stitchin' the Night Away  .
I used 8 ply for the pink one then found some silky bamboo yarn more like 4 ply for the gold one and a 3.50 hook.
I plan to hang them on the tree.


Happy Quilting and Crafting,
Val

Monday, December 9, 2013

Little Christmas bits 8

Getting behind again! I did finish the stitching yesterday but had to spray it with water and let it dry before sewing it.
I found 4 delightful 'chickies running around getting ready for Christmas' stitcheries at Bee Tree Designs quite a while ago now. She has a page of free patterns. If you scroll down a fair bit you will get to the chickens.
I made a tree decoration with the baking chicken a few years ago. This time I stitched the present toting chicken and made it into a slit and turn hexagon coaster. Nearly forgot - I enlarged the original design to 125%. I find bigger designs easier to stitch.


Happy Quilting and Crafting,
Val

Saturday, December 7, 2013

Little Christmas Bits 7

I really liked the little pieced santa coaster I made earlier and I couldn't find any patterns. It is not too hard to draw them up for paper piecing so I made a set of different sizes. I used the freezer paper method for piecing and found it very easy to use. I copied the block layout from a site for free patterns. There was only a photo of it. No pattern.


Download the diagrams I drew and make your own gaggle of gnomes. The PDF pages should print out at the right size.

Happy Quilting and Crafting,
Val

Saturday, October 26, 2013

Jewellery Pouch - Tutorial and Pattern

Just loved this pouch the minute I saw it on Pinterest. A similar pouch given as a gift was the inspiration for the one on Pinterest. There was no pattern so I had to make it up.

Not very often I make two of anything but I had to make a few improvements for the tutorial.


The flannel flower pouch closes with a strap and velcro and has nice deep pouches.

Download the tutorial PDF from my Google Drive.

I am linking up with Finish it up Friday over at Crazy Mom Quilts

There still seem to be some people not on Google Plus so you can also comment on my
Facebook Page
My Pinterest Pin  - go here and pin this post.
My Flickr Photo

Happy Quilting and Crafting,
Val


Saturday, October 19, 2013

A Coin Purse Tutorial PDF and Pattern

I have only made about dozen coin purses but I have learnt a little bit each time.
Things like using a shorter fatter needle like a quilting needle that is the same width all the way along to make the thread easier to pull through.
Also, now I only sew the top seam at the very sides so I don't have a folded over seam thickness where I sew the frame on.
I am also very careful about centring the fabric in the frame and adjusting as I sew.
I have discovered that squeezing the frame with pliers to tighten it around the fabric makes it all sit better.
I have a spotty glass charm to put on this one but it hasn't gone in the kiln yet.

I have put the Tutorial PDF in Google Docs and realised that the preview shows fuzzy photos but when you download it it comes out fine. I have to say that the photos are just a fraction blurry. It is driving me nuts. I will have to connect up to the laptop and check each photo as I take it in future. The paper pattern is in a separate file. It is a standard pattern I got from here and sized for my frame.

Coin Purse Tutorial PDF download
Coin Purse Pattern PDF download

I am linking up with Finish it up Friday over at Crazy Mom Quilts

I had a great time at the craft show and said hello to some of my blogging buddies. I bought a couple of essentials. A new cutting board! Yay! The A4 one was getting tedious.


Some new fabrics to use in my Who Knows owl BOM and a few plains.


Happy Quilting and Crafting,
Val
Related Posts Plugin for WordPress, Blogger...