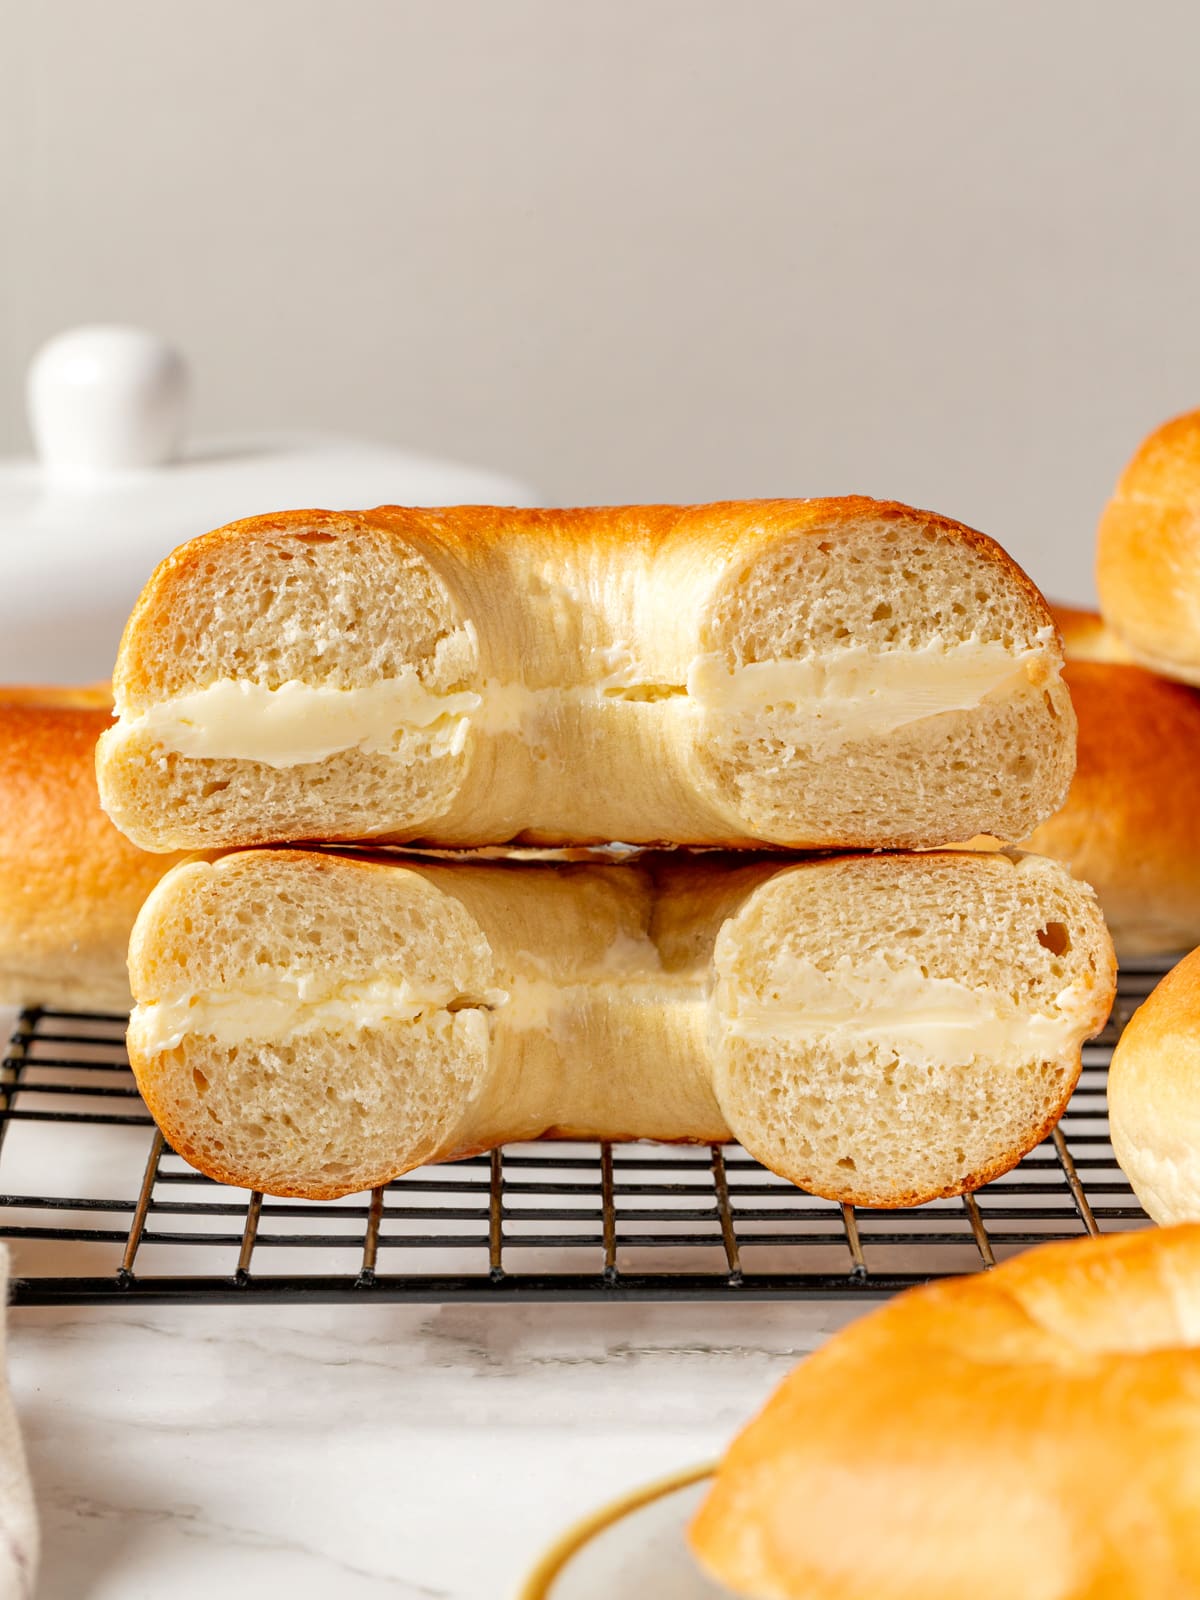
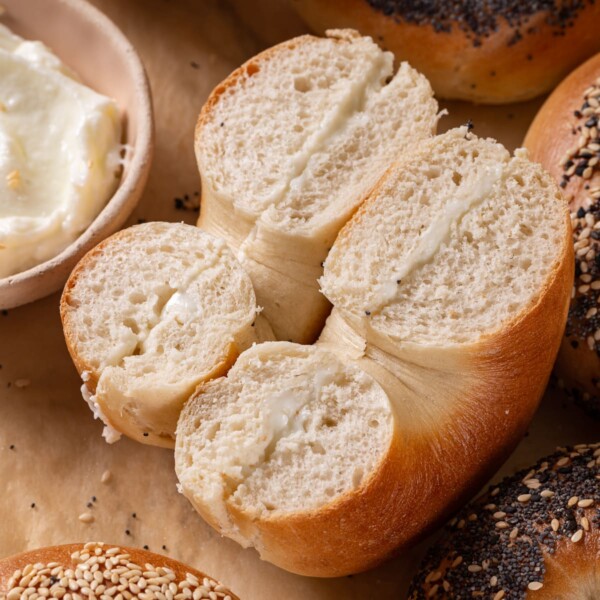
A professional recipe for homemade bagels that are chewy, soft, and better than your local bagel shop! With this simple recipe, you can bite into a warm, fresh bagel in just a few hours.
A Quick Look At The Recipe
This is a brief summary of the recipe. Jump to the recipe to get the full details.
Prep Time
3 hours
Cook Time
16 minutes
Overnight Proof
8 hours
Total Time
11 hours 16 minutes
Servings
8 bagels
Difficulty
Intermediate
Calories *
289 kcal per serving
Technique
Mix, divide, shape, then proof and chill. Simmer the bagels and then bake.
Flavor Profile
Simple yet rich. They taste fresher and have a more developed flavor than store bought bagels.
* Based on nutrition panel
I can’t believe I waited this long to make homemade bagels, this recipe is an absolute game changer! The tips on using high-gluten flour and the boiling step gave my bagels that perfect chewy crust I’ve always loved from bagel shops. I topped mine with everything bagel seasoning and served them with lox and cream cheese, hands down the best weekend breakfast I’ve ever made!
Mara
⭐⭐⭐⭐⭐
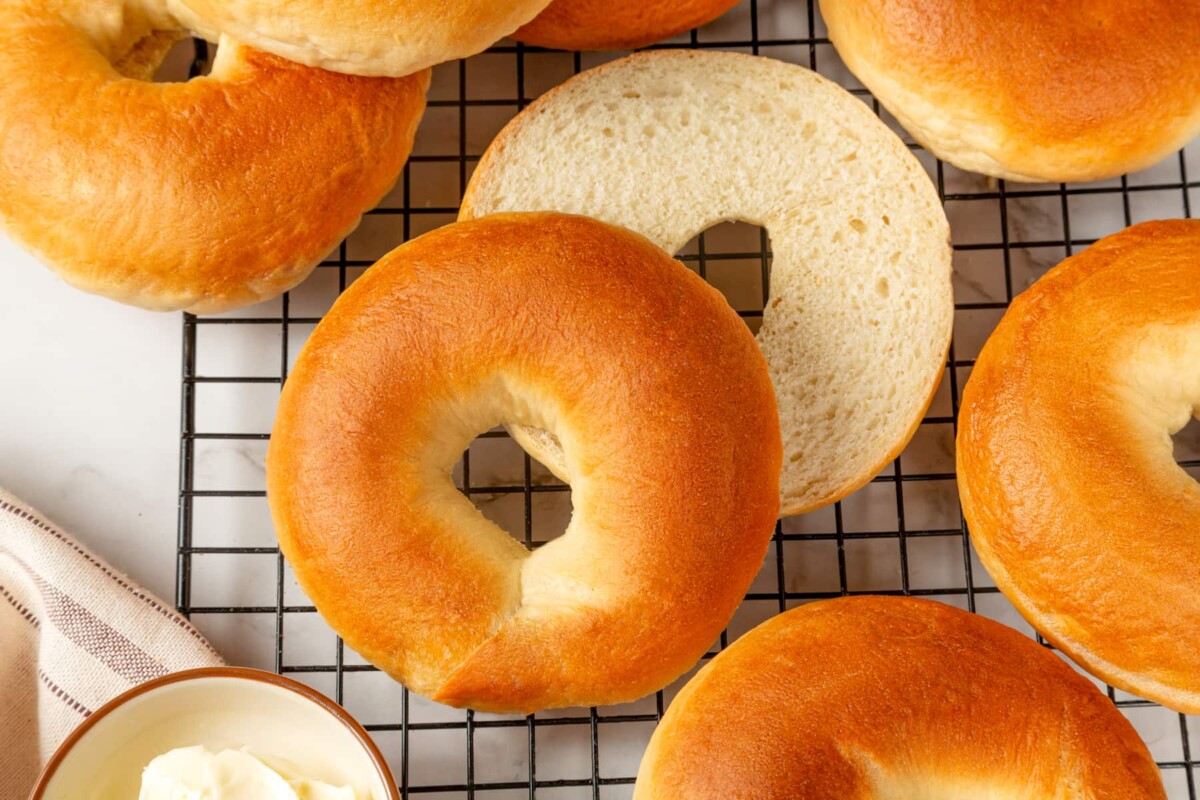
Why You Will Love This
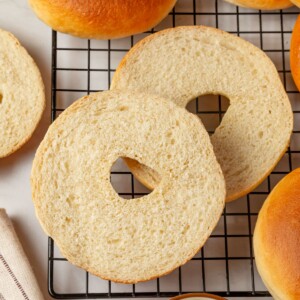
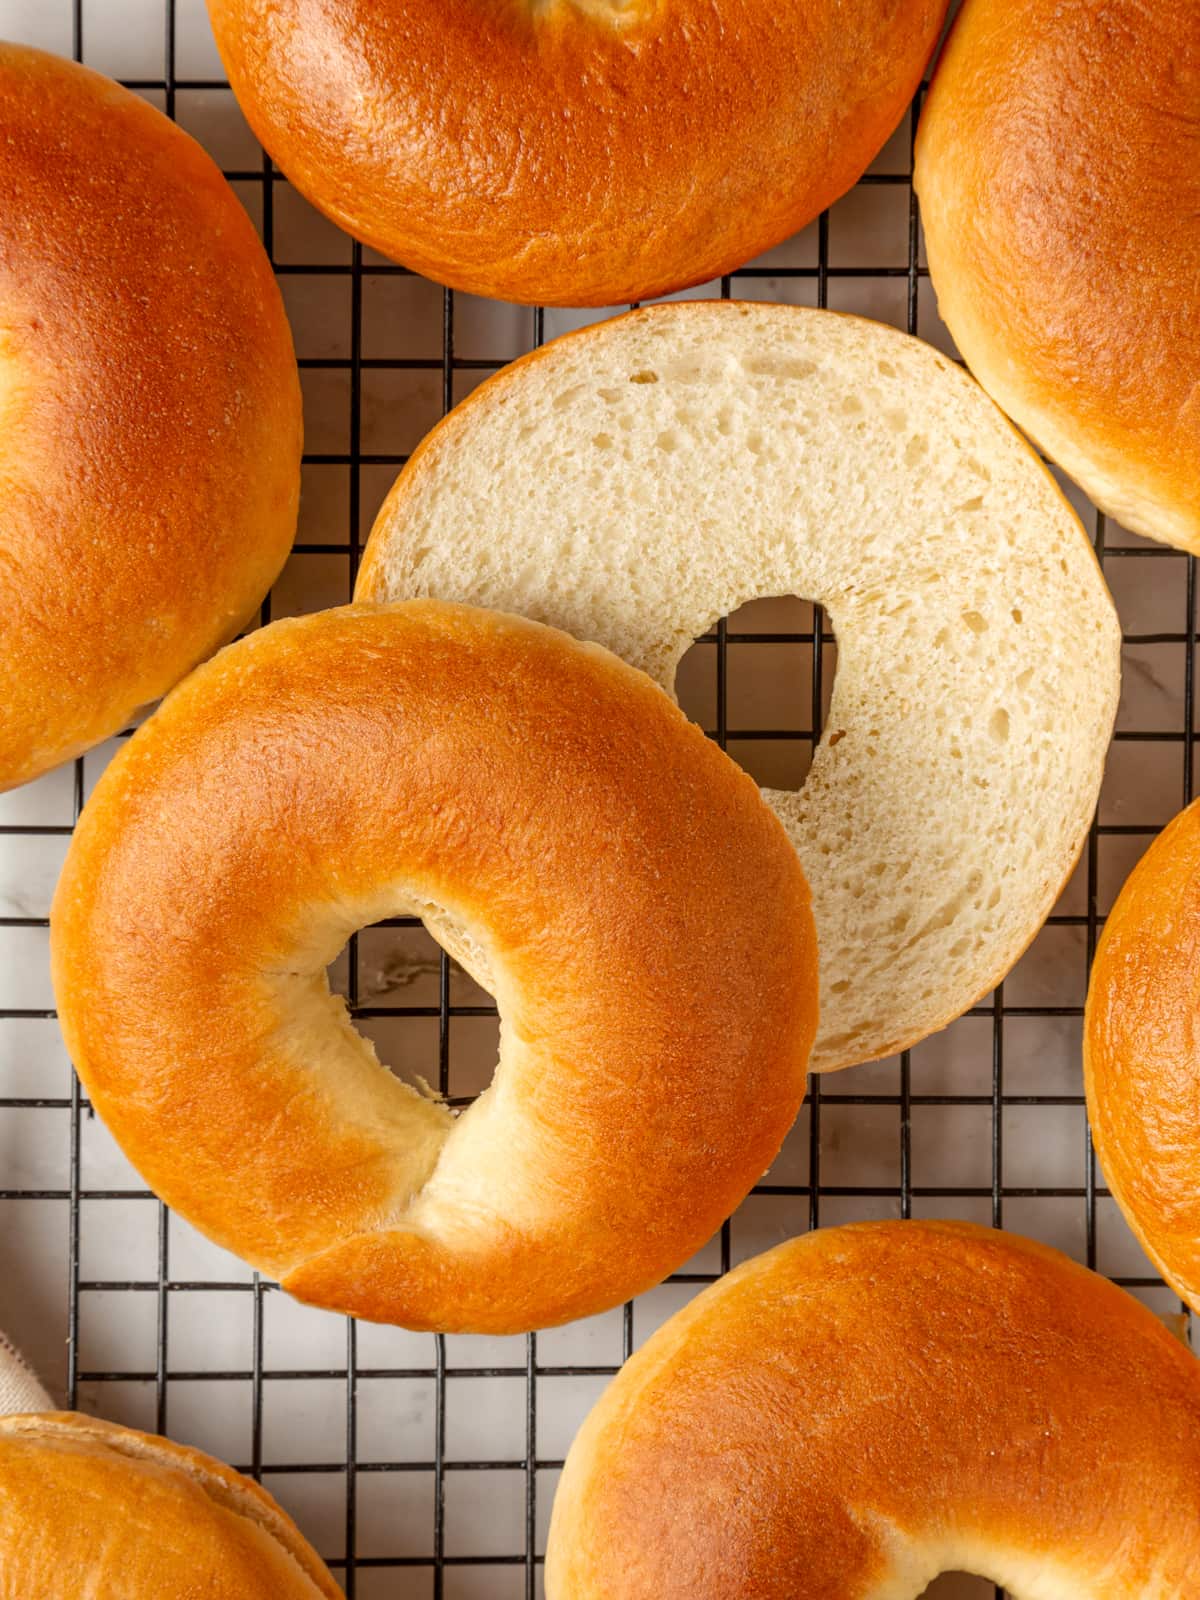
- Soft and chewy with a lovely golden crust. These bagels, like my sourdough discard bagels, are true New York City style bagels. The high protein flour and intensive mix ensure the perfect chew. .
- It’s easy to follow along. If you’re new to making bagel recipes, no worries! I include tips and photos so it’s easy for you to follow along. If the shaping process intimidates you, you can always go the easy route by poking a hole in the center with your pointer finger and stretching them out like my chocolate chip bagel recipe does.
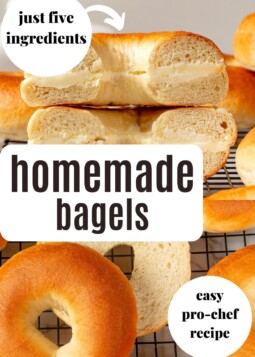
- Only 5 ingredients. This bagels recipe only calls for 5 ingredients, many of which you likely already have in your pantry!
- Freeze for fresh, homemade bagels every morning! I make a double batch and keep the cooled bagels in a zip-top baggie in the freezer to pull out as we want them! Simply warm in the microwave or toaster oven.
Table of Contents
I’m a firm believer that everyone should have a classic homemade bagel recipe they can rely on—you know, the type of recipe that gets passed down through generations. Luckily, that’s exactly the kind of recipe this is. Just like my classic sandwich bread recipe and same day sourdough bread!
Ingredients & Substitutions
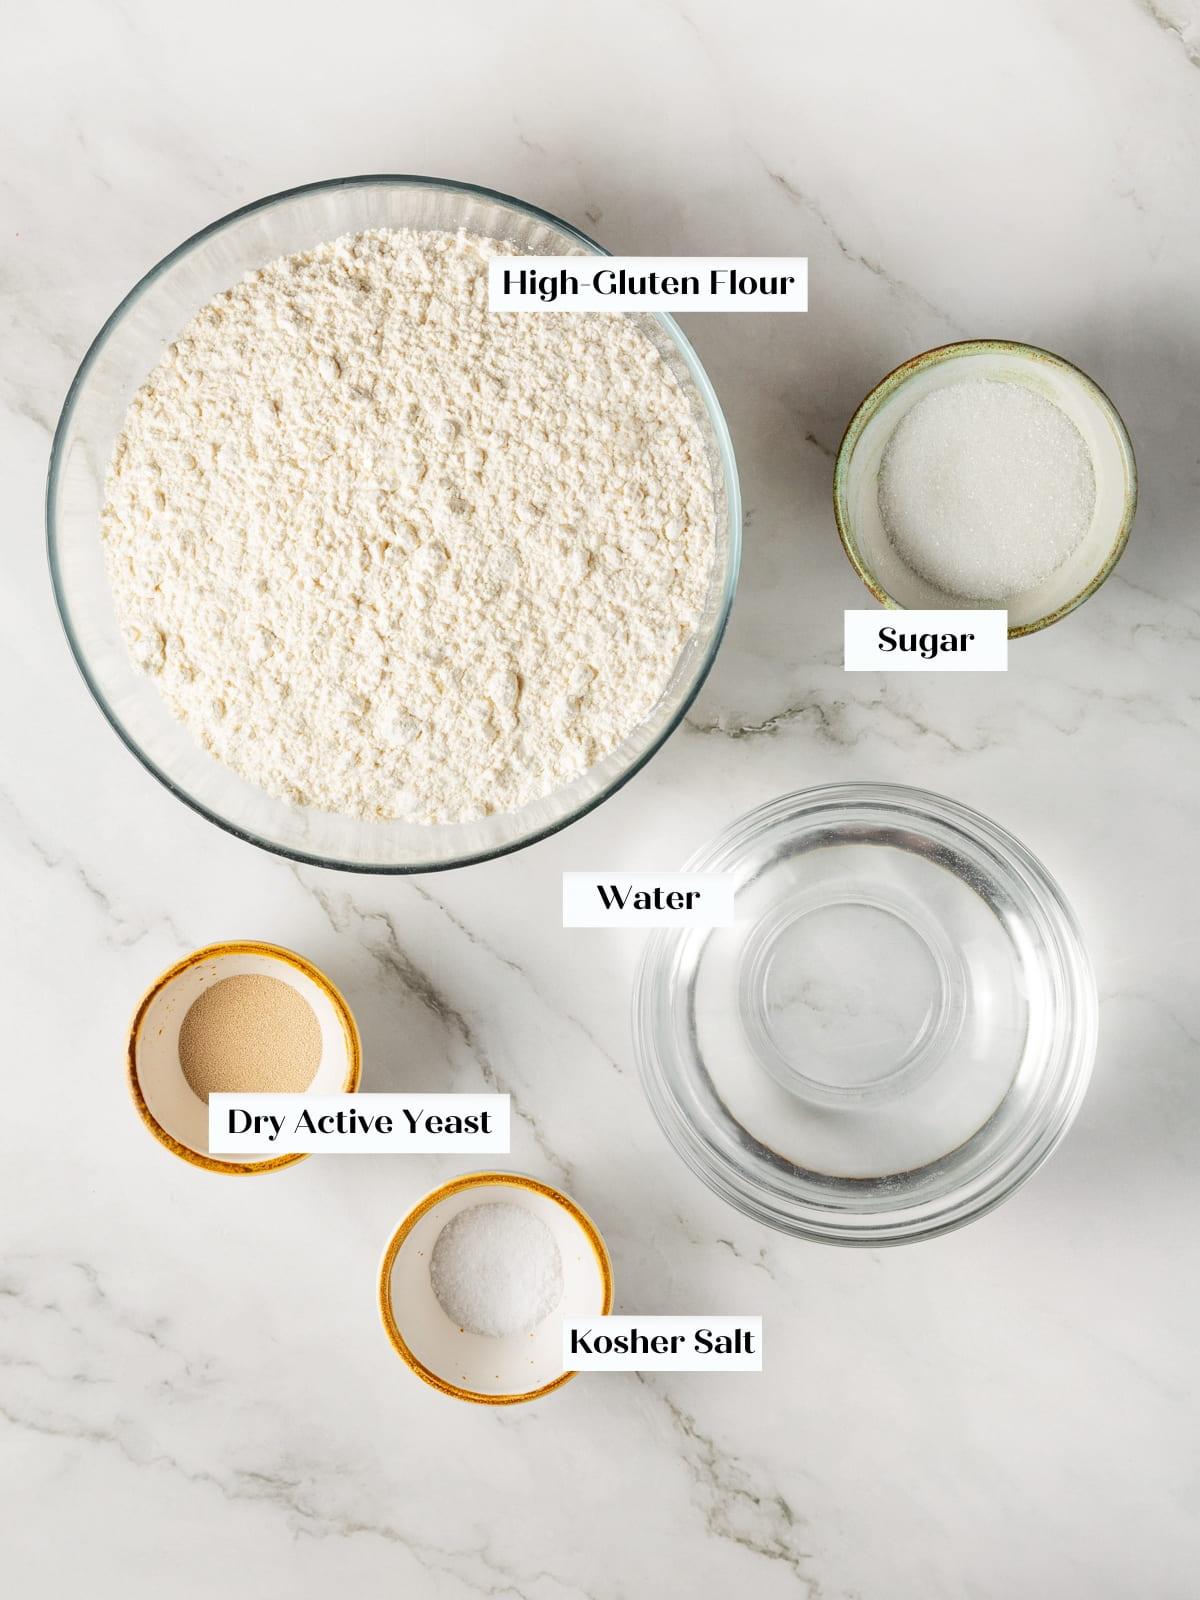
- Warm water: Ideally the water temperature is around 100°F. Adjusting the temperature of the water will change your proofing and baking timeline, and water over 130°F will kill the yeast!
- Dry active yeast: The slow fermentation of active dry yeast contributes to flavor development and a pleasant texture. You can use instant yeast instead, but rather than blooming the yeast, I would add all the ingredients to the bowl and mix.
- High-gluten flour: Just like with my everything bagels, this ingredient is crucial since it helps the bagels rise and creates the perfect balance between soft, dense, and chewy. If needed, you can substitute the high-gluten flour with bread flour in equal amounts by weight, but the crumb will be slightly fluffier and less dense.
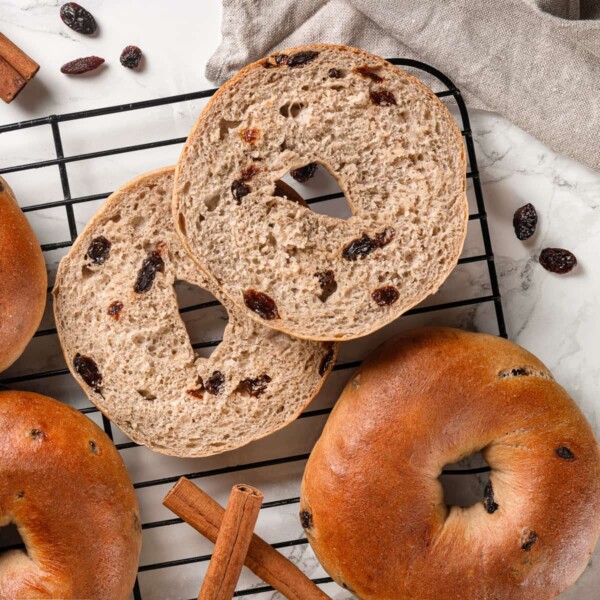
- Granulated sugar: Sugar boosts yeast activity, which speeds up the timeline like the warm water. It also balances the salt and helps give the bagels color through a process called the Maillard reaction. You can use brown sugar instead of granulated sugar like my cinnamon raisin bagels recipe.
- Kosher salt: This recipe was tested using kosher salt. However, if you only have table salt, you can use half of the amount called for in the recipe.
See the recipe card for full information on ingredients and quantities.
Variations for Homemade Bagels
- Add toppings. You can dip the damp bagels with chopped nuts, poppy seeds, or sesame seeds —or use everything bagel seasoning to make it extra easy! Minced garlic and onion make a yummy topping pair, as well as jalapeno slices and shredded cheddar. You could also go sweet like my French toast bagels or simply sprinkle with sea salt.
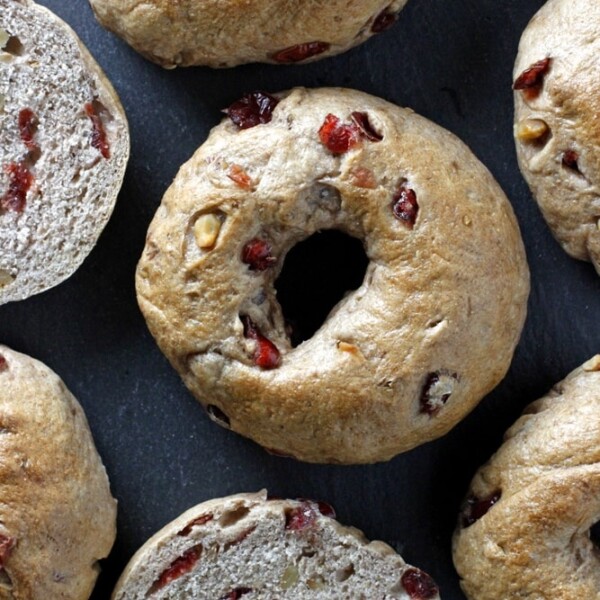
- Use mix-ins. You can also add ingredients directly into the developed dough, such as chocolate chips, dried herbs, spices like cinnamon, citrus zest, or dried fruit and nuts like I do in these cranberry bagels.
- Add a hint of sweetness or warmth. Try adding a small amount of vanilla extract, maple syrup or molasses to the bagel dough like my pumpernickel bagels. Increase the amount slightly if you want a more pronounced sweetness. Another option is to add honey or barley malt syrup to the water when boiling the bagels like these Montreal style bagels.
Professional Tips For Making Homemade Bagels
- If you plan on using toppings, boil in small batches so you can dip them while they are still damp. While some brush on egg wash to adhere toppings, it isn’t the proper way.
- Be gentle when you boil the bagels. It doesn’t need to be boiling water, just simmering. Also, make sure to handle the dough with care. Gently place them in the water to retain their shape and prevent them from deflating. Overboiling can cause them to deflate, too, so make sure not to leave them in the water for too long.
- When shaping the bagels, aim for 8-inch ropes as instructed. If they’re shorter, the hole might not be large enough, and it won’t be as pronounced once the bagel expands.
- If you wish, you can add 2 tablespoons (15g) of diastatic malt powder to the dough. This will give the bagels a sweeter, complex flavor and also make them slightly denser overall. I tested this recipe with and without the malt powder, and both versions were fantastic!
How to Make Homemade Bagels
Use these instructions to make the perfect homemade bagels every time! Further details and measurements can be found in the recipe card below.
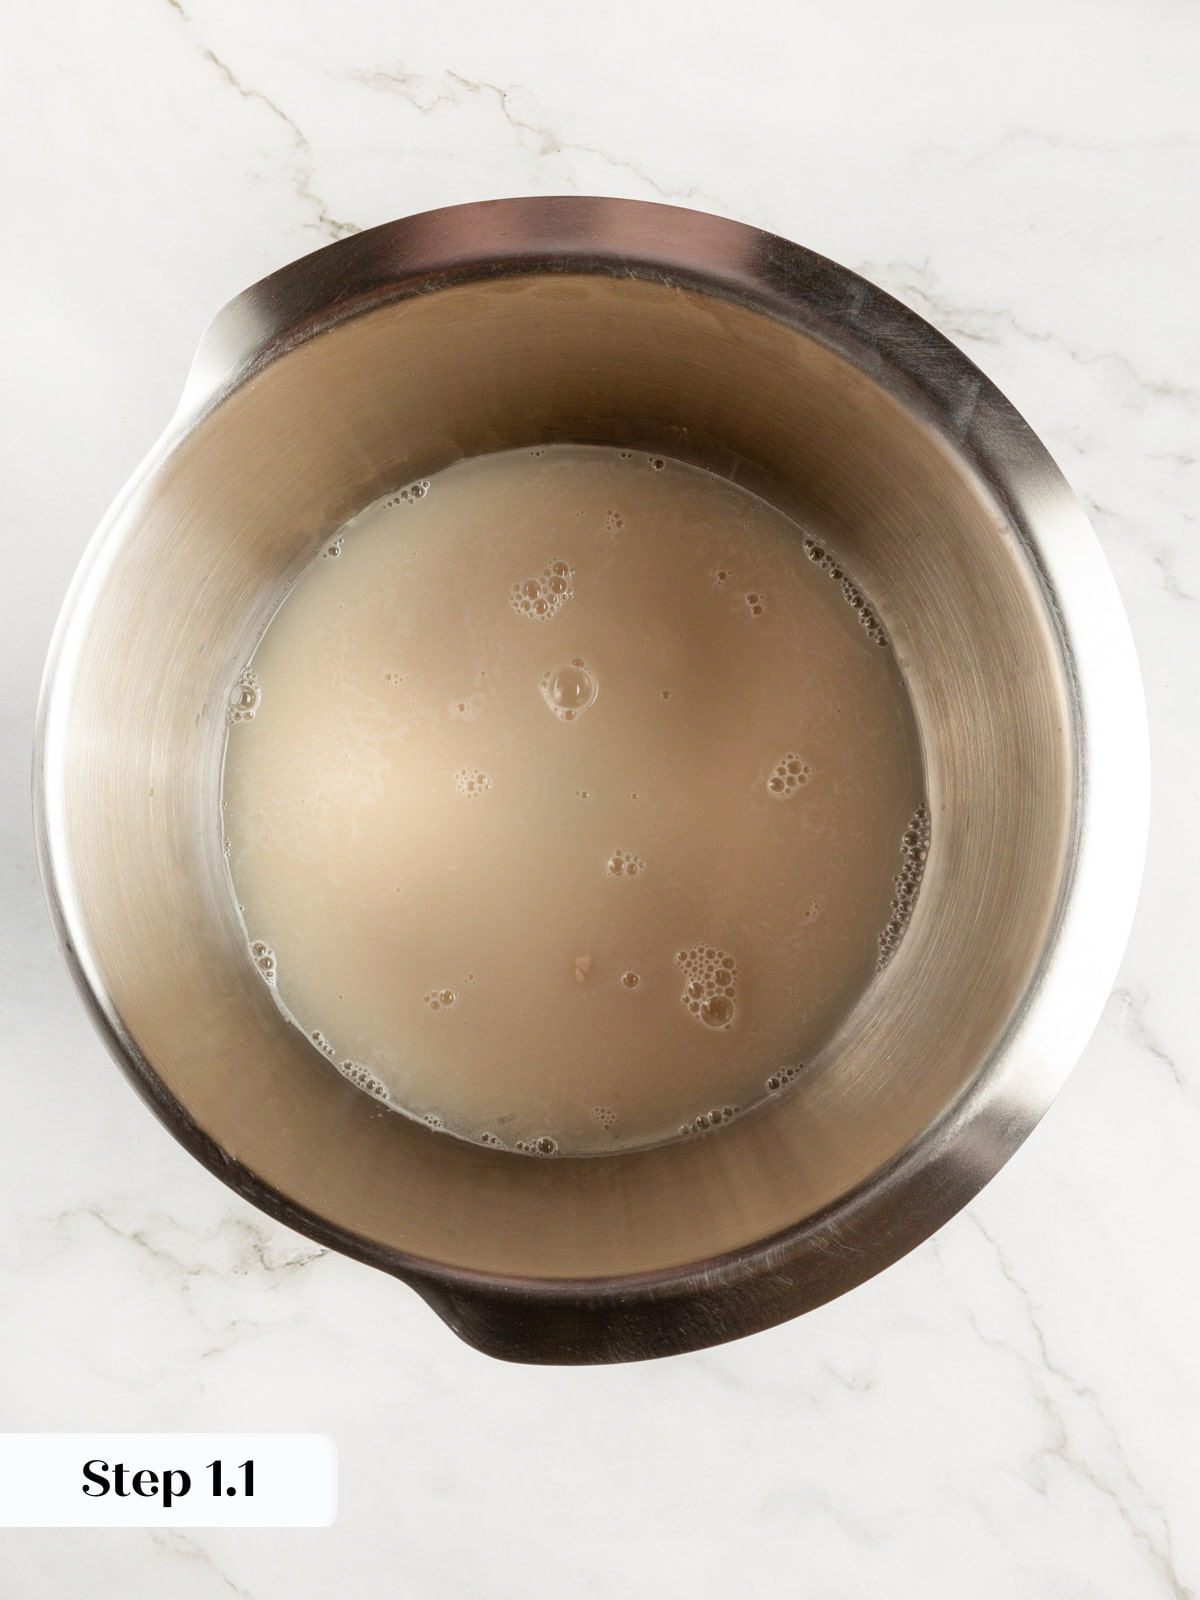
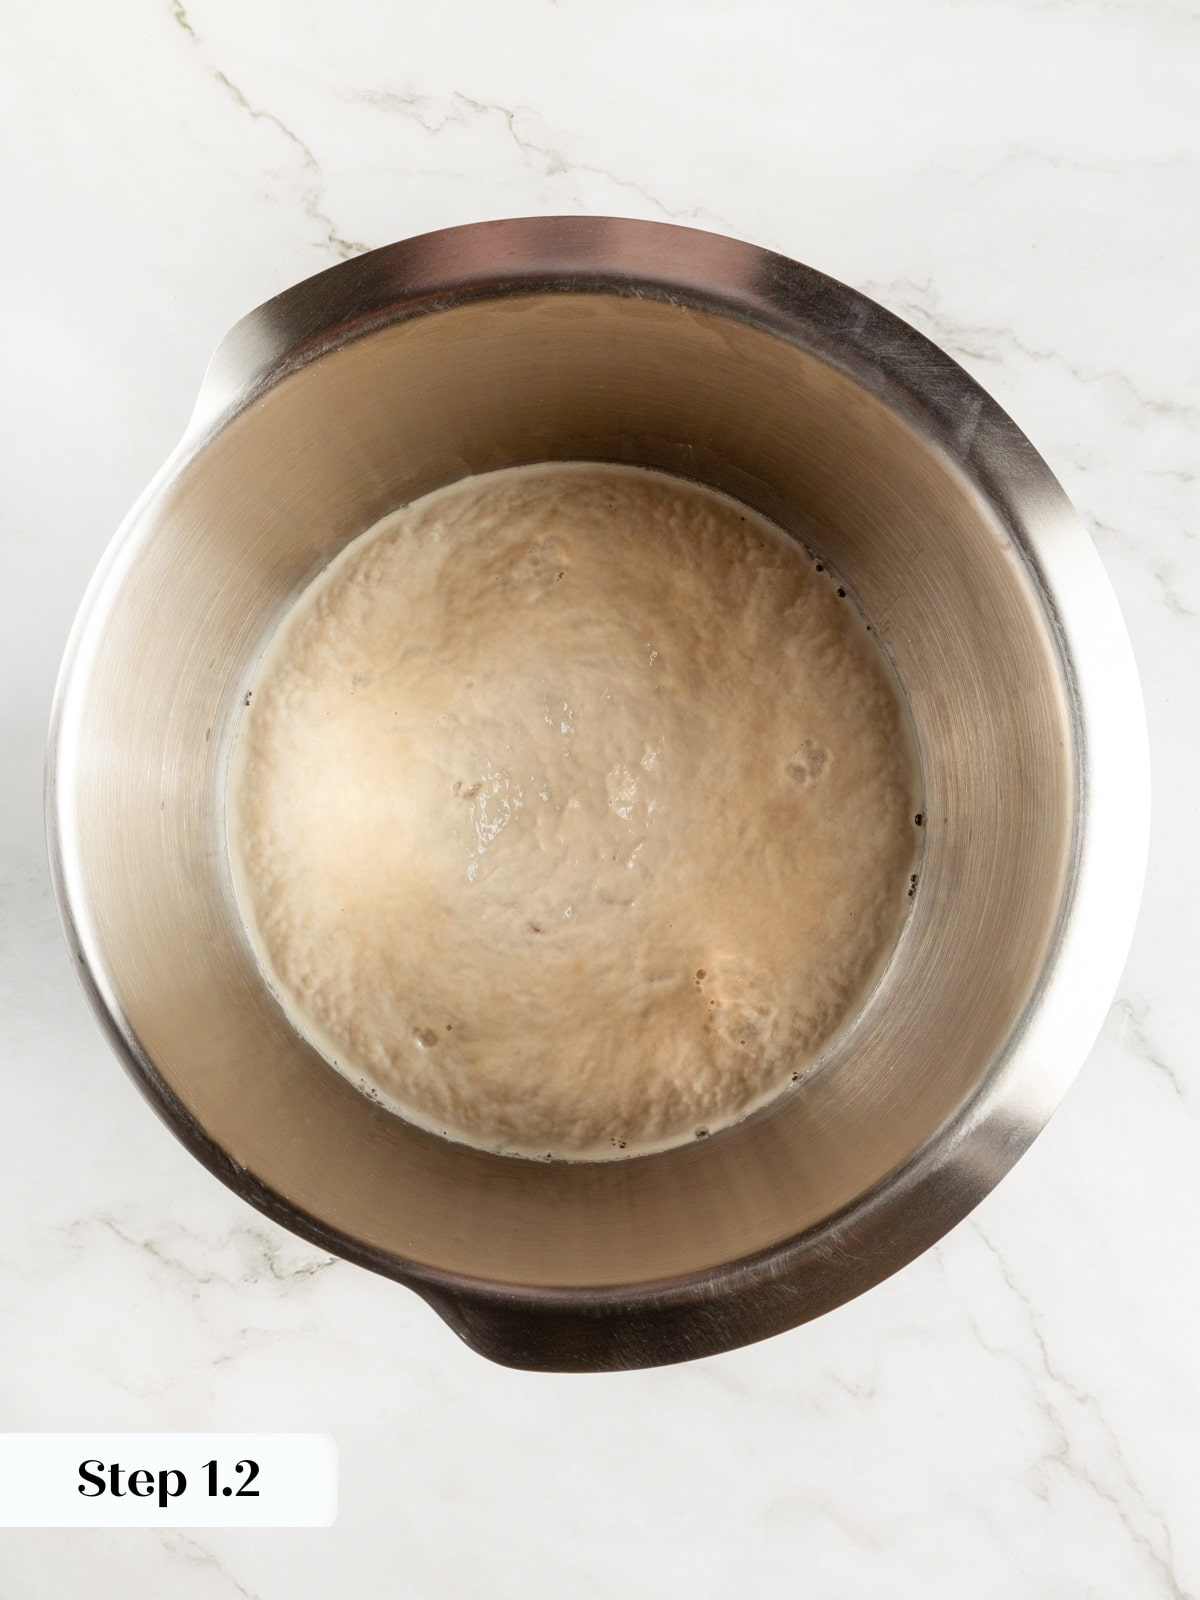
Step 1: Whisk yeast and water; allow to bloom. In the bowl of a stand mixer, whisk together dry active yeast, water, and a little of the sugar if you want. Allow to sit for 10 minutes or until foamy (photos 1 & 2).
Step 2: Incorporate remaining ingredients. To the stand mixer bowl, add high-gluten flour, sugar, and kosher salt. Use the dough hook attachment to combine all the ingredients on low speed.
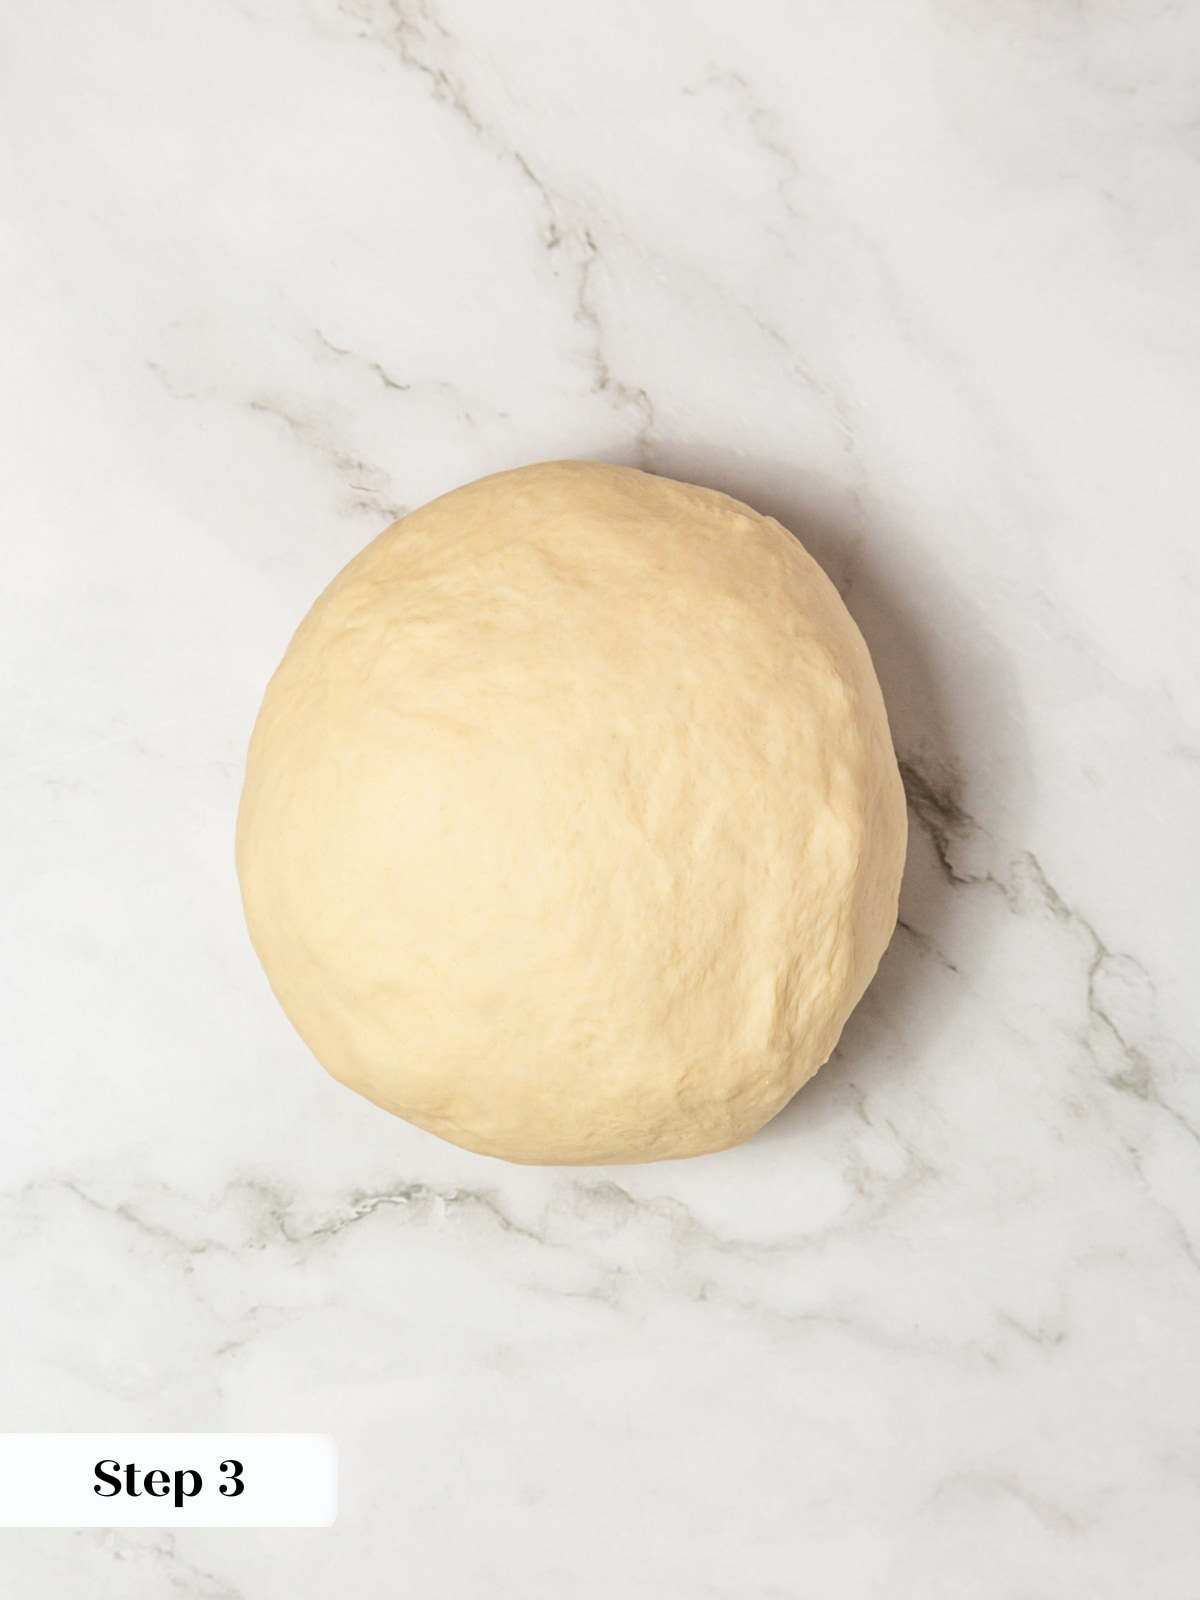
Step 3: Knead until properly developed. Mix on medium speed until a smooth dough forms. You should be able to pull a window pane. You are looking for a smooth dough. The surface shouldn’t look like scar tissue; if it does, it isn’t mixed. I knead this recipe for 6 minutes on medium speed in a stand mixer. I’ve made it so often, I don’t even bother to test development anymore. There is no bulk fermentation, so it is important that it is properly developed (photo 3).
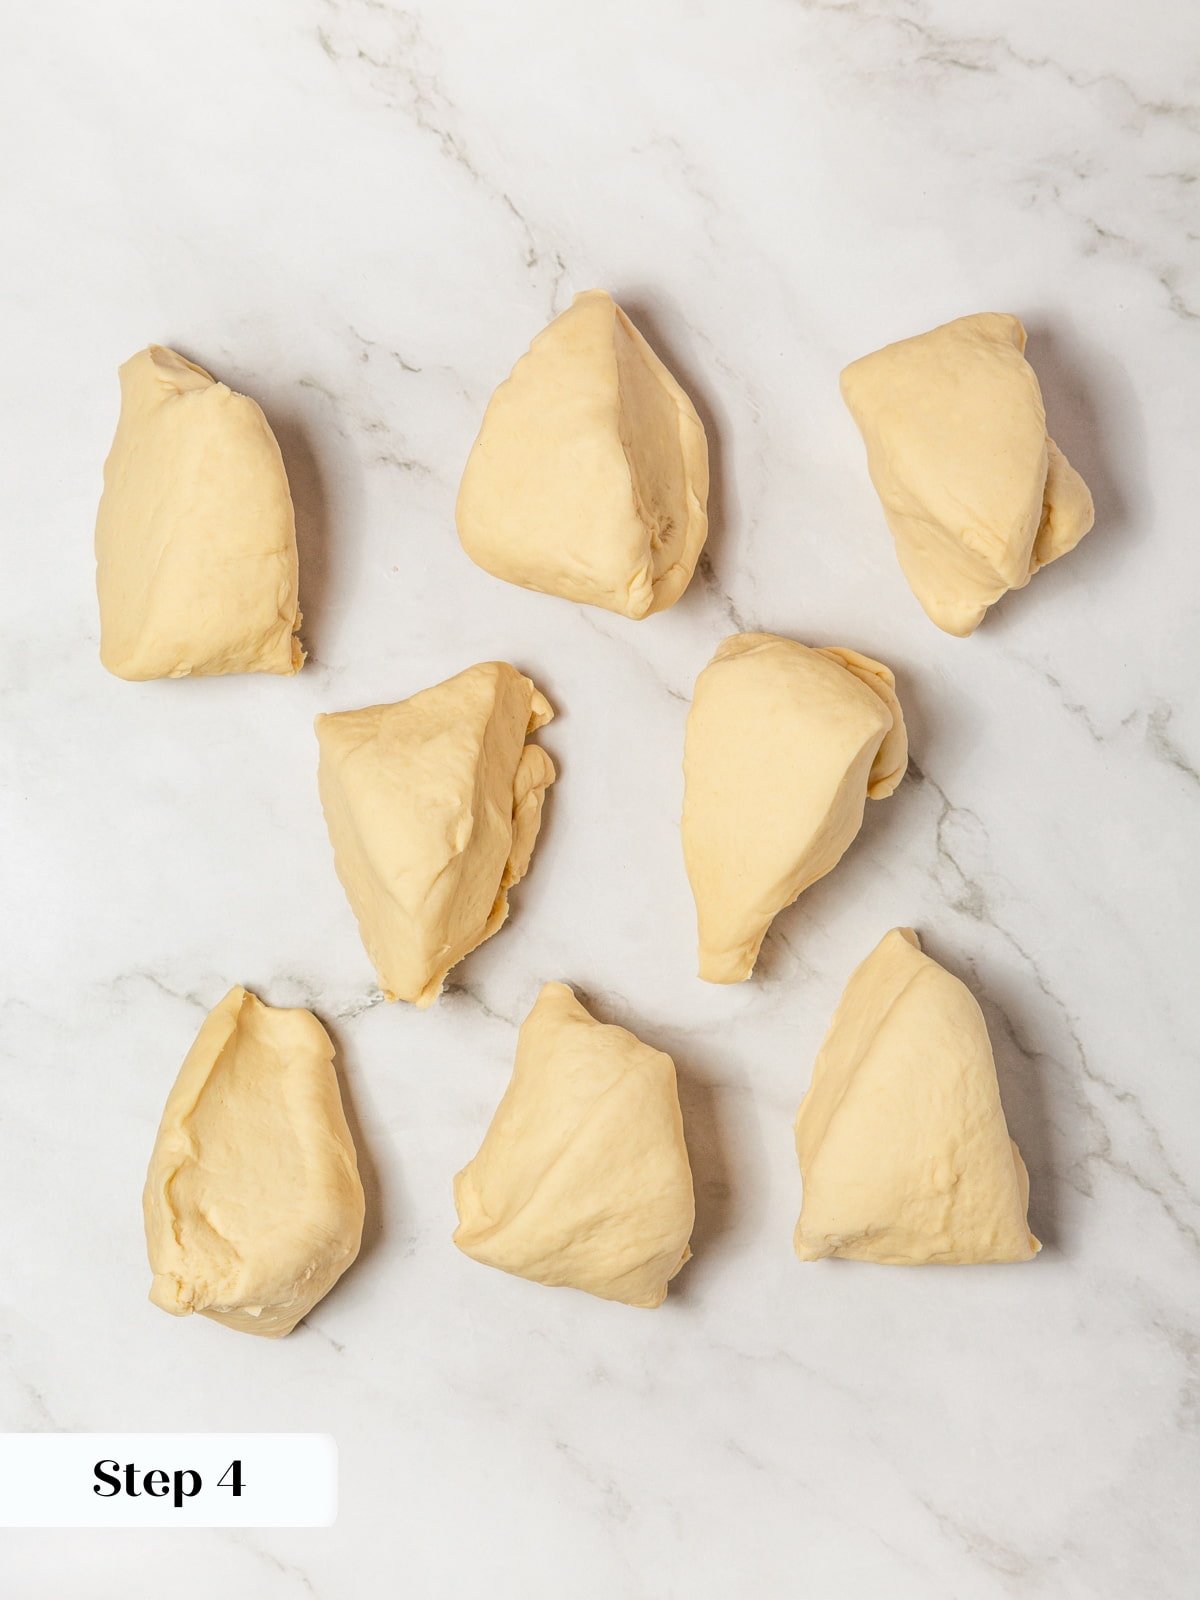
Step 4: Divide the dough. Turn the dough out onto a smooth surface. Divide into 8 equal pieces, approximately 122 g each (photo 4).
This is a low-hydration dough, so it will dry out quickly. I like to keep the pieces covered with a piece of plastic wrap or a towel as I divide, preshape, and shape.
Step 5: Pre-shape the dough. Working with one piece at a time, pre-shape the dough into a log shape by stretching the dough into a rectangle. Fold the top 1/3 down to the center and then continue folding the folded over the final 1/3, sealing it against the counter with your fingers. Place it to the side and keep covered while you repeat with all remaining pieces.
If you weigh the dough to divide, you’ll probably have some small pieces. Place those pieces in the center of each rectangle before pre-shaping. That way, they will be in the center of the dough and not stuck to the outside.
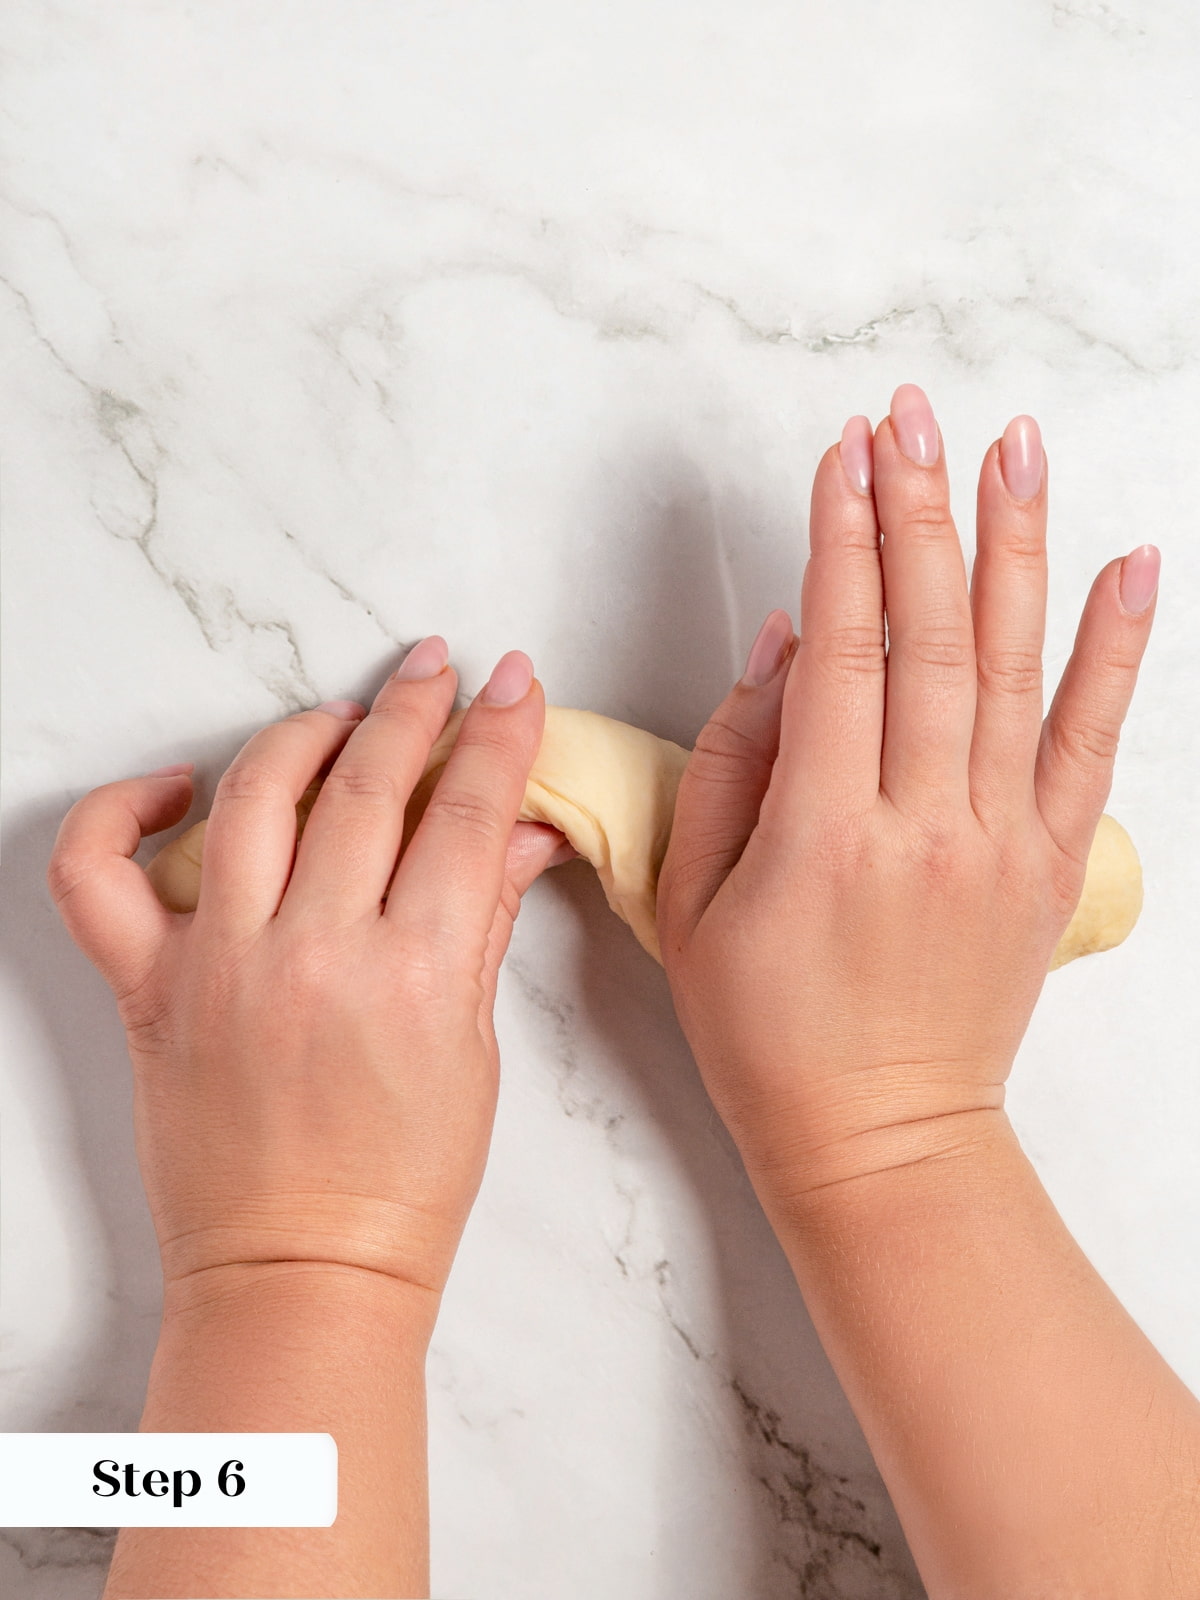

Step 6: Shape the dough into logs. Starting with the first piece of dough that you pre-shaped, flip it over so the seam side is up. Place your left thumb on the seam. Your hand will make an “L” shape. Using your left hand, fold the dough in towards your body around your left thumb and then seal it with the heel of your right hand. Repeat this down the length of the rectangle. You are making a log shape. Repeat once more to make a tight log shape. Since we skipped the envelope fold, you might need to do 3 thumb folds to make a tight rope (photo 5).
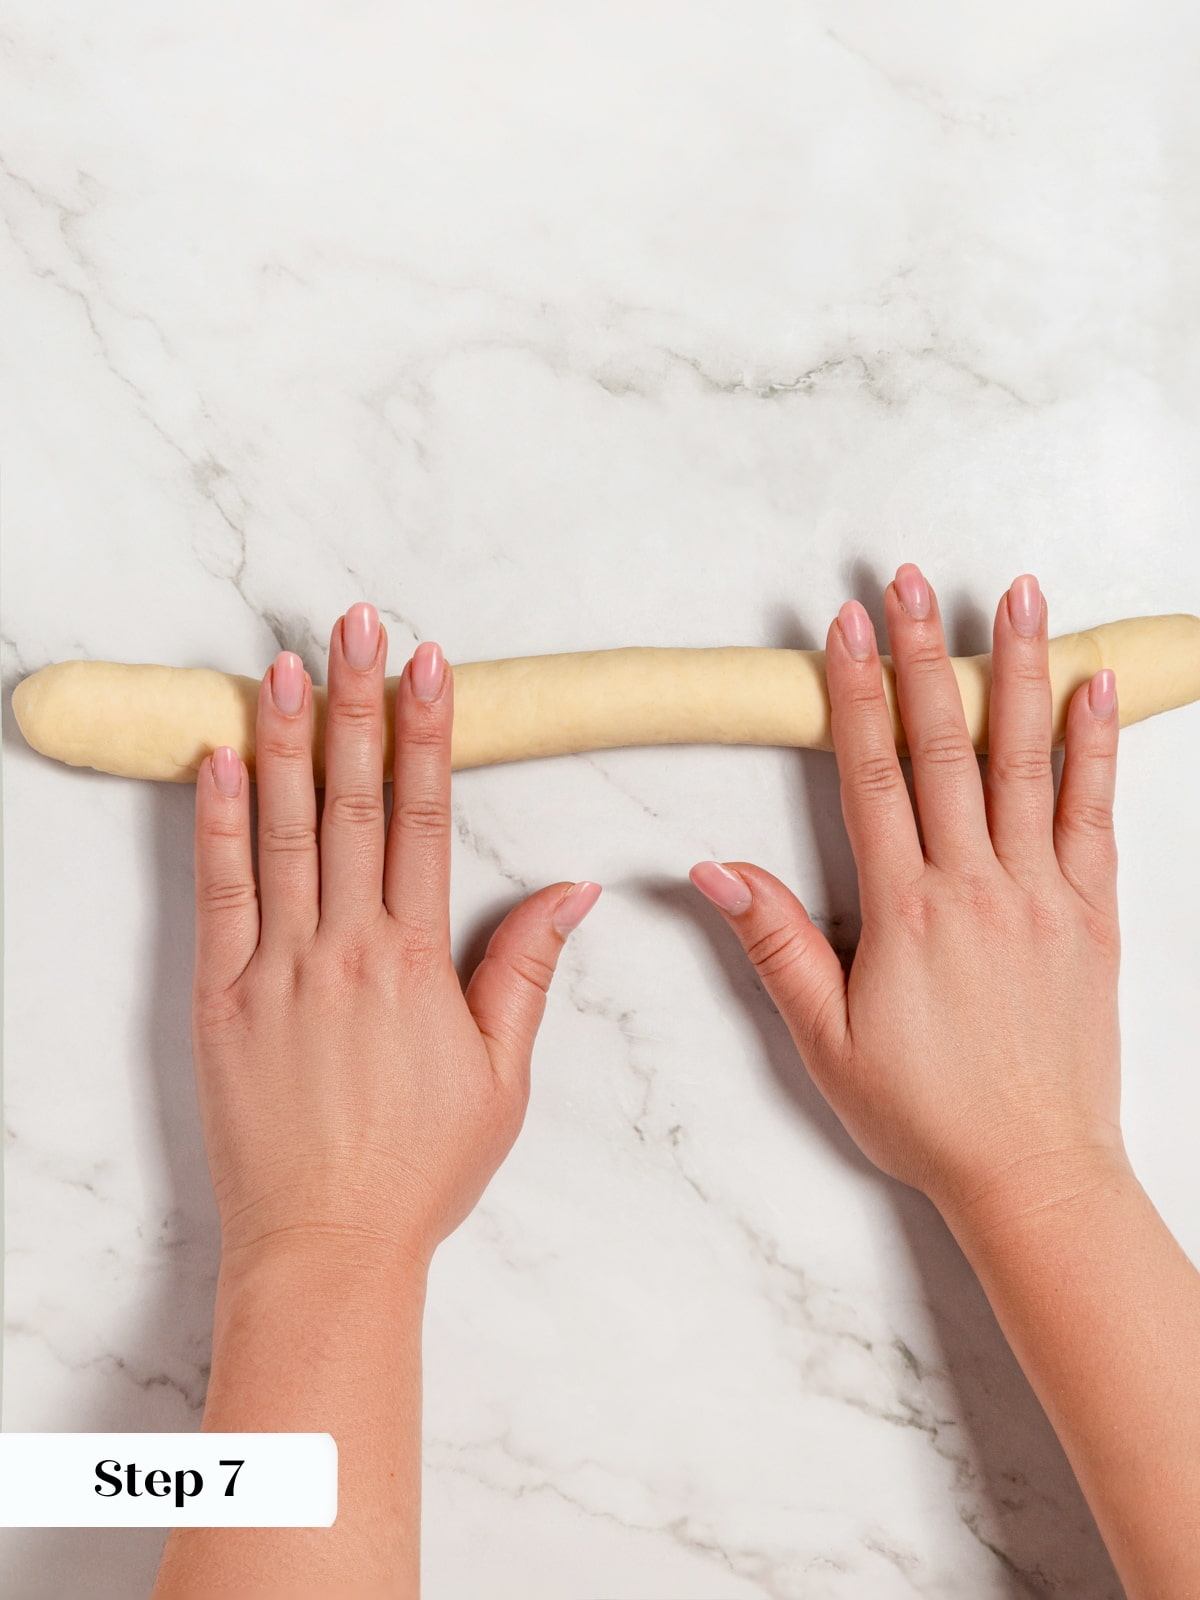
Step 7: Create ropes. Now roll that log out using both hands like a snake or rope. Start with both hands in the center and gently roll it back and forth while moving your hands apart. This will lengthen the rope. Get it to around 8 inches (photo 6).
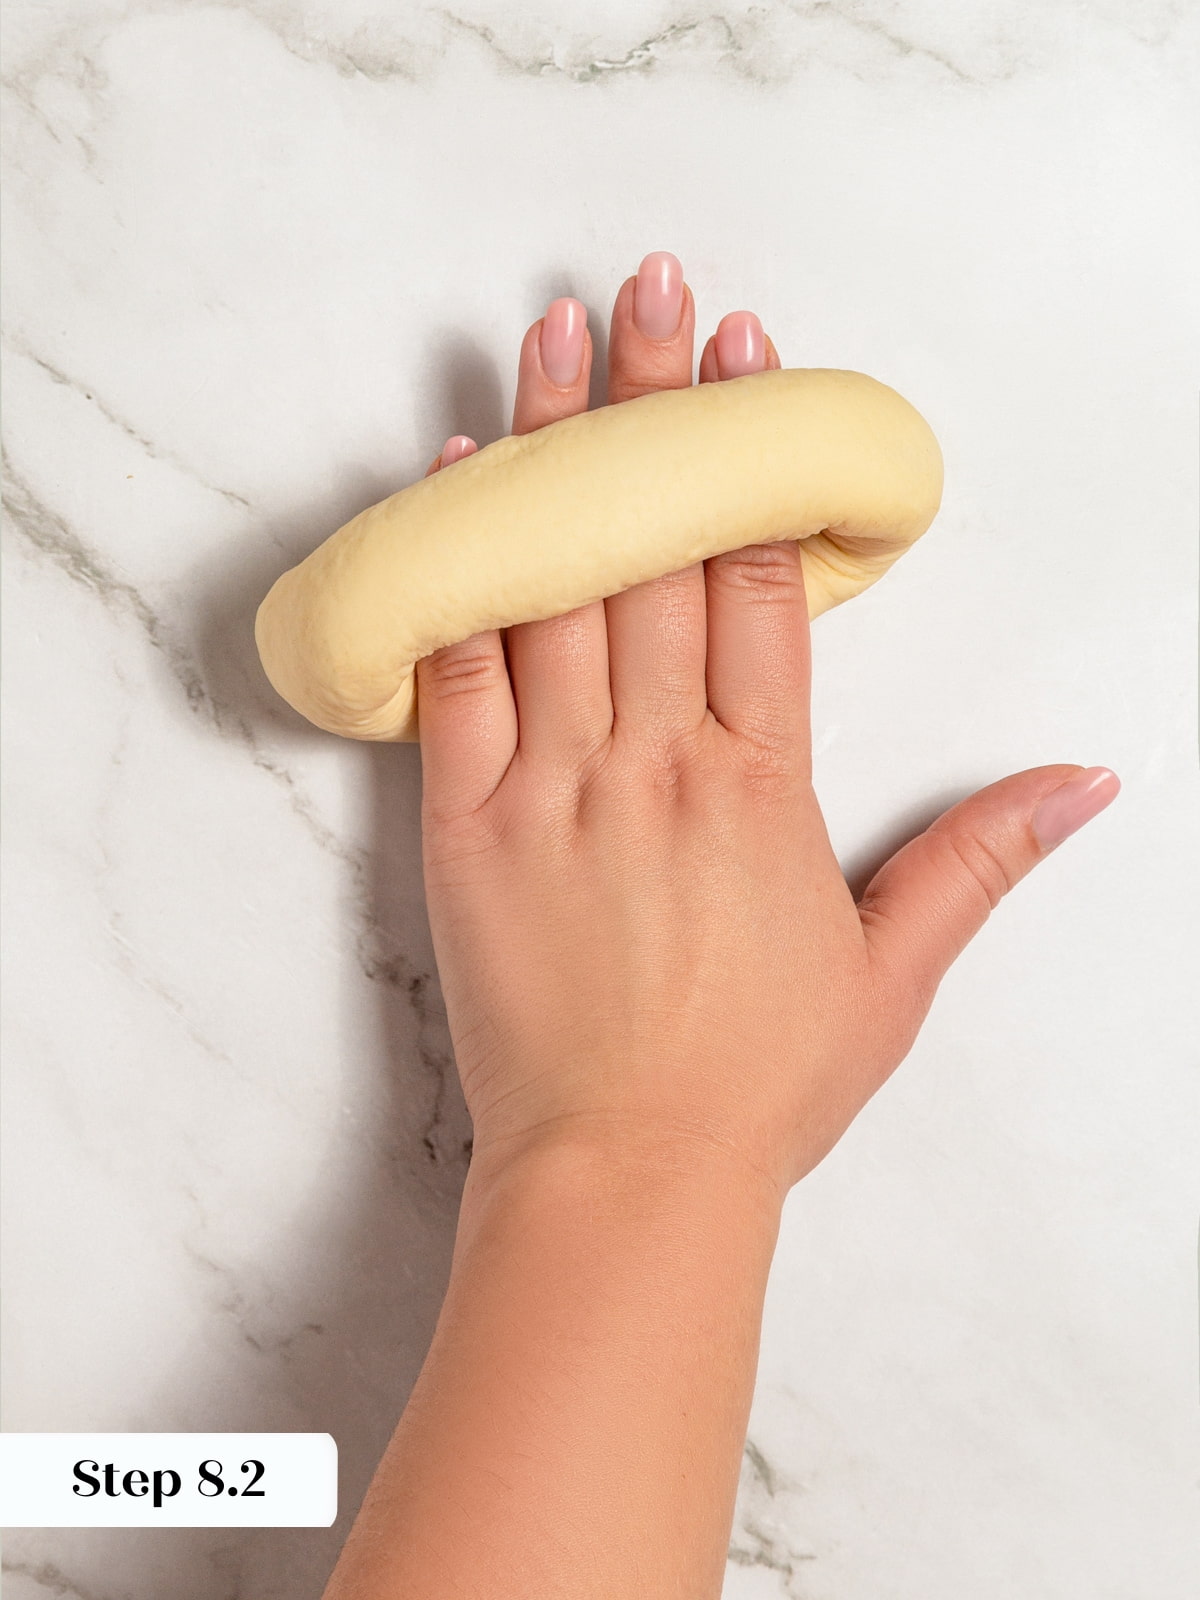
Step 8: Shape and seal the bagels. Take the rope and wrap it around your hand, overlapping the ends by about 1 ½ inches. Flip your palm flat with the overlapped portion underneath it. Roll the overlap gently underneath your palm to seal them together. The goal isn’t further lengthening, but rather just to seal the ends together. This is the traditional way to shape bagels, not by poking a hole in the center (photos 7 & 8).
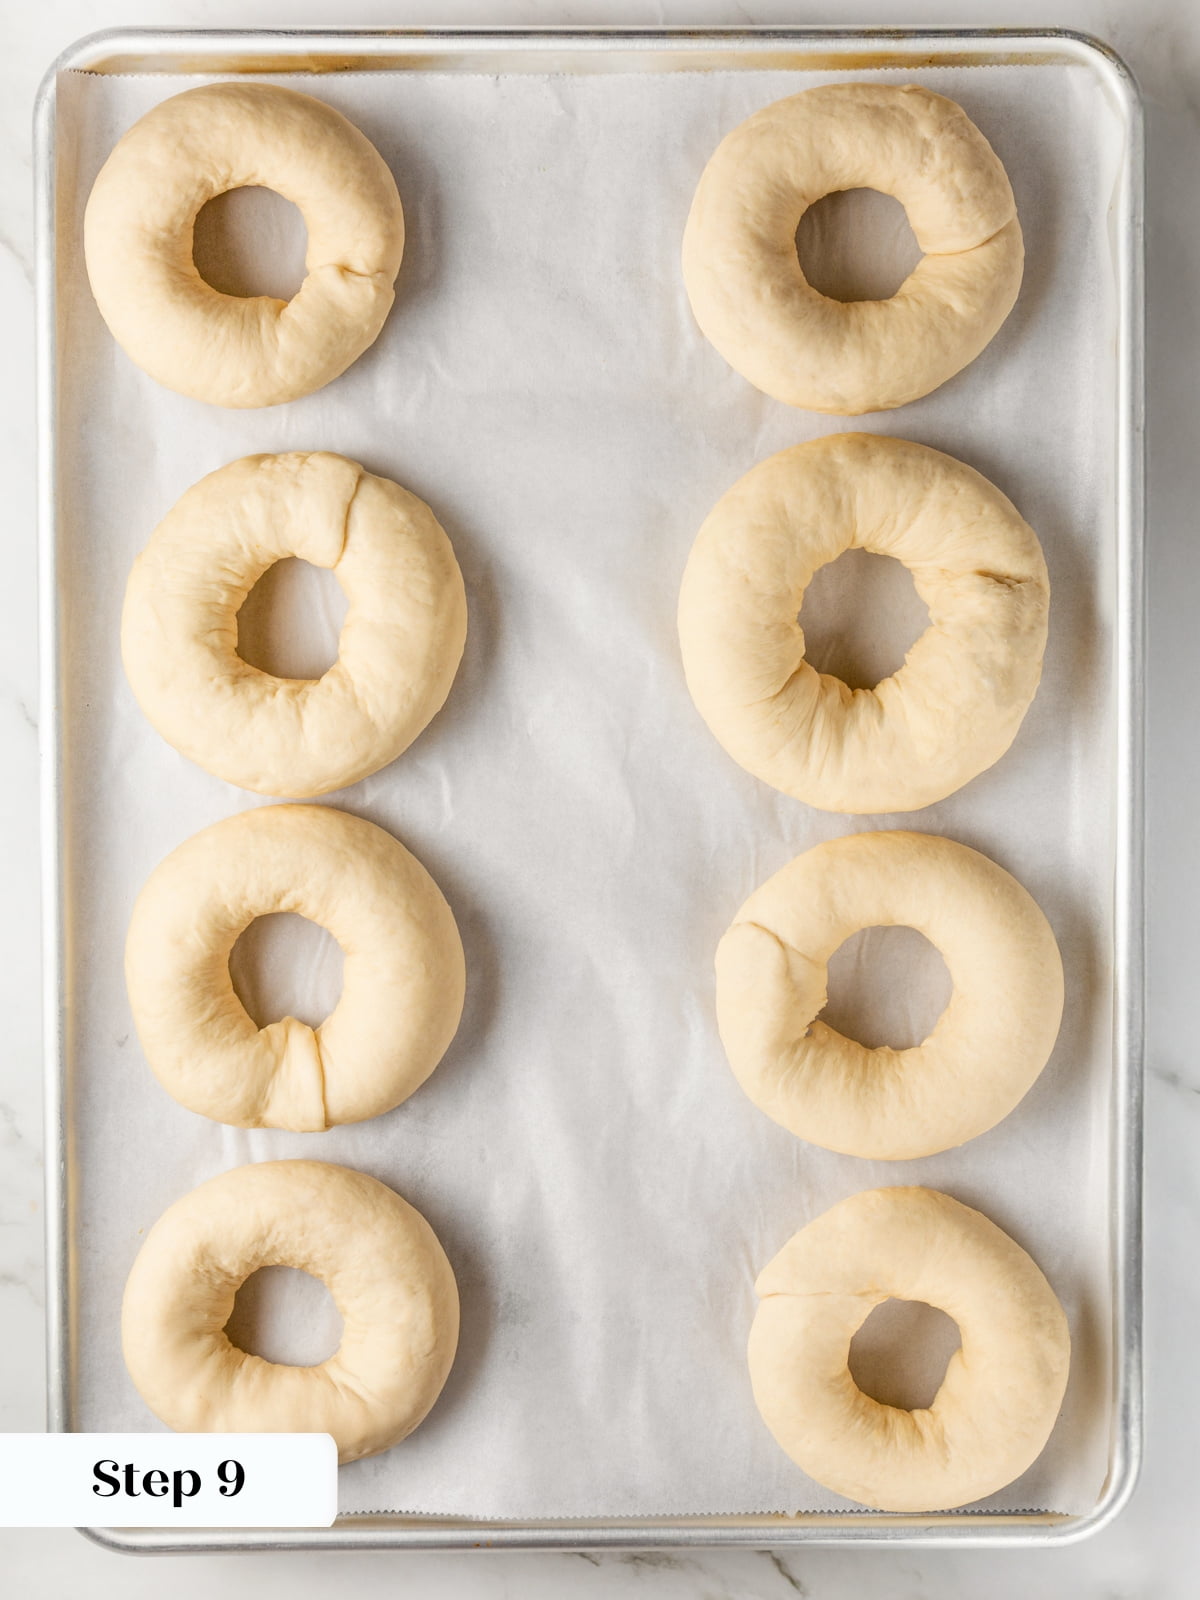


Step 9: Place a shaped bagel on parchment paper or a silicone mat-lined baking sheet. Repeat with all 8 pieces of dough. Wrap well with plastic wrap so the surface doesn’t dry out (photo 9).
Step 10: Proof and chill. If baking the same day, allow to proof for 45-60 minutes at room temperature, then refrigerate at least 60 minutes until they feel light and airy, but cold. It is a little tricky when the dough is cold, but you can still feel the difference. If you are baking the next day, immediately refrigerate the shaped bagels for up to 24 hours. This is my preferred method (photo 10).
Step 11: Preheat the oven to 425°F (no fan). Set up your boiling station. Place a wire rack inside a rimmed baking sheet, line two baking sheets with parchment, gather a spider (like for frying) or a large slotted spoon, and bring about 4 inches of water in a large pot to a boil. Reduce the heat to a simmer and then begin boiling bagels. I also like to set up shallow bowls with all my favorite bagel toppings at this point, so that I am ready!
They call it boiling bagels, but the water isn’t actually boiling. You don’t want to cook them too hot or too long in the water, or the yeast will die. If that happens, they will not continue to rise in the oven. Cooking them in the water keeps the surface soft, allowing for maximum expansion in the oven while also cooking the outside of the bagel, giving it that chewy exterior. I do turn the temperature back up after 2 batches of bagels because the cold bagels lower the temperature of the water, and heating it back up will ensure all bagels get that nice exterior chew and expansion.
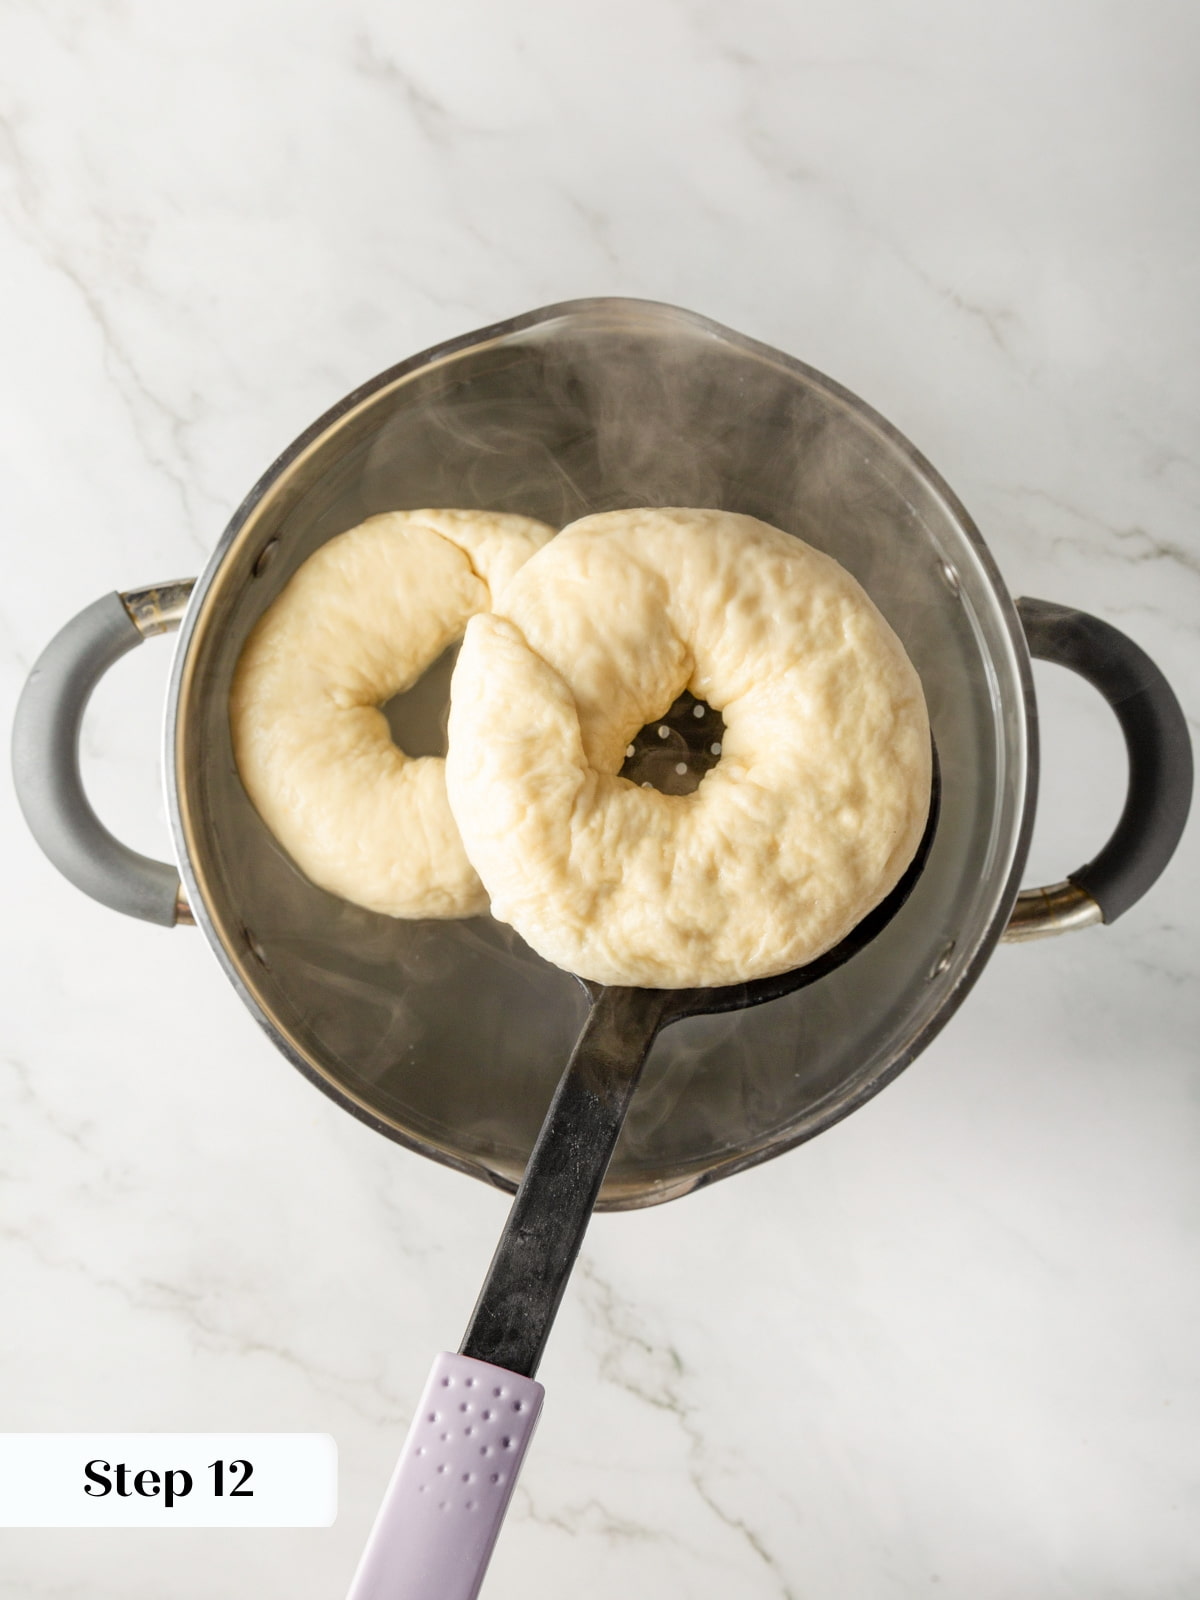
Step 12: Simmer the bagels. Take the cold bagels from the refrigerator and cook them 1-3 at a time (depending on your comfort) in the large pot of water. I like to place each one in the simmering water gently, top side down, then flip after about 30 seconds. Allow to poach on the second side for another 25-35 seconds, then remove to the wire rack (photo 11).
You can test if they have proofed enough by placing one in the water. It should float immediately; if not, they aren’t ready to bake (or they proofed too long, but probably the former).
Step 13: Add optional toppings. If you are going to use a topping, after about 10 seconds on the rack, dip the top of each bagel into the topping of choice, then place on the prepared baking sheet. Repeat with all bagels.
Step 14: Bake the bagels in the preheated oven for 15-16 minutes until they are a nice golden brown color. Rotate the racks top to bottom and front to back after 8 minutes. Cool before slicing, if you can wait that long (photo 12)!
Recipe FAQs
It is worth making your own bagels with the right recipe especially if you don’t have access to delicious New York bagels. There is no bulk proofing and the shaping only takes a few minutes (especially with practice!). This recipe produces a bagel on par or better than most bagel shops, and it freezes perfectly!
You can store homemade bagels at room temperature, in an airtight container, to keep them as fresh as possible. They are best enjoyed within 3 days!
Of course! Make sure you allow the bagels to cool first before freezing them. Wrap them tightly and freeze them in an airtight bag or container for up to 4-8 weeks for best results. Unwrap before thawing. My favorite method is a brief trip to the microwave, sliced and then warmed in a toaster oven or air fryer. This preserves the texture without drying them out.
I don’t recommend using all-purpose flour for this recipe since the high-gluten flour gives the bagels their recognizable chewy texture. They will be fluffier. However, I do have some bread recipes that use all-purpose flour, such as my no-knead Dutch oven bread and French bread that you can try out.
There are so, so many ways to serve them! You can spread butter on them while still warm from the oven, or use cream cheese, hummus, or even jam. Enjoy these bagels with the traditional brunch fixings: lox, cream cheese, capers and red onions! Use them as a bread for sandwiches like Panera bread’s bacon turkey bravo!
Recommended Bagel Recipes

Bagels

Bagels
Bagels

Breakfast & Brunch
If you enjoyed this recipe, please leave a star rating and let me know how it goes in the comments below! I love hearing from you and your comments make my day!
Homemade Bagels
Ingredients
- 1 ⅔ cups water, warm (approximately 100°F)
- 2 ¼ teaspoons dry active yeast, 1 package
- 5 cups high-gluten flour, (King Arthur)
- 2 tablespoons granulated sugar
- 2 teaspoons kosher salt
Instructions
- Whisk yeast and water; allow to bloom. In the bowl of a stand mixer, whisk together dry active yeast, water, and a little of the sugar if you want. Allow to sit for 10 minutes or until foamy.
- Incorporate remaining ingredients. To the stand mixer bowl, add high-gluten flour, sugar, and kosher salt. Use the dough hook attachment to combine all the ingredients on low speed.
- Knead until properly developed. Mix on medium speed until a smooth dough forms. You should be able to pull a window pane. You are looking for a smooth dough. The surface shouldn’t look like scar tissue; if it does, it isn’t mixed. I knead this recipe for 6 minutes on medium speed in a stand mixer. There is no bulk fermentation, so it is important that it is properly developed.
- Divide the dough. Turn the dough out onto a smooth surface. Divide into 8 equal pieces, approximately 122 g each.
- Pre-shape the dough. Working with one piece at a time, pre-shape the dough into a log shape by stretching the dough into a rectangle. Fold the top 1/3 down to the center and then continue folding the folded over the final 1/3, sealing it against the counter with your fingers. Place it to the side and keep covered while you repeat with all remaining pieces.
- Shape the dough into logs. Starting with the first piece of dough that you pre-shaped, flip it over so the seam side is up. Place your left thumb on the seam. Your hand will make an “L” shape. Using your left hand, fold the dough in towards your body around your left thumb and then seal it with the heel of your right hand. Repeat this down the length of the rectangle. Repeat once more to make a tight log shape. You might need to do 3 thumb folds to make a tight rope.
- Create ropes. Now roll that log out using both hands like a snake or rope. Start with both hands in the center and gently roll it back and forth while moving your hands apart. This will lengthen the rope. Get it to around 8 inches.
- Shape and seal the bagels. Take the rope and wrap it around your hand, overlapping the ends by about 1 ½ inches. Flip your palm flat with the overlapped portion underneath it. Roll the overlap gently underneath your palm to seal them together. The goal isn’t further lengthening, but rather just to seal the ends together.
- Place a shaped bagel on parchment paper or a silicone mat-lined baking sheet. Repeat with all 8 pieces of dough. Wrap well with plastic wrap so the surface doesn’t dry out.
- Proof and chill. If baking the same day, allow to proof for 45-60 minutes at room temperature, then refrigerate at least 60 minutes until they feel light and airy, but cold. If you are baking the next day, immediately refrigerate the shaped bagels for up to 24 hours. This is my preferred method.
- Preheat the oven to 425°F (no fan). Set up your boiling station. Place a wire rack inside a rimmed baking sheet, gather a spider (like for frying) or large slotted spoon, and bring about 4 inches of water in a large pot to a boil. Reduce the heat to a simmer and then begin boiling bagels. I also like to set up shallow bowls with all my toppings at this point, so that I am ready!
- Simmer the bagels. Take the cold bagels from the refrigerator and cook them 1-3 at a time in the simmering water. I like to place each one in the water gently, top side down, then flip after about 30 seconds. Allow to poach on the second side for another 25-35 seconds, then remove to the wire rack.
- Add optional toppings. If you are going to use a topping, after about 10 seconds on the rack, dip the top of each bagel into the topping of choice, then place the bagels on parchment-lined baking sheets. Repeat with all bagels.
- Bake the bagels in the preheated oven for 15-16 minutes until they are a nice golden brown. Rotate the racks top to bottom and front to back after 8 minutes. Cool before slicing, if you can wait that long!
Notes
Nutrition
Nutrition information is automatically calculated, so should only be used as an approximation.
 Like this recipe? Rate & comment below!
Before You Go
I hope you enjoyed this simple yet fun recipe for plain bagels. Check out our other delicious yeasted bread recipes!


I can’t believe I waited this long to make homemade bagels, this recipe is an absolute game changer! The tips on using high-gluten flour and the boiling step gave my bagels that perfect chewy crust I’ve always loved from bagel shops. I topped mine with everything bagel seasoning and served them with lox and cream cheese, hands down the best weekend breakfast I’ve ever made!
Hooray, Mara! Thank you so much for taking the time to come back to comment and rate! My son is requesting that we make another batch of these bagels soon; the trick is hiding them from my husband! ~Lindsey
Wish there was a video to accompany the folding directions . I am just a very visual person. Thank you! I love your recipes
Hi Caron! Thank you so much — I’m glad you love the recipes! And totally hear you on wanting visuals. For now, I did try to make it easier to follow with tips and photos so it’s easy for you to follow along. Also, if the folding feels tricky, you can use the simpler shaping option: you can always go the easy route by poking a hole in the center with your pointer finger and stretching them out. Enjoy! ~gvd team
This is the best bagel recipe I could ask for! The instructions really break down how to shape them correctly, and they turned out golden brown with a perfect texture. This is definitely going to be my go-to bagel recipe from now on!