Made with all purpose flour and just a touch of butter, learn how to make soft, tender sourdough sandwich bread with bubbly, active sourdough starter. Recipe adapted from my bestselling book:
Artisan Sourdough Made Simple.
Out of all the sourdough bread recipes I make on repeat (my beginner sourdough bread recipe,
sourdough focaccia and sourdough pancakes to name a few!), this easy sourdough sandwich bread gets the most requests. Why? It’s soft. It’s buttery. It makes the kitchen smell like magic.
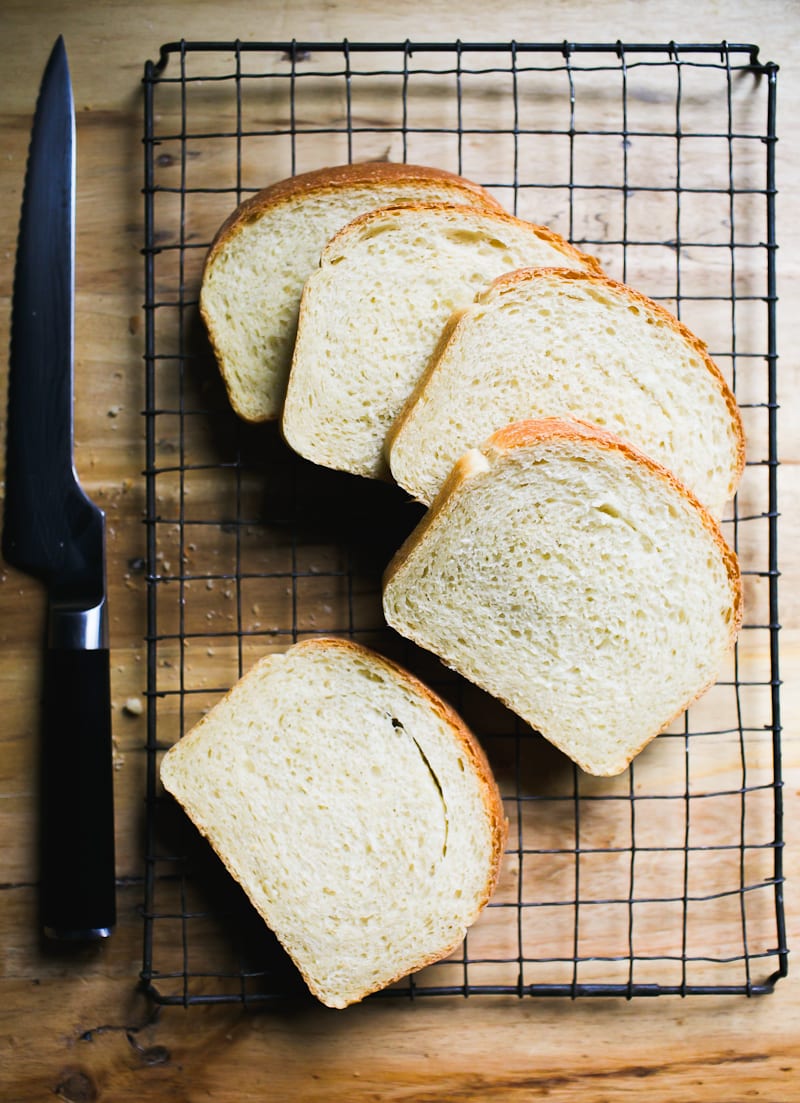
And the best part: you made it yourself. No junk or preservatives. Just simple sourdough with a soft crust, subtle tang and fluffy crumb that holds up to slicing, toasting and sandwiches (anything really).
Below, you’ll find my step-by-step walkthrough and baking schedule. You’ll also get three solid
variations (cinnamon raisin, whole wheat and bread flour) plus more sandwich loaf recipes in my book for inspiration.

Good To Know:
- What most bakers get wrong: the second rise goes for too long. This creates over proofed dough that bakes up flat. Follow my recommended timing and tips to master this step.
- Pan size matters. Want a taller loaf? Use an 8.5×4 inch pan instead of the standard 9×5 inch pan. Both work, but the smaller size will give the dough a nice upward boost.
- Use softened butter. If it’s cold, it won’t blend into the dough.
- Make it vegan. Swap in your favorite plant-based butter. Just check the label. Some brands are very salty.
- Temperature controls time. Warm kitchen? The dough will rise fast. Cold kitchen? Give it more time. Watch the dough and not the clock.
How To Make Sourdough Sandwich Bread {Step-By-Step Recipe}
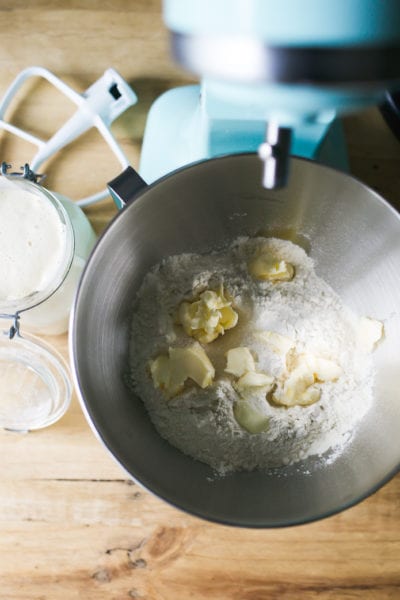
Step 1: Mix the Dough
To Start: Add the flour, softened butter, sugar and salt to a bowl. I like using a stand mixer for this recipe. The dough is naturally a bit sticky; the machine makes it easier to handle. Mix with the paddle attachment until the butter looks like crumbs.
Mix in your bubbly, active sourdough starter and water until everything comes together. Cover and rest for 30 minutes to relax the dough before kneading.
Note: If you need assistance with your sourdough starter, read my companion articles Feeding Sourdough Starter: My Best Tips & Tricks and Troubleshooting Sourdough Starter.
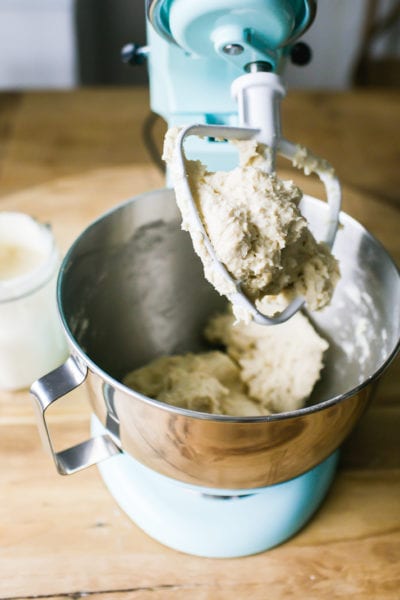
After 30 minutes of resting…
Remove the paddle attachment and switch to the dough hook. Knead until soft and supple, about 6-8 minutes. Note: on this particular day, my dough was stickier than usual so I added a sprinkle of flour to even it out. You can do that too.
No Stand Mixer? Knead the dough by hand on a lightly floured surface until it feels smooth, soft and elastic, about 8-10 minutes. Don’t worry about under/over kneading. If it’s springy (not sticky) you’re good to go.
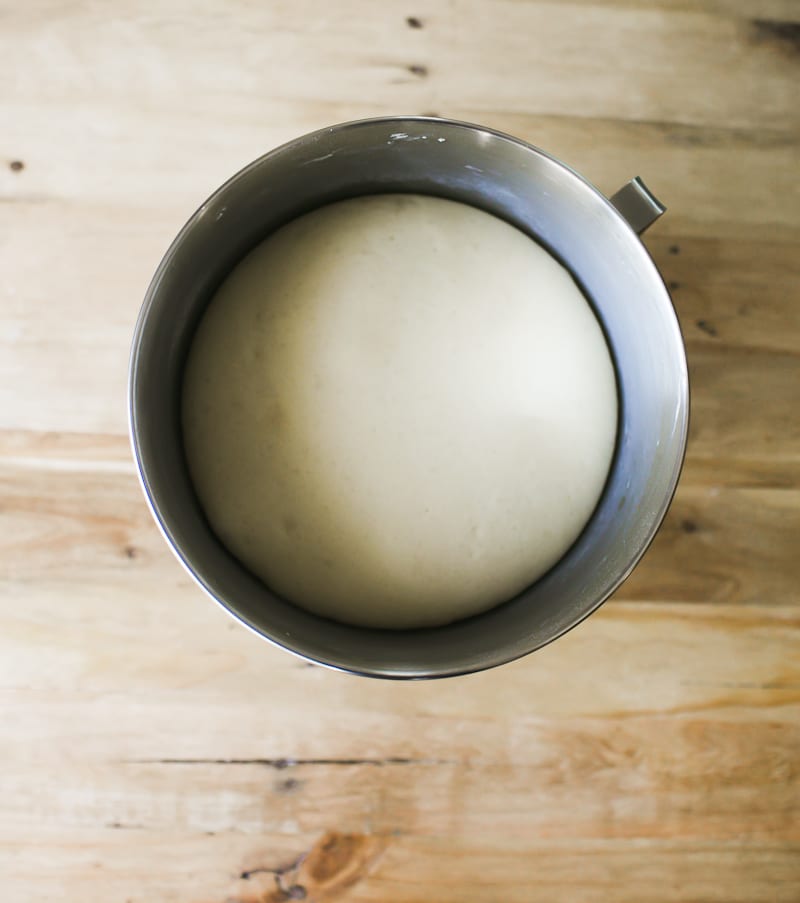
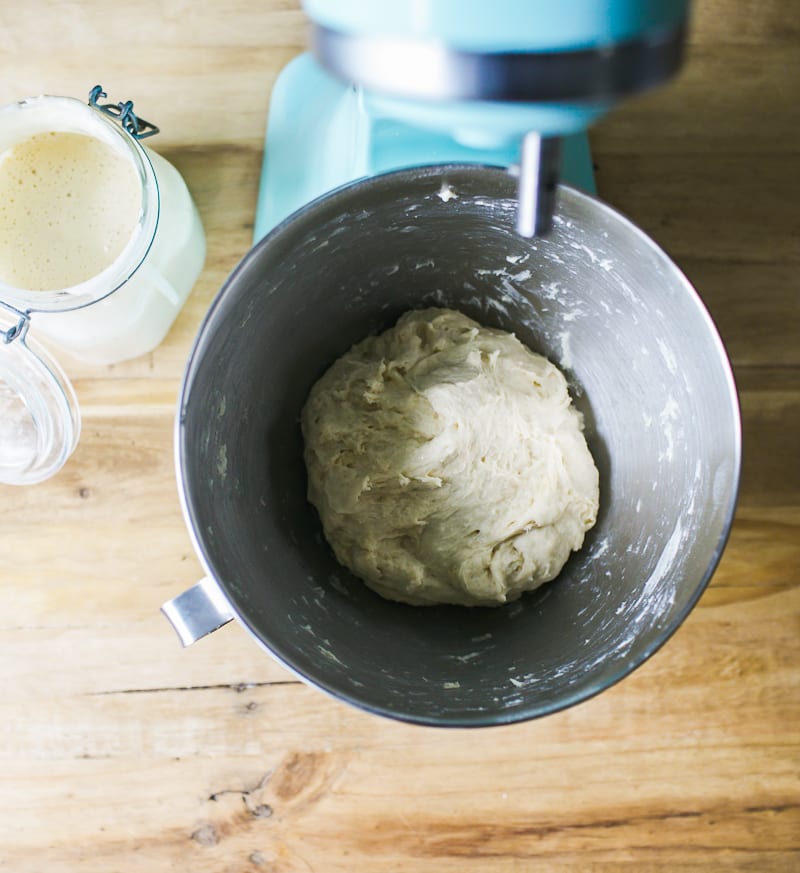
Step 2: Bulk Rise (Overnight)
Cover the bowl with plastic wrap and let the dough rise overnight at room temperature (68 F), about 10-12 hrs. The dough is ready when it’s puffy, airy and has doubled in size.
Tip: This is an overnight sandwich dough. However, you can do a same-day bake instead (see my Sample Baking Schedule).
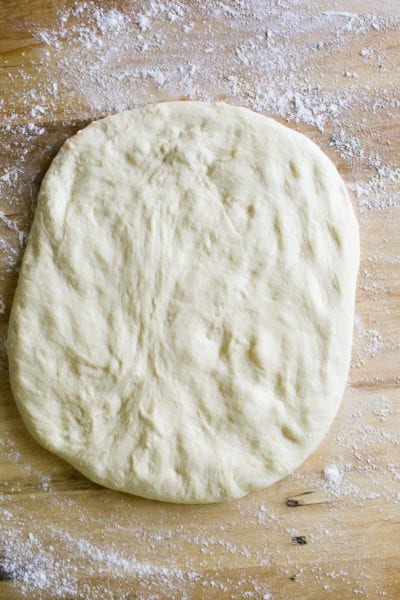
Step 3: Shape the Dough
Remove the dough onto a lightly floured surface. Gently flatten to release the air bubbles (you don’t want big holes like ciabatta!).
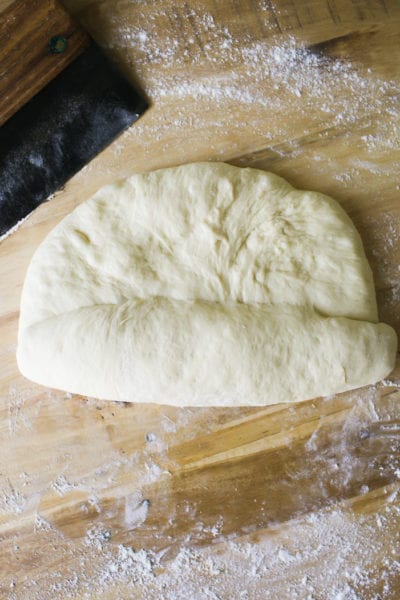
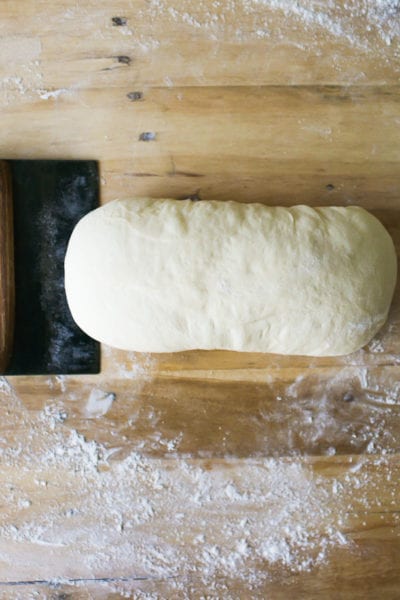
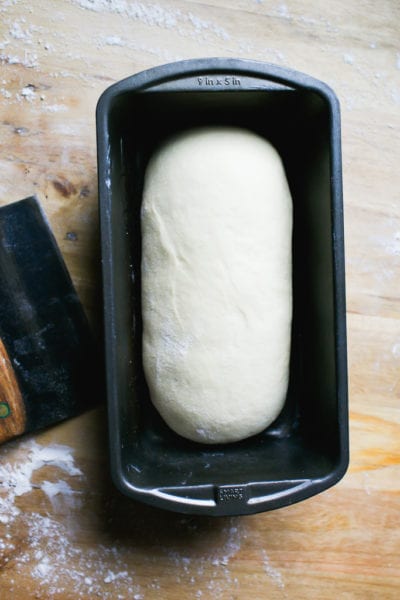
Roll the dough into a log, tucking the ends underneath. Then, with floured hands pull the dough towards you creating surface tension to tighten its shape. Place the dough into a buttered loaf pan, but make sure it’s seam side down.
Step 4: Second Rise
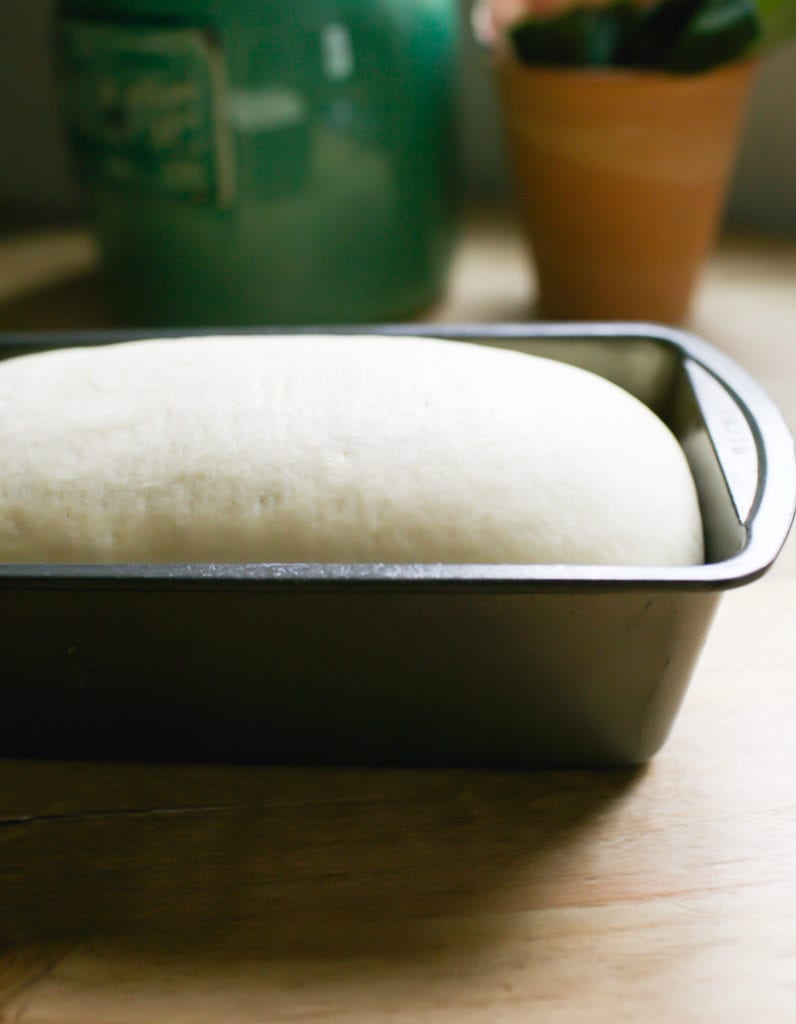
This step is crucial. When done correctly, your loaf will build back additional strength needed for good oven spring. Cover the pan with lightly oiled plastic wrap so the dough doesn’t stick to the top. Let rise until the center domes about 1 inch above the rim of the pan. You’e not going for double in size or sky scraper height; just notably puffy and less dense.
Tip: Cold Kitchen? Your second rise might take longer than expected @ 68 F. Be patient with this step. Plan on 1 1/2 -2+ hours depending on your specific room temperature and starter strength. If you’re short on time, use a proofing box or my DIY warm oven trick to speed things up (see “Helpful Tips” in the recipe card below).
Step 5: Bake The Bread
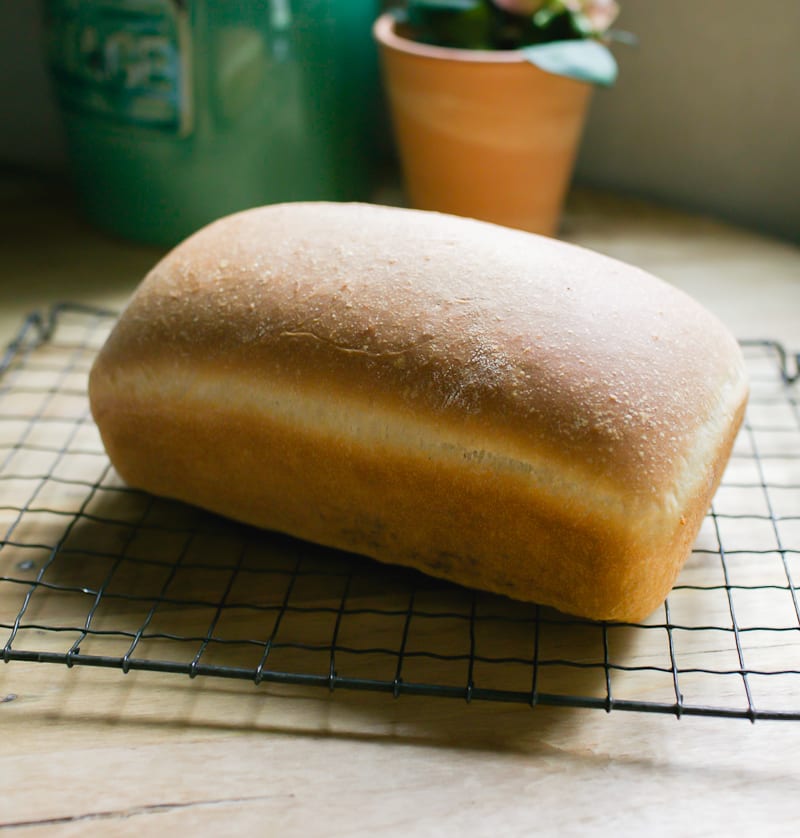
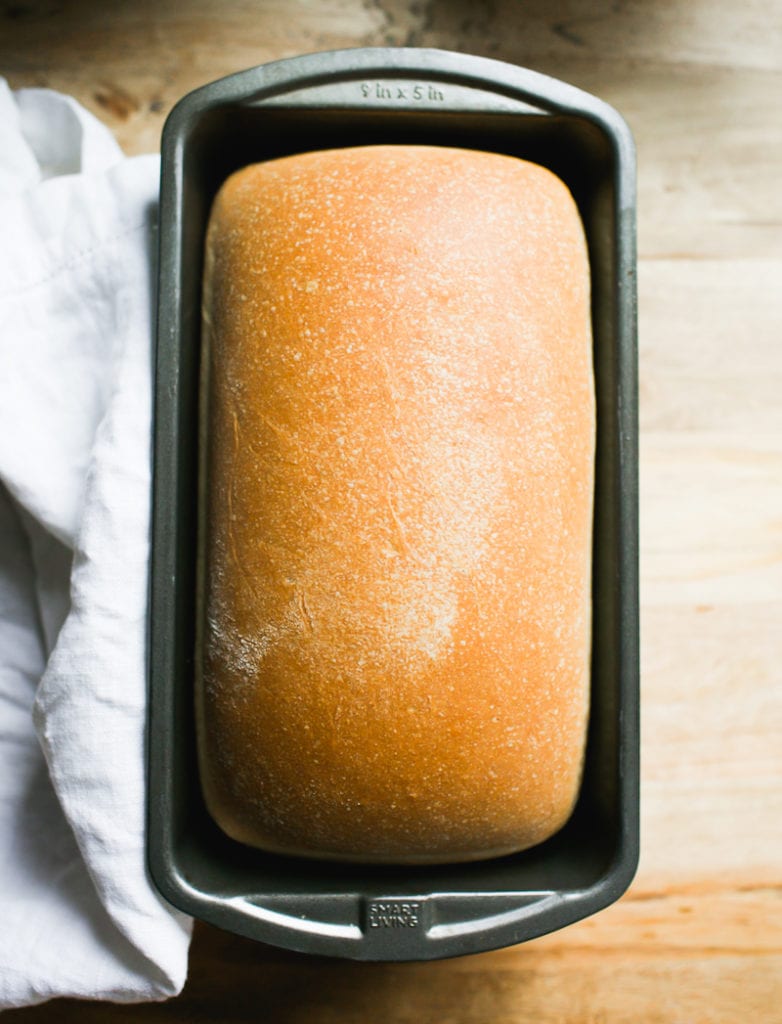
Preheat your oven to 375 F. For better oven spring, preheat to 500 F instead, then lower the temperature to 375 F when the dough goes into the oven. Bake on the center rack for 45-50 minutes or until golden brown.
Cool in the pan, then transfer to a wire rack. Wait an hour before slicing (skipping this step can turn the inside gummy).
Tip: Have an extra loaf pan? Some bakers create a makeshift “lid” by placing a separate, upside loaf pan on top of their pan before baking. This traps steam inside, creating a humid environment for the dough to rise avoiding potential blow-outs or tears, and keeps the crust soft. It’s similar to using a Dutch oven for my sourdough bread recipe.
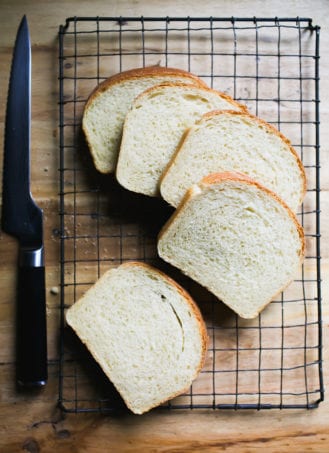
Slice & Store
You’ll need a good serrated knife (I use this one). For a moderately priced option, try this knife instead. If your bread slices are really uneven, consider this collapsable bread slicer with 3 different thicknesses: thin, medium and thick to guide you along.
What I do at home: If you have a large family, or just eat a lot of bread, I highly suggest doubling this recipe. Bake (2) loaves side by side and freeze whatever you don’t eat. This loaf can be frozen whole, covered tightly in plastic wrap or as individual slices.
Sourdough Sandwich Bread Variations
- Whole Wheat: Replace 20% of all purpose flour with whole wheat or white whole wheat flour. If the dough seems dry (whole grain flours absorb more liquid), add more water as needed to achieve a workable consistency. Do this 1 teaspoon at a time.
- Bread Flour: Do an even swap, adding more liquid if the dough is dry. For example, King Arthur Bread flour is very thirsty so more liquid might be needed. If using Gold Medal bread flour which is not as absorbent, additional adjustments might not be necessary.
- Sourdough Cinnamon Raisin Bread: You’ll find my step-by-step post here. The vanilla-soaked raisins make it a community favorite!
What To Bake Next
In addition to the above variations, a natural next step for sandwiches and breakfast fare would be my easy, NY-style sourdough bagels (they are so incredibly chewy and addictive) and these super soft sourdough english muffins. I’m excited to see what you make next.
Sample Overnight Baking Schedule (68 F)
Feel free to adjust the start times below as needed. It’s flexible. For a same-day bake, start early in the morning and bulk rise at a warmer temperature.
Day 1 (Evening)
- 4:30 PM: Feed sourdough starter (to activate)
- 8:00 PM: Mix dough
- 8:30 PM: Rat 30 minutes, then knead.
- 9:00 PM: Cover and bulk ferment, room temp @ 68 F overnight (10-12 hrs).
Day 2 (Morning)
- 7:00-8:00 AM: Check the dough (should be doubled)
- 8:15 AM: Shape dough
- 8:30 AM: Second rise (1 1/2 – 2+ hours)
- 10:30 AM: Preheat oven
- 10:45 AM: Bake
- 11:30 AM: Cool
By signing up, you agree to receive emails from The Clever Carrot. Unsubscribe at any time.
Easy Sourdough Sandwich Bread
- Prep Time: 12 hours
- Cook Time: 50 minutes
- Total Time: 12 hours 50 minutes
- Yield: 1 loaf 1x
- Category: Sourdough Bread
- Method: Oven-Baked
- Cuisine: American
- Diet: Vegetarian
Description
A simple and easy recipe for homemade sourdough sandwich bread. Made with all purpose flour and just a touch of butter. I like to make the dough at night so we can have fresh bread in the morning. This loaf freezes well (whole or sliced). I recommend this loaf pan.
Helpful Tips:
- For best results, weigh your ingredients with a scale instead of using measuring cups. Weight and volume measurements are not equal, only approximate! For example: If your starter is very bubbly, 1/4 cup might only weigh 30 g which is too little for this recipe (you need 50 g). The dough will take forever to rise. Same goes for the flour: 4 cups might weigh over 500 g depending on how tight the flour was packed into the cup. More flour = dry dough.
- This recipe works with Whole Foods 365 Everyday, King Arthur and Trader Joe’s all purpose flour. If using another brand with a lower protein content (i.e. Gold Medal, Pillsbury, Heckers) consider reducing the total water amount by 15 g.
- For a variation of this recipe with more sourdough starter, please choose one of the following adjustments below, keeping the rest of the ingredient quantities the same:
- 100 g starter + 255 g water
- 150 g starter + 250 g water
Additionally, because temperature controls time: you can also increase your surrounding temperature for the bulk or second rise, as needed. Place the dough in a proofing box set to 75-80 F. Or, preheat your home oven to 75-80 F and then shut it off immediately (use an oven thermometer to make sure it’s set to exactly 80 F and not higher!). Place the covered dough inside until it bulks up. Do no use this option overnight- it will be too warm.
Ingredients
- 500 g (4 cups) all purpose flour
- 60 g (4 tbsp.) unsalted butter, softened, cut into cubes
- 12 g (1 tbsp.) sugar
- 9 g fine sea salt
- 50 g (1/4 cup) bubbly, active sourdough starter (100% hydration)**
- 270 g (1 cup + 2 tbsp) warm water
Instructions
Baking Schedule: this is an overnight dough which takes approximately 10-12 hrs to rise @ 68 F. Start the night before, in the evening, and plan to bake the following day. If it’s warmer than 68 F the dough will take less time to rise. Alternatively, start in the morning and bake in the afternoon or evening.
Mix the Dough
In a stand mixer fitted with the paddle attachment, add the flour, butter, sugar and salt. Mix on low speed until combined; the butter should look like crumbs.
Add the starter and warm water. Mix until the flour is fully absorbed (get in there with your hands to finish mixing). The dough will feel slightly sticky and elastic at this stage. Cover with plastic wrap or a damp towel and let rest for 30 minutes. Meanwhile, replenish you starter with fresh flour and water.
After the dough has rested, switch to the dough hook and run the machine on medium-low (#3 on a KitchenAid) for 6-8 minutes. The dough will feel soft and supple and not stick to your hands. If it does, add a dusting of flour.
Note: If you do not have a stand mixer, the dough can be made by hand. After mixing and resting for 30 minutes, knead the dough on a lightly floured surface for 8-10 minutes, or until smooth, soft and elastic. Do not worry about under/over kneading. Relax into the process and focus on the texture, not the time.
Bulk Rise
Cover the bowl with plastic wrap and let rise overnight at room temperature (68 F) until double in size, about 10-12 hrs. Please refer to the Baking Schedule above for additional rise time options.
Shape the Dough
In the morning, coat an 8.5×4 inch loaf pan with butter.
Remove the dough onto a lightly floured work surface. Gently flatten the surface to release any large air bubbles.
Roll the dough into a log tucking the ends underneath. Rest for 5-10 minutes. With floured hands, gently cup the dough and pull it toward you to tighten its shape. Using a bench knife, place the dough into the loaf pan seam side down.
Second Rise
Cover the dough with lightly oiled or buttered plastic wrap. Let rest at room temperature until it has risen to about 1-inch above the rim of the pan (check the height by looking at the domed center portion of the dough). You are not looking for it to double in size. For timing, this can take anywhere from 1 1/2-2 hours (or more!) depending on temperature and the amount of sourdough starter used. Remember, the warmer it is, the faster the dough will rise. Refer to the “helpful tips” at the top of this post.
Preheat your oven to 375 F. Note: For higher oven spring, preheat to 500 F instead. Reduce to 375 F once the dough goes into the oven and bake as directed.
Bake the Dough
Bake the dough on the center rack for about 45-50 minutes, or until golden brown. Cool in the pan for at least 10 minutes, and then transfer to a rack to cool completely. This sandwich loaf will stay fresh for up to 3 days, stored in a plastic bag at room temperature.


Comments
Lindsey says
This is delicious and super easy. I added cinnamon swirl-perfect for toast.
Laura Tiffany says
My first loaf of sourdough sandwich bread
Nhi says
Hi i can I replace the butter for olive oil? I would like to make it allergy friendly for my son.
Karen says
This was fantastic! Thanks for including the measurements in cups, etc. I discovered after buying my sourdough starter that my kitchen scale doesn’t actually weigh in grams, so it was great having everything listed both ways. Turned out delicious and was very easy to make.
Andrea says
Hi!! I’m new to sourdough but I really want to try your recipe since I already make my own regular sandwich bread. My question is, can I use a lidded pan for this recipe? And if yes, how tall do I let it rise on the second rise. Thank you!
Meeghan says
Hi! (Obviously im not the creator) but I used the lidded loaf pans for mine. It rises all the way towards the lid usually and bakes perfectly square!
Catherine Remus says
I followed the ingredient amounts, in grams, exactly but when mixing it was extremely stiff and lumpy not shaggy hard and lumpy. Hopefully it will soften up after autolyzing. Can I add more water at that point or is it too late?
Mickey says
Can I do honey instead of sugar ? Is it the same amount as the sugar. If so do I add the honey to the starter and water. Thank you Mickey
Eric Miller says
I am experimenting with using heirloom /heritage turkey red wheat flours and was wondering if you could advise on adjustments to this recipe if using 100% whole wheat flour and if using 100% bolted wheat flour. Thank you.
Amy says
Great straightforward recipe that I will use over and over! Made a delicious and soft loaf. I doubled it and froze one for later.
Nicole Cumberbatch says
I’m a newbie to making sourdough bread. I followed you recipe exactly as given and my first sourdough sandwich bread came out AMAZING and DELICIOUS!
Thank you so much for sharing
Danielle says
I just made this bread and it is by far the softest sourdough sandwich I have ever made. I definite keeper!!!
Pip Hyde says
Hi,
Question my bread came out cakey, I didn’t put in as much salt as I used salted butter, also had to cook longer as internal temp was WAY under 95c
Im guessing should be same as boules… any advice would greatly accepted.
Laur says
This has quickly become my go to sourdough loaf! It’s so easy and yummy, I have one in process right now. Tweaking the sourdough started amount this time, excited to see the result, but really this recipe never fails.
Rebecca says
Thanks for sharing! This is my go to sandwich bread recipe. I’ve made it 3 times now and always double it to create 2 loaves.
Tania Carrier says
Question for you… do you separate the dough before the first rise or before the second rise?
Rebecca Elaine Thomas says
I separate before the second rise.
Jackie says
First off, Happy New Year! Thank you for this delicious recipe! I’m rather newish on my sourdough journey, but immensely enjoying it. I did start this loaf rather late in the day. I did an 11 hour BF in my cool 68° kitchen. Wanted to go to bed at 11PM so I shaped, put into banneton, covered with oiled plastic wrap. Took it out at 7AM, scored it and then wondered what to do :) I let it sit one hour. Preheated oven. Covered with my other loaf pan for 20 minutes, uncovered let it brown. It’s not as beautiful as yours, it’s a bit heavy in weight, BUT THE FLAVOR IS HEAVENLY. I can’t stop nibling LOL I did replace one cup APF with one cup whole wheat. I’m gonna try this again soon and start earlier in the day! I suspect during the summer months this preparation will go much faster! Again, thank you!
Diane says
Do you have a daytime time chart? Can’t wait to try this recipe.
Annette Martinez says
Can I use Bread flour instead of all purpose flour?
Suzy Charto says
Can you use a bread maker for mixing the dough
Jessi says
This recipe was exactly what I was looking for! My kids eat lots of sandwiches and I just wanted a healthier option for them. I’m very new to sourdough (still struggling to make the artesian loaf), but this has been so easy. I’ve been tweaking my timing to get it a little fluffier. This last time I accidentally let it rise too long in our warm house and it overflowed, but I think that longer bulk rise may have been the secret.
I also tried it with honey, golden wheat flour, bread flour, and AP flour. Trying to make a soft honey wheat. If you have any recommendations on that I would love to hear them!
Kristen Maleski says
Can I put this in the refrigerator overnight after the second rise in the sandwich pan and bake it the next morning straight from the fridge? Or should I do the second rise in the pan after refrigerating it overnight?
Deloah Browne says
I was wondering this too.
Sandy says
I have made this recipe about 5 times with no issues at all, it’s simple and comes out so delicious! It’s my favorite sourdough sandwich bread recipe! The only changes I made were substituting honey for the sugar and leaving a loaf pan on top of the loaf with the dough in it as a makeshift Dutch oven for @30 min and then removing it for the rest of the bake. I like my bread a lighter color than more golden. It is So good!
Gerrit says
Hi,
This was my first attempt at Sourdough and typical me I went all out… 3kg flour bake. It came out perfectly. Took 23 hours as I was gifted a 40g starter so I first made a 1:16:16 levian…
Ralph says
Could I suggest, perhaps, having the conversion next to the imperial measurement for your international audience? Save us toggling back and forth to the Google tab to run the conversion.
Sunny says
This has been my go-to recipe and has been so consistent and lovely each time!! I would like to make smaller loaves for friends this holiday, and have 7″X2.5″ paper pans to use. My thought is to split the dough an half for this recipe (1 regular loaf pan = 2 minis) but how would the bake time be adjusted?
Adrii says
Do you cover the loaf with anything when it’s baking in the oven or leave it open?
Casey says
I have made another of your sourdough loaves and its gone within a few days. Its delicious!
Just curious- if I wanted to double or triple this recipe, would I just simply double or triple all the ingredients or are there certain modifications? I bake a loaf every weekend, but would love to make a few at the same time to save time!
Thanks!
Geri says
Can I make this Everyday Bread in an oval Dutch oven or do I have to use a loaf pan.
Vicki Metherd Allwardt says
This was a very tasty loaf even tho I started too late and had to leave. It on fridge too long. Will give it another go
Mary Ellen says
Wow! I am so excited with how this turned out. This is my first loaf. I’m looking forward to making this again. I did put it in the oven with the light on to get the initial rise going. Delicious! Thank you!
Diane L. says
This is the first sourdough sandwich bread I’ve made. It is fabulous! Slices easily, buttery, rich flavor. It’s my favorite recipe!
Angie Coffey says
Hi. I’m going to give this sandwich loaf a try today as the comments are so good I can’t resist. I’m a bit of a novice at sourdough baking and trying to understand all the intricacies with starters, hydration, gluten development etc. Can I substitute the sugar for honey and if so how many grams would I use? Thank you
Sandy says
I do and it comes out really good! I use the same amount as the recipe states for the sugar.
I have made this recipe 3 times so far and it is my favorite!
KJo says
Worked out well for my first sandwich loaf, thank you for your thoughtful tips throughout, I’m new to this so was really not sure but just followed all of your tips and it was great; very tasty, not too chewy but still the lovely sourdough flavor! Will be making this again!
Laura Larsen says
SO SO GOOD! The first sourdough recipe I’ve ever made! So easy to follow and turned out perfect!
Talia Carlton says
Can this do go in the fridge for the second rise overnight if I’m short on time?
Beth says
I love this recipe! I used this bread in my Thanksgiving dressing and it was spectacular. I have a loaf rising now.
milissa passig says
The most tender loaf I’ve made. Kudos from my family–they’re eating it plain!
Jolie says
Loaves came out great! Have you made stuffing using these loaves? I’m thinking of trying it!
Lottie says
I made this and it tastes great and good texture but id love it to be taller. Would it rise more if I add more starter? Thanks ☺️
Lucy says
Love this recipe. This is now my go-to bread recipe. I now make 2 loaves every few weeks and slice & freeze to toast up when we are ready to eat. I typically omit the sugar and love to do the variation with wheat flour. Best everyday kind of loaf!!
Dana says
Can this recipe make two loaves in the smaller pans? If so, are there any changes I need to make?
Marc Hanson says
I’ve done the 10 hr proofing tonight but it’s too late to bake. Can I leave on counter overnight, or should I set it in the refrigerator ? Thank you.
Dorina Berger says
I also mixed mine in the morning at 10:00. I don’t want to bake it tonight, it will be late by the time that I get it in the oven.
Should I leave it on the counter or in the fridge. I hope someone has an answer to our question.
Waiting….
Santhia says
I’m in a similar situation. Did you end up putting it in the fridge after the second fermentation process? How did your loaf turn out?
Michelle says
Can you use a different oil than butter (e.g., canola, olive, etc.)? If so, do you use the same quantities for the other ingredients?
Lauren says
I have made this twice now because I wanted to make sure the first time wasn’t just a miracle…. Thank you for this recipe!!!! It is amazingly fluffy light perfect bread!!!
Emilie Raffa says
You win the comments today. 🥰 Thank you, Lauren. Glad you liked it!
Linda DeGennaro says
I tried to find the schedule if you mix the dough in the am. I mixed my dough, its 8;30am , should i put it in the oven with the light on? for how many hours, until doubled? should I check the dough temperature after a few hours? Im so confused ! lol!!!!
Help!! thanks!!! Linda
Johanna says
Thank you!
Made this today with my only 8 days old starter. Thus used 100g and bit less water.
I also used a lid with my bread pan and it came out looking quite pro!
Long fermenting time with a starter that is only fed once a day with 1:1:1 ratio does taste quite strongly now, but still ok. When my starter is stronger maybe the dough needs less time fermenting and the standard 50g starter, but quite nice already like this.
Emilie Raffa says
Thanks for sharing your feedback, Johanna! I always tell people, if what you’re doing now works, don’t change a thing. Every baker will have a different experience based on the personal nuances of their starter paired with environmental variables, such as time and temperature. It’s a unique expression of art & science! 🥰
Ann says
My dough developed a dry crust during the overnight rise, how do I prevent this? Do I need more hydration? Shaping meant a cracked surface was my result. It was hard to tighten. Still need to see how it turns out.
Emilie Raffa says
Hi Ann! What did you use to cover the bowl of dough? A dry crust will form when the dough was exposed to too much air during the overnight rise. Next time, cover the bowl with lightly oiled plastic wrap, or transfer the dough to a high-sided tub (with a lid). This will help.
Beth Lortie says
I’ve made this recipe three times. First try was a bit dense due to under proofing. I purchased a proofing box and the second try was perfect. The third is in the oven now and it looks & smells fabulous.
Emilie Raffa says
Hi Beth! Good info here, thanks for sharing. Yes: inadequate gluten development due to under proofed dough will 100% lead to dense bread. Proofing boxes are great for temperature control and timing the dough for readiness.
Allison says
I made two loaves of this for the first time this weekend. I found this much easier to make and use than a sourdough loaf. It still has the tanginess of sourdough, thinner crust. Used vegan butter, omitted the salt. One loaf is gone already and there’s a remaining 3/4 of one. Will be adding to our weekly baking routine.
Emilie Raffa says
Hi Allison! You’re right- it is easier. The dough is not as wet, so shaping and handling is more manageable. Plus, there’s no intricate shaping or scoring involved. I’m happy to see you modified it according to your taste, and it worked. Thanks for sharing your experience with us! 🥰
Maggie says
Hi! I’ve been so excited to try this receipt! I could never get mine to come together at the initial mix, it was way too dry. I did weigh all ingredients. Any suggestions?
Emilie Raffa says
Hi Maggie! If you’ve weighed your ingredients (assuming the flour to liquid ratio is correct), then it could be the mixing method. Did you use the paddle attachment? Or the dough hook for the initial mix? The latter won’t bring the dough together as successfully at first. Try that and see how it goes!
Maggie says
I knew you’d have the answer! I used the dough hook so I’m gonna give it another go this weekend. Thanks so much for your reply!
Emilie Raffa says
You’re very welcome. I had a feeling! I’ve done this before myself, so that’s how I knew. Happy baking!
Kathy says
I want to adapt a bread recipe to make hoagie rolls. I’ve researched and cannot figure out how to do so. Any insight is really appreciated.
Love the book and all of the wonderful ideas provided.
Emilie Raffa says
Thank you Kathy! This is a great idea. Unfortunately, I haven’t tested this myself so I’m unable to advise with specifics. If you experiment, please let us know!