Velvety butternut squash ravioli filling shines in these delicate, hand-crated pasta squares. Learn my simple step-by-step method for perfect butternut squash ravioli every time. Serves 4-6.
Are you making fresh homemade ravioli? This version features a sweet butternut squash filling using my easy whole-roasted method (no peeling, chopping or deseeding required).
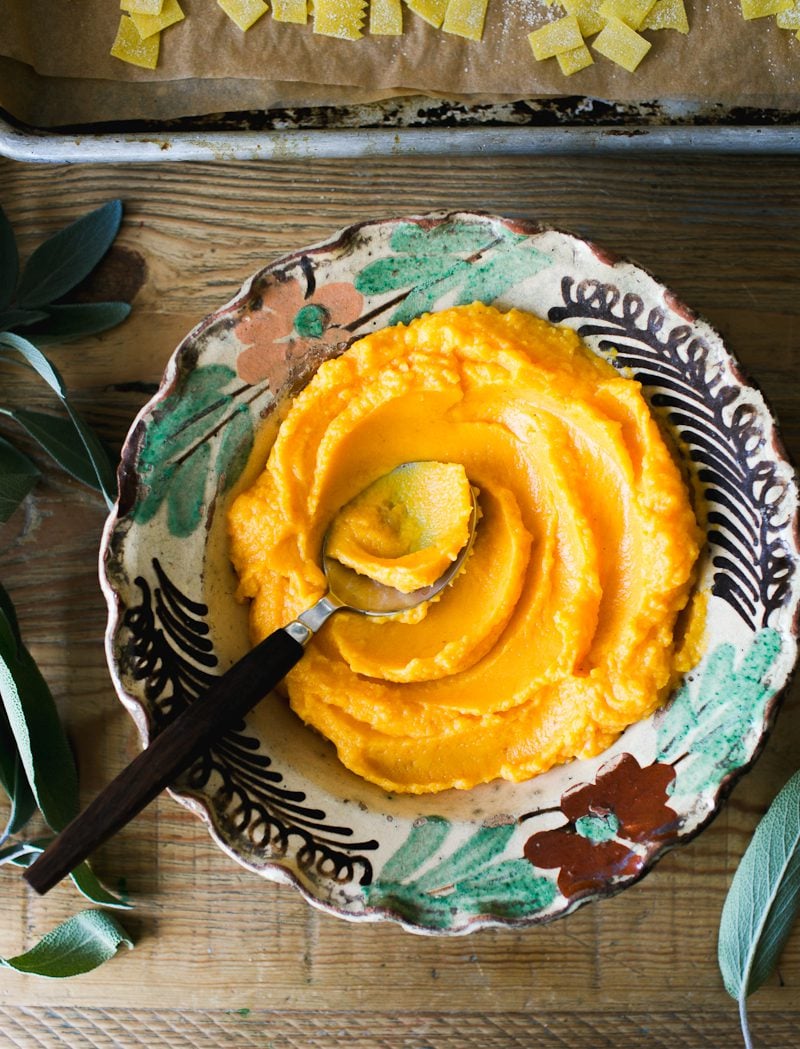
The squash is whipped with salted butter and nutmeg for the creamiest, most decadent ravioli filling.
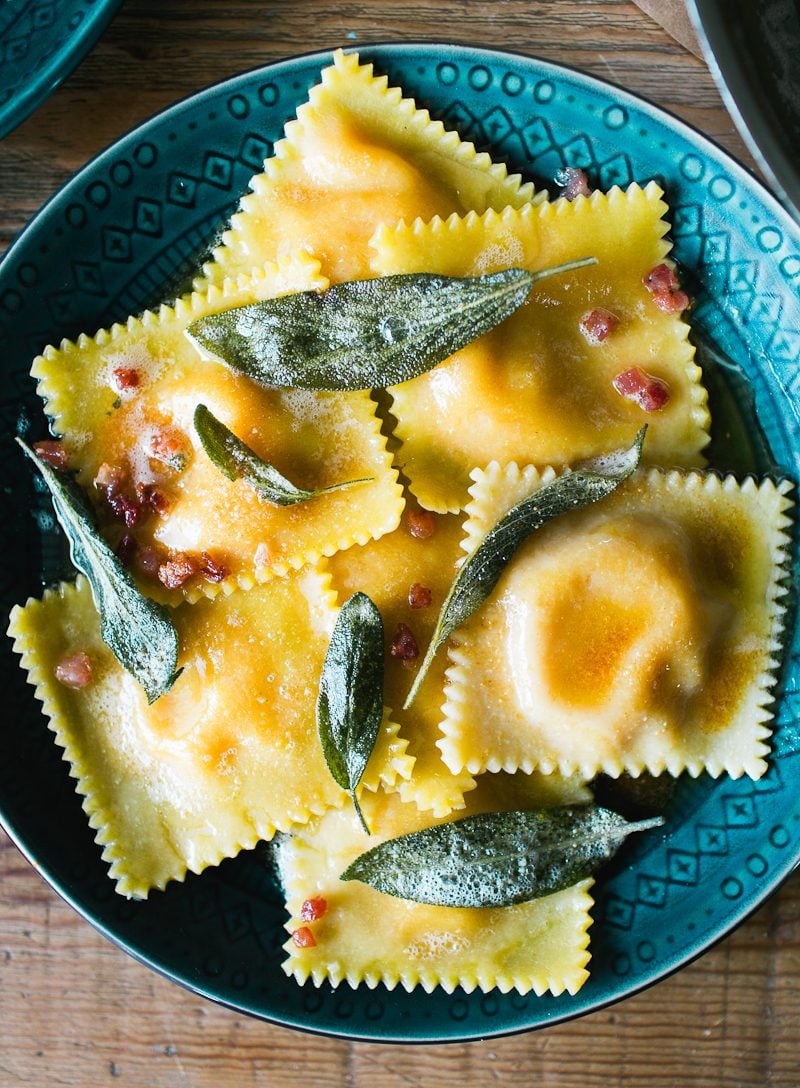
To serve, I finish the butternut squash ravioli with spoonfuls of golden butter and sage sauce and crisp, pancetta for a salty, punctuated kick. Perfect as a light starter or memorable main course with a radicchio salad on the side.
My Homemade Ravioli Tips
- Make space. You’ll need a large, clutter-free work surface to roll out the pasta dough (the kitchen table is ideal). Don’t overlook this tip. Rolled out pasta sheets can measure up to 3ft. long.
- Do not use hot filling. Chill the butternut squash mixture in the fridge for 1 hour, otherwise the pasta dough will get soggy. Alternatively, assemble the filling ahead of time and store in the refrigerator for up to 3 days.
- Double duty. this recipe only calls for 400 g (about 1 3/4 cups) of roasted butternut squash; use leftovers to make my creamy 30-minute butternut squash soup. A two-for-one meal!
How to Make Homemade Butternut Squash Ravioli
Step 1: Make the Pasta Dough
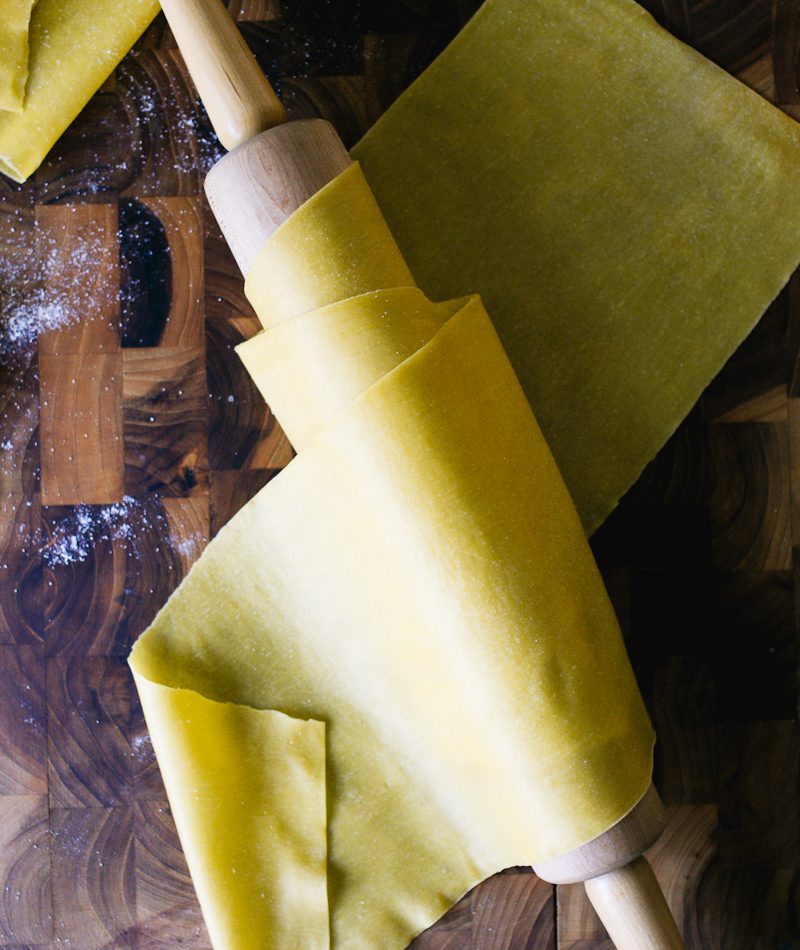
Follow my step-by-step ravioli recipe (with video) for my master method — it works for any ravioli recipe. Once your dough is rolled into thin sheets you’re ready to for the filling.
Step 2: Make The Butternut Squash Ravioli Filling
Whip roasted butternut squash with salted Kerry Gold butter and a pinch of nutmeg (I like fresh grated). Nothing else!
I tested a few versions with Parmesan cheese, creamy mascarpone, cinnamon and honey. But nothing beat my original, which lets the squash’s natural sweetness shine. It’s not pumpkin pie filling.
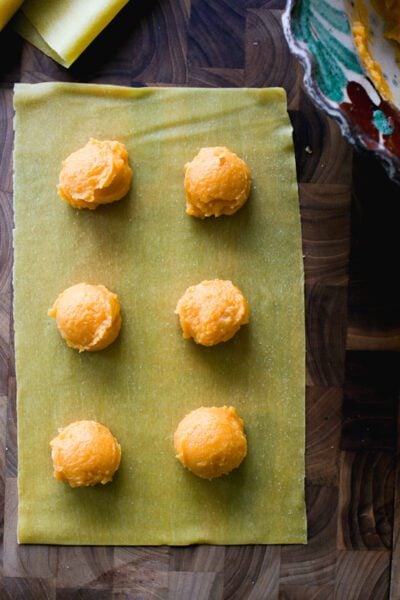
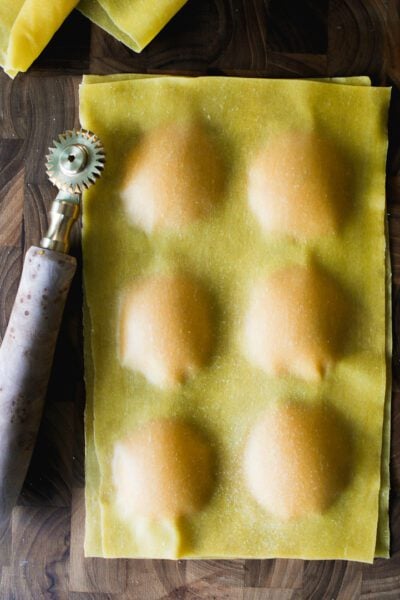
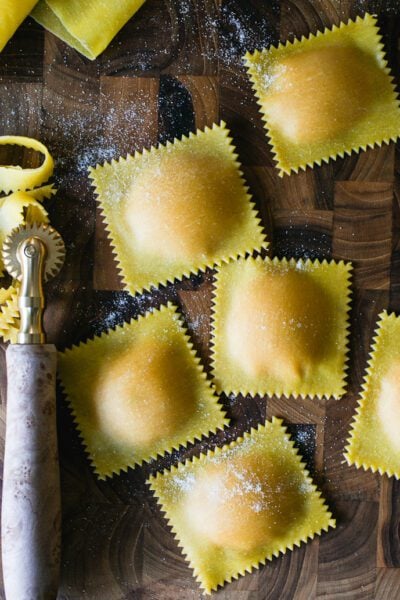
Step 3: Assemble & Cut the Ravioli
Dollop rounded teaspoons of the butternut squash filling down the center of a pasta sheet. You can also do two rows if you want, as pictured above. Top with another sheet, smooth out the air pockets, and cut into squares with a fluted ravioli cutter. Arrange on a parchment-lined sheet pan while you finish the rest.
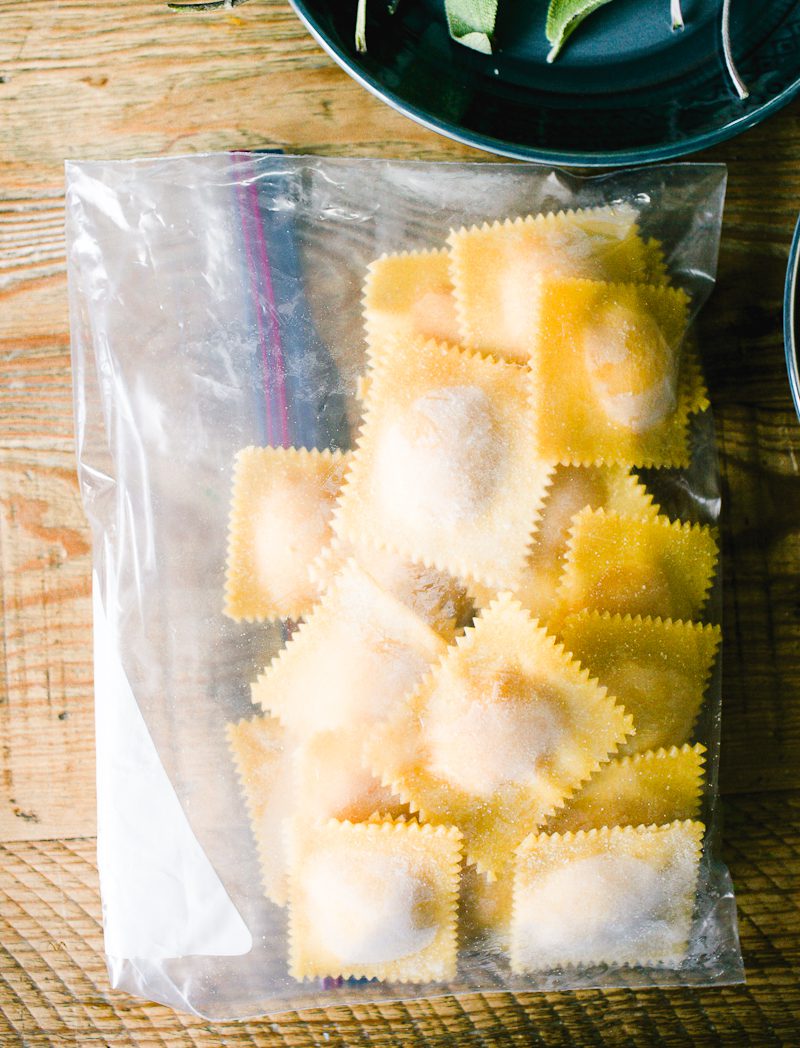
How to Store, Chill & Freeze Homemade Ravioli
If you don’t want to cook the ravioli right away, you have a few options to consider. They’ll last at room temperature for (1 hr), in the fridge (4 hrs) and in the freezer (up to 1 month). Keep in mind, you just don’t want them to get soggy.
By signing up, you agree to receive emails from The Clever Carrot. Unsubscribe at any time.

Fresh Homemade Butternut Squash Ravioli
- Prep Time: 2.5 hours
- Cook Time: 5 minutes
- Total Time: 0 hours
- Yield: Serves 4
- Category: Homemade Pasta
- Method: Boil
- Cuisine: Italian
- Diet: Vegetarian
Description
Learn how to make fresh, homemade butternut squash ravioli from scratch. So light, tender and delicate! The toasty, butter and sage sauce is the perfect compliment.
A few tips:
- I’ve listed the full instructions for homemade ravioli below. However, for additional guidance, visit my step-by-step tutorial & video.
- The butternut squash can be roasted several days in advance, to be chilled or frozen. I never roast the squash and make ravioli from start to finish on the same day- it will take ages! You only need 400 g (about 1 3/4 cups) of the roasted butternut squash for this recipe; use the rest to make butternut squash soup for dinner.
- If you’re not cooking the ravioli right away, freeze them. Jump to the notes section at the very bottom of this post for more details. I do this all the time with excellent results.
Ingredients
For the Pasta Dough
Fresh Homemade Pasta Dough (ingredients below)
- 300 g Tipo 00 Flour*
- 3 large eggs*
- 1 large egg yolk
- Olive oil
- Semolina flour, for dusting
*Note: For the Tipo 00 flour, I recommend Molino Grassi or Caputo. For the eggs & yolk, the total combined weight (cracked) should be 185 g. Because eggs size vary, make up the difference, if needed, with an extra egg yolk or olive oil. Olive oil makes the dough more soft, supple and satisfying to work with.
Ravioli Filling
- Whole-roasted butternut squash
- 400 g (about 1 3/4 cups) roasted butternut squash (from the above recipe)
- 42 g (3 tbsp) salted butter
- Generous pinch of nutmeg
To Serve
Easy Golden Butter and Sage Sauce (ingredients below)
- 115 g (8 tbsp) salted butter
- 8 fresh, beautiful fresh sage leaves
Garnish
- 113 g (4 oz) cubed pancetta (I buy Citterio “cubetti”)
- Parmesan cheese
Pasta Equipment
- Kitchen Aid Stand Mixer (w/ roller attachment) OR Hand-Crank Pasta Machine to roll the pasta dough into sheets.
- Parchment paper (6 pcs). I like pre-cut sheets for convenience
- Sheet pan
- Digital scale
- Fluted ravioli cutter (or large knife)
Instructions
- Roast the Butternut Squash. Place a whole, unpeeled butternut squash onto a parchment-lined sheet pan. Bake at 400 F for approximately 1 hour or more, depending on size. A sharp knife will easily slip out when it’s ready. Cool for 20 minutes or so, and then peel off the skin. Scoop out the seeds. Process in a blender or food processor until completely smooth. Chill (or freeze) until ready to make the butternut squash filling, as per the instructions below.
- Make Pasta Dough: Add the flour, eggs and olive oil (if using) to a food processor fitted with the metal blade. Process to form dough, about 15-20 seconds. Remove to your work surface and cover with an upturned bowl for 5 minutes- it will be much easier to knead in the next step. Then, knead the dough into a ball, about 1-2 minutes (don’t worry about technique here, the food processor does most of the kneading for you). Cover again, and let rest for 30 minutes to 1 hour to relax the gluten. I prefer a 1 hour rest for long pasta sheets. Tip: Use this resting time to make the filling.
- Make the Butternut Squash Filling: Heat the roasted butternut squash, butter and nutmeg together in a small pot. Stir occasionally with a rubber spatula so the mixture doesn’t stick to the bottom. Taste and season with salt, if needed. Transfer to a bowl. Chill for 1 hour. You cannot use hot filling to assemble ravioli; the dough will get soggy.
- Set Up Your Work Station For The Ravioli: Choose a large, clutter-free work surface to spread out (I like the kitchen table). Dust your work surface and the pasta machine/roller with semolina flour to prevent sticking. Line (2x) sheet pans with parchment paper, no overhang. Cut 4 additional pieces to layer in between the pasta sheets as you roll them out; set aside.
- Roll Pasta Dough Into Sheets: Cut the pasta dough into 4 equal pieces. Flatten one piece into an 5×8-inch long disc (re-wrap or cover the remaining pieces so they don’t dry out). A rolling pin helps with this step.
- Send the disc through the roller on the widest/lowest setting. This is “#1” on the Kitchen Aid attachment. Send it through a second time. Note: if using a hand-crank pasta machine, refer to their specific instructions for rolling pasta sheets for ravioli. The process is the same, but the settings are different.
- Continue to roll the dough through settings #2-5 (2x on each setting), dusting with semolina flour in between if the pasta gets sticky. You can also cut the sheet in half if it gets too long. The pasta sheet is ready when it’s slightly translucent and you can see your hand underneath, about 1 mm thick.
- When finished, lightly trim the rounded edges. Cut into 10-12-inch long sheets. The sheets do not have to look perfect- you’ll trim more later on. Place onto your sheet pan and cover with parchment paper. Repeat to roll the remaining 3 pieces of dough.
- Assemble & Cut Ravioli: Grab a pasta sheet. Dollop the butternut squash filling (in rounded teaspoons), down the center of the sheet, spaced 2 finger widths apart. Place a second sheet on top, like making a sandwich. (Tip: If you’re feeling confident, you can do two rows of filling, instead of one. Two rows is not necessarily harder; it requires more practice and patience when smoothing out the pasta sheets. You will have enough filling to do so, and your total number of ravioli will increase. Perhaps start with one row, and then work your way up).
- Smooth the pasta sheet with your fingertips, working around the filling to get the air bubbles out. Press to seal the edges and sides.
- Cut the ravioli in half and then into strips. Trim into 2 1/2- 3-inch ravioli squares. Transfer the ravioli to the remaining parchment-lined sheet pan dusted with semolina flour. Cover with towel or an inverted sheet pan. Repeat to assemble and cut the remaining ravioli.
- To Cook & Serve: Boil a pot of water; salt it generously.
- Meanwhile, cook the pancetta until slightly crisp. Transfer to a paper towel to drain.
- Start the butter and sage sauce. To control timing, I usually undercook the sauce slightly. The butter will continue to get toasty, like brown butter, as the pan sits off the heat.
- Working in batches, cook the ravioli.I recommend doing a test batch first with 1-2 ravioli to gauge the correct cooking time. Plan on 3-6 minutes or more, depending on thickness. The thicker the pasta, the longer the ravioli will take to cook. Taste for doneness. When finished, gently transfer the ravioli to a serving dish with a slotted spoon or fine mesh strainer- be careful, they are delicate!
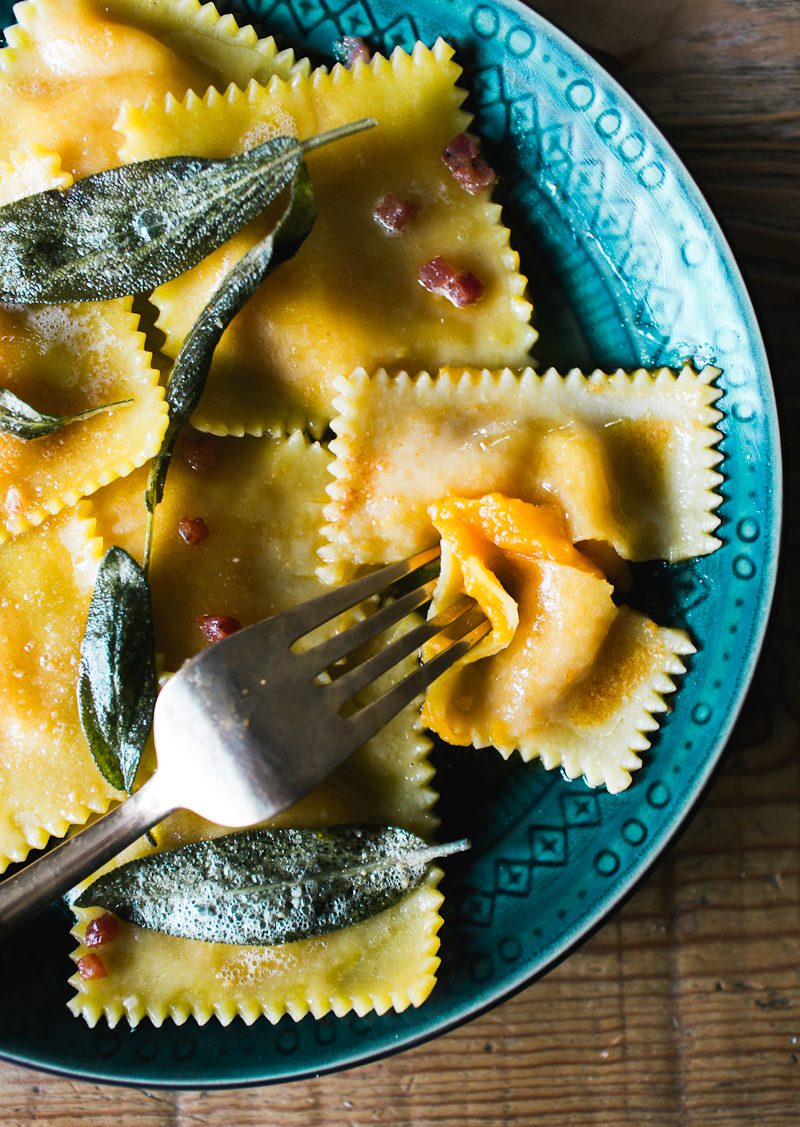
- Spoon some of the butter and sage sauce over the top. Decorate with crispy sage leaves (yes, you can eat them and they are delicious!) and the pancetta.
Notes
Storage Options:
Homemade ravioli is best enjoyed on the same day its made. If they sit around for too long, they’ll get too soft and soggy, and the filling will seep out through the dough. If not cooking right away, choose one of the storage options below.
- At Room Temperature (1 hr): Arrange homemade ravioli on a parchment-lined sheet pan dusted with semolina flour to prevent sticking. Cover tightly with plastic wrap. Store at a moderate room temperature for 1 hour.
- To Refrigerate (4 hours): Arrange the ravioli as indicated above. Chill up to 4 hours. Do not refrigerate overnight. The pasta will oxidize and discolor, and the filling will create soggy ravioli.
- To Freeze (1 month): Arrange the ravioli as indicated above, minus the plastic wrap. Freeze directly on the sheet pan. Once frozen solid, transfer to a parchment-lined air-tight container. Freeze up to 1 month.
To Cook Frozen Ravioli
- No need to defrost beforehand; cook directly from frozen. Drop a few ravioli into a pot of boiling salted water. When the water returns to a boil, cook for up to 5 minutes or more.

Comments
Cheryl says
This was my second attempt at making ravioli. Definitely need more practice. I really liked the pasta but I felt the filling needed more flavour. Loved the method to roast the squash.
Luisa says
I am a very experienced ravioli/filled pasta maker (over 50 years plus half Italian) and have made roasted butternut squash ravioli recipes Many times. However I am eager to try Your recipe once my garden butternut squash are ready to harvest.
The reason I’m commenting before actually trying these is that I love your Tips. Not seen some of them before and you are right on.
Also My daughter is very lactose intolerant so I’ll be trying your sage coconut milk sauce recipe too.
Maree says
Hi Emily, have you tried adding the butter and nutmeg in with pumpkin in the food processor? I’m basically lazy and thought I might be able to cut out the middle man. 😂 Maree
Emilie Raffa says
Hi Maree! It’s so nice to hear from you :) Yes, you can. But… two things:
First, the butter needs to be very, very soft. Otherwise, it won’t blend properly and you’ll get small chunks of shaved-looking butter throughout the mixture. I’ve done this before in a rush, and it was a total flop (I then had to cook the mixture on the stove to blend it all together. Annoying).
Second, for this particular recipe, I’ve found it’s best to season the butternut squash filling when it’s warm (or hot-ish). It just tastes different vs. cold filling. Just something to keep in mind as you experiment.
MINDY Ohio says
Hi! I’m going to make this very soon. I read that it serves 4, approximately how many raviolis will this recipe yield? Thank you!
Michelle says
Just made this for dinner and it was outstanding! We rolled out the pasta using the thinnest setting and the ravioli was so light and melted in our mouths. Putting it on my favorite list!
Maria says
Well. My kids are both at their in-laws for Thanksgiving and will be over on Saturday to celebrate with us. Since I have extra time, I decided to try these ravioli. I’ve only finished Step 1 so far – the filling – which is to die for! The butternut squash has such a wonderful roasted flavor; mixed with butter, and nutmeg it’s perfection. Thank you, thank you, thank you!
Can’t wait to eat the finished ravioli on Saturday. I have to learn about Instagram so I can post photos, lol. Happy Thanksgiving to you and yours!
Maria says
These were delicious! Although my first batch of pasta dough must have been too dry, as it cracked a bit when I made the ravioli. I learned from my mistakes, made a second batch next day – delicious! Would use a touch more nutmeg next time. Another tip – don’t use a black enameled pan when making golden sage butter, because it’s impossible to see the color change! Thanks for another winning recipe!
Emilie Raffa says
Ahh yes… fresh pasta dough dries out very quickly. But you figured it out ;) It helps to keep your sheets covered with parchment paper and then a towel on top to weigh everything down while you work. PS: Excellent tip re: the black enameled pan! Thank you! And thank you even more for circling back with your feedback- much appreciated. xx
Emilie Raffa says
Hello! Isn’t this filling delicious? I ate half of it with a spoon when writing this post. So simple, yet so decadent. I used this filling as a side dish with red wine braised chicken and mushrooms… excellent. The hint of sweetness was the perfect balance to the rich, fall flavors.
Happie says
This looks so special! Great inspiration for the upcoming festive days.
Do you have any other recipes for fillings as well? My crew over here loves ravioli, so this is just perfect.
Thank you as always!
(Review provided by a support team member for theclevercarrot.com)
CMR says
Wow! These photos are amazing! My daughter has been learning to make your homemade pasta and I can’t wait to share this recipe with her so we can make the butternut squash ravioli. Thanks for the inspiration once again! I love my Sunday emails!! Just love them, and I find myself looking at all your recipes over and over again!!!!!