
The default WordPress menu system hasn’t changed much over the years, but Kadence Theme Kit Pro helps bring WordPress menus to the next level by adding mega menus, highlight tags, icons, and other advanced features to help you customize your menus and make them really stand out.
Kadence Theme Kit Pro is available with the Kadence Plus and Ultimate plans or can be purchased separately. See our pricing page for details.
Enable Kadence Pro Ultimate Menu
After you’ve installed and activated the Kadence Theme Kit Pro plugin, you can enable Ultimate Menu feature.
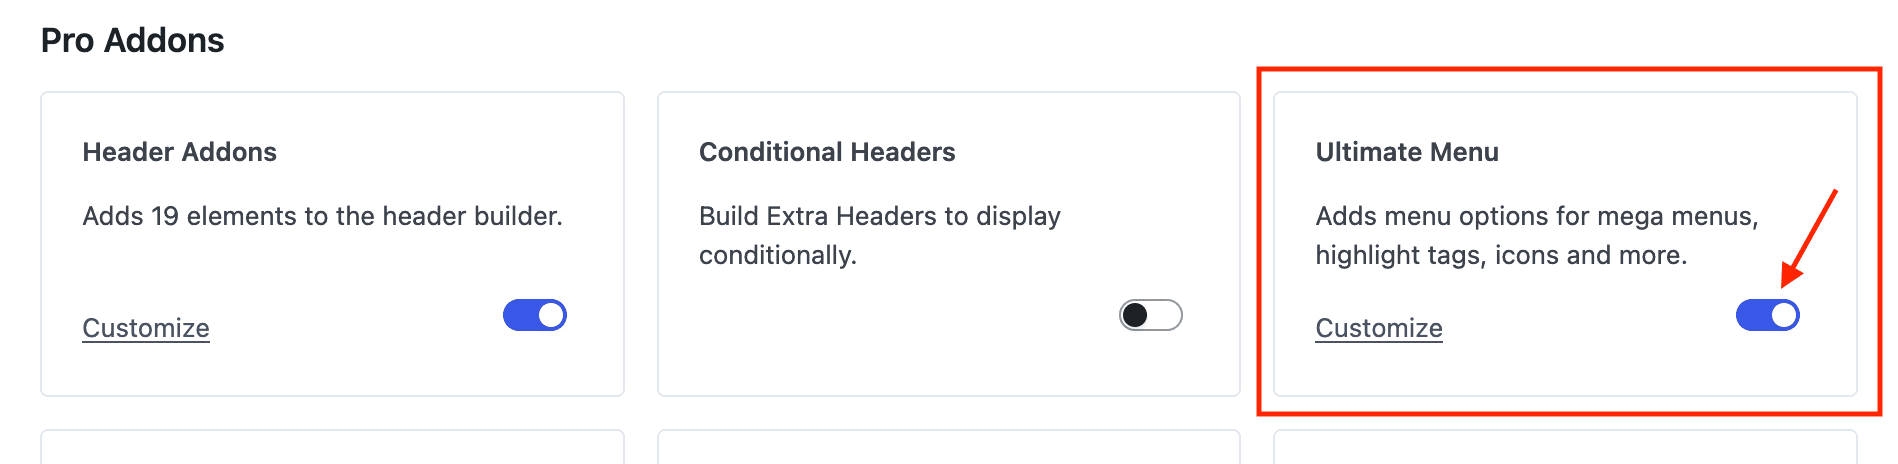
- In WP Admin, under Appearance, click on Kadence.
- Enable Ultimate Menu under the Pro Addons section.
Edit Your WordPress Menu
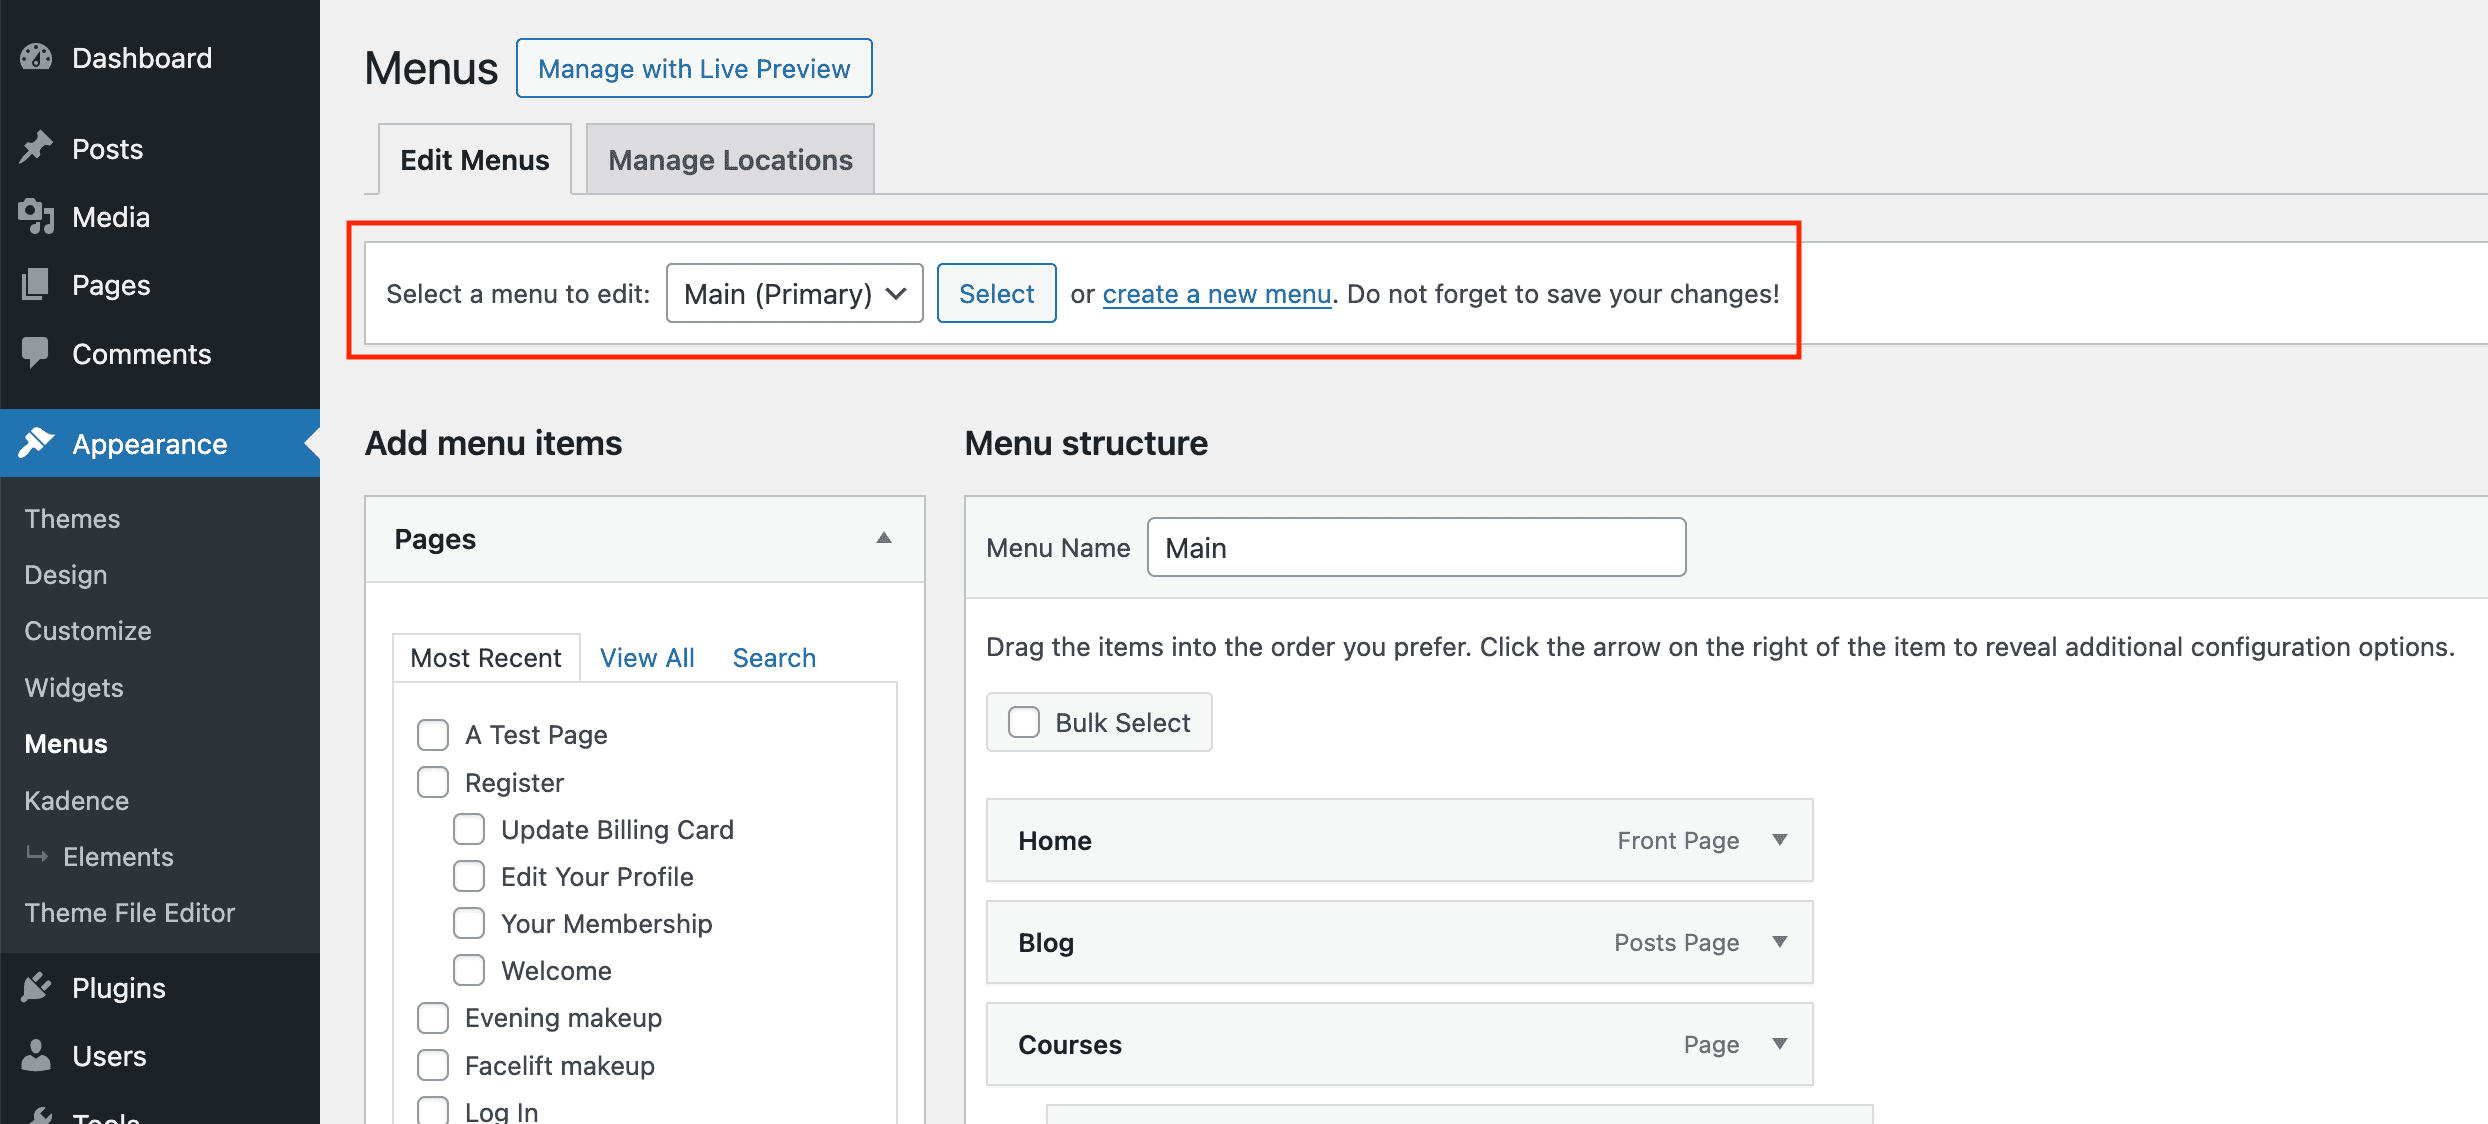
- Either click the Customize link shown above or go to Appearance → Menus to edit your WordPress menu.
- Choose a menu to edit from the drop-down navigation and click “Select” or click create a new menu if desired.
Add an Icon to a Menu Item
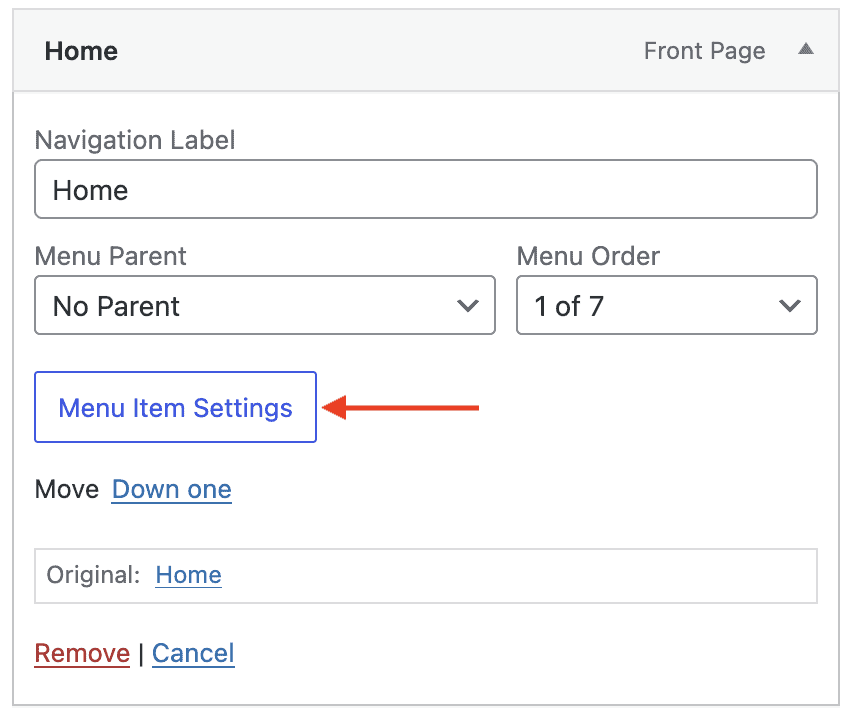
Edit a menu item by clicking the down-arrow on the right. While editing the menu item, you should see a “Menu Item Settings” button. Click that button to open the Kadence menu item settings.
Kadence Menu Item Icon Settings
For this document, we’re mainly focused on adding an icon. See also our Mega Menu help doc.
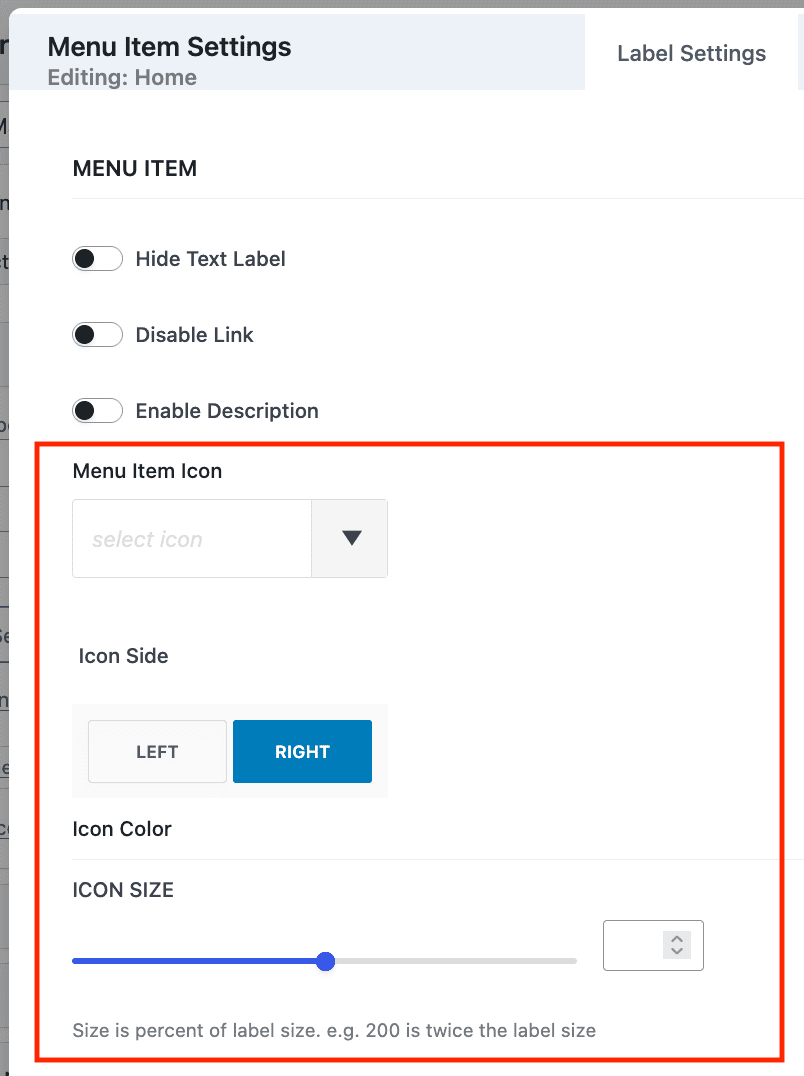
Optional: if you want to hide the menu text and only show an icon, enable Hide Text Label
Menu Item Icon: select an icon from the list of available icons.
Icon Side: choose Left or Right side
Icon Color: tap the color picker to the right to choose a color. If you do not choose a color, the menu text color will be used.
Icon Size: leave blank to match the size of your menu text or use the slider to make the icon larger or smaller.
Click Save or Save and Close to save your menu item settings.
When you are done adding icons, be sure to save your menu by clicking Save Menu on the bottom of your screen. And of course, test the menu by viewing the front-end of your site.
