Showing posts with label Onions. Show all posts

Saturday, October 27, 2012

Canning Stress-Free French Onion Soup


What could be better than a rich, hot bowl of French Onion Soup on a chilly winter evening...

Here's how I made a batch to have on hand...

I sauteed...

7 medium onions, sliced

in...

2 Tbsp. butter

until softened and caramelized.

I divided the sauteed onions evenly among 5 quart canning jars I had previously washed well and sterilized by boiling in water.


For the soup part...

In my large stainless steel saucepan, I mixed together...

12 cups beef broth (your own, homemade broth... or storebought will do)
3/4 tsp. garlic powder
2 tsp. steak sauce (any kind)
2 tsp. salt (I used canning salt)

Bring the mixture to a boil, stirring occasionally.


I ladled the hot broth over the sauteed onions in the quart jars, leaving a one inch headspace.


Using a damp cloth, I wiped the jar rims and added my hot lids and rings, tightening on to fingertip tightness.

I then processed the jars of soup in my pressure canner at 10 pounds pressure for 75 minutes.

After processing, I allowed the pressure in the canner to drop to zero on its own... then opened it up and removed the jars using my jar lifter, setting the hot jars of soup on a folded dish towel on the counter to cool and to listen for the PING! of each successfully sealed jar.


All we need to do when we want French Onion Soup for dinner, is open a jar, heat it up... add a baguette or some croutons and some good mozzarella and Yumminess in a jar!

Not only is making delicious meals such as this french onion soup and canning food exciting and a great hobby it's also something that makes for an excellent source of stress relief. I would suggest it to anyone who likes to cook, needs a good hobby and has some free time!

For a printable copy of this recipe, click here.

Monday, September 5, 2011

Canning Red Onions in Vinegar


I got a huge bag of red onions at the farmers market... used them in salsa, several relishes, and in cooking... still had some left... 

I came across a simple recipe for red onions in vinegar and decided to use up the rest of my onions.

According to the recipe, "These onions rings are a perfect addition to fresh salads. Try adding them to a bed of romaine lettuce or spinach. Add strawberries and candied walnuts and dress with a mild vinaigrette." Well, that sounded yummy, I was sold! Plus they would look so pretty in the jars!

Here's what I did...

First I prepared my half pint canning jars by sterilizing them in boiling water. I simmered my lids and rings in water, keeping them hot until I was ready to use them.

In a large stainless steel saucepan, I combined...


4 cups red wine vinegar and 


1 clove garlic

I brought the mixture to a boil over medium-high heat, reduced the heat and boiled gently for 5 minutes until the garlic flavor infused the liquid. I added...

10 cups sliced, peeled red onions (1/4 inch thick rings)

...and increased the heat to medium-high and brought everything back to a boil, reduced heat again and boiled gently for another 5 minutes, until onions were heated through. I discarded the garlic clove.


I packed my half pint jars with the onion mixture, leaving a generous half inch headspace and removing any air bubbles. I wiped the rims and tightened the lids on to a fingertip tightness.


I processed my jars of onions in a boiling water bath... place jars in canner, ensuring they are completely covered with water. Bring to a boil and process for 10 minutes.

After processing, I removed the jars from the canner using my jar lifter, and set them on a folded dish towel on the counter to cool... and to listen for the PING of each successfully sealed jar!

In real life, the jars are NOT this blurry ;-) but the color is beautiful!


Wednesday, May 18, 2011

Canning Caramelized Onions


Caramelized onions are delicious on a hot roast beef sandwich, a Philly cheesesteak sandwich, atop a baked potato, or stirred into mashed potatoes... among other things. I decided I would caramelize and can some of my Vidalia onions.

Here's what I did...

First, I peeled my onions, then cut them in half and sliced them in about 1/4 inch slices.


Then, I started melting butter in my crock pot (with the heat on high), about 2 Tablespoons of butter for every pound of onions... I had sliced 6 pounds of onions, so I melted one stick of butter...


Then sliced another stick of butter into pats to add on top when all the onions had been added to the crock pot.


I left the heat on high in the crock pot for about an hour, until the onions started sweating a little and the butter was mostly melted, then I turned it down to low and, stirring after a couple hours more, I left it to cook for about 10 hours, or overnight.


Next morning the onions were golden brown and caramelized, so I got to work on the canning process.


I heated half pint canning jars in a pan of water set across two stove eyes with a dish towel lining the bottom of the pan to keep the jars from tipping over or knocking together.


I simmered the lids and rings and kept them hot until I was ready for them.


I began ladling the onions into the jars using a canning funnel. Some recipes I have read say to drain the onions first but I like the juice too, so I left it in.


I wiped the jar rims with a damp cloth.


Using my plastic gadget, I ran it down the sides to get rid of any air bubbles (a butter knife will do the job just as well).


Then I put the lids and rings on, tightening them to finger-tip tightness.

Onions are a low-acid food and must be pressure canned unless they're made into pickles or relish using vinegar or other high-acid ingredients... there was nothing in these onions except onions and butter so I got the pressure canner out.

I processed the jars at 10 pounds of pressure for 70 minutes. (Follow the directions that come with your brand of pressure canner).

After processing I removed the canner from the heat and let the pressure drop to ZERO on its own... don't rush it, you don't want broken jars!

I removed the jars from the canner using my jar lifter and set them to cool on a folded dish towel on the counter... and to listen for the PING of each successfully sealed jar.


Yummy! Can't wait to mix them into some mashed potatoes... or, seeing as I used Vidalias, and they are sweeter than most onions, my caramelized onions will be sweet... maybe I should call it onion jam... and maybe I'll just have it on toast for breakfast!

Canning Granny©2011 All Rights Reserved


Tuesday, May 17, 2011

Canning Vidalia Onion Relish (White Vinegar Recipe)


The Ruritan Club was selling Vidalia onions as an annual fundraiser this spring... I bought a 25 pound bag. Decided to make a couple kinds of relish among other things. This recipe uses white vinegar and has only a few, simple ingredients. It's delicious on hot dogs, brats, and sausages, and in pinto beans or bean soup on a cold winter evening.

Here's what I did...


First, I washed my pint canning jars and kept them hot until I was ready for them. I simmered my lids and rings in hot water and kept them hot as well.

Then I started peeling onions... and chopping onions... this Granny is grateful beyond belief for a KitchenAid mixer with a food slicer/chopper attachment to cut down on the chopping time, and reducing the tears.

I chopped 10 cups of onions.


I combined my onions in a non-reactive pan, along with
2-1/4 cups white vinegar
1 cup sugar
2 Tablespoons celery seed


I stirred all the ingredients together and brought the mixture to a boil, reduced the heat and simmered for 10 minutes.


I ladled the mixture into the hot pint jars leaving about a half inch of headspace. I wiped the jar rims with a damp cloth and, using my magnetic wand gadget, removed the lids and rims from the hot water, tightening them to a fingertip tightness on the jars.

I processed the jars in a boiling water bath for 10 minutes, then removed the jars from the boiling water using my jar lifter.


I set the jars on a folded dish towel on the counter to cool... and to listen for the PING of each successfully sealed jar... I love that sound... it gives me such a satisfying feeling!


I can't wait to serve up this relish on a hot dog... but I'm going to wait at least a couple of weeks to give the flavors time to marry.


Aren't these flowers pretty? They have absolutely nothing to do with canning, onions, or relish, but my son  and daughter-in-law gave me the orange daylily for Mother's Day, and my daughter and her boyfriend gave me the purple delphinium, and they look so pretty contrasted side by side, I thought I'd share!

Canning Granny©2011 All Rights Reserved


Monday, May 16, 2011

Bubble Baths and Canning Vidalia Relish (Apple Cider Vinegar Recipe)


My son drove down and spent the day with me on Mother's Day, we had a wonderful visit, we enjoyed wonderful conversation, took him to see the new house we are in the process of buying, and he took me out to a delicious dinner at a local "cook at your table" Japanese place. He also brought me a gift of a cute tote bag filled with Sugared Vanilla Bubble Bath, lotion, a bath pouf and other pampering products (I'm pretty sure his sweet little wife picked it out, but nevertheless, I love the gift and the givers).

How does bubble bath have anything to do with canning Vidalia onion relish? I'm glad you asked...

I became the proud owner of a 25 pound bag of Vidalia onions recently... purchased them from a local Ruritan Club who hold this fundraiser every spring. The weekend became dedicated to making relish, among other yummy onion-ness (including an experiment in making homemade blooming onions... turned out pretty good I must say)


Here's how I made Vidalia Relish using a recipe with apple cider vinegar...

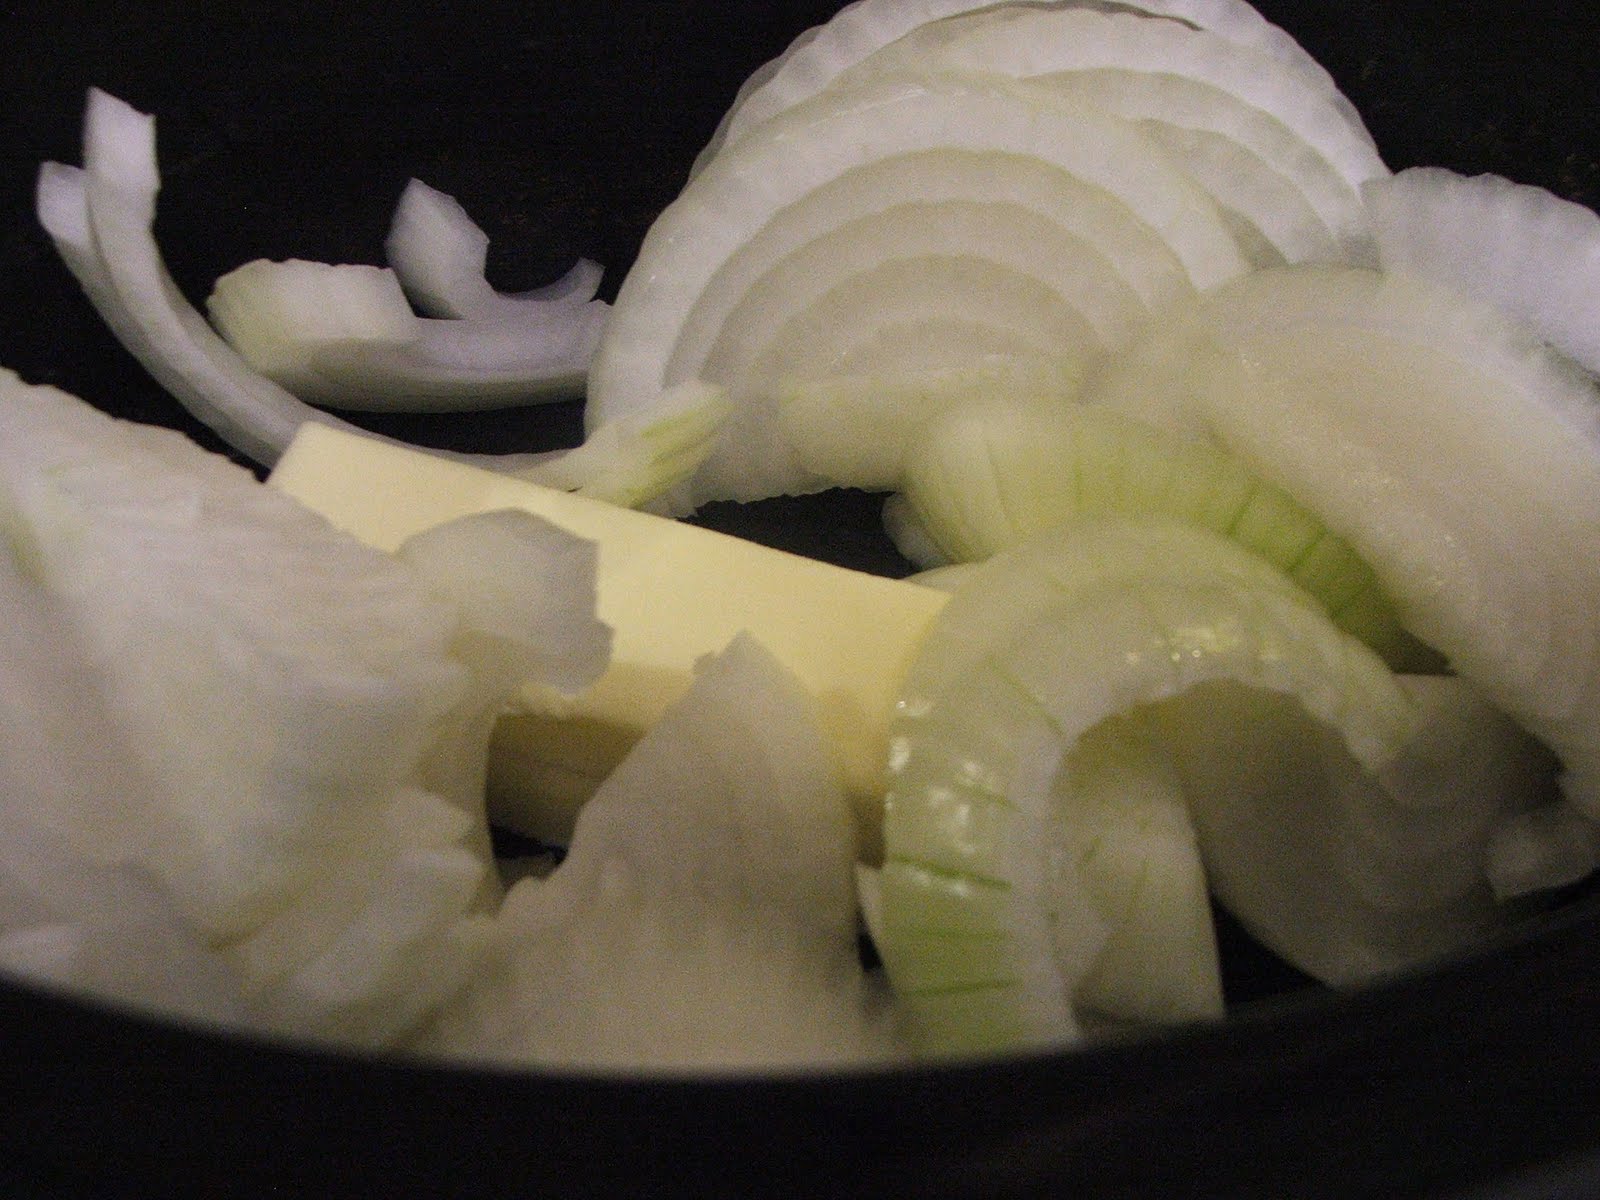
First I peeled and chopped 10 pounds of onions. This came out to one and a half gallons of chopped onion, or 24 cups.


Thank God (and my dear, dear husband) I have a KitchenAid Mixer and a food chopper attachment to chop all those onions! And even with the mechanical assistance, the onion odor filled our house and brought tears to my eyes in the kitchen, and to my sweet husband's eyes in the living room... I was beginning to get concerned about our two parakeets! Can a parakeet be killed by noxious onion fumes? DH solved the worst of the problem by opening the front and the back doors to allow air flow and we were spared watery eyes.

After chopping the millions and millions of onions (in reality maybe 20? exaggeration runs in my family!) I continued with my recipe...

1 red pepper (I used 2... hey, it's my recipe, I wanted more red in my relish, OK!)


1/4 cup salt (the kind for canning and pickling, not table salt, it's more pure, doesn't contain additives, like iodine and aluminum that might cause discoloration or sediment in the final product)

I layered in a large bowl (huge actually) onions, peppers, salt until I had filled the bowl. This mixture was left to sit for 30 minutes or so while I prepared the liquid for the relish "syrup."

In a large stock pot I combined


1 teaspoon turmeric (a natural anti-inflammatory, it is also said to be good for so many things in the body, from preventing cancer to aiding memory, to regulating blood pressure, plus it adds a beautiful, natural yellow color and delicious flavor to the relish)


4 cups sugar


1 Tablespoon Fruit Fresh


3 teaspoons pickling spice (I added more like 2 Tablespoons, again, this is my relish, I wanted more pickly-ness!)


Side note about the pickling spice... it can be bought pre-mixed at the grocery store, I chose to mix up my own to have on hand for other pickling projects. I used mustard seeds, whole allspice, coriander seeds, whole cloves, ground ginger, dried red pepper flakes, bay leaf, and cinnamon sticks. I tied the pickling spice into a square of cheesecloth and dropped the sachet into the stockpot.

I brought the mixture to a boil, then lowered the temperature to a simmer and simmered the liquid for 30 minutes.

I then drained the onion/pepper/salt mixture using a colander and discarded the liquid and added the onion mixture to the stockpot, mixing all the ingredients well. I brought it back to a boil, then simmered again for another 30 minutes, stirring often. I removed and discarded the spice bag.


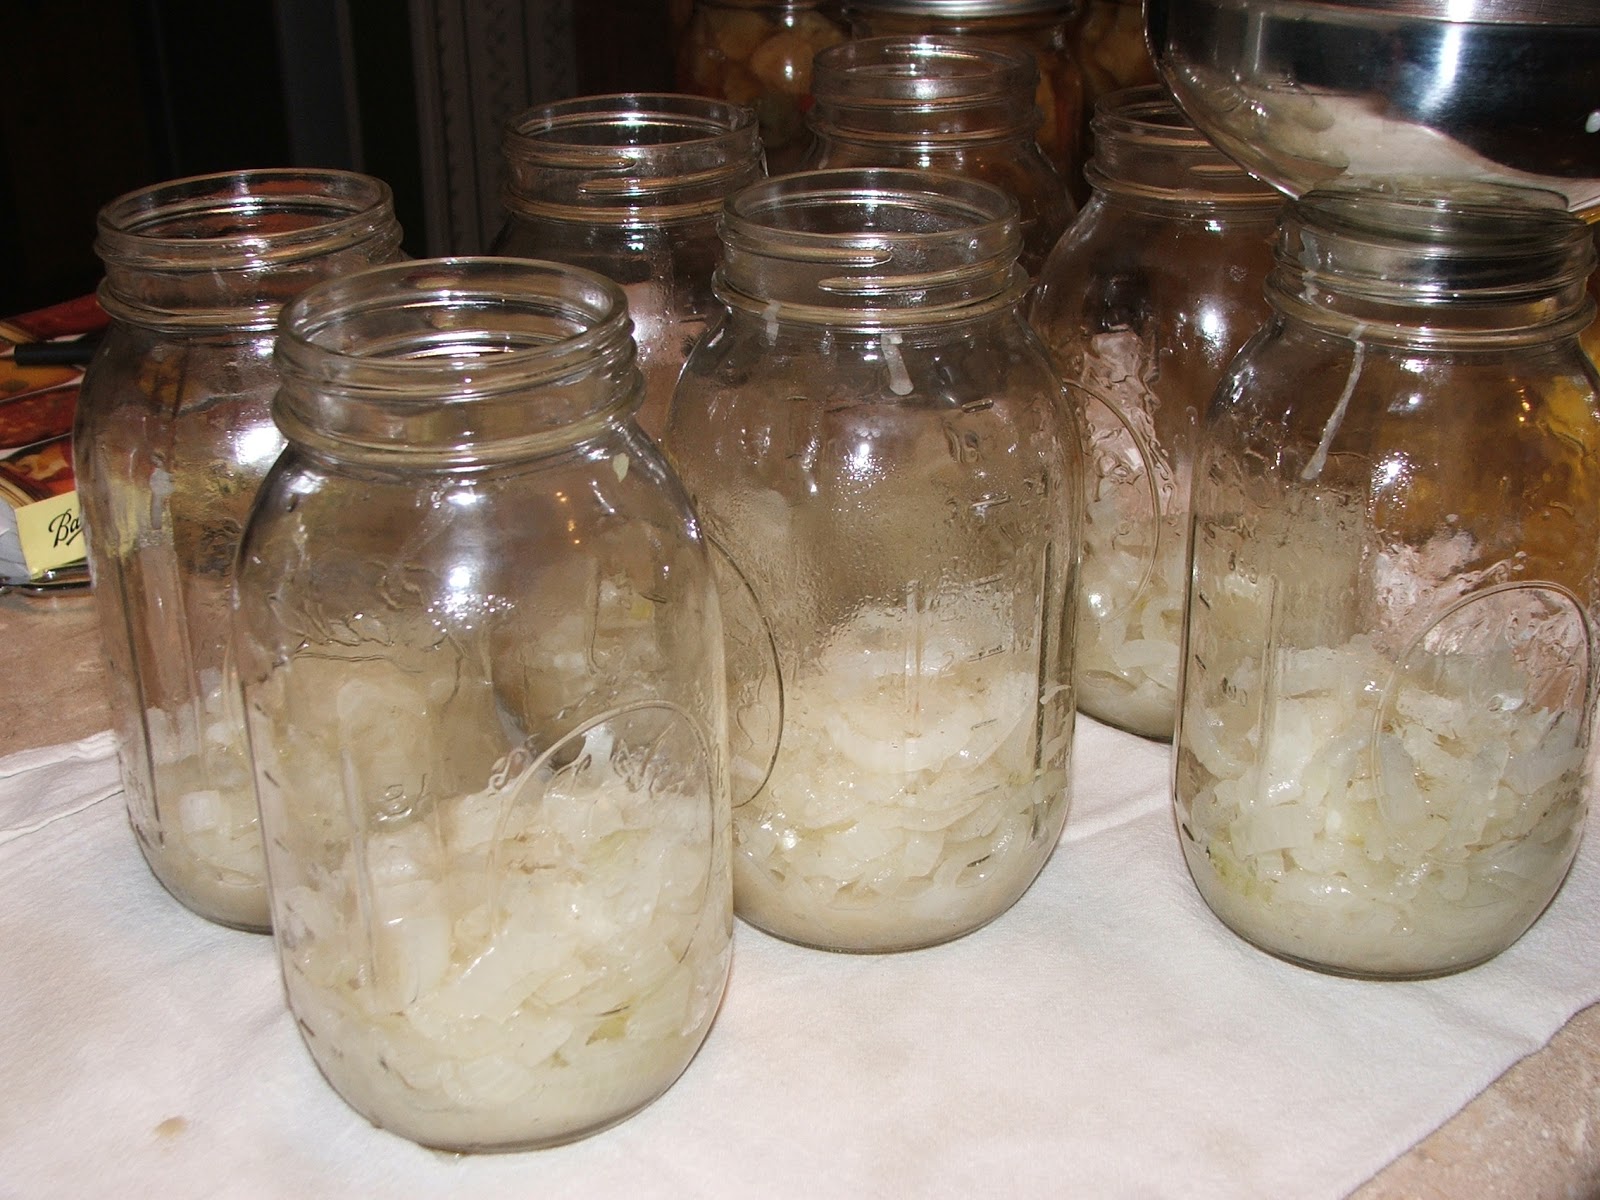
Then began filling my pint canning jars that had previously been washed, sterilized and kept hot until ready to use. I left about a half inch of headspace.


I wiped the rim of each jar with a damp cloth...


Then added the lids and rings that had been simmering and kept hot until I was ready for them.


I processed the jars of relish in a boiling water bath for 10 minutes. Then removed them using my jar lifter and set them on the counter on a folded dish towel to cool...


And to listen for the PING! of each successfully sealed jar.

Now, back to that bubble bath... after smelling onions all afternoon, my eyes streaming, and sweating over a hot stove... I decided to relax in a delicious smelling Sugared Vanilla Bubble Bath, thanks to my son and daughter-in-law's thoughtfulness.


Ahhh!!! Pure bliss!!!


Canning Granny©2011 All Rights Reserved


html, body, div, span, applet, object, iframe, h1, h2, h3, h4, h5, h6, p, blockquote, pre, a, abbr, acronym, address, big, cite, code, del, dfn, em, font, img, ins, kbd, q, s, samp, small, strike, strong, sub, sup, tt, var, b, u, i, center, dl, dt, dd, ol, ul, li, fieldset, form, label, legend, table, caption, tbody, tfoot, thead, tr, th, td { margin: 0; padding: 0; border: 0; outline: 0; font-size: 100%; vertical-align: baseline; background: transparent; } body { line-height: 1; } ol, ul { list-style: none; } blockquote, q { quotes: none; } /* remember to define focus styles! */ :focus { outline: 0; } /* remember to highlight inserts somehow! */ ins { text-decoration: none; } del { text-decoration: line-through; } /* tables still need 'cellspacing="0"' in the markup */ table { border-collapse: collapse; border-spacing: 0; }