Showing posts with label Syrup. Show all posts

Monday, August 31, 2015

Amish Recipe Series... Amish Cherry Varenya


How do the Amish hold a funeral?

In Lancaster County, funeral and burial usually takes place three days after death. A funeral director from the local area assists in a minimal way, which usually includes embalming, and sometimes includes supplying the coffin and the hearse. In death, as in life the simplicity is evident. A plain wooden coffin is built. Often it is six-sided with a split lie - the upper part is hinged so it can be opened for viewing the body. It is very simple - no ornate carving or fine fabrics. Traditionally a woman will wear the white apron she wore on her wedding day. In some Amish communities both men and women wear white for burial. The tone of the two-hour Amish funeral service is hopeful, yet full of admonition for the living. There are no eulogies. Respect for the deceased is expressed, but not praise. A hymn is spoken but not sung. There are no flowers. The grave is hand dug in an Amish church district cemetery. There will be only a simple tombstone to mark the spot, much like all the other tombstones in the cemetery - in death as in life, we are all equal and do not elevate one person above another.

Today's recipe... Remember... Disclaimer: The Amish don't always follow updated USDA canning methods, they follow methods passed down from generation to generation. Use this recipe at your own discretion, or adapt it to your own method. I am sharing these recipes EXACTLY as they were sent to me and take no responsibility for them.

Amish Cherry Varenya 

From mennonitegirlscancook


A Cherry Syrup, also called Cherry Varenya is used to sweeten hot tea. They used whole pie cherries for this recipe.

1/2 Cup Water
1 Cup Sugar
1 Cup Whole Sour Cherries (Pie Cherries)
1 Tablespoon fresh lemon juice

You would increase the proportions of this recipe according to how many cherries you have on hand that you want to make into Varenya. Boil the water and sugar to make a clear simple syrup. When the liquid is clear add your cherries and let it boil for 10 to 20 minutes (depending on how hard the cherries were to begin with) At the end of the boiling add 1 Tablespoon of fresh lemon juice to help preserve the brightness of the syrup. You could increase the ingredients to have enough to can for future use. If you are familiar with canning I'm sure you can do it successfully with this syrup.

You can do this process with sliced lemons, too, to make a Lemon Varenya.

Saturday, July 12, 2014

Corn Cob Syrup


After I cut off and canned my corn, I made corn cob syrup from the cobs...

I put all the cobs in my bid stockpot and covered them with water... brought the water to a boil, lowered the heat and simmered them, covered, for two hours.

I then drained the liquid into another pot and discarded the cobs.


 I then added sugar to the "corn juice," adding one part sugar to two parts liquid... for example, I ended up with 13 cups of juice, so I added 6 and a half cups of sugar... white or brown sugar may be used... I used half white and half brown sugar... more brown sugar will result in a darker "corn syrup" and all white sugar will make a light, almost clear syrup.

I stirred in the sugar(s), brought the mixture to a boil, and boiled gently until the mixture reduced and thickened to a syrup consistency.

Meanwhile, I washed, sterilized, and heated my jars and lids (I used half pint jars).

Once my syrup had reached the thickness I wanted, I added a little vanilla extract (optional) and filled my jars, leaving a half inch headspace.

I wiped the jar rims with a damp cloth and tightened on my lids to fingertip tightness.

I processed my jars in a boiling water bath (covering the jars with water) for 10 minutes.

After processing, I removed the jars of syrup using my jar lifter and set them on a folded dish towel on the counter to cool and to listen for the PING of each successfully sealed jar.

The syrup will be yummy on pancakes or waffles... and I'm sure there are other uses I haven't come up with yet!


Mr. G said, "Baby, you used that corn from the Rooter to the Tooter!"

I even saved the silks for a medicinal tincture! But that's another story for another day!

Sunday, June 29, 2014

Canning Blueberry Syrup

I ended up with 2 four-ounce jars, 7 eight-ounce jars, and one 12-ounce jar
of blueberry syrup... plus a bit left over.

Our blueberries have been ripening over the past couple of weeks... but this week they've stepped it up a notch and I'm picking every couple of days. Mr. G has had a hankering for blueberry syrup over pancakes like they used to have at the original IHOP... back in our younger days.

So, I made him up a batch of blueberry syrup!

Since I failed to take photos of my process due to the fact that I decided to make this delicious syrup in the middle of the night... and since I followed exactly the recipe on the PickYourOwn website... I'm just going to link below to that site so you can follow their most excellent tutorial on canning your own blueberry (or any berry!) syrup. It's BERRY delicious!

Sunday, May 4, 2014

Wild Honeysuckle Syrup


When I was growing up, honeysuckle blooms were so much fun... they meant summertime to us! They smelled so very sweet and we'd pick them and ever so slowly and carefully pull the stamens out and suck off the drop of tasty nectar from each one. Sweet and sticky and yummy!


My parents were always trying to get rid of honeysuckle... I never understood this as a child... it was so pretty and smelled so good... and gave us a delicious summertime snack! But, as we found out, honeysuckle is prolific... invasive really. So Daddy chopped it down, pulled it up, anything he could do to rid our yard of this invasive vine. At my grandmother's house, there was always a huge honeysuckle vine growing just outside... and up the side wall of the outhouse... made visiting that smelly place much sweeter!


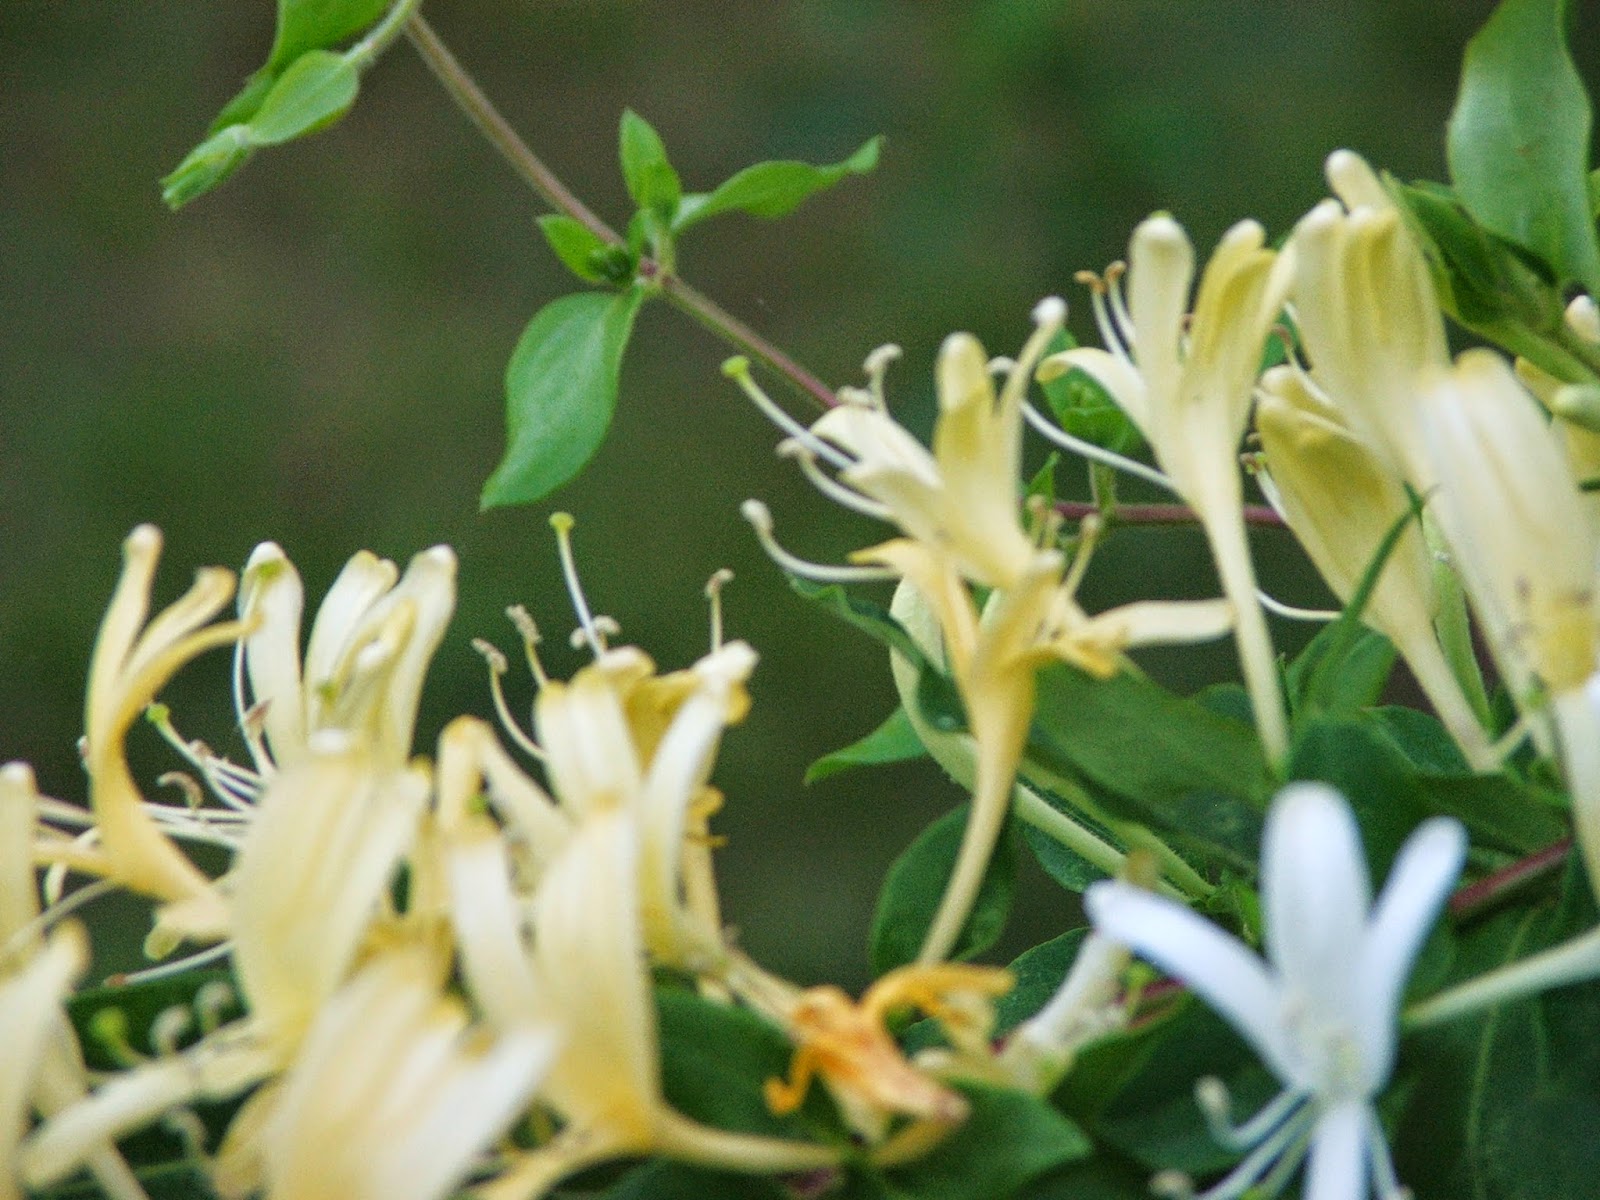
When Mr. G and I moved back to the country a few years ago, we found we had honeysuckle growing near our front deck... being hardened against it as a child, I immediately began pulling it up to rid our yard of its invasive nature... Mr. G liked the stuff! He begged me to keep it! So we kept one small vine, with my warning to him that it would take over the porch... it has! But it smells so lovely this time of year... takes me back to barefoot, lazy, summer days with my siblings and cousins wandering the woods in the heat of summer, wading the creek and "falling in" to cool off... climbing trees, making "playhouses" underneath the pine trees with moss for our carpets and beds, and picking honeysuckle blossoms to suck the sweet nectar from them.

Since we now have a massive honeysuckle vine attached to our front deck and it showers us with its delicate, sweet-smelling blossoms several times each summer, I decided that SURELY honeysuckle has some usefulness... so I began scouring the internet and books to find out.

Guess what? Honeysuckle is indeed a useful, beneficial plant!

According to WebMD, honeysuckle (or as it is sometimes called, woodbine) "is used for digestive disorders including pain and swelling (inflammation) of the small intestine (enteritis) and dysentery; upper respiratory tract infections including colds, influenza, swine flu, and pneumonia; other viral and bacterial infections; swelling of the brain (encephalitis); fever; boils; and sores. Honeysuckle is also used for urinary disorders; headache, diabetes, rheumatoid arthritis, and cancer. Some people use it to promote sweating, as a laxative, to counteract poisoning, and for birth control. It is sometimes applied to the skin to reduce itching and inflammation."

From BellaVista Farm... honeysuckle medicinal benefits:
  • clears toxins
  • kills or inhibits germs
  • coughs and asthma
  • natural antibiotic used for staph or strep
  • reduces fever and heat in the body
  • for reducing ulcers, sore throats
  • clears congestion
  • used for acute symptoms NOT chronic symptoms
  • reduces rashes from poison oak
  • cuts that have become infected
  • tea used as an eye wash
  • headaches
  • helps nausea and vomiting from Hepatitis C
After finding all the medicinal benefits in honeysuckle, a plant I once thought of as a pest, a weed, something to destroy... I set about looking for recipes.
A favorite of ours is Wild Honeysuckle Syrup... it's delicious as a sweetener for tea and soothes a cough and congestion when you have a cold or the flu...
Here's how I make it...
First I pick honeysuckle blossoms when they're full and sweet smelling... if a few leaves get mixed up in them, no problem, they're good too, just not as sweet as the flowers (just no berries, they're toxic).

2 cups of honeysuckle blossoms
4 cups water
1 cup honey
In a saucepan over high heat, bring the water to a boil, stir in the honey suckle and reduce heat, simmering for 10 minutes. Turn off heat and strain. Return to warm pot and stir in the honey until it is dissolved.


Now... once you've done this, you can...
1. Store your syrup in a lidded jar in the fridge for up to a month.
2. Freeze it in ice cube trays, then store the cubes in a plastic bag in the freezer for up to 6 months.
or
3. (which is what I do because I make more than 2 cups worth of blossoms at a time) Can it!

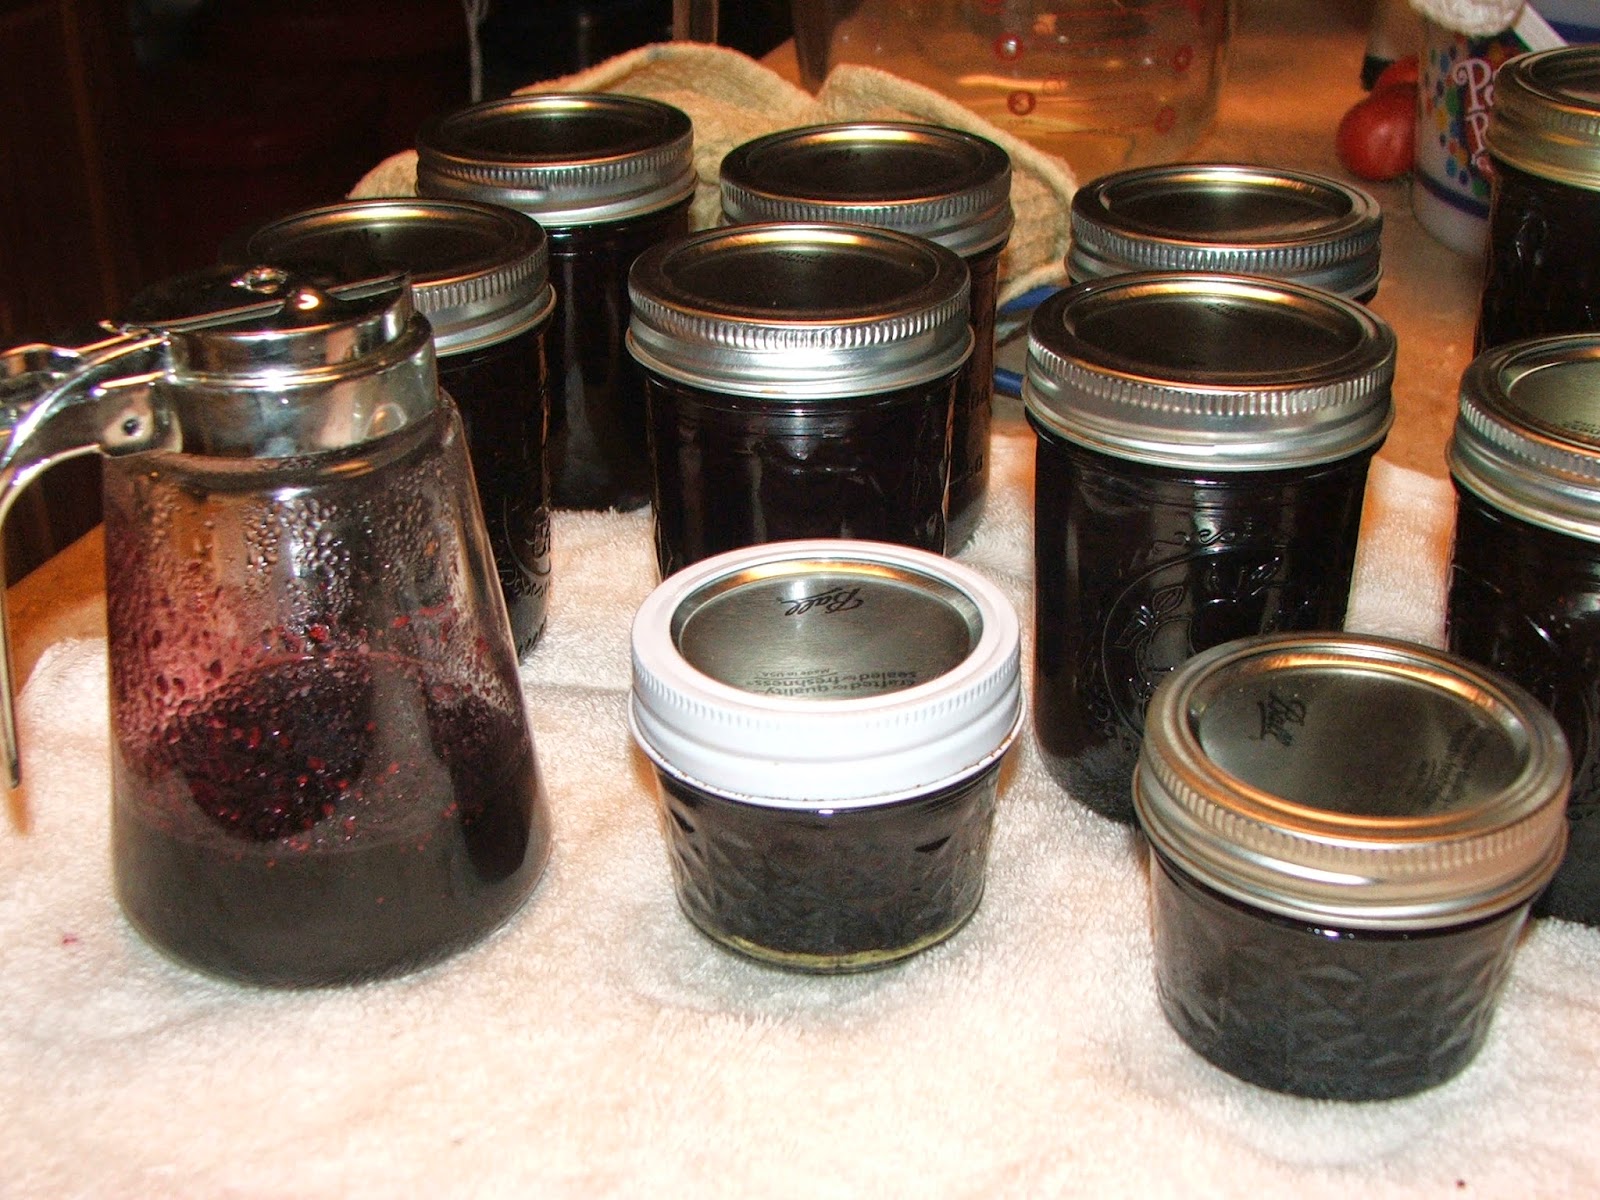
I heat my pint (or half pint) canning jars to boiling to sterilize them and I keep them HOT... then I simmer my lids and rings and keep them hot. Once I dissolve the honey into the warm honeysuckle "tea" I then ladle the mixture into my hot canning jars, twist on the hot lids and set them on a folded dishtowel on the counter to cool and seal.

This is the only recipe I make that I DO NOT process in a boiling water bath or pressure canner... and here's why I don't...
There is a large amount of honey in this recipe... honey is a natural preservative and never goes bad.
Boiling the mixture, in my opinion, would kill the benefits of the honey in the syrup, I just heat it up gently.
If your jars and your lids are HOT and the liquid is hot, the jars will seal as they cool on the counter.
If it would make you feel better, and "safer" to do so, you could process the jars in a boiling water bath for 10 minutes. I prefer not to so I keep all the benefits of the honey as well as the honeysuckle.

To use this mixture for a cold or cough, take 1 ounce every 4-6 hours. Do not give to infants or children under 2 years of age.
Now, just so you know, I am not a medical professional, so must add a necessary disclaimer to using this recipe as a remedy... we use it for coughs and colds, but use it yourself at your own risk. Thanks.

Tuesday, November 22, 2011

Praline Syrup


We were selling soap a few weeks ago at a local barbecue festival. Our booth was located underneath two huge old pecan trees... pecans were falling all around us... I decided that gleaning was in order, so between customers and while DH was "minding the store" I meandered around picking up pecans a handful at a time throughout the day... by closing time, I had several pounds of pecans stowed... feeling very "hunter/gatherer" and not unlike a squirrel.

When I got home with my free food, I found an old Ball Blue Book recipe for Praline Syrup and got started on my own version...

Here's what I did...

I shelled all those lovely pecans, and DH was kind enough to chop them in the antique chopper that belonged to his Mom...


A few broken fingernails and a lot of finger stains later, I had about four cups of chopped pecans...

The recipe I had found called for
2 cups dark corn syrup

I could have sworn I had dark corn syrup somewhere in my pantry, but alas, it was not to be found... so I substituted half molasses and half light corn syrup... I love the taste of molasses so went with it...


1/3 cup dark brown sugar


1/2 cup water

Bring the syrup, sugar and water to a boil over medium heat. Boil one minute, then stir in...
1 cup chopped pecans (more is better)... so I added all four cups


..and 1/2 teaspoon vanilla extract (I added more like a teaspoon)


I prepared my pint canning jars by placing them in a flat pan of boiling water set on two stove eyes. I simmered my lids in boiling water and kept everything hot until I was ready for them.


I ladled the mixture into the hot jars, leaving a 1/4 inch head space. I wiped the rims and tightened the lids on to fingertip tightness.


I processed the jars in a boiling water bath, ensuring they were completely covered with water, for 10 minutes. After processing, I removed the jars using my jar lifter and set them on a folded dish towel on the counter to cool, and to listen for the PING of each successfully sealed jar! The recipe says it makes four half pint jars... I got three pints and one half pint (all those extra nuts!)


This syrup would be wonderful over ice cream, topping a pound cake, or with butter on a homemade buttermilk biscuit for breakfast. Yummy!


For a printable version of this recipe, click here.

html, body, div, span, applet, object, iframe, h1, h2, h3, h4, h5, h6, p, blockquote, pre, a, abbr, acronym, address, big, cite, code, del, dfn, em, font, img, ins, kbd, q, s, samp, small, strike, strong, sub, sup, tt, var, b, u, i, center, dl, dt, dd, ol, ul, li, fieldset, form, label, legend, table, caption, tbody, tfoot, thead, tr, th, td { margin: 0; padding: 0; border: 0; outline: 0; font-size: 100%; vertical-align: baseline; background: transparent; } body { line-height: 1; } ol, ul { list-style: none; } blockquote, q { quotes: none; } /* remember to define focus styles! */ :focus { outline: 0; } /* remember to highlight inserts somehow! */ ins { text-decoration: none; } del { text-decoration: line-through; } /* tables still need 'cellspacing="0"' in the markup */ table { border-collapse: collapse; border-spacing: 0; }