Showing posts with label Italian. Show all posts

Sunday, September 7, 2025

Risotto with red radicchio


Sauté a small chopped onion with olive oil until translucent, then add chopped radicchio and a pinch of salt. Keep stirring. 


When the radicchio is soft and your Italian ancestors whisper to you that the time is right, add the rice. If you don’t have Italian ancestors then gently sauté the radicchio for about ten minutes, or until you lose the bitterness but not the taste. Add vegetable stock little by little until the risotto is ready. Adjust with salt and pepper five minutes before the end. It tastes great with a drop of Aceto Balsamico Tradizionale di Modena, if you have it.


Photos and Recipes by Alessandra Zecchini ©

Monday, July 26, 2021

Make your own ciabatta bread


This is my recipe for a simple yet foolproof ciabatta bread loaf, one of my favourite loaves! The recipe is straight from my book Savour (now available as an ebook from Kobo and from Barnes & Noble, and also from Amazon for Kindle), where there are many more bread recipes, and more. In the meantime enjoy this one!
  

Ciabatta 

Ingredients

300ml warm water

2 teaspoons active yeast granules

14⁄teaspoon sugar

300g high-grade flour, plus extra for dusting

pinch of salt 

Makes 1 loaf

Place the warm water in a large bowl, add the yeast and sugar and set aside for 5 minutes. When the yeast starts to bubble, add the flour and salt and work into a dough for about 5 minutes using your fingers. This dough will be too sticky to roll on the bench or table so knead it in the bowl (although it feels more like mixing). Cover the bowl with a damp tea towel and leave to rise for about 2 hours. Line a large baking tray with baking paper and turn out the risen dough onto the tray bottom-side up. The dough will be sticky so you will need to scrape it from the sides of the bowl; it is also likely to be runny – prop up the outside edges of the baking paper with a couple of small ovenproof ramekins to avoid ending up with an extremely large flat loaf (the ramekins can be filled with water to create a steam oven effect - image 1)). Dust the top of the loaf with the extra flour. Bake in a preheated 180 ̊C (350 ̊F) oven for 25–30 minutes.

 Remove the bread from the oven, wrap in a tea towel, then place in a plastic bag and seal. Leave the bread in the bag for 30 minutes so that the steam will cook it further and make it soft and deliciously chewy. If you prefer a ciabatta with a crunchy crust, eat it while it’s still warm – yum!


Tips and variations

Although some recipes add 1–2 tablespoons of olive oil to the dough, I prefer an oil-free version so I can drizzle olive oil on it when it is freshly cut and ready to eat. I also like to dip ciabatta slices in a little oil flavoured with crushed cumin seeds and salt or basil leaves.


Photos and Recipes by Alessandra Zecchini ©

Saturday, July 17, 2021

Beautiful Brown Lentil Salad with Edible Flowers


Ingredients

500 g brown lentils
1 leaf bay
water and salt for boiling
extra virgin olive oil
lemon juice
salt to taste
Cucumber, half
Rocket salad
Edible flowers 


A fresh lentil salad for summer! Soak the lentil overnight, then rinse well, add plenty of water, a bay leaf and a pinch of salt. Cook until 'al dente', or as soft as you like (but not mushy). Drain and briefly rinse under cold water. Place in a mixing bowl, add extra virgin olive oil, lemon juice, salt to taste, and half a cucumber chopped into small pieces. Mix well. Line a serving plate or large shallow bowl with rocket salad leaves, spoon the lentils on top, then sprinkle with petals and small edible flowers (I used borage, verbena, dianthus, calendula and cornflowers).
Photos and Recipes by Alessandra Zecchini ©

Saturday, July 13, 2019

Risotto with radicchio


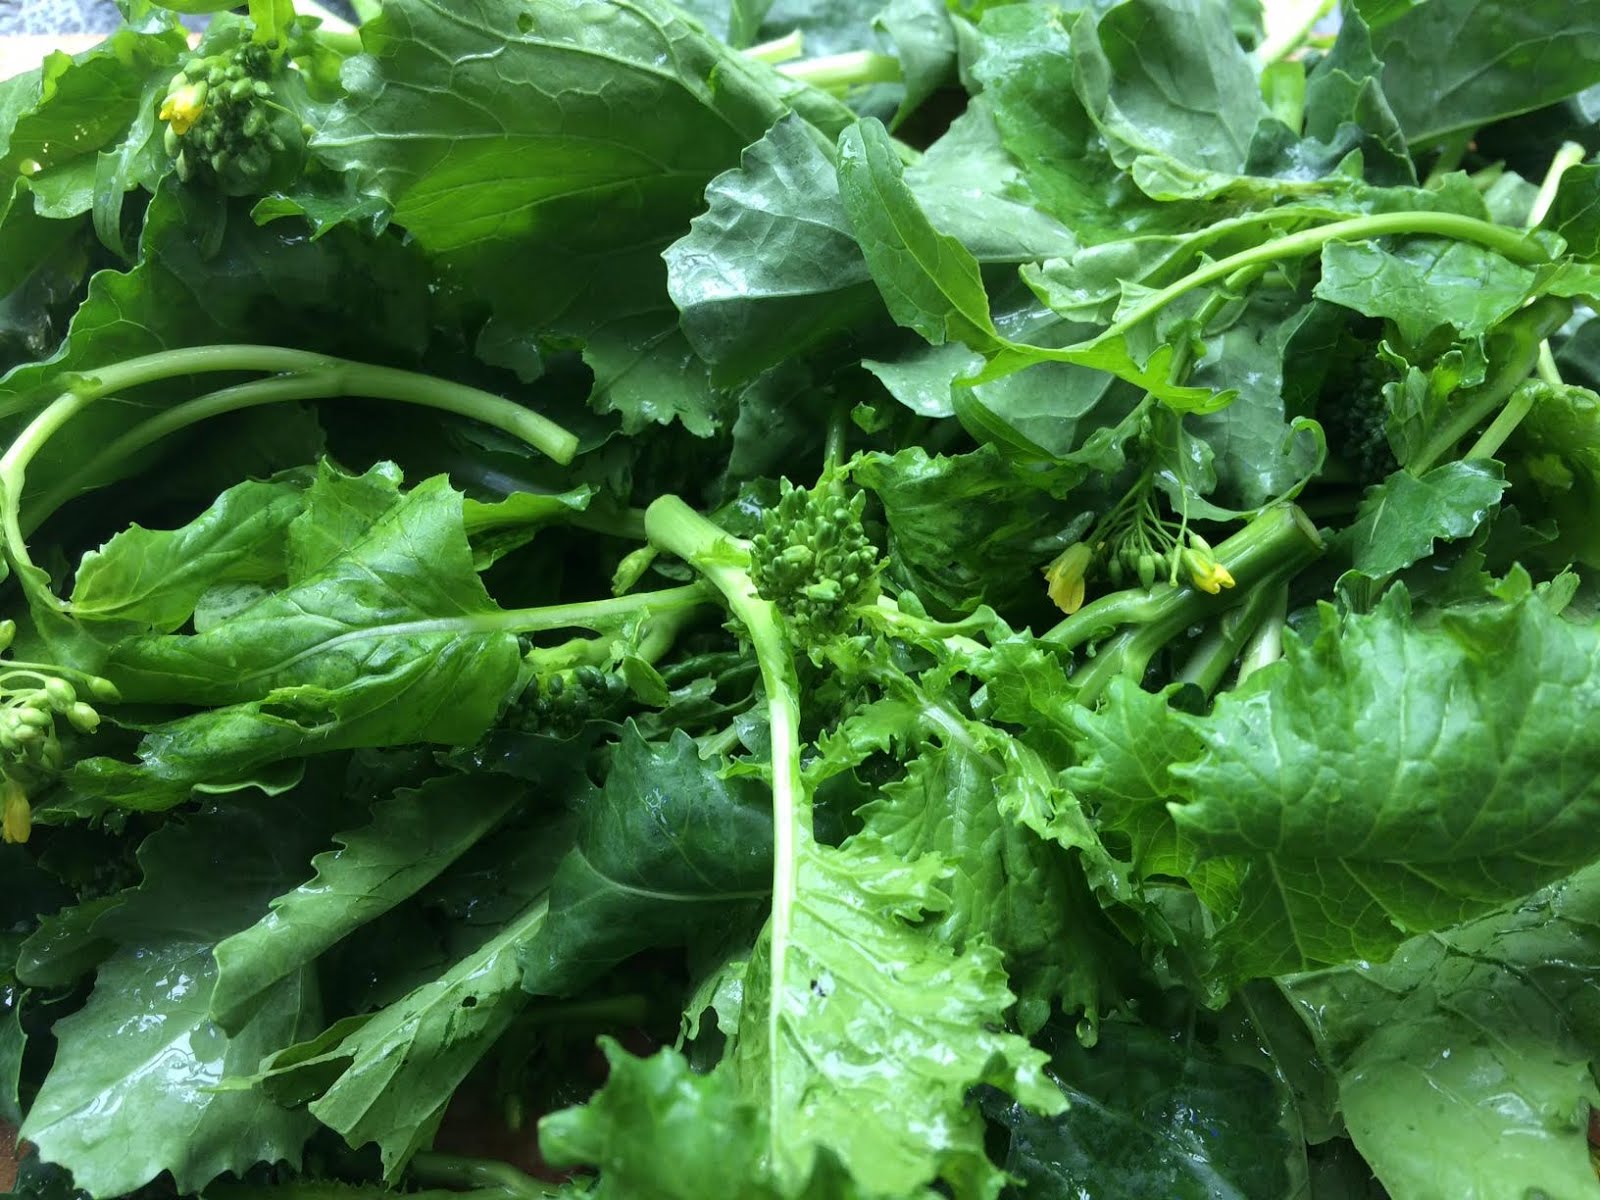
One of the many joys of winter in Italy is the abundance of radicchio, and there are so many varieties, like this long and compact beauty, perfect for risotto.


I also found my Mum's old green pot (about 50 years old) which she always used to make risotto, and discovered that it is suitable to my new Italian kitchen's induction cooker. It may look a bit battered but it cooks beautifully!  


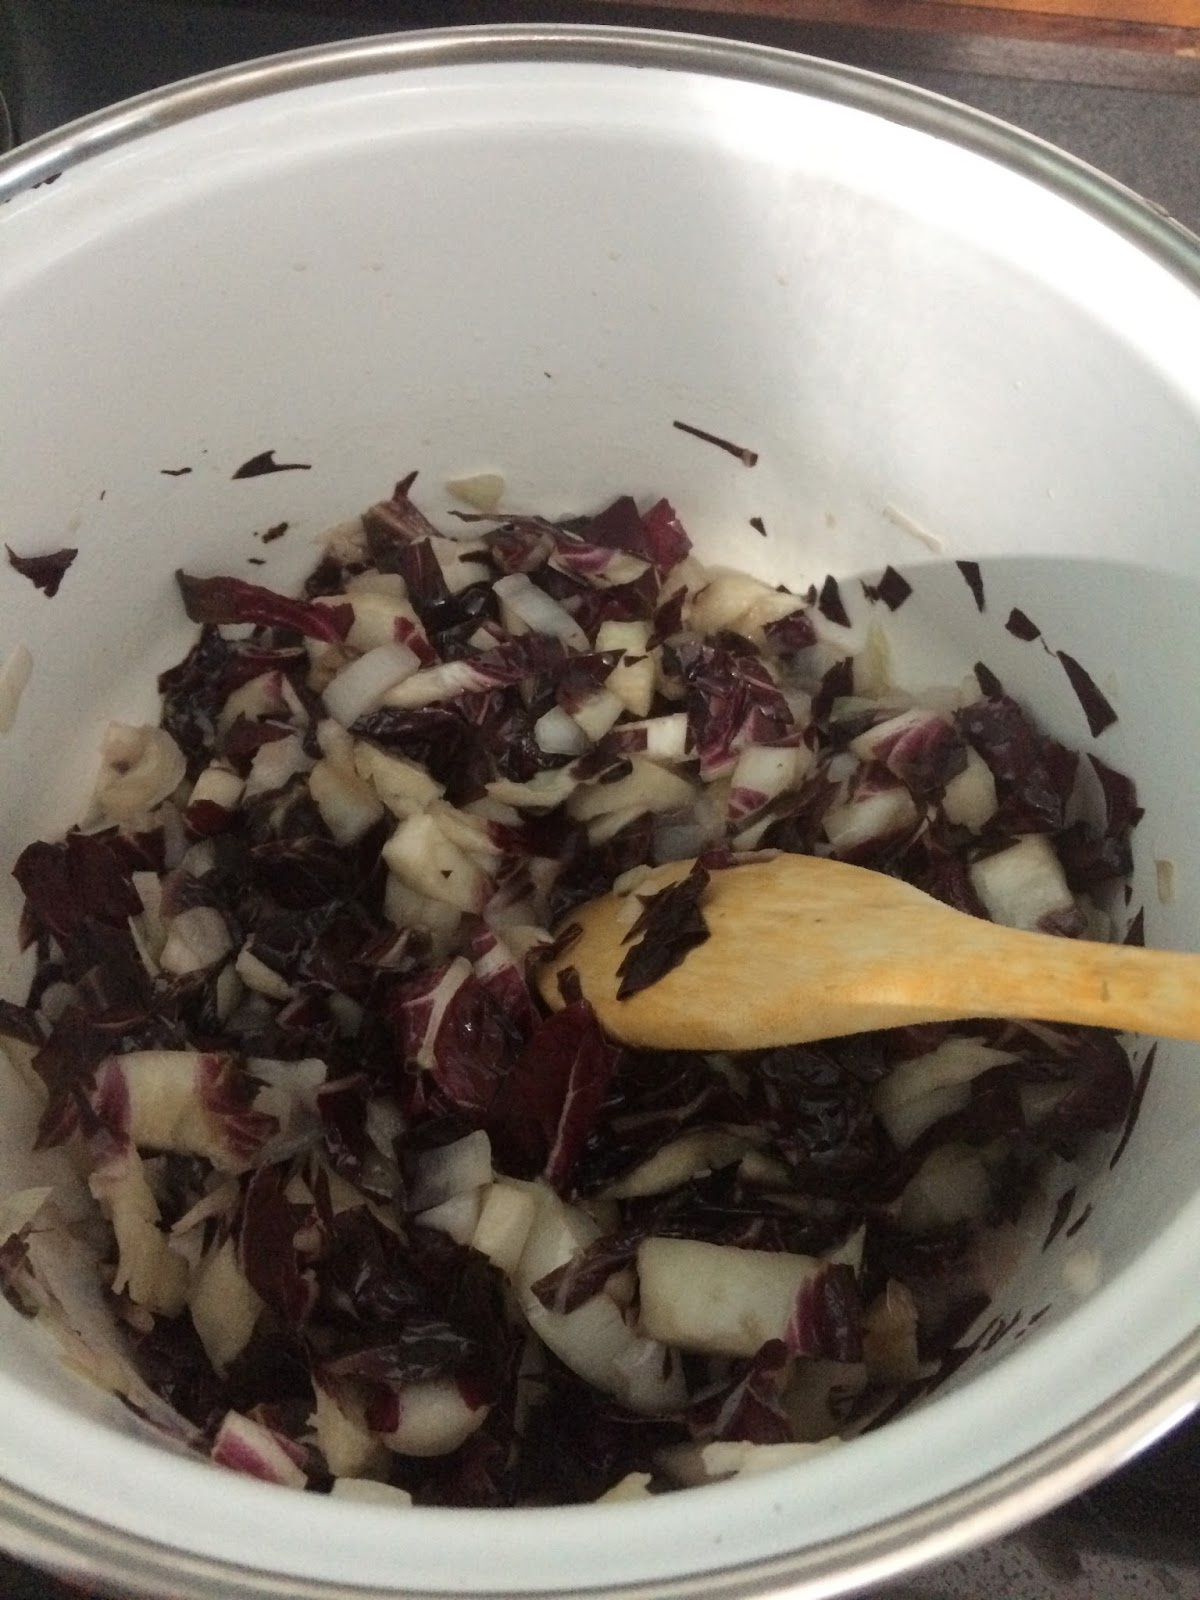
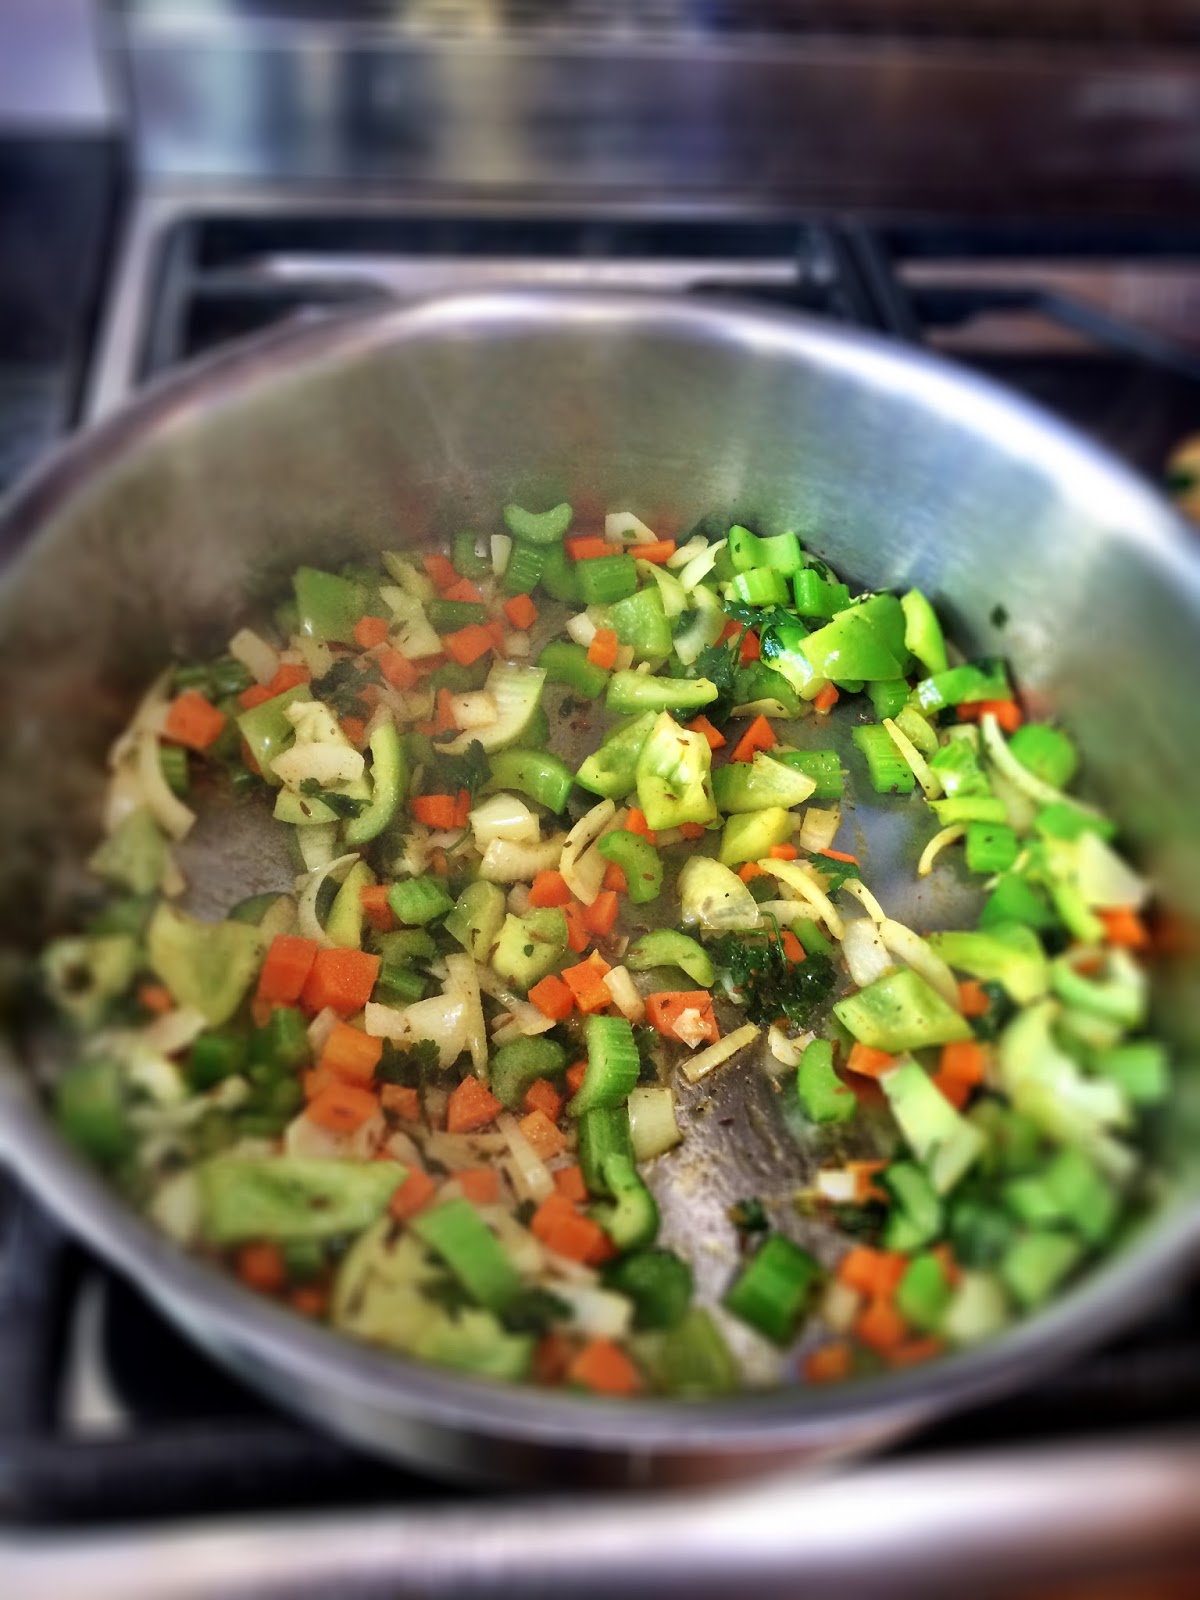
To start chop a white onion and sauté with olive oil, then add the chopped and rinsed radicchio with a pinch of salt, put the lid on and simmer, stirring from time to time, until the the radicchio is all wilted and doesn't taste too bitter.


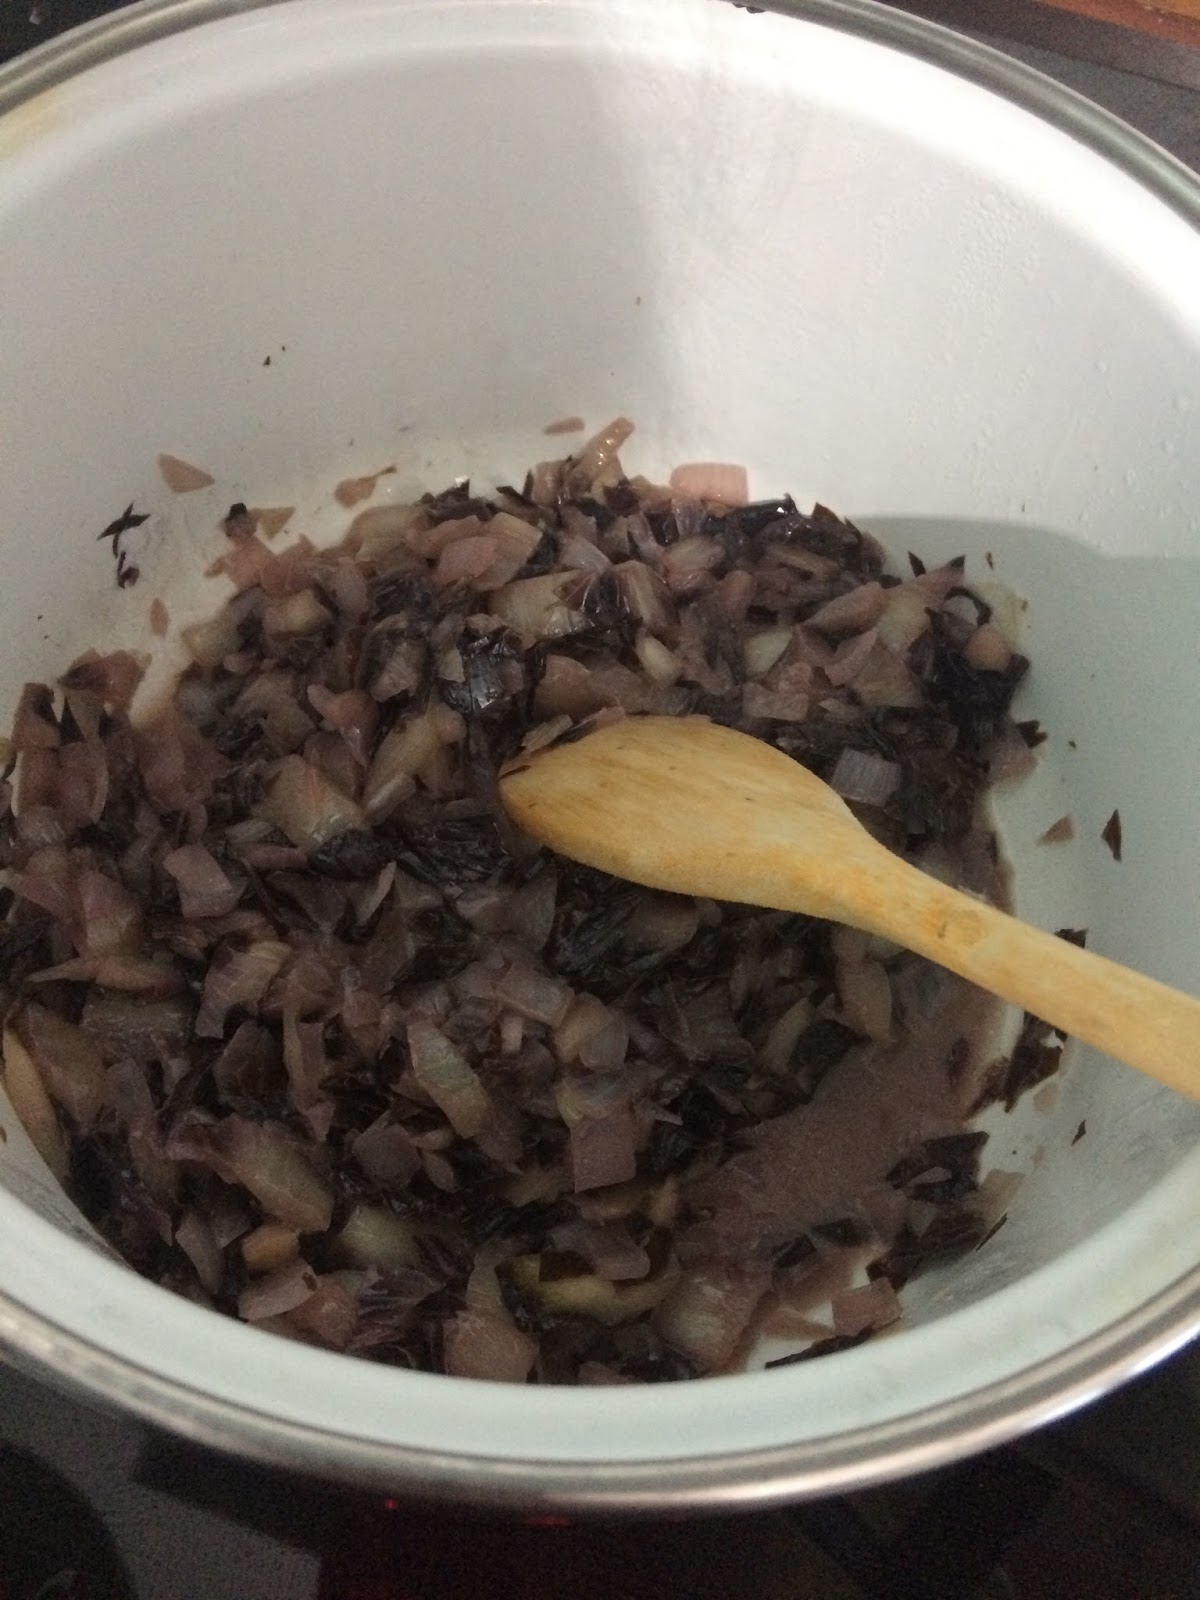
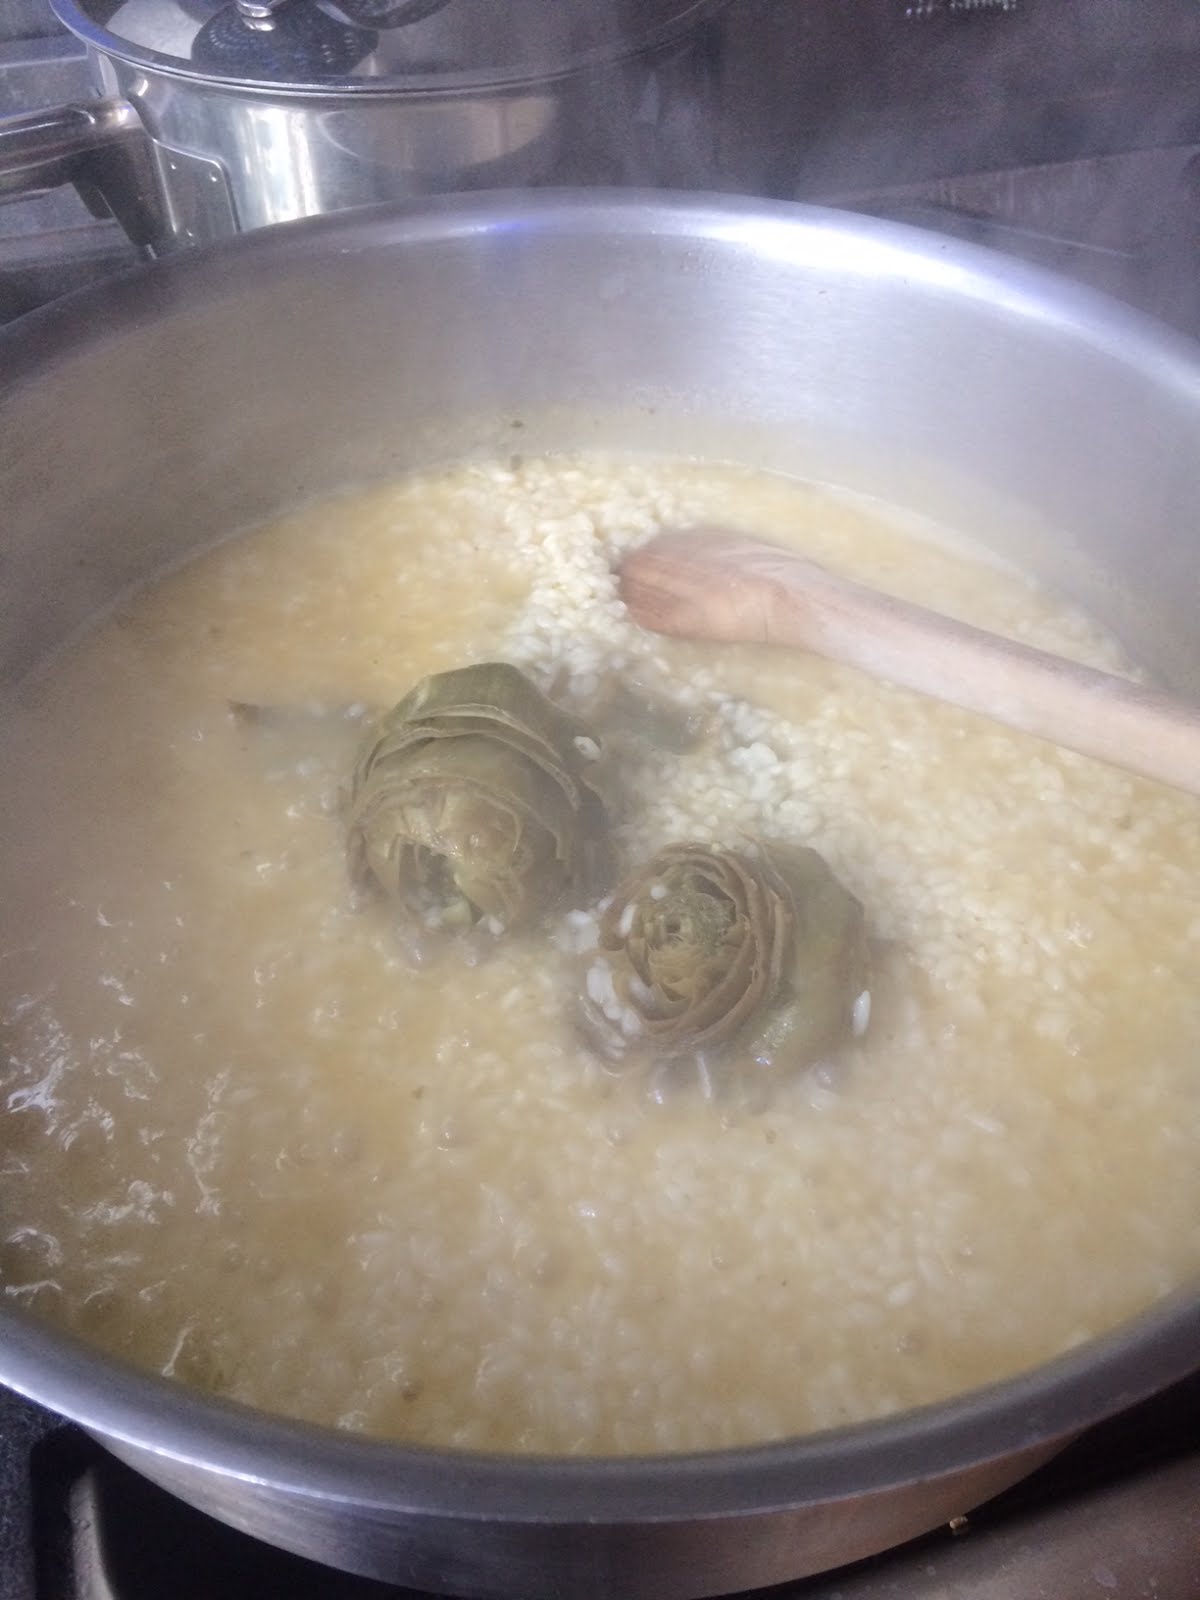
It should take about 20 minutes on low, and look like this (with a bit of juice). Now add the arborio rice,  (I made risotto for 8 with about 600 g of rice, only one onion and one radicchio!).


Stir until the rice is hot and then start adding the vegetable stock, ladle by ladle as needed, you will need about two litres of it.


Keep stirring and adding stock until ready. When working with large quantities of rice it is better to rinse it first to remove a little starch, otherwise it will become too hard to turn, and too sticky.

Risotto with Radicchio is a great Italian classic, very popular in Veneto and Emilia Romagna (the best radicchio is from Treviso). Possibly in Veneto you would accompany it with one their fine whites, but in Emilia I paired it with a Pignoletto and it tasted great!  Enjoy!


Photos and Recipes by Alessandra Zecchini ©

Monday, January 14, 2019

Italian chips - patatine fritte (with olive oil, garlic and rosemary)


How silly can a recipe be? I never thought that I would bother writing something so basic, but the world where I live is so full of chips, and terrible chips I must say, that I very rarely eat them out, and very occasionally I like to make them at home the Italian way, patatine fritte, like we made on special occasions, usually on a Sunday. These are not deep fried but pan-fried, and they are flavoured with garlic and rosemary, 

Peel the potatoes, cut the potatoes into chip sizes, rinse (or just soak in water) and pat dry. Sizzle some garlic in a frypan with extra virgin olive oil, then add the chips and pan-fry stirring and/or shaking the pan constantly. I add just a little salt at the beginning, and remove the garlic before it burns. Then I add rosemary when they are nearly cooked (they takes about 20 minutes), finish with more salt and eat immediately (although if you cook them this way they are also tasty when cold, unlike British style chips). 

And now for something completely different (especially if you like birds!)

A Kereru! The New Zealand native wood pigeon, all puffed up and using her chest for a pillow.


Photos and Recipes by Alessandra Zecchini ©


Saturday, January 12, 2019

Orecchiette con cime di rapa (o friarielli) e broccoli


The only reason I made these with both cime di rapa and broccoli is because in the garden I had just a handful of cime di rapa, so the broccoli made them go... further.

Wash the friarielli and broccoli, cut onto manageable pieces. Boil the water for the orecchiette, adding plenty of salt when the water boils, and before adding the orecchiette. In the meantime in a pot sizzle chopped garlic and a chili with olive oil, add the cime di rapa and broccoli, a small pinch of salt, and cook them stirring often, and adding the boiling water from the orecchiette (but only after you have put the orecchiette in!) from time to time. The cooking water from pasta is very useful for pasta sauces and for cooking vegetables this way. When the orecchiette are ready drain and add to the cime di rapa, stir well, add more olive oil and serve.

Photos and Recipes by Alessandra Zecchini ©

Monday, April 16, 2018

Schiacciata con pomodorini - cherry tomato schiacciata


 This schiacciata is easy as it doesn't need muck kneading.

For the schiacciata:
Place 300 ml warm water in a large mixing bowl, add 2 tsp active yeast granules and 1/4 tsp raw sugar. Wait 5 minutes then add 500 g high grade flour and 1 tbsp wheat gluten flour, plus a good pinch of salt. Mix well then dust with four, cover with cling film and let it rise for 2 hours. After 2 hours place a little olive oil on your hands and then gently mix the dough, pick it up and place it on a baking sheet cut so that it will fit you over tray (I have a 90cm oven so one long tray is good for me, for a standard oven divide the dough into two pieces). Roll the dough to cover the baking paper and then place on the baking tray. Brush with more oil if you like, then cut the cherry tomatoes into halves and place over the down, pressing them down lightly. Sprinkle with salt and oregano (chopped garlic too if you like).


Bake in a pre-heated oven at 200° C for approximately 20-25 minutes, or until you can see that the bread is baked on top and on the bottom (lift to check). Eaten warm is fantastic, but it keeps well for a couple of days, or at least, it would, but we tend to eat it pretty quickly! 


Photos and Recipes by Alessandra Zecchini ©

Sunday, March 18, 2018

Eat your colour in a minestrone soup


Lovely colourful vegetables from the garden (except the red onions), all ready for a minestrone. From the bottom: red onions, rainbow chard, carrots, yellow beans, silverbeet stalks, celery, green beans, flat beans, kale. Just add water and salt.

Wishing you all a colourful week!


Photos and Recipes by Alessandra Zecchini ©

Monday, March 12, 2018

Tofe con friarielli (cime di rapa)


For the first time in my life I planted friarielli (cime di rapa), I got the seeds from Slow Food Auckland and I was so excited that I didn't wait for Autumn but I planted them straight away. Auckland is hot and wet, so they grew fast and started flowering quickly, I had to pick them before they seeded even if the tops were small. But they were delicious. I also have to confess that I ate some as salad, when the leaves were very young, and they are probably one of the best alternative to rocket salad around.


After I got my first batch I cleaned it and then cooked in a pan with olive oil, garlic and salt. You can add chilli, but I prefer to taste the friarielli rather than the chilli. Simmer them slowly with a lid for 20-30 minutes stirring often, if they are fresh you don't need to add water (mine came directly from the veggie garden!). The best pasta to have them with is orecchiette, but I didn't have any so I used some tofe, which are close enough in shape, but different in flavour! Still, they were great, or maybe it is just me, happy with my new crop of friarielli!

And now for the bouquet of the day from my garden!


Photos and Recipes by Alessandra Zecchini ©


Saturday, February 10, 2018

Risi e bisi coi baccelli - Fresh pea risotto with pea pod broth (waste not!)


Peas are a precious crop for me, I don't like to buy big bags of frozen peas like everyone seems to do in New Zealand (and other countries), it makes them feel 'cheap' and 'common' and an everyday boring side veggie.

I like my fresh peas and I like them to be the main player in a dish, like for risi e bisi, a traditional risotto dish from Veneto, Italy. And the best part of growing them? Is to keep the pods, and as I am a NO-FOOD-WASTE advocate, to use them to make stock, which will be the base of the risotto. So shell the peas and keep the pods, wash them well and place them in a pot with water (I used about 1.2 litres of water for a basket of peas) and rock salt and simmer for at least one hour. You can also add a little parsley or celery leaves to the stock, but not too much as they have very strong flavour. Filter the stock and keep hot. You can also cut the pods into tiny strips and add them to the risotto, but I just gave them to some hungry visiting chickens (big mistake, they are always around my house now!!).


To prepare the risotto chop an onion and saute with margarine or soy butter (olive oil ok but vegetable butter is better for this). Butter should still be bubbling when you add the rice (I used arborio). Stir until the rice is hot then add the peas.


Stir again and then start adding the stock, little by little. If you use a good casserole you can cover the risotto from time to time and let is absorb the liquid, otherwise keep stirring and adding stock until the risotto is ready.


Towards the end test for salt and add a little pepper if you like. Eat hot. Leftovers are good to make croquettes or arancini the day after.


Photos and Recipes by Alessandra Zecchini ©

Thursday, November 9, 2017

Artichoke Risotto


I only had two artichokes and needed a meal for 4 people, and risotto was the ideal solution. Clean the artichokes and remove the outer leaves. Peel the stalks and cut into small pieces. Put everything in water with lemon juice while you work or the artichokes will become black. Finely chop a handful of parsley with a couple of garlic cloves and add salt. Stuff the artichokes with the chopped garlic and parsley and add a drizzle of olive oil. Place in a casserole, together with the stalks, and add 5cm of water. Simmer on low with the lid on for one hour or until cooked (the outer leaves will start to detach), adding a little hot
water from time to time. Prepare a litre of boiling vegetable stock (I used Rapunzel vegetable broth cubes). In a separate pot melt a tsp of vegetable margarine or 3 heat 3 tbsp of extra virgin olive oil, add the rice (arborio or carnaroli) 100g per person, then add the artichokes and their juice. Then slowly add the vegetable stock stirring constantly until the risotto is ready. Adjust with salt if needed and serve immediately, if you have two people one artichoke each, if four cut the artichokes into two.

 Photos and Recipes by Alessandra Zecchini ©

Thursday, July 20, 2017

Italian chestnut fritters


… chestnut fritters! And you only need three ingredients: Italian chestnut flour (which is naturally sweet so you don't need to add sugar), sultana (optional, but traditional!) and oil for frying! These are full of protein, gluten free, and perfect for breakfast, or snack, hot or cold. I love them after a gym workout and the kids like to put them in their lunch boxes. They are very filling, plus they last a few days, if you don't eat them all at once!

Mix the chestnut flour with enough water to make a batter (same consistency as hot cakes), add the sultana.


 Drop full spoons of batter in the hot oil and fry on both sides until nice and brown.


Drain excess oil with kitchen paper


Enjoy! 

Photos and Recipes by Alessandra Zecchini ©

Friday, March 17, 2017

Carciofi alla romana


These type of artichokes are called mammole,  the 'petals' are rounded and not as spiky like for carciofi. But they are excellent cooked alla romana. Cut the outer petals off until you get to the tender heart, leave a bit of the stalks, but peel them, and then immediately put them in water and lemon (so that they don't become black) to wash them. Finely chop plenty of Italian parsley with garlic and a pinch of salt, and use this to fill the centre of each artichoke. Place the artichokes in a pot, drizzle some olive oil in the centre of each artichoke and add a little water at the bottom of the pan (about 2 fingers). Cover with a lid and simmer on low for a long time (1-2 hours) adding water from time to time. Sorry I didn't take a photo of the final product, but you can find one here.

Photos and Recipes by Alessandra Zecchini ©

Saturday, September 17, 2016

Peperoni e salvia fritti - fried capsicums and sage


Red capsicums are so nice fried in olive oil, and then sprinkled with a little salt… this time I tried a different pairing though: sage! And it works really well. Of course I really like fried sage, so I guess that that help. (In the background I have some fried eggplants, but you all know how to make that right?) :-)

Photos and Recipes by Alessandra Zecchini ©

Saturday, July 2, 2016

Brussels sprouts and pastina vegetable soup


One of the easiest way to cook these notorius vegetables is in a soup, a bit like a minestrone, so that all the flavors from the other vegetables, plus the starch of pasta, 'improve' the distinctive taste of Brussels sprouts.

Chop one onion, half a carrot and one celery stalk with leaves, sauté with a tbsp of olive oil and then add 1.5 l of vegetable stock. Simmer until the carrots are soft and then add the Brussel sprouts, a cube of frozen spinach and a handful of pastina (small pasta like stelline). Simmer until the pasta and Brussels sprouts are cooked, add a little more extra virgin olive oil and black pepper to taste. Easy and yum!

 Photos and Recipes by Alessandra Zecchini ©

Tuesday, June 28, 2016

Lenticchie in umido - Brown lentils Italian style

I love a nice big pot of lentils, preferibly with some oven fresh crusty bread or a slice of polenta or creamy mushed potatoes. But also as pie fillers, for lasagne, or as a side dish, especially now that the weather is cold in New Zealand. For this recipes wash, soak and rinse 500 g of brown lentils, and then boil them in water with just a pinch of salt until cooked but not too soft or mushy. 


In the meantime roughly chop one peeled carrot, one peeled onion, one peeled garlic clove and one stalk of celery with leaves and a few leaves of Italian parsley. This time I also added one green pepper because it was all alone in the fridge, but this is not necessary.


Sizzle the vegetables with two tbsp of olive oil until the onions are soft, then add 1 tbsp of tomato puree, and if you like a little smoked paprika or a chili. Stir and sizzle for one minute.


Add the lentils and their water and more salt to taste, but not too much as the water will reduce.
Cover and simmer until most of the liquid is gone and you are happy with the consistency of your lentils. Add salt and pepper to taste, plus a drizzle of extra virgin olive oil, and serve.


Photos and Recipes by Alessandra Zecchini ©

Sunday, June 12, 2016

Gluten free, fat free, sugar free, vegan chestnut and cocoa cakes


 I used one cup of Italian chestnut flour (only used Italian chestnut flour, the chestnuts have been toasted prior to grinding and have a special sweet taste and lovely texture!), 2 tsp cocoa, a few sultanas and enough water to make a batter. I poured the batter in silicone moulds and baked for about 20 minutes (until a toothpick came out clean). Very yummy, incredibly filling, and healthy too.

Photos and Recipes by Alessandra Zecchini ©