Showing posts with label Meat. Show all posts

Thursday, June 27, 2013

Canning Lamb


 Just after the Easter/Passover season I bought a nice-sized leg of lamb... regular price $60 plus... for $18! I brought it home and put in the freezer... it was probably 8-10 lbs. and there are only the two of us... thought I'd save it for company... or can it.

Now with this shower for my daughter coming up and berries coming in and needing the freezer space... I pulled it out the other day and thawed it...

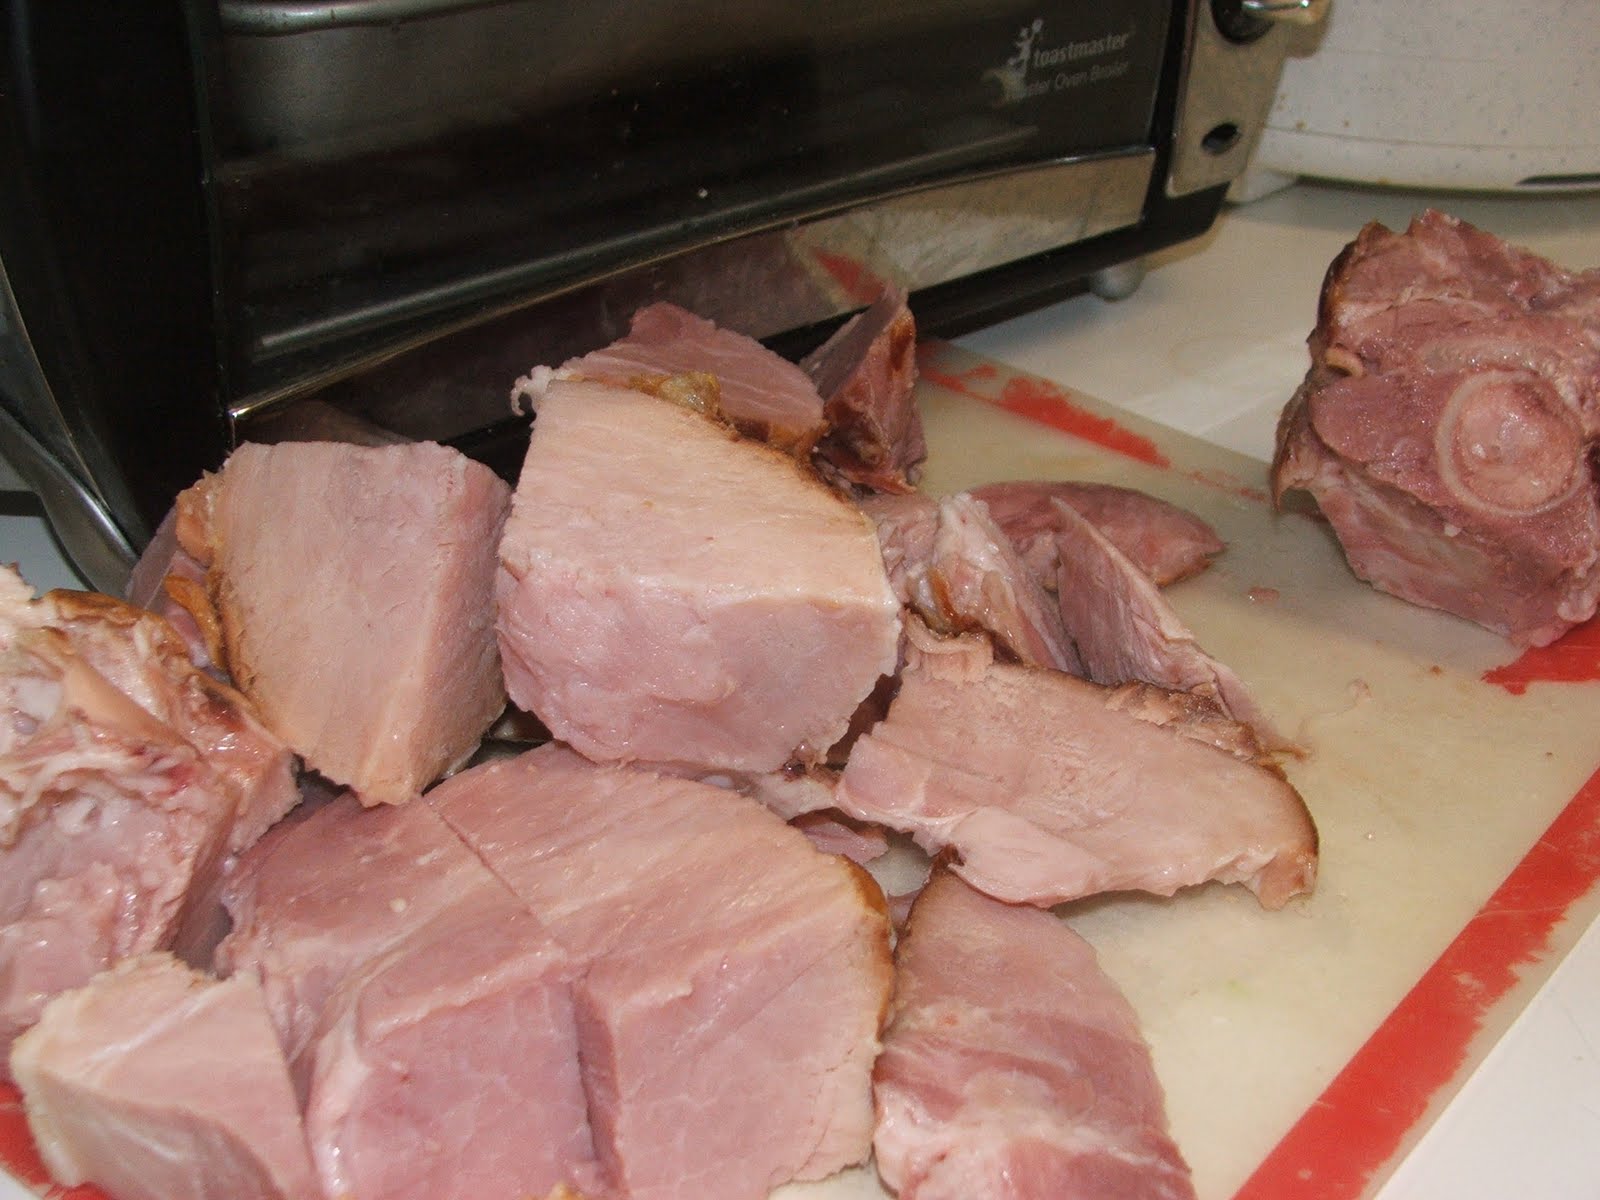
I decided to cook it in our smoker... I salted and peppered it... added a variety of herbs (rosemary, mint, thyme, oregano, basil) to my smoker's water pan... set the temp to 250 and the time to 8 hours and let 'er smoke... adding chips (I used Jack Daniels whiskey barrel chips) every hour or two.

Due to our schedules and such, we weren't gonna get all that lamb eaten any time soon so I canned it...

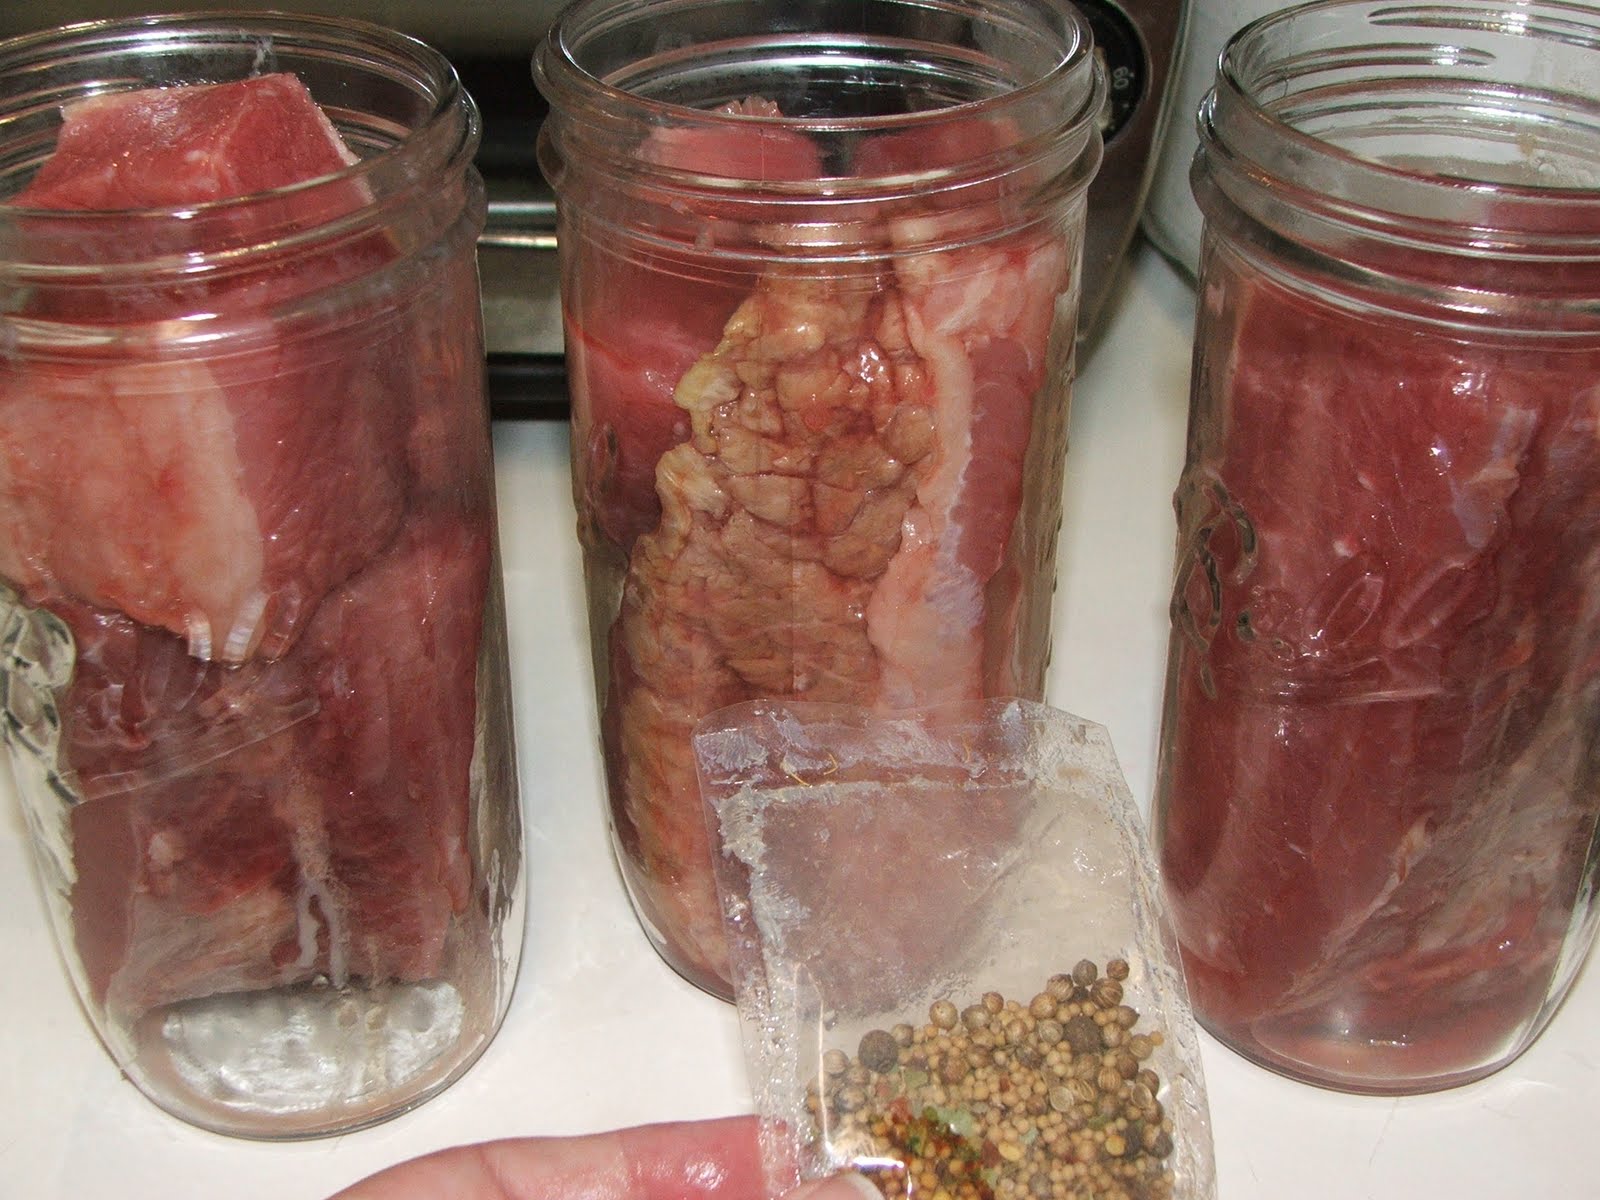
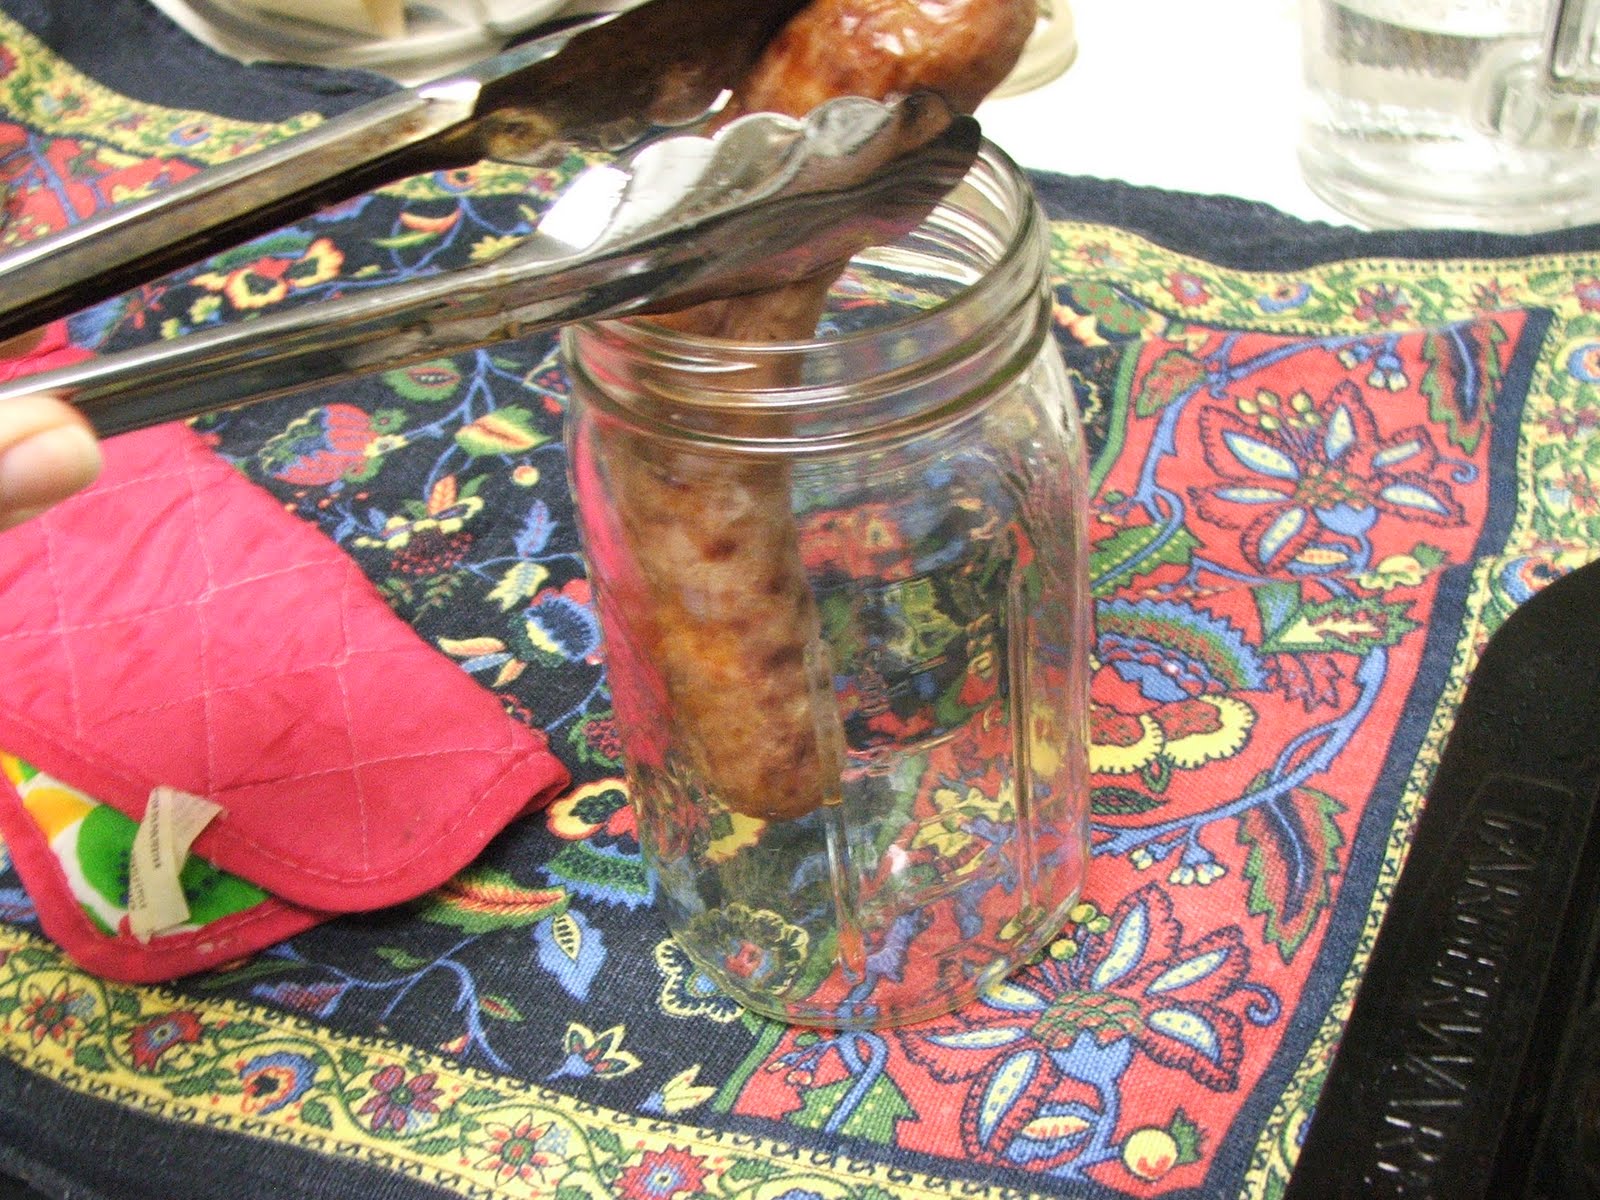
First, I removed all the meat from the bone and cut it into stew sized chunks, taking care to remove any excess fat and gristly pieces.

Then I boiled my wide-mouth pint jars and put my lids on to simmer.


 I packed the jars pretty loosely with the chunks of lamb, leaving a good inch or more headspace.


I added a half teaspoon of canning salt to each pint jar (optional of course!)


Then I filled the jars with boiling water, leaving an inch headspace.


 I removed any air bubbles using a plastic chopstick and adjusted the liquid if necessary.


I wiped the jar rims with a damp cloth and tightened my lids on to fingertip tightness (no tighter or you can end up with buckling lids!)

I then processed the jars in my pressure canner at 10 lbs. pressure for 75 minutes (quarts would process for 90 minutes).

After the processing time, (I gotta be honest here!) it was time to leave for work so I turned the stove off and left the canner to cool naturally while I was gone for the day.

When I got back home, I removed the jars from the canner and set them on a folded dish towel on the counter... they'd already cooled AND PINGED!!! while I was gone so I missed the music! But they all sealed!

I ended up with 7 pints of lamb chunks... lamb stew this winter??? I think so!

And now I have this lovely meaty lamb bone left... I'm thinking I'll try making a little lamb broth outta that.


Sunday, November 18, 2012

Canning Ground Beef in Broth


Having jars of canned ground beef can be very handy on a busy day... or if you forgot to thaw out anything for dinner...

Open a jar, add to spaghetti sauce, season for tacos, add some beans and spices for a quick pot of chili, make a brown gravy, add spices and top with mashed potatoes for Shepherd's pie... the possibilities are endless...

Here's how I canned ground beef in broth...

I canned my ground beef in pint jars... rule of thumb one pint=one pound (more or less)... so pints are a good size for when your recipe starts out with "brown one pound of ground beef..."

I buy ground beef whenever I find it on sale... or it would be great if you raise (or buy) your own beef and don't have the freezer space to store it.

I started out by browning my ground beef...


I then drained the meat...


...and filled the hot, sterilized pint jars loosely, leaving a generous one inch headspace.


Next, I filled the jars with hot beef broth (make your own, buy it from the store, or use beef broth granules and mix with boiling water)... I left a one inch headspace... got rid of any air bubbles by inserting a plastic knife between the inside of the jar and the meat, adjusting headspace as necessary by adding more broth if needed.

After wiping the jar rims with a cloth dampened with a little vinegar to cut any greasiness, I tightened my hot, sterilized lids on to fingertip tightness.

I processed the pint jars in my pressure canner at 10-11 pounds pressure for 75 minutes (quarts would be processed for 90 minutes).

After processing, I let the pressure drop in my canner slowly, on its own... then waited an additional 10 minutes or so (the slow "cool down" helps prevent liquid loss and jar breakage) then removed the jars using my jar lifter...

And set them on a folded dish towel on the counter to cool (away from any drafts) and to listen for the PING! of each successfully sealed jar.


Homemade convenience food... doesn't get any better!

Tuesday, May 10, 2011

Canning Ham


OK... so I bought a big ham when they were on sale near Easter, can't pass up a good sale. We stayed home, just the two of us on Easter this year so there's that big ol' ham for two! I decided to slice out what we would eat and can up the rest... here's what I did...

First I washed my jars, this time I used quart jars, and kept them hot until I was ready for them. I simmered my lids and rings in hot water and kept them hot... and I got my trusty pressure canner out and got it ready.


I cut my ham up into chunks to fit nicely into my jars.


Once I had all the ham "chunked" up it was time to start filling the jars.


I had a nice, meaty ham bone left over and not one to waste a good ham bone, I put it in the crockpot with some pintos for supper... Yummy! But I digress... back to canning the ham...

I filled the jars with the ham chunks, leaving an inch of headspace. Now the decision... do I add broth or water to the ham? or not? I chose not, the ham would make its own juices.


I wiped the jar rims with a cloth dampened with a little vinegar (the vinegar helps remove any greasy residue better than water alone)... removed my lids (using my trusty magnetic wand gadget) and screwed them onto the jars (finger tightness) then I processed the jars, following the directions in my canner's instruction booklet, at 10 pounds of pressure for 90 minutes.

After the jars processed and the canner cooled down, the pressure returning to ZERO... I removed the jars from the canner with my jar lifter and set them on the counter on a folded dish towel to cool and seal.


I sat back, relaxing with a cool drink and listened for the sound of the PING of a successfully sealed jar! A beautiful sound!

Now if I could only can deviled eggs to go with that ham... Hmmmm... canned deviled eggs??? Nah! Guess not!

Canning Granny©2011 All Rights Reserved


Wednesday, May 4, 2011

Canning Corned Beef Brisket

I love corned beef... and cabbage... with sauerkraut... on a sandwich... love a Reuben! My DH is not a big corned beef brisket fan, so I rarely cook a whole big brisket just for me. So I thought if I bought a whole big brisket and divided it up into smaller serving sizes and canned it up, I could open a jar whenever the Irish in me insisted upon corned beef and cabbage.

Here's what I did...


I cut my brisket into chunks that would fit nicely into a wide mouth pint canning jar, leaving an inch or so headspace. I sterilized my jars in a pan of water on the stove and simmered my lids and rings, keeping them all hot until I was ready to use them.


I put the chunks of brisket into the jars. Then, taking that little packet of spices, I divided it evenly among the jars of meat.


Once my jars were filled with meat and spices, I poured boiling water to fill the jars then, using a butter knife or one of those plastic gadgets that come in canning kits, I removed any air bubbles by inserting the tool down the sides of the jar between the meat and the jar.


I wiped the jar rims with a damp cloth (dampening the cloth with a little vinegar will help remove grease better than water alone!)... then finger-tightened my lids onto the jars.


I loaded the jars into my pressure canner and, following the instructions that came with my canner, I pressured canned the pint jars of meat at 10 pounds of pressure for 70 minutes.


After the canning process completed, I removed the canner from the heat and let the pressure drop to ZERO without hurrying the process... just let it sit. Then I carefully removed the canner lid (it's still super hot, so care must be taken!) and using my jar lifter, I removed the jars from the canner, setting them on a folded dish towel on the counter to cool... and seal... I love the PING sound of a successfully sealed jar! Corned beef and cabbage... here we come!


“A cabin with plenty of food is better than a hungry castle” ~  Irish Proverb


Canning Granny©2011 All Rights Reserved


Tuesday, May 3, 2011

Canning Bratwurst


Brats were on sale this week at the grocery store... I bought a few packages. I vacuum sealed some of them and put them in the freezer. But my freezer is not so big... and it's filled to overflowing with important things, like ice cream! So I decided to can a few of these Mega-Brats... here's how I did it...

First I browned the sausages a little in the oven... cooked them at 400 degrees for maybe 10-15 minutes, just to brown them and keep them from sticking together when I canned them, the canning process would cook them through, I just wanted a good brown on them.

I heated my wide mouth quart jars by washing them in the dishwasher and leaving them hot until I was ready to use them (my dishwasher gets HOT!) And I simmered my lids and rings in hot water until time to seal the jars.


Using tongs, I began loading up the jars with the brats... these brats were extra-long so had to squish and maneuver them a little to fit them in the jars, but I did it! I got five brats in each jar.


I wiped the jar rims with a damp cloth... with meats and the greasiness they possess, it's a good idea to dampen the cloth with a little vinegar, it helps cut the grease better than water alone.


I removed the lids from the simmering water using my magnetic wand gadget and sealed the jars with a fingertip tightness (not too tight, not too loose!)


Using my pressure canner's recommended directions for pressure canning meats (each canner is different, read and follow ALL safety and canning instructions carefully)... I pressure canned my brats at 10 pounds of pressure for 90 minutes.


After the processing, I removed the canner from the heat and let the pressure drop to ZERO without any outside influences... just let it sit and do its thing.

Then I opened the canner CAREFULLY... it's still hot, Hot, HOT!!! and removed the jars one at a time using my jar lifter... setting them on a folded towel on the counter to cool.


And to wait for the PING! of a successfully sealed jar!

Canning Granny©2011 All Rights Reserved


html, body, div, span, applet, object, iframe, h1, h2, h3, h4, h5, h6, p, blockquote, pre, a, abbr, acronym, address, big, cite, code, del, dfn, em, font, img, ins, kbd, q, s, samp, small, strike, strong, sub, sup, tt, var, b, u, i, center, dl, dt, dd, ol, ul, li, fieldset, form, label, legend, table, caption, tbody, tfoot, thead, tr, th, td { margin: 0; padding: 0; border: 0; outline: 0; font-size: 100%; vertical-align: baseline; background: transparent; } body { line-height: 1; } ol, ul { list-style: none; } blockquote, q { quotes: none; } /* remember to define focus styles! */ :focus { outline: 0; } /* remember to highlight inserts somehow! */ ins { text-decoration: none; } del { text-decoration: line-through; } /* tables still need 'cellspacing="0"' in the markup */ table { border-collapse: collapse; border-spacing: 0; }