Showing posts with label Chives. Show all posts

Wednesday, January 7, 2026

Spaghetti with chives pesto


This is as easy as it is delicious!

For the sauce you just need chives, salted cashew nuts, olive oil and cooking water from the pasta. Blend the lot and stir into the spaghetti (or any pasta). Decorate with chive flowers, if you wish.

Everyone is always amazed at the taste, and no one guesses that it is chives until I tell them. The colour is beautiful too!

 Photos and Recipes by Alessandra Zecchini ©

Wednesday, May 7, 2025

Soba with Vegetable Tempura - and the Leftovers for the Second Night


I don't fry much these days, but I love fried food, like tempura. I made the batter quickly with just flour and beer, nothing special, it was an impromptu dinner. I fried pumpkin, red onions and nori seaweed (in that order). Nori is great to use at the end to pick up all the batter - no waste in my kitchen :-).

I add salt to the fried pieces as I take them out of the hot oil to drain on kitchen paper. Quite a bit of salt, actually, as I don't use any in the batter.

In the meantime I prepared the cold soba. One thing that I quickly learned is that soba is not cooked like pasta. The only thing in common with pasta is that you should use the biggest pot you have, and have enough water as if you were to cook spaghetti. But don't add salt!

Bring the water to boil: add the soba, stir gently. When the water starts to froth add half a cup of cold water and lower the heat. Do this three times. After the third time your soba should be ready. Drain and collect the cooking water to make soup, if you like (full of starch and vitamins and minerals) and place the soba in a bowl with ice water. Or just rinse under cold water (I prefer this way, the soba may not be perfect but I cannot bear to loose anymore starch!

For the dipping sauce, usually I make a kombu broth, but I didn't have any kombu, so I used the water from the soba, to which I add soy sauce. Then this time I used chopped chives, ground ginger, and yuzu citrus with chili paste (wasabi is an alternative). Put everything in your dipping bowl and enjoy, and if there is some sauce left at the end, just add more soba water and drink it like a soup.

The day after:


This meal is even better in my opinion. I had some soba noodles and tempura leftovers, so I just made a light vegetable broth and poured it over the noodles. I warmed up the tempura and put it on top and added fresh chives. Seasoned with soy sauce and Japanese chili.


Photos and Recipes by Alessandra Zecchini ©


Saturday, March 28, 2015

Zucchine ripiene - Stuffed zucchini


I have two zucchini plants in the garden, one yellow and one green. They produce a lot, the yellow three times more than the green (I don't know why) and we have been eating zucchini in 100 different ways: grilled, sautéed, fried and tempura, in soups, with pasta… fortunately they are very versatile!
Here I had a few big ones (sometimes I don't pick them for a day and they double overnight! But the important thing is that they don't get to the 'marrow' state - too big and bitter) so I decided to stuff them.
I cut them into two and scooped out the flesh. Then I baked the shells upside down with a pinch of salt and a drizzle of olive oil for 15 minutes. In the meantime I blended the zucchini flesh and then added chopped parsley and chives (about 1 tbsp), salt and pepper, a tbsp of olive oil and enough breadcrumbs to make a stuffing (add the breadcrumb one tbsp at the time so that you don't add too much). The zucchini were fresh from the garden and therefore they were very moist, so I needed more breadcrumbs, but if you buy them they may be a few days old and more dry, so less breadcrumbs are needed. I removed the zucchini from the oven, turned them up and filled them tightly with the stuffing. 
In the tray you can see also some zucchini slices, these where from 'regular' size zucchini, and I used them as side veggies.


Bake everything until the stuffing has a nice golden crust and serve.

Photos and Recipes by Alessandra Zecchini ©

Saturday, September 13, 2014

A basket of veggies from the garden to make soup


Vegetable soup with: yellow zucchini, green zucchini, plum tomatoes, parsley, chives, celery,
carrot, silver beet, onions. The onion are really small but I can't grow them any bigger in the bush so
I grow them in pots.
Chop, add water (rain water for me, so this too is free!) and salt, then cook. You can add a bit of
extra virgin olive oil at the end.
Photos and recipes by Alessandra Zecchini ©

Sunday, April 29, 2012

Puy lentil, red onion and herb soup


Puy lentil, red onion and herb soup

Ingredients
300 g puy lentils
1 bay leaf
1 pinch of salt
1 red onion
2 tbsp extra virgin olive oil (plus more for serving)
1 sprig sage
1 sprig rosemary
1.5 l vegetable stock
1 tbsp freshly chopped parsley and chives

Served with homemade onion ciabatta


Rinse the Puy lentils and place in a pot with plenty of water and one bay leaf. Cook for about 25 minutes, then add one pinch of salt and stir. Drain, discard the bay leaf and rinse again. Chop the red onion and place in a capable pot with the oilve oil, sage and rosemary, and sauté for a few minutes, then add the lentils, followed by the vegetable stock. Simmer for about 30 minutes, and just before serving add the chopped parsley and chives and another drop of extra virgin olive oil.

Photo and Recipe by Alessandra Zecchini ©

Friday, April 20, 2012

Aparagus Inari Parcels


I really really like the fried tofu parcels used to make oinari-san, I wouldn't know how to make them, a Japanese friend told me ages ago, but it seemed quite involved... maybe one day, but for the time being they can be bought in Japanese/Asian stores :-). This pack contained 16 tofu parcels. 


The parcels are usually filled with sushi rice, but they can also be uses as "containers" (see the image on the packet) and I really liked this brand: not a single parcel broke when I was opening it! I decided to used them with rice and asparagus. The asparagus were simply steamed, and then I cut them and placed then in a bowl with the liquid of the tofu parcels (they are sealed in an sweetish sauce which I thought was a waste to discard).


Wash the sushi rice (or Japanese rice) several times in cold water, until the water runs clear, and then cook it by absorption. The doses are about 1 and 3/4 (three quarters) cups of sushi rice for 2 cups of water, but that depends on the type of pot. You need a pot with a good lid, or you will loose too much steam. I kind of regulate myself by ear now, since I know my pots and pans. Bring the pot to boiling point, lower the heat and simmer until all the water has been absorbed. Once the rice is ready pour it into a bowl and stir it with a wooden spatula, cooling it with a fan if you can. I then add some ready made sushi vinegar, about 2 tablespoons, but this is my personal taste. If I don't have sushi vinegar I use 2 tbsp of rice vinegar, a little sugar and a little salt (to taste, and I don't like to use too much sugar or salt!).


I filled the parcels with rice and asparagus and wrapped them up with a chive. 


Photos and Recipes by Alessandra Zecchini ©


Tuesday, July 12, 2011

Vegan Thai Salad Rolls with Dipping Sauces


This is Vegan, gluten free, fat free, light, and yet fully balanced and filling (or at least, it is for me :-)). Best consumed with beer, or with a glass of chilled white wine.


Vegan Thai Salad Rolls


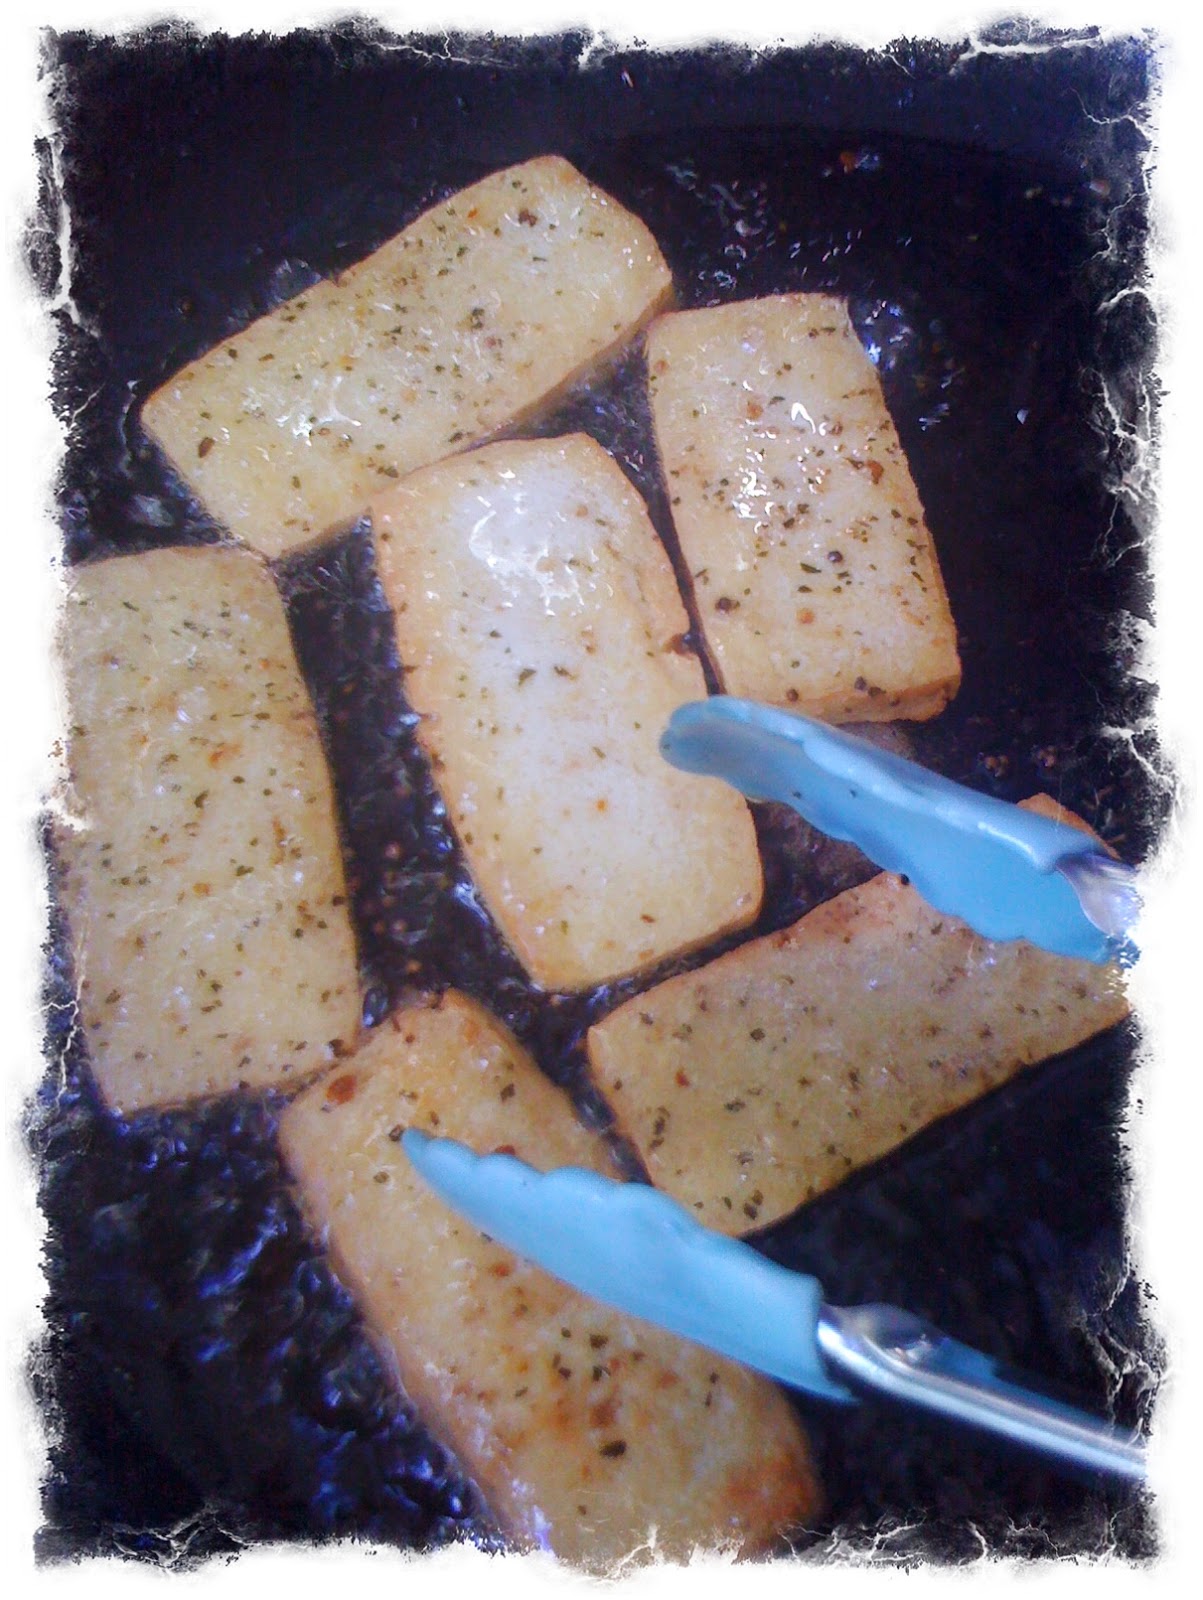
On Saturday I went to the Oratia Farmers Market and bought some smoked salt and garlic. The smoked salt is really nice and mixed with a few spices and herbs, so I thought of using it to marinate some organic tofu to put inside my Thai salad rolls.


I cut the tofu into thin strips and then I sprinkled the salt on. After 30 minutes I turned the tofu slices over and sprinkled the smoked salt on the other side too. After other 30 minutes I lightly fried the tofu slices with rice bran oil. I put it on some kitchen paper to remove the excess oil, and set aside.


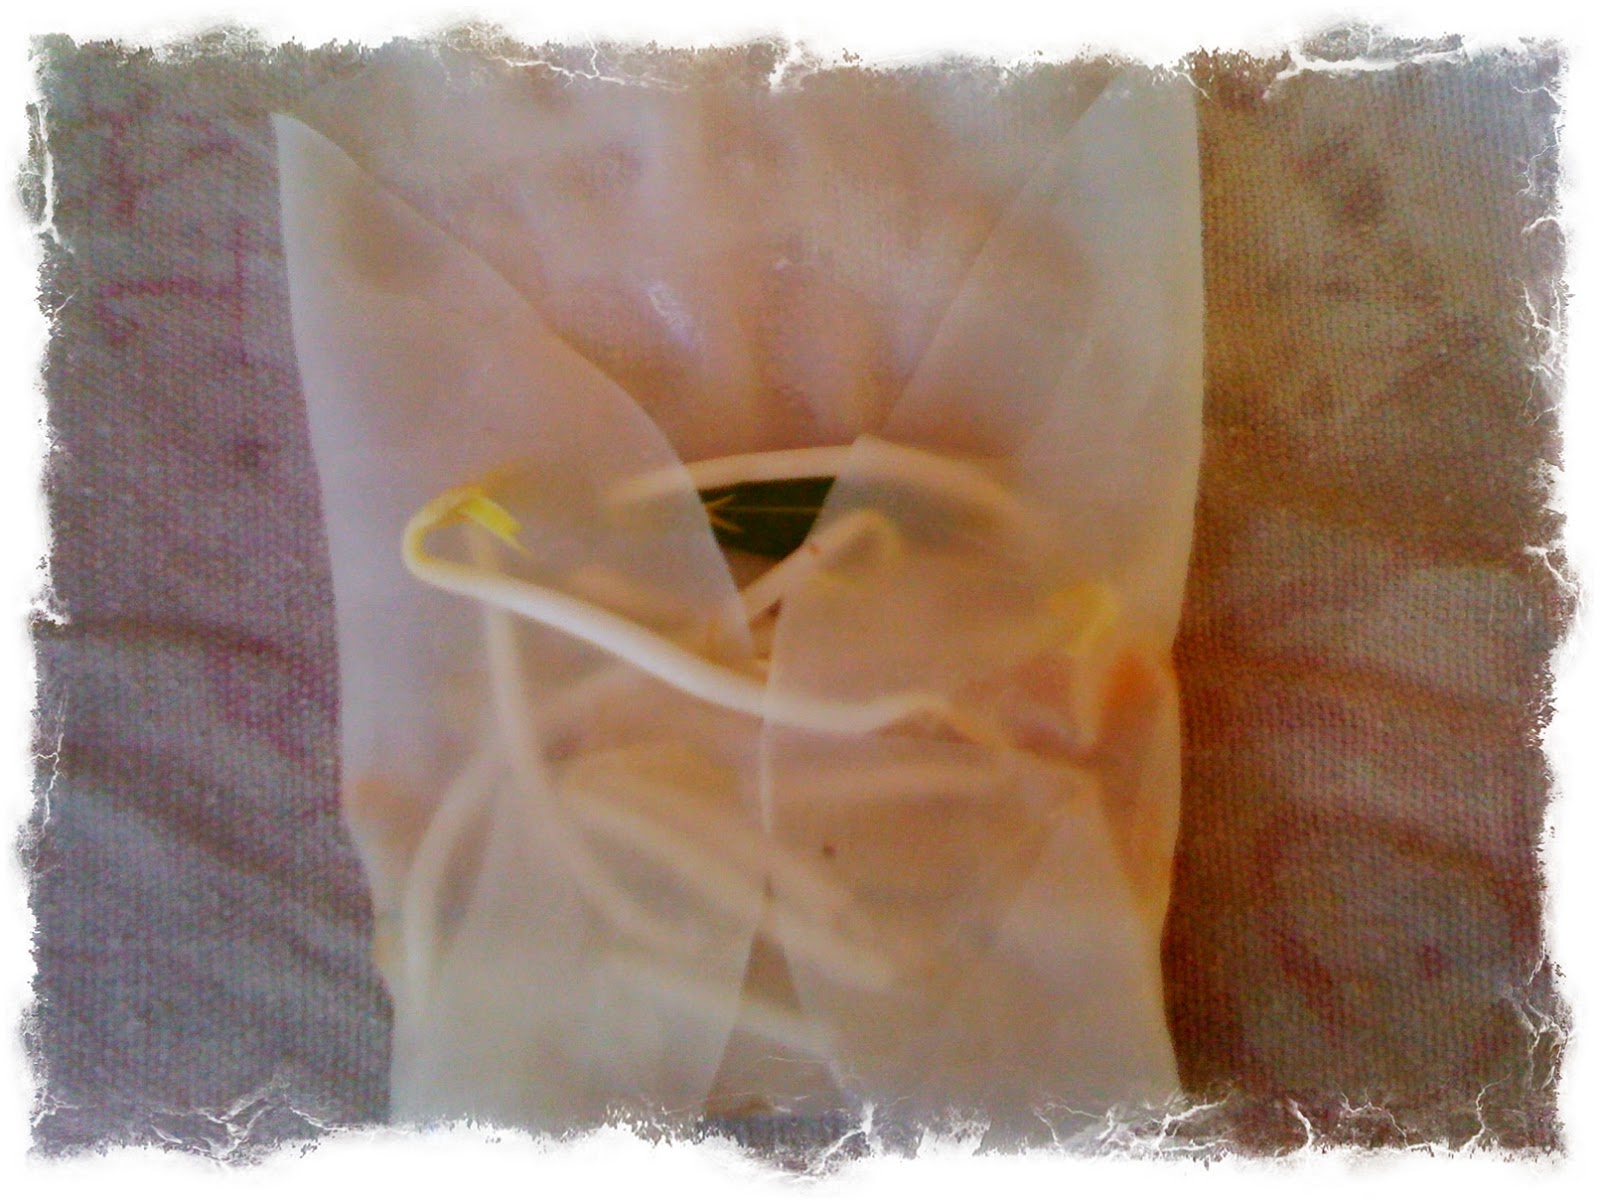
I used Thai rice paper wrap, which are gluten free. You need to soak the rice papers for a few minutes in warm water (five at the time) and then place them flat on a dried tea towel.


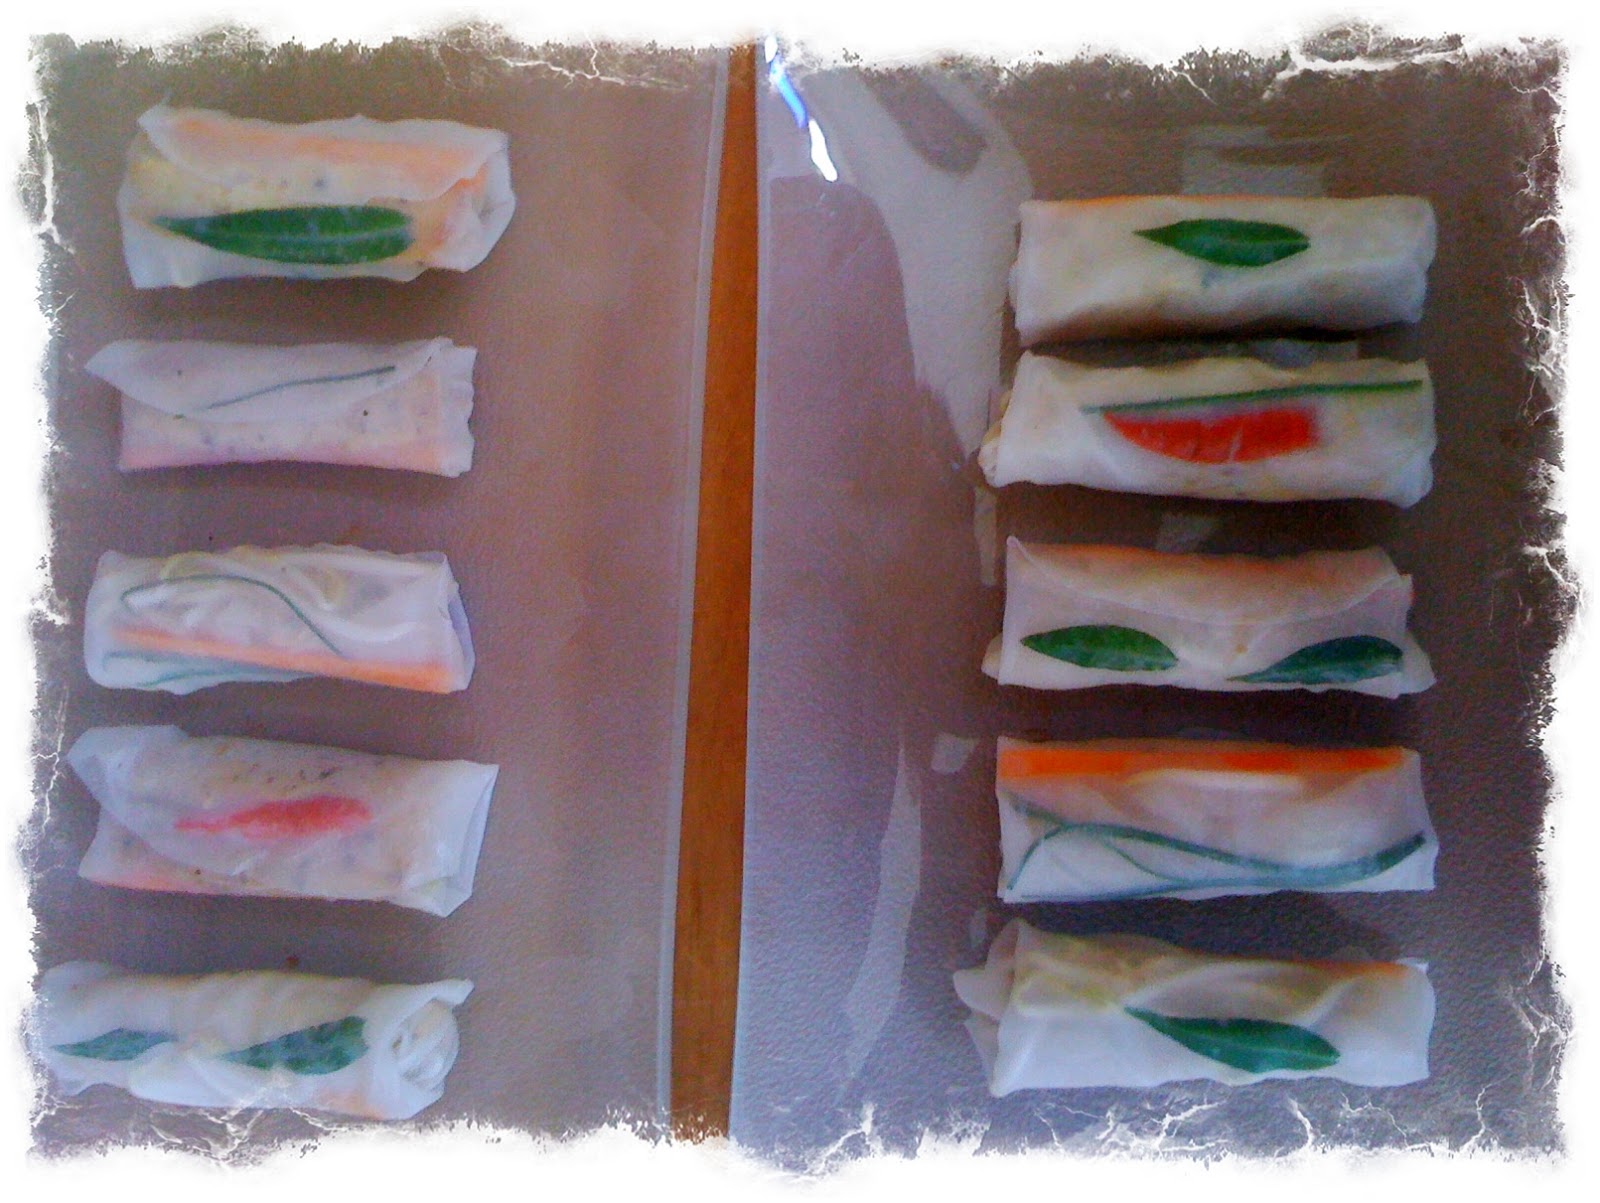
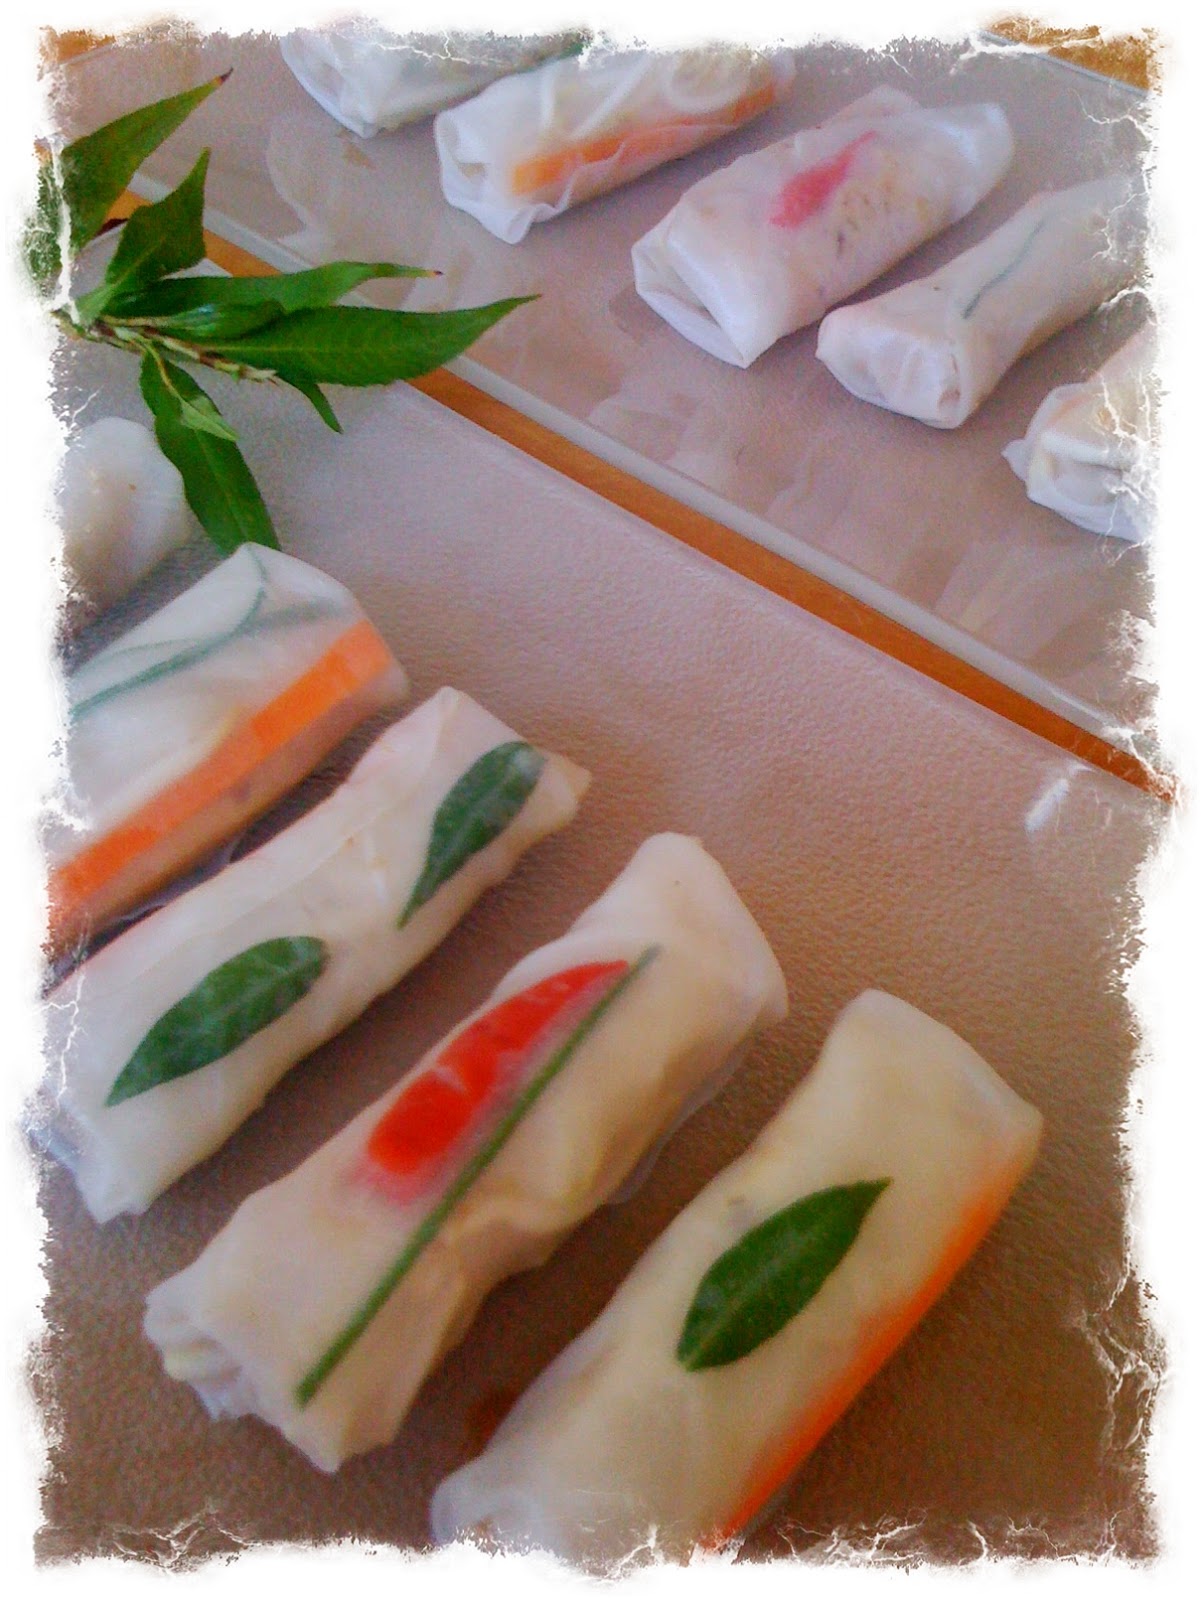
For the filling I also used some Thai chillies in brine, but not in all of the rolls, for others I used leaves of Vietnamese mint, but you can also use Thai basil and Thai mint. Then I used thin slices of carrots, chives, bean sprouts, and of course the tofu (each slice broken into two pieces for easy rolling).
You can also use shredded lettuce, and any other vegetable cut into Julienne strips.


Place the tofu and vegetable on the rice paper. Keep the decorative leaves/chillies a little to one side so that when you roll up your rolls they will be more visible.


Roll the rice paper, folding the sides in as you go, to seal the roll. The wet rice paper is sticky so it will seal well!


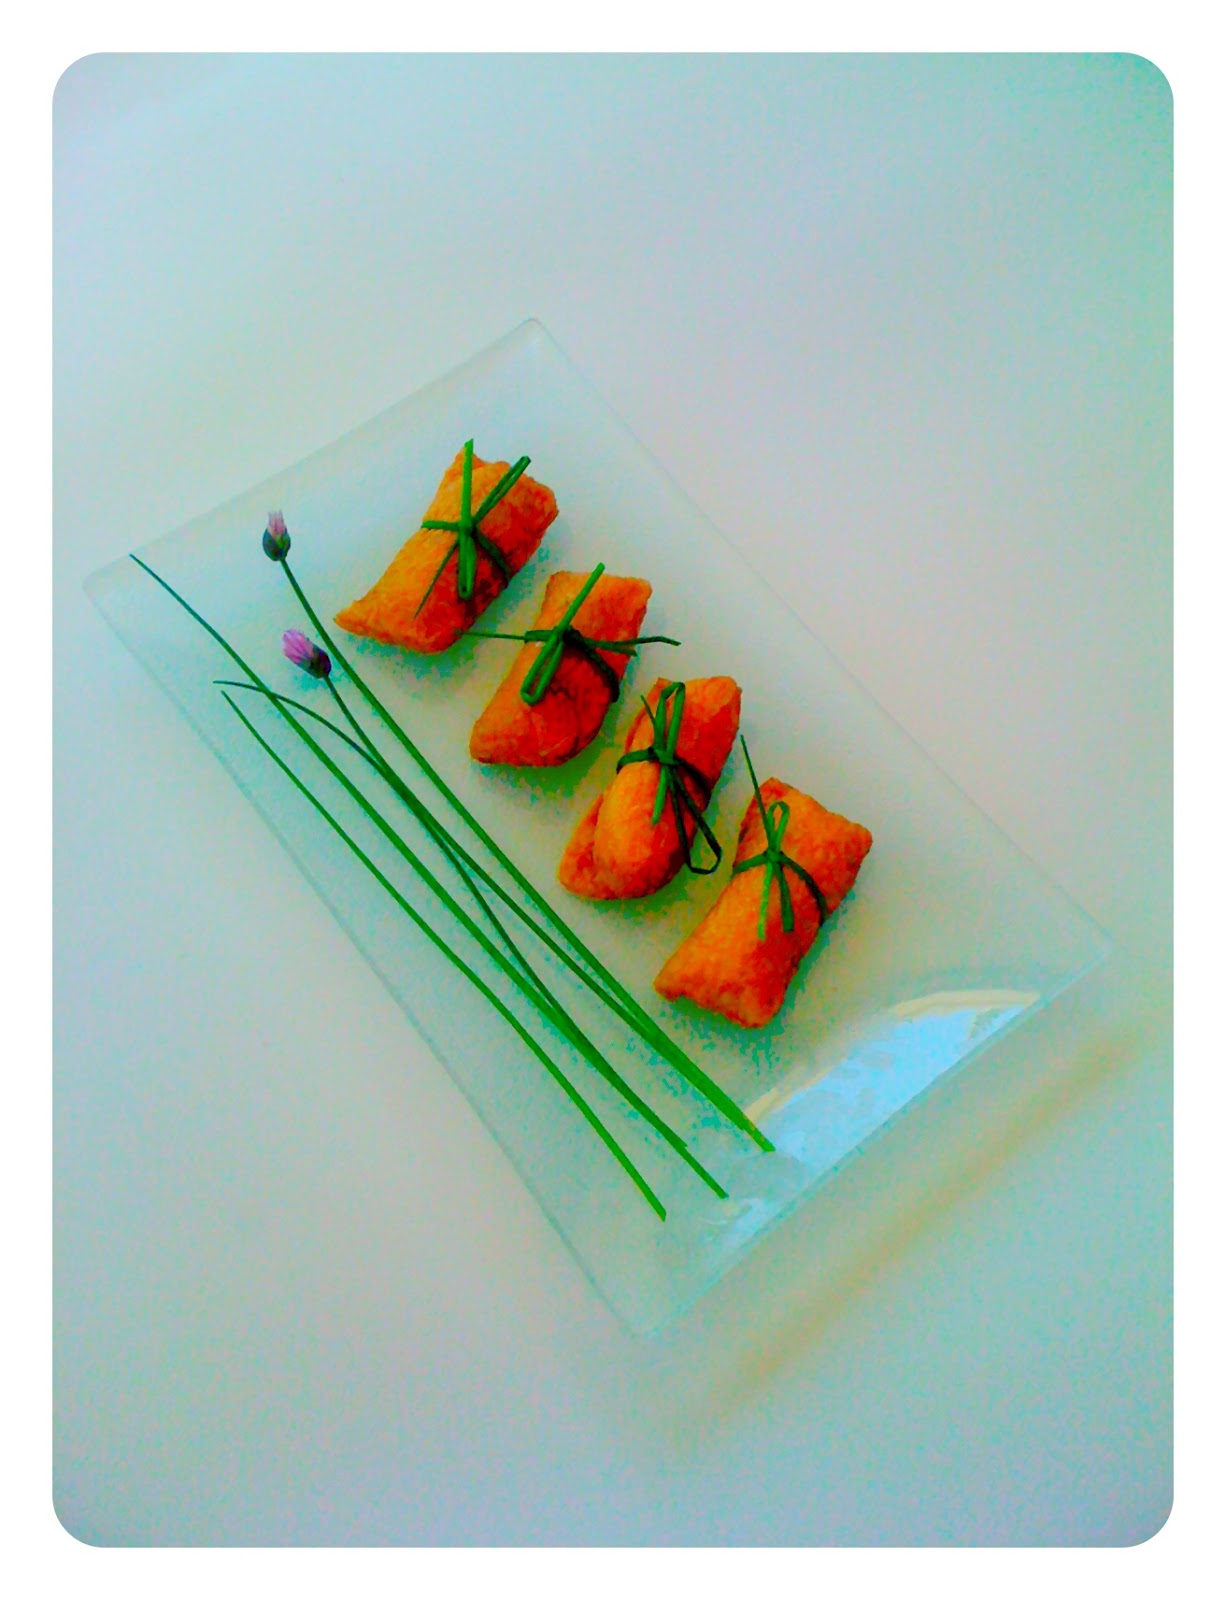
Herbs and chillies makes nice decorative motifs, and they are edible too. Make the most of them!

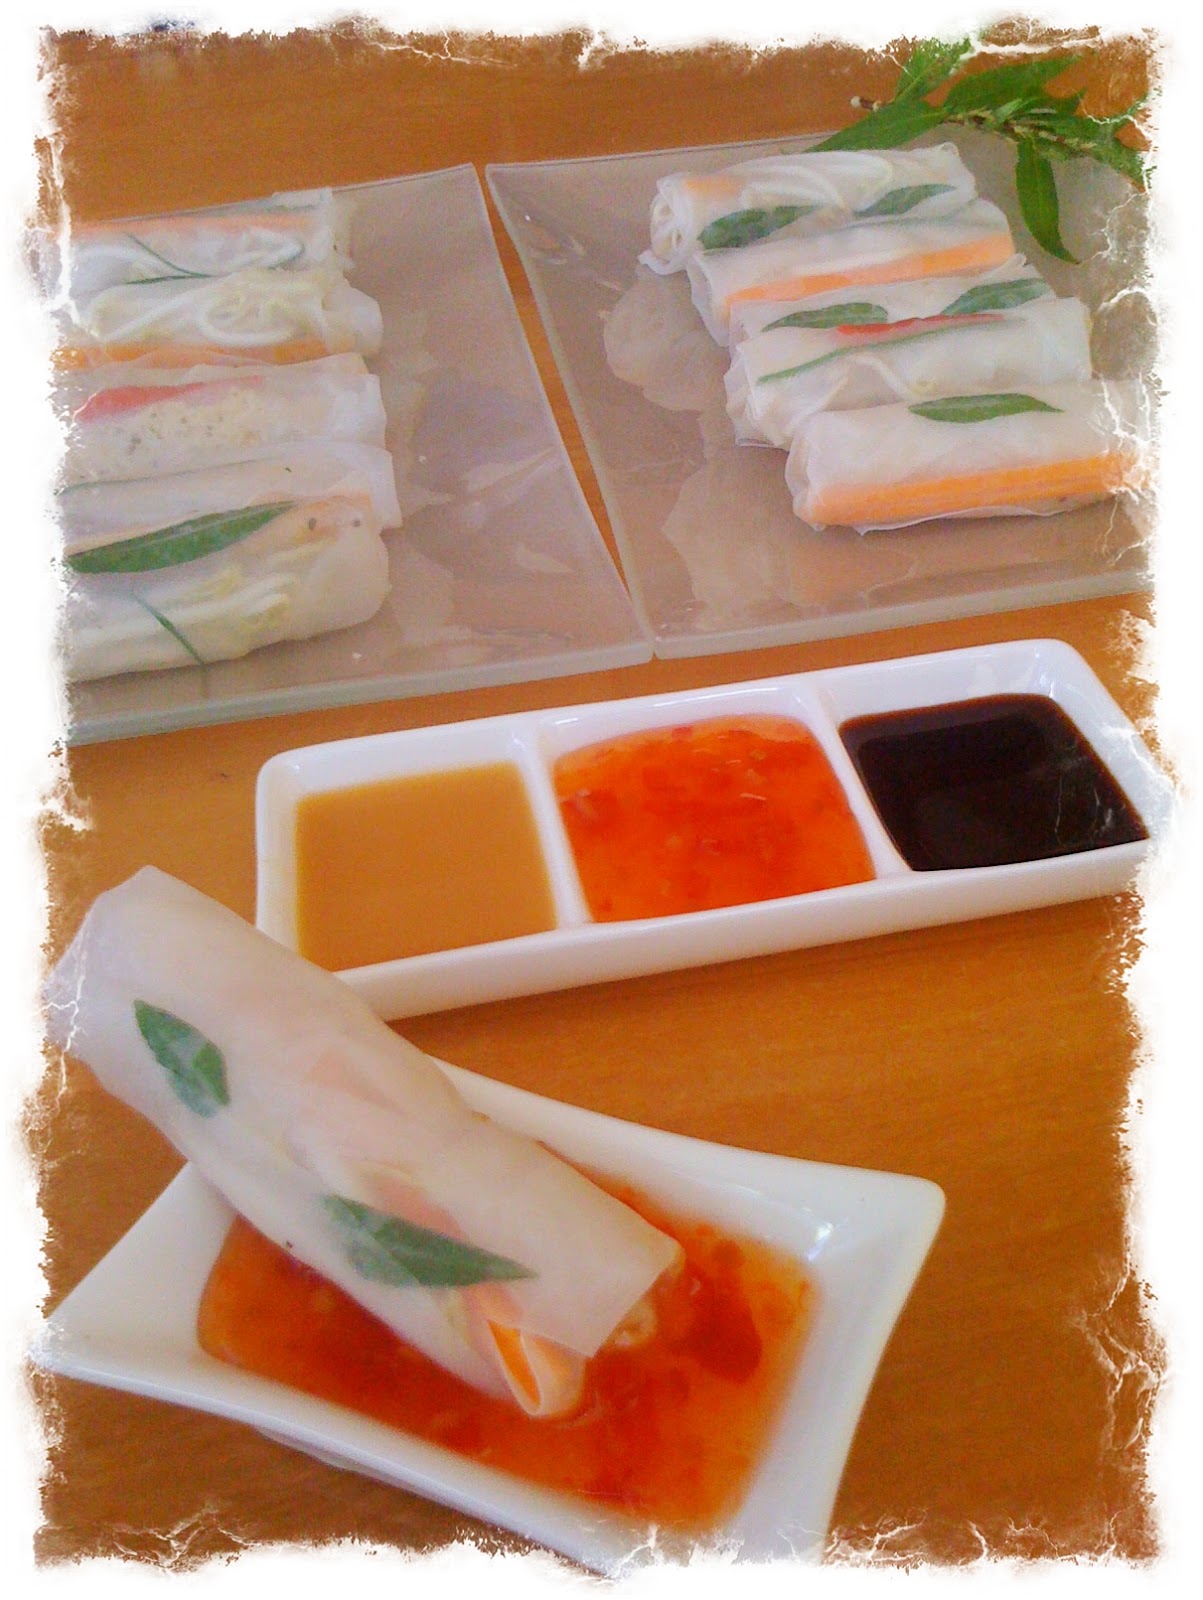
Place your rolls on serving plates, 5 or 6 per child (don't overdo it with the chillies for young kids)
and 7 or 8 per adult.


To serve I used three sauces: soy sauce, Thai sweet chilli sauce, and miso sauce (just a little miso paste diluted with hot water). Each sauce makes the rolls taste quite different!


My little boy loves Thai sweet chilli sauce, so he just had his own little dipping dish. Eat with fingers!


Photos and Recipes by Alessandra Zecchini ©


Saturday, January 1, 2011

Year of the Rabbit, Sushi Rabbits


Happy New Year


I would like to wish each and everyone of you a Happy New Year. Buon Anno!


To make the sushi rice you can follow the recipe here. I have a Sushi rabbit stamp from Japan, but you can also use a cookie cutter, if you have one (maybe among your Easter's stuff?).


I have to say that the sushi rabbits looked really nice and stylish even plain! I would have them plain for a more 'formal' dinner :-). But today we have little faces: I used borage flowers, cucumber, chives, takuan, (Japanese pickled daikon), Ume (Japanese pickled plum), and black sesame seeds.


And then it was my daughter's turn, and she also used some tiny basil leaves. We had so much fun making these, and I hope that you like the idea!


Photos and Recipes by Alessandra Zecchini ©