Showing posts with label Christmas. Show all posts

Tuesday, December 5, 2017

Christmas Fruit Platter with Balsamic


Traditional Balsamic Vinegar of Modena goes well with fruit, and there is also a Balsamic cream you can buy which is less expensive and ideal to decorate plates.

 Photos and Recipes by Alessandra Zecchini ©

Saturday, December 17, 2016

Sugar Christmas decorations


On Sunday we had the Dante Alighieri Society Xmas Market (Mercatino di Natale), and I made lots of sugar decorations for sale.


Ideal for 'baby's first Christmas' trees, sweet pastel colours, they can be used for Christmas cards too!

White and hand painted with a thin brush

Chocolate fondant, they smell great!

Green and silver for the trees


I used fondant (white, chocolate, red and green), corn flour, cookie cutters, food coloring (not cochineal!) and a thin brush to paint. We sold the lot!

Photos and Recipes by Alessandra Zecchini ©

Friday, December 19, 2014

Raw, vegan and gluten free sweet for Christmas? Homemade marzipan!


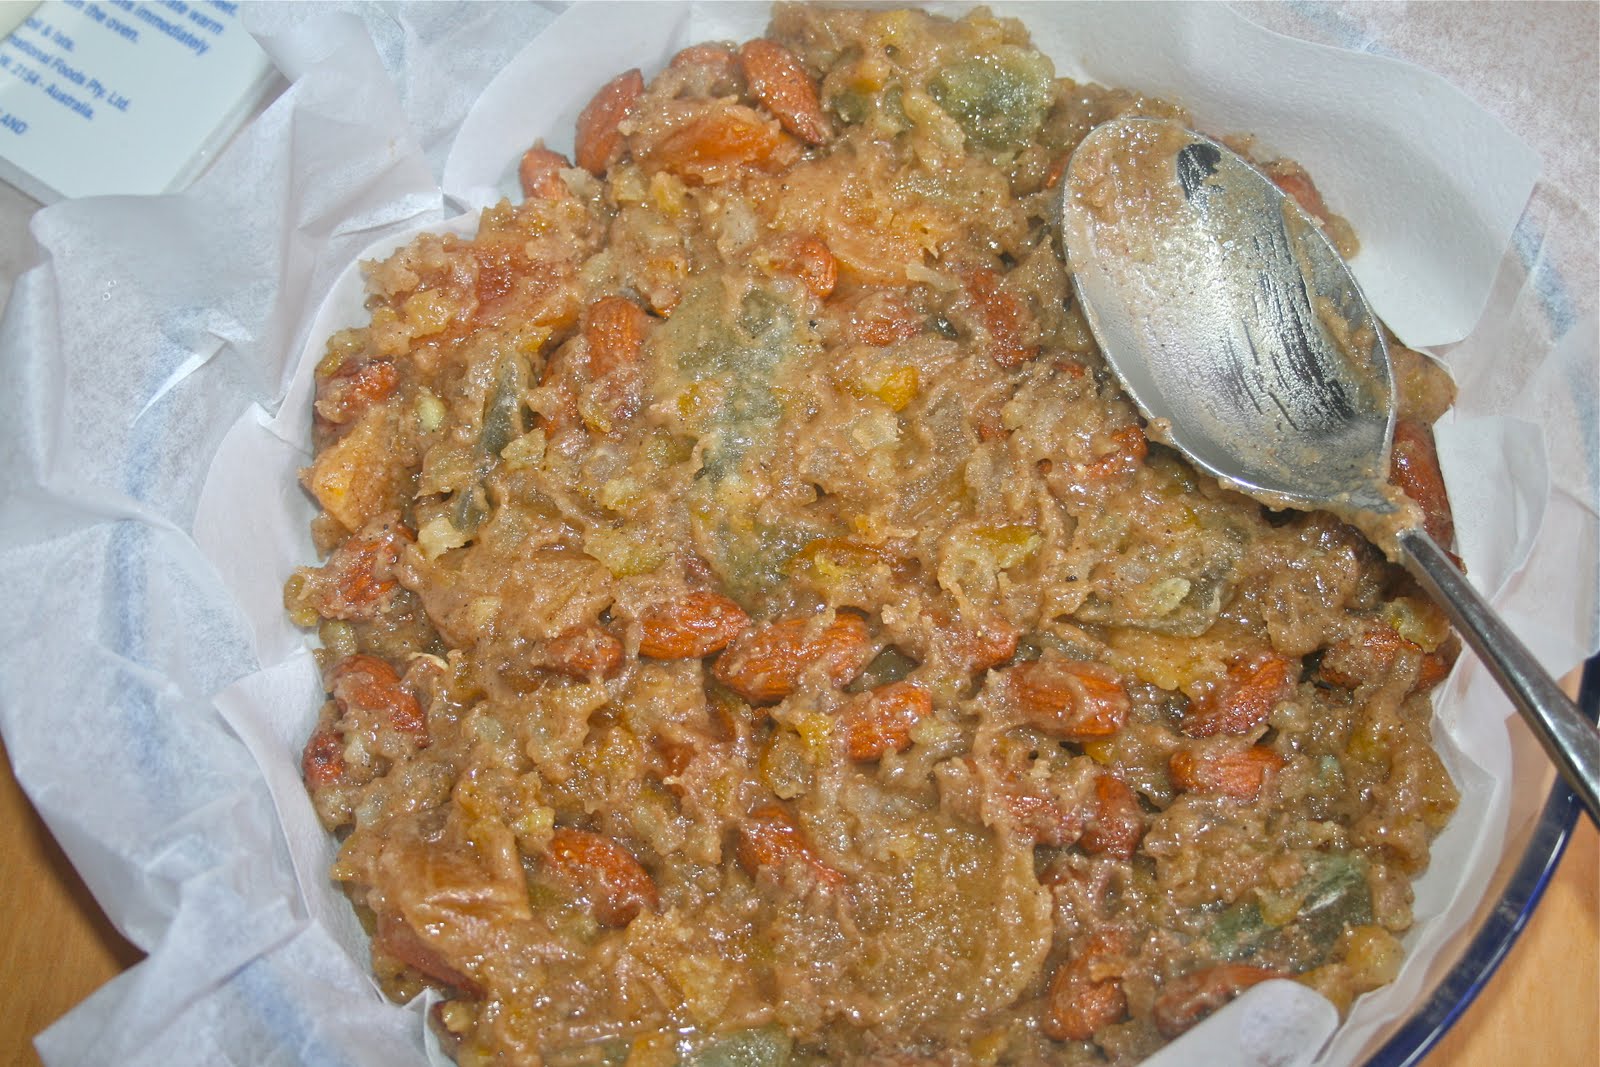
Marzipan is the perfect sweet for the Holiday Season, and this is RAW, VEGAN and GLUTEN FREE, so it seems to cover most of the current food trends :-). Click here to see the recipe and step by step images (including how to use apricot kernels). Note that for colouring this time I didn't use berry juice but Fresh As raspberry powder, and also quite a bit of spiraling powder for a darker green hue. The nuts on top are optional, of course.


Photos and Recipes by Alessandra Zecchini ©

Friday, December 9, 2011

How to make (Vegan) Rose Turkish Delights (Lokum) step by step


Before I start I would like to say that I don't have a sugar thermometer, essential if you are really into confectionery, and that I didn't use much sugar for these Turkish delights. Many recipes use much more sugar, and it is not that I wanted to make a low sugar treat here (it is still pretty sweet), it is just that making it at home really makes me realize how much sugar there is already in my diet, and if I can have something with a little less... well, why not!

This method is 'home friendly' i.e. these can be made at home with very little effort and equipment, and the recipe comes from my book Sweet As... where I also have the recipe for lavender and orange blossom Turkish Delights.

Ingredients

1 l water
300 g sugar
2 tbsp lemon juice
100 g cornflour
1 tbsp frozen raspberries
1 tbsp rose water
icing sugar (very little) and cornflour (lots) to dust.


In a pot put half of the water (500 ml) with the sugar and lemon juice and bring to the boil. Boil it down until you get a light syrup (here those with the sugar thermometer will go to about 240 degrees, I just waited for the mixture to thicken a little). In another pot mix the remaining water with the cornflour, then bring to the boil and simmer, stirring, until the mixture thickens. Add the hot sugar syrup and stir well.


Now let the pot simmer, without stirring, for at least 30 minutes. More would be good, if you are patient, 45 minutes to one hour is more like the shops do it, but in a home kitchen looking at a bubbling mixture is a little worrying. Still, the more you cook it the harder your Turkish Delights. At the end add a tbsp of rose water, and to colour it, since I try not to use artificial colouring, a few raspberries. The berries will 'melt' in the hot mixture and the little seeds are quite pretty, I think. If you don't like the seeds, just pass the berries through a sieve, and adde the juice only. Pour the hot mixture into a square or rectangular tupperware or similar plastic container (easy to detach the solid block after it sets) and let it cool down and set overnight.


The day after tip out your 'candy' block and cut into pieces. I now understand why when you buy lokum it is full of white powder: it takes lots of cornflour to keep it! To dust it I use a mixture of cornflour and very little icing sugar: if you use too much icing sugar the sweet may 'sweat' and become all sticky! Another problem is humidity: it is very humid here in the Auckland bush, if your sweets seems too 'wet' after cutting them, place them on a oven tray and bake them at 50 on fan for a little to dry. Store them in layers divided with paper, and dust regularly with a mixture of cornflour and icing sugar to keep them dry. Eat within a few days. Turkish Delights are Vegan and Gluten Free. Next post will be about hazelnut Turkish delights :-).


Photos and Recipes by Alessandra Zecchini ©


Wednesday, December 22, 2010

How to make Marzipan Fruit


It is raining in Auckland today, but the bush looks happy and green, and the water tank is filling nicely (yes, we drink rain water!). It is also the last day of school for my daughter, holiday mood in the air, Xmas trees alight. The boy is already home, with a friend who is staying for a sleep over. They are playing with lego: domestic bliss for me!

Yesterday I posted about making your own marzipan, and today I'll show you my little fruit.
For the marzipan recipe click here, and for the colours I used some spirulina powder dissolved in hot water, and some juice from berries.


Shape the fruit with your fingers, you can either colour the marzipan before, or you can paint it later using a small brush, or opt for a combination of the two for a stronger colour.


For the stalks I used the smallest cloves that I could find, but this is because I made some miniature fruit! I like miniatures, in a past life I am sure that I belonged to a Jane Austen world where ladies painted miniatures and embroidered delicate patterns (or so I wish!).


To show you the scale of the fruit I put a NZ dollar coin in the mini basket. The kids didn't have the heart to eat the fruit yet: they told me that it is too pretty! But they will get over that soon!


Photos and Recipes by Alessandra Zecchini ©

Tuesday, December 21, 2010

How to make marzipan sweets


This is another recipe from my book Sweet As, and something that I love to make for Xmas.
I would like to say that for marzipan you should get the best almonds around, natural, but here in New Zealand the almonds taste different from the ones in Italy. They are imported, not sure where from most of the time, but they are not top grade almonds.

Still, with a few tips, you can make your marzipan taste great even with 'regular' almonds! Buy them natural, not blanched, you need to blanche then yourself or the result will be too dry.


To blanch them you need to put them in boiling water for a couple of minutes, and then add cold water and take the skin off, one by one. For this recipe you will need:

200 g almonds
100 g icing sugar
5 apricot kernels.


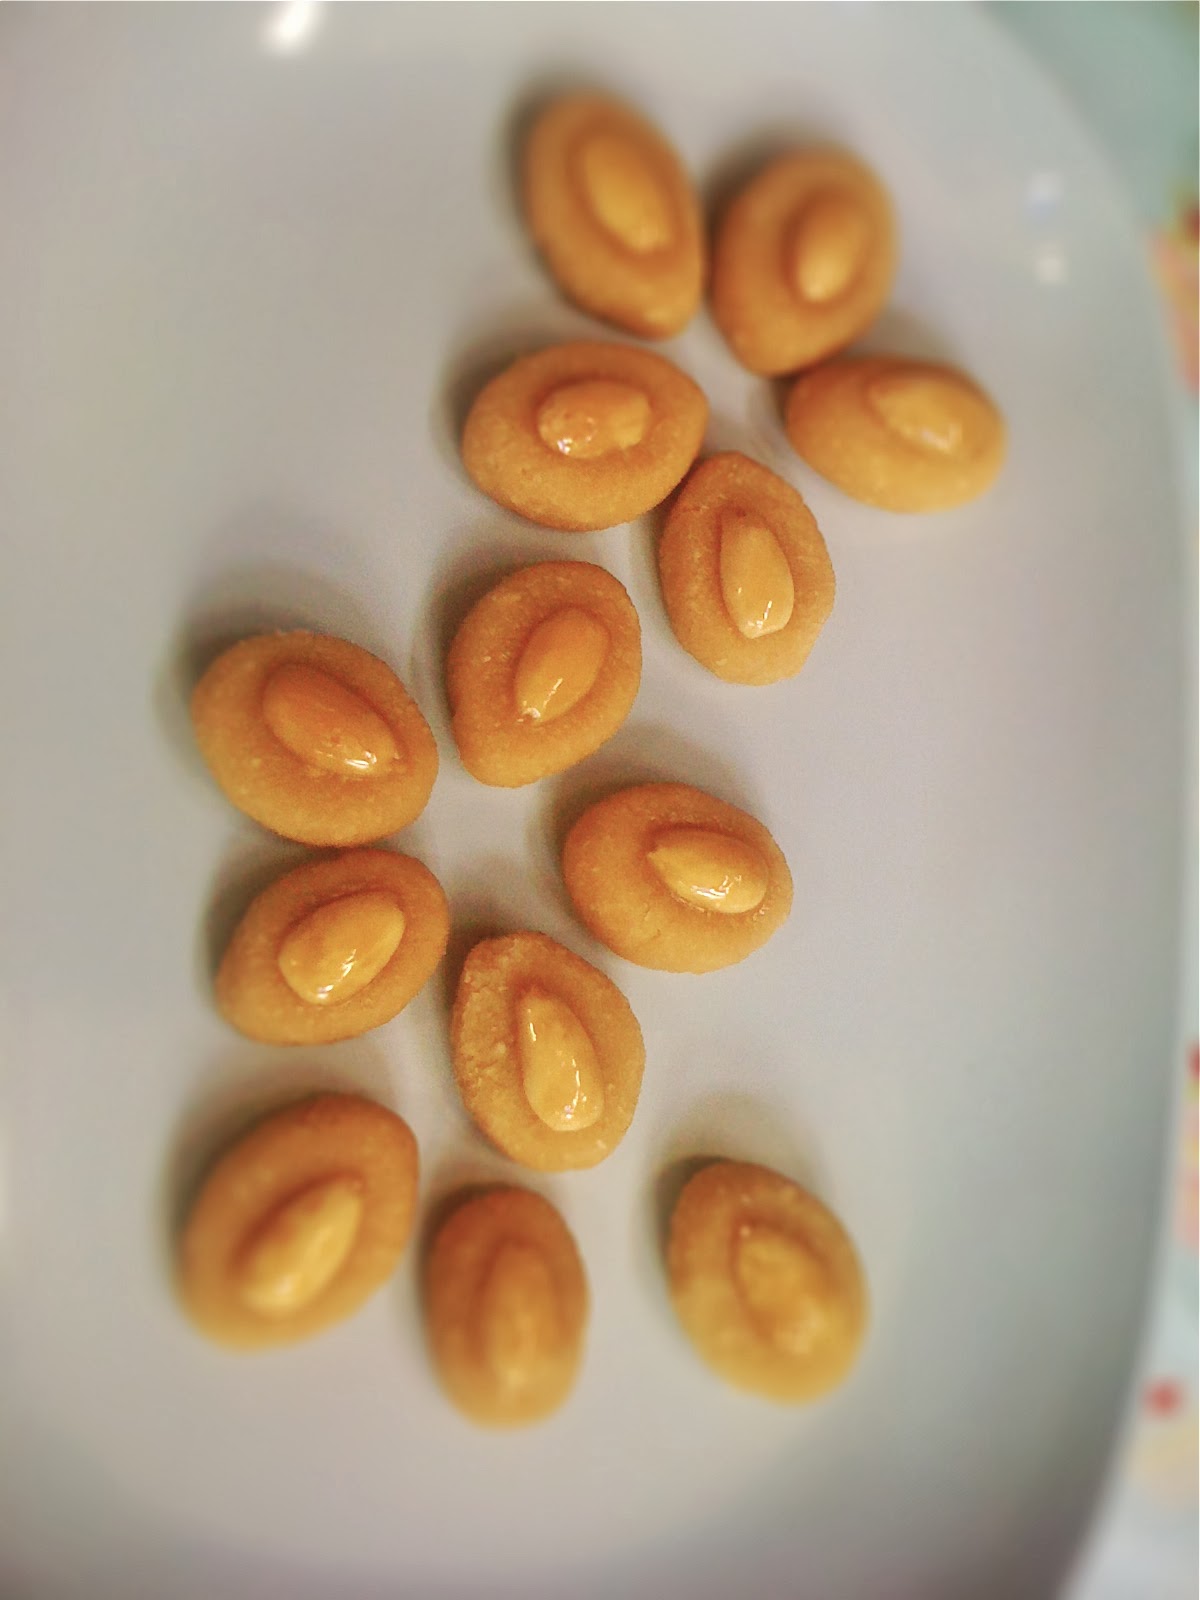
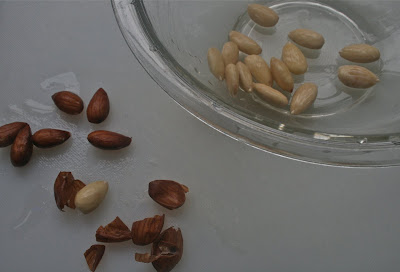
As I was saying before, the almond here have little taste, so I like to collect the stones from apricot and get the almonds out. They are a real pain to crack! In the photo above you can see apricot stones and kernels.


The apricot kernels too need to be blanched, in fact the skin is poisonous! And you should not eat too many, 5 for 200 g of normal almonds is what I use, and they give the marzipan a nicealmondy taste. In the photo above you can see an apricot kernel (left) , and a normal almond (right). Try and taste an apricot kernel, they are bitter, but more aromatic.


Blend the blanched almonds and apricot kernels, still wet from blanching, until they are very fine, almost a paste. You may need to do this a few times, scraping the sides of the food processor.


Place in a bowl with the icing sugar and mix, first with a spatula, and then with your hand, like for a dough. At first it will seem dry and crumbly, but then it will all come together in a paste.


And here you have it, almond paste to work with. If you like you can also add a little grated lemon zest, or use vanilla sugar for a delicate floral hint.


You can colour your marzipan. I like to go for natural colours, so I made green with spirulina powder dissolved in water, and red with berry juice.


Roll and cut, like for gnocchi, and then shape with your fingers. For my main sweets I made simple shapes, but you can make fruit (on the blog tomorrow!!).


To top the marzipan with fruit I used more blanched almonds and pistachio, plus some walnuts. I made a syrup with a little sugar and water, and when hot I put the nuts into it to coat them and make them shiny and sticky. Then I placed a nut over each little marzipan sweet (I used tweezers for this, as the sugar was still hot!).


Ready to be eaten, and pretty too! A perfect Vegan and gluten free Christmas treat! And you can also use it to stuff dates and dried figs, or cover it with bitter dark chocolate.


Photos and Recipes by Alessandra Zecchini ©


Sunday, December 19, 2010

Vegan Panforte, an Italian Christmas Treat!


As a child I always had panforte for Christmas. It came in a packet, and my brother and I loved it: it was special. Then I moved to London, and panforte became an even more expensive luxury. Let's not talk of Japan and New Zealand! So about a decade ago I decided to make my own.


A made a few variations this year. In a recent comment Yari from Il cucchiaio di legno blog told me that industrial Vegan Panettone is not exactly 'nice'. I thought that it is hard to be a Vegetarian or a Vegan at Xmas. Panforte is almost Vegan.... it has honey in it. It may be interesting to know, for some of you, that in New Zealand there are some Vegans who eat honey, in fact they are bee-keepers. They say that they don't kill the bees when collecting honey, and that the insect are vital if we are to get fruit in this country. But NZ must be an exception, for all I know Vegans in other parts of the world do not eat honey, so I decided to make this panforte with golden syrup, for Yari :-)

Ingredients

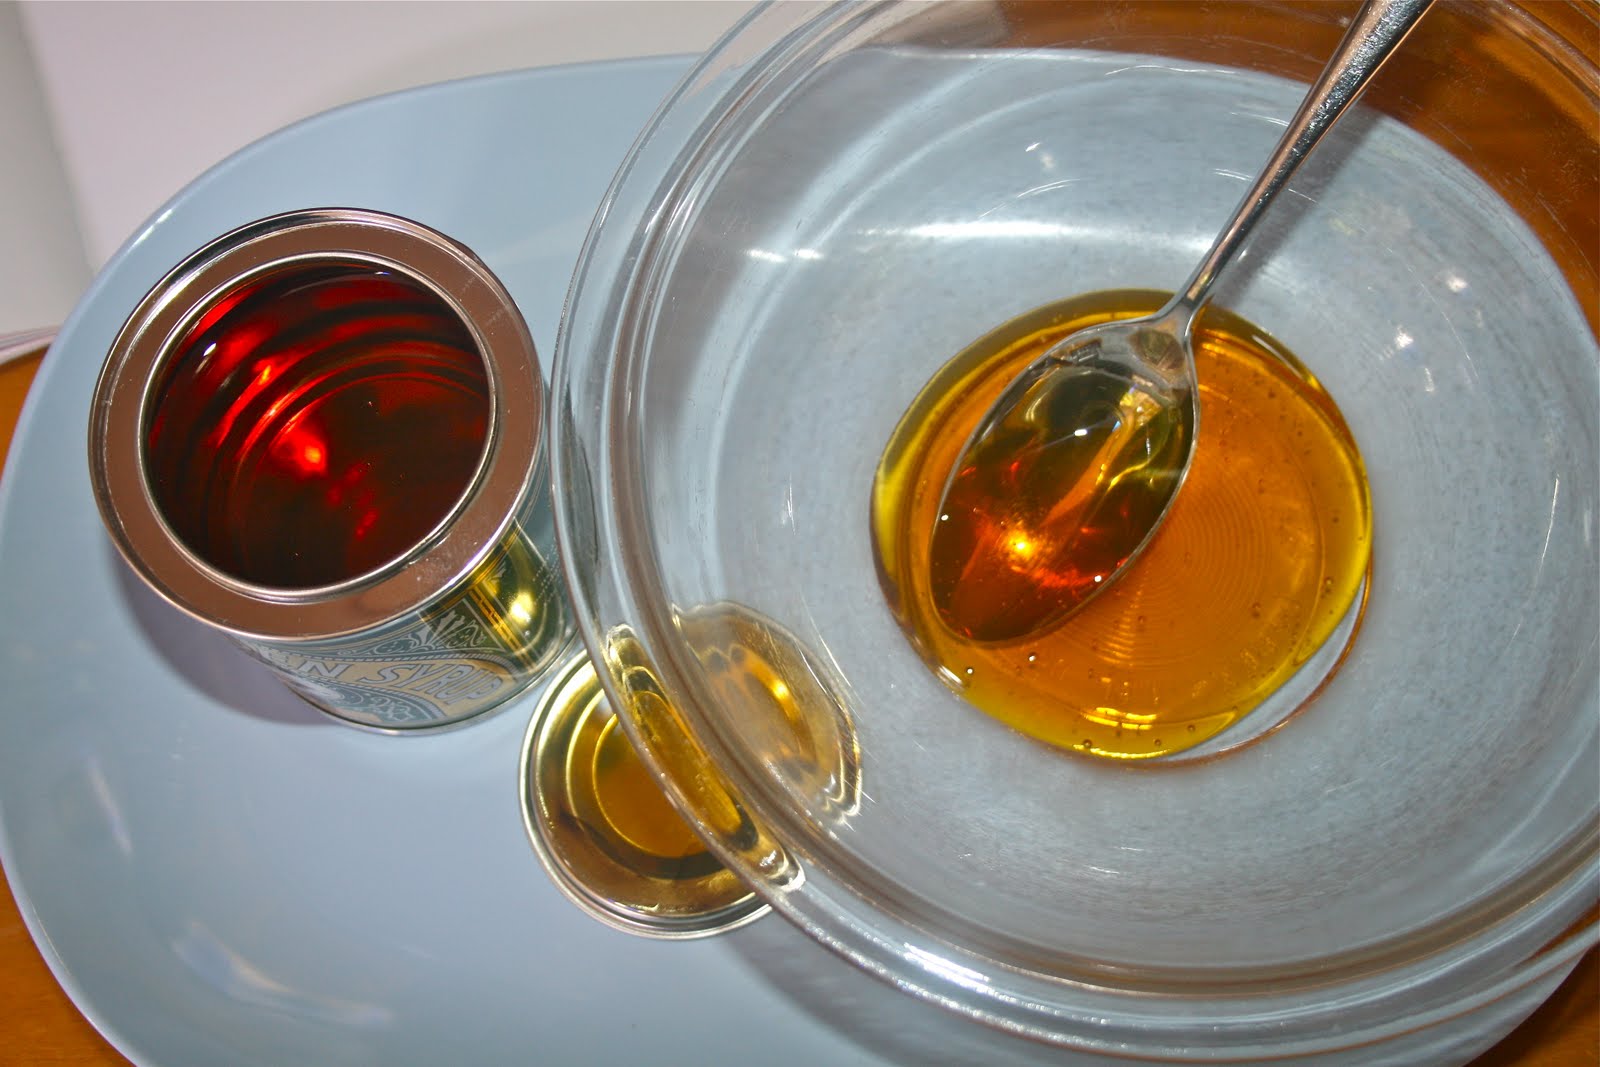
Golden Syrup, 2 tbsp

Vanilla flavoured sugar, 2 tbsp

Vanilla Icing sugar, 2 tbsp, plus more for dusting

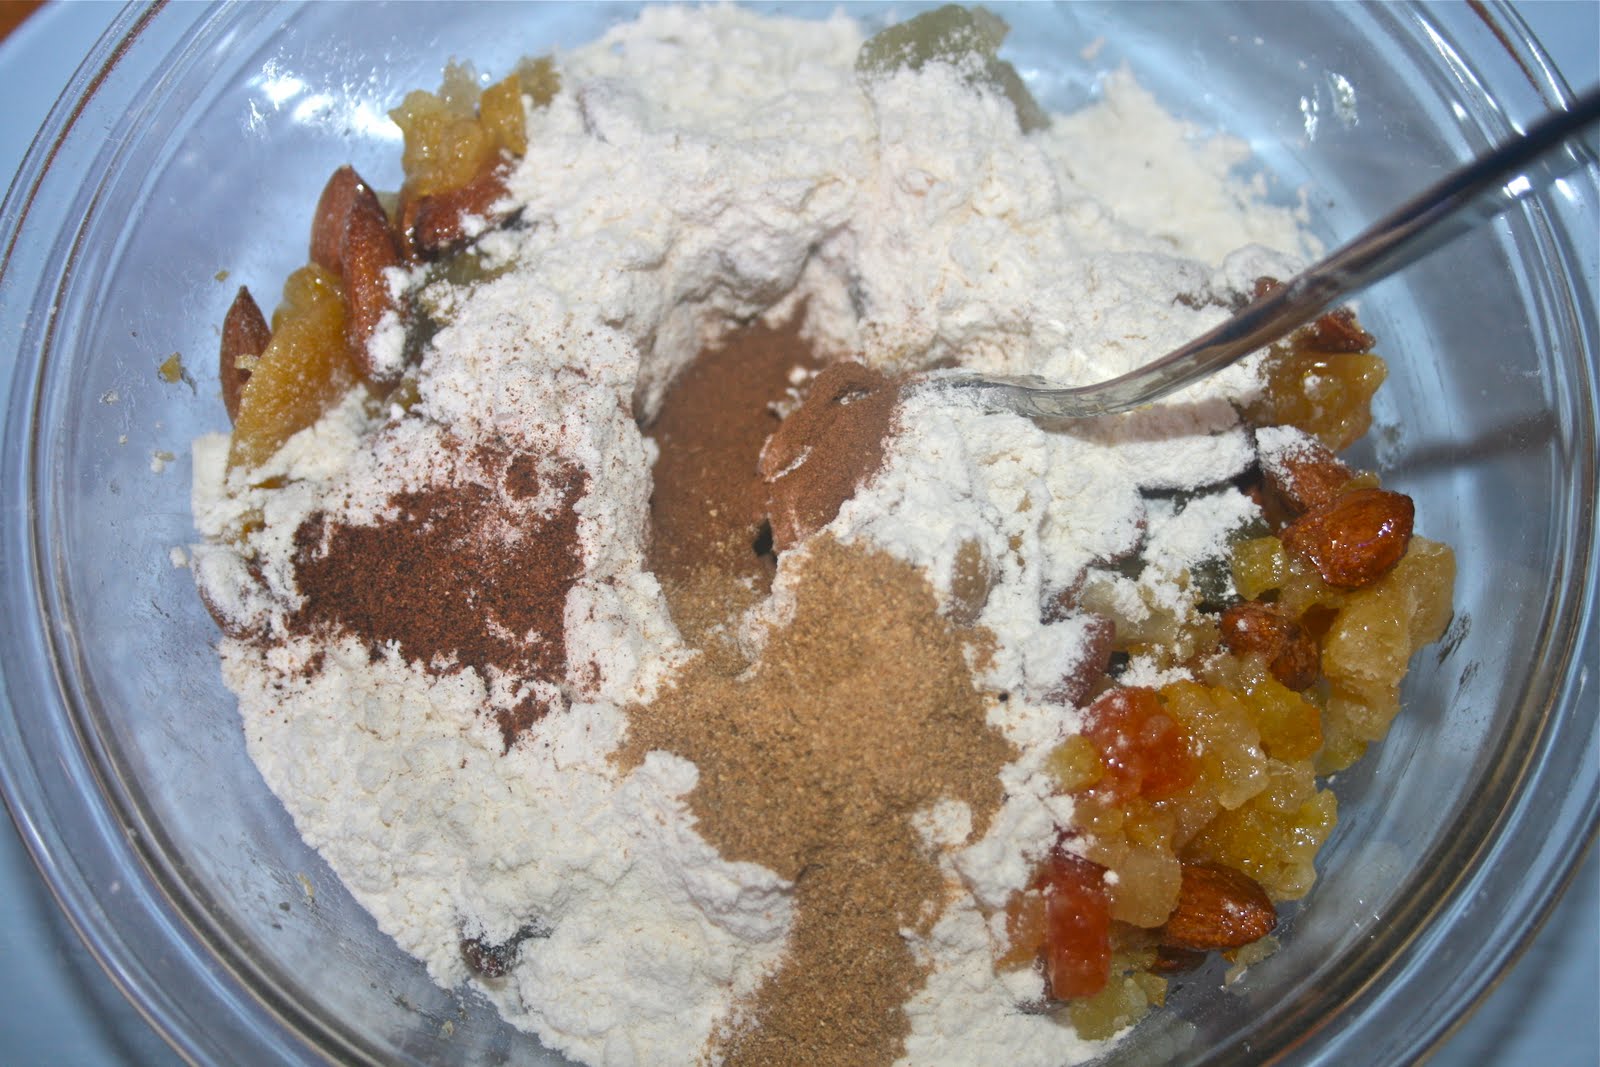
Almonds (natural), 150 g /5½ oz

Citrus peels, 150 g / 5½ oz

Candied Fruit (I used a mixture of papaya, melon, and mango) 200 g / 7 oz

Plain flour, 100 g / 3½ oz

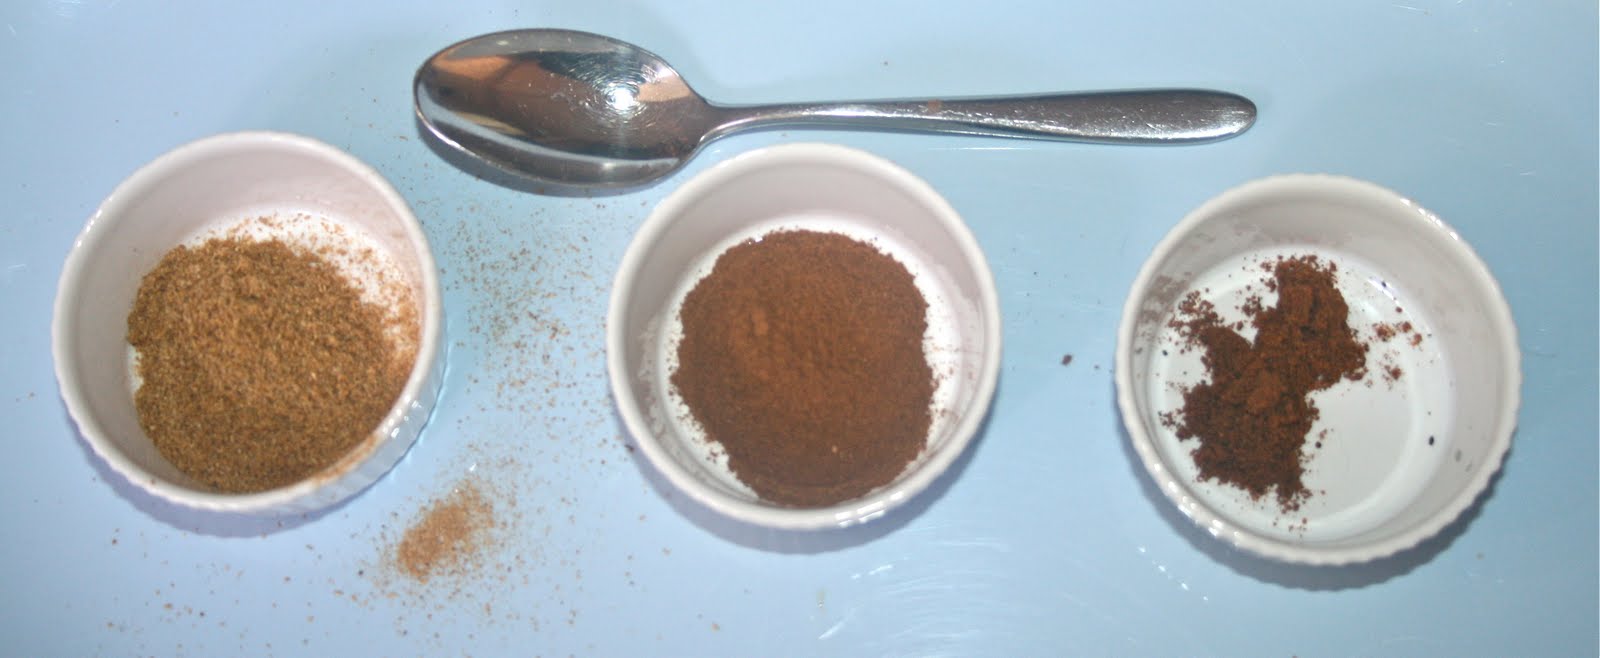
Powdered coriander, 1 tsp

Powdered cinnamon, 1 tsp

Powdered nutmeg, ¼ tsp


The vanilla flavoured sugar is white sugar kept in a sealed jar with a vanilla stick in it.


Put the golden syrup, vanilla sugar and icing sugar in a bowl with two tbsp of water, and dissolve on low heat in a pot of water (Bain Marie or double boiling).


Remove from heat and add fruit, almonds and all the other dried ingredients. At this point you will start to fill the aroma of the spices, it really feels like Christmas!


Line a 22-23 cm round tin with baking paper and, if you have it, line it with some rice paper. Fill with the mixture and cover with more rice paper, pressing down well. Wet the top rice paper with water so that it will not burn.


Bake at 160°C (325ºF) for 30 minutes, Remove from the oven, but leave in its baking tin, and cover with a thick layer of icing sugar. Serve cold, and only small slices (it is quite filling!).


Photos and Recipes by Alessandra Zecchini ©