Showing posts with label Jam pickles and preserves. Show all posts

Saturday, March 16, 2019

Autumn preserves: quince paste, feijoa paste and fig jam


It is Autumn and there is great produce around, in particular I like quinces, which I can find at the local orchard in Oratia (Dragicevich and Sons, in West Coast Rd). I usually make jelly (recipe here) or paste, the paste needs less sugar and you get more out of it, although the cooking process is quite long. 


Wash the quinces, quarter and then remove the centre but not the skin. Cook with a bit of water until soft then blend. Add 60% of weight in sugar and a pinch of citric acid, and then bring to the boil, and boil, boil and boil until quite thick, stirring most of the time (ideally all the time, but I took breaks away from the heat!!). Then pour into a mould or a rectangular container.


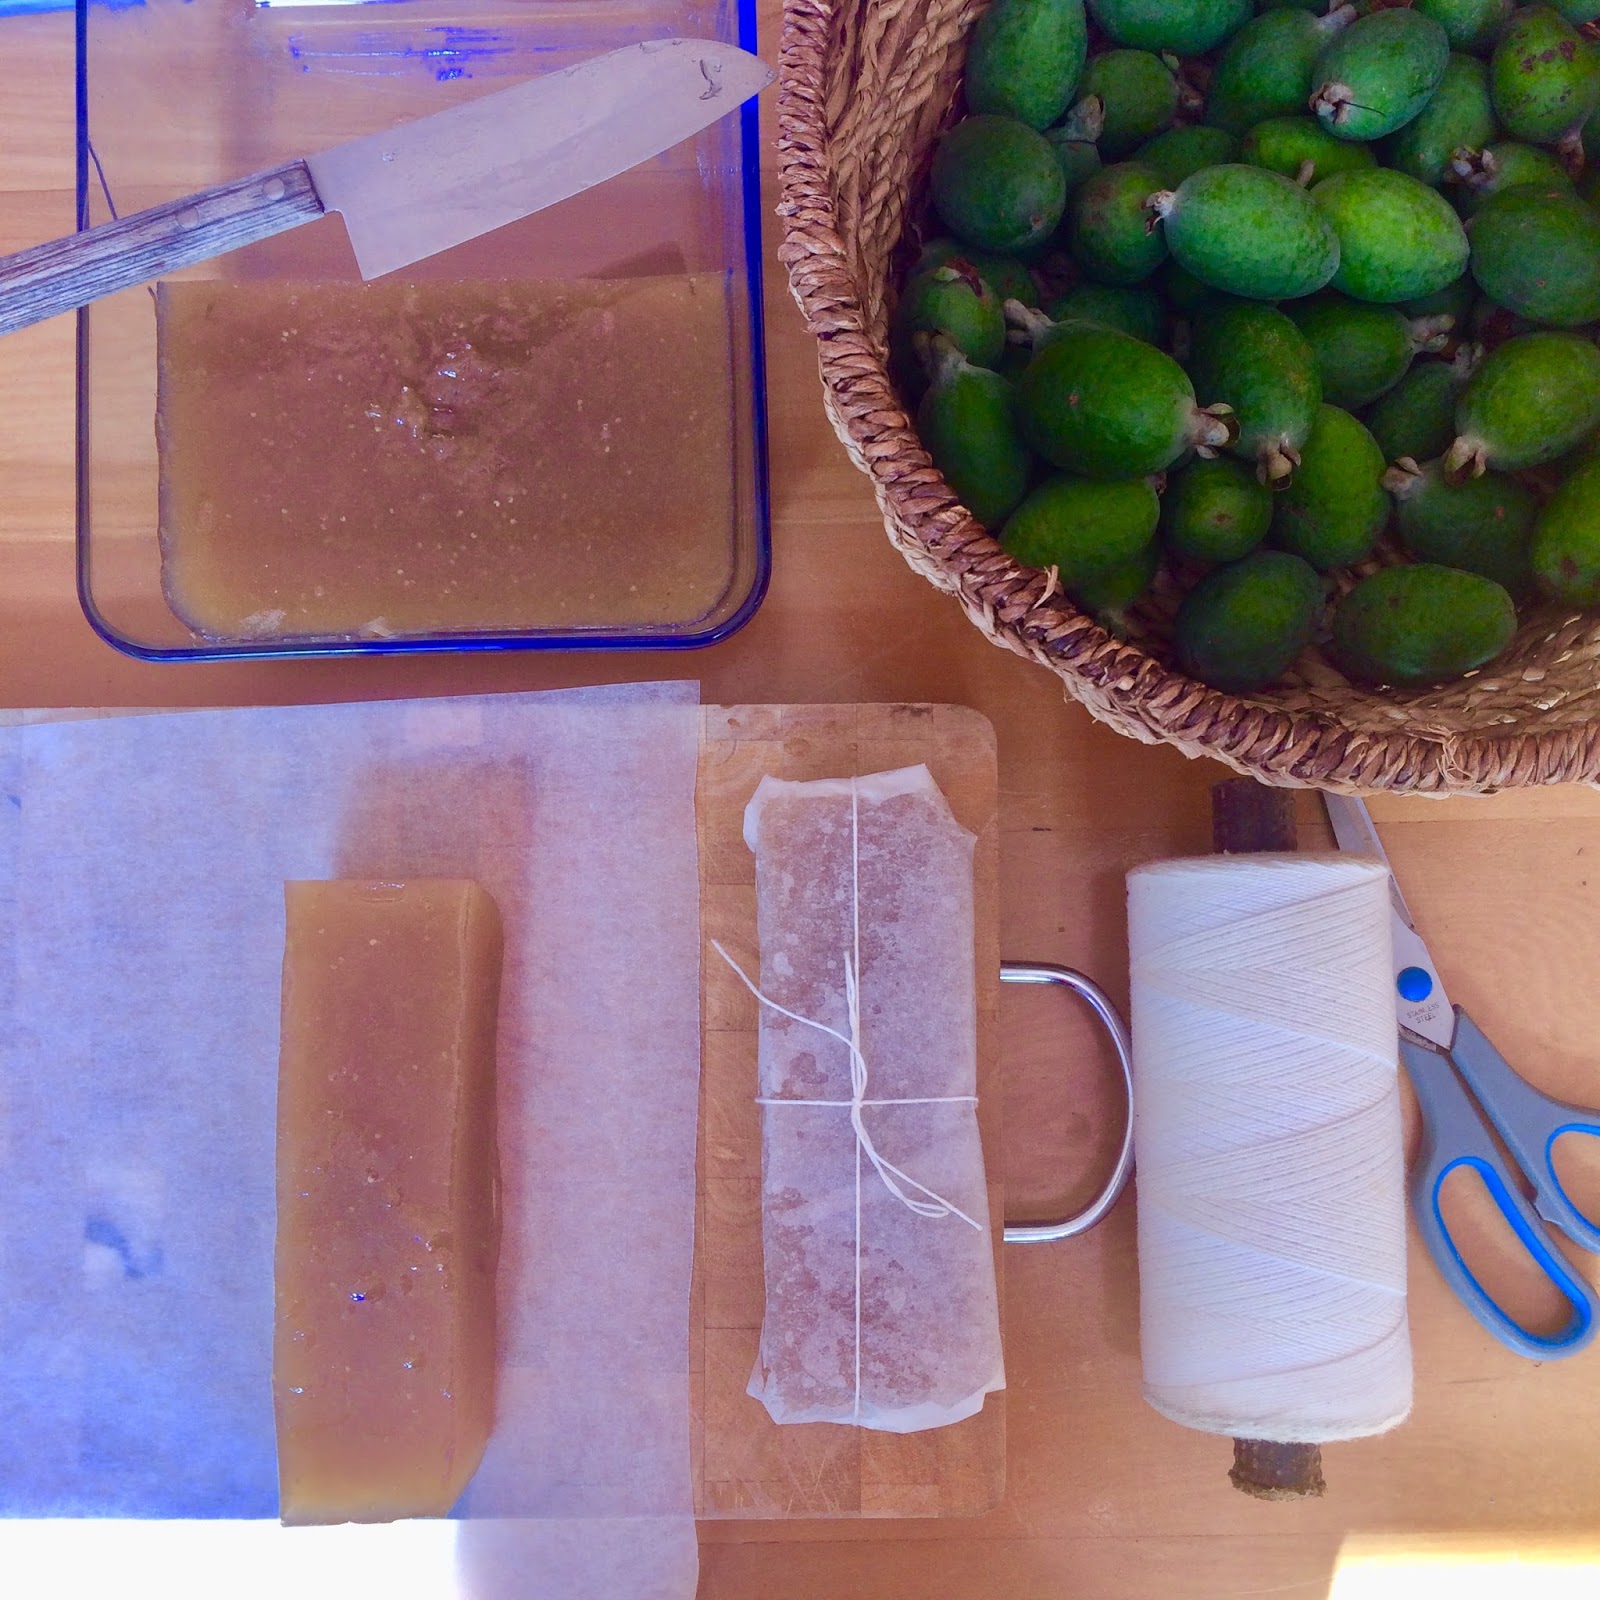
Let the paste set for a few days, then cut and wrap in baking paper.


This year I had quite a few feijoas in the garden, so I though of doing the same. In the past I made jam (recipe here) and it was so solid that I realised that it had been a mistake to put it into jars: feijoas are like guava and guava makes a paste similar to quince paste.

So I followed the same steps as for the quinces, but instead of removing the core I removed the skins with a knife. If you want to use the skins for something else you can try this feijoa cordial.


 Finally, the fig trees have a few figs, not big and as soon as they ripen the birds eat them, so the only thing I can do is to pick them when they are still green, not so good for eating fresh, but good for jam. 

Boil them first for five minutes then discard the water and scum (from the white sap that comes out), cut them into two and put them back in the pot, once again with 60% sugar, and a little water. 


 The figs should mush easily while boiling, if you keep stirring them with a wooden spoon, but if you want to keep a few whole remove them from the pot before mashing the rest, and add them back during the last 5-10 minutes. This jam went into jars, it looks great, but I have the feeling that it will also be quite hard (I added some pectine - jam setting mix) and probably next year I will end up making fig paste instead of jam!


 Photos and Recipes by Alessandra Zecchini ©


Monday, November 13, 2017

No waste post: Japanese style pickled radishes - and eat the leaves too! Plus a beautiful Japanese Vegan meal


I picked some lovely radishes from the vegetable garden, did you know that you can eat the leaves too? They are full of nutrients, as well as delicious!

Wash the radishes well, then cut in halves (or quarters if big), keeping attached some of the centre leaves. Set the outer leaves aside to use later.


These are the radishes (with the tender centre leaves) ready to pickle.


Add some salt, I used Japanese unrefined salt because I had it, but ordinary kitchen salt is fine.


Put another bowl over the radishes and then a weight on top (a rock, or anything heavy that you may have in the kitchen). Leave for a day and night, move the radishes from time to time if you like, to get them pressed. They will put out lots of water and create a brine.


This is what they will look like the day after.


Put into a jar with their brine and keep in the fridge (they will last a couple of weeks... maybe more but I don't know, we eat them quite quickly!

And now for the remaining leaves: since I had the above raw I decided to cook the rest for a few minutes in boiling water. 


Then I drained them and when cool I dressed them with soy sauce (gluten free readers can use tamari) and lemon juice. The portion looks small, but they are a perfect addition to a Japanese meal...


 like this one!

Vegan Japanese lunch with produce from my veggie garden

Clockwise from top left: rice with vegetable furikake, nimono of radish leaves, silken tofu with chrysanthemum leaves, rice with spinach, gari (pickled ginger). In the centre pickled radishes. Radishes, ginger, spinach and chrysanthemum all came from my garden

Yes chrysanthemum leaves are also edible (I was given a variety that only seems to make leaves, I like to eat them young). and if you want to know how to grow ginger and make your own gari click here.

Photos and Recipes by Alessandra Zecchini ©

Sunday, June 26, 2016

Quince jelly


I love quince jelly, lovely project for rainy days! Wash and quarter some quinces, removing the pips, then boil the lot with lemon juice and a little water until the fruit is soft and mushy. 


Put the pulp inside a jelly bag, cheaper if you just use a clean pillowcase (I have one which I use just for jellies) and hung it over a bowl (using a broom and two chairs) for a day and night.


This way the juice will drop into the bowl. As a rule if you like a clear jelly do not squeeze the bag! But I confess that I gave it a little squeeze… I wanted to get more out of it!


Measure the juice and add the same amount of sugar, then boil again.


I had lots, so I put half in a container to set, and added Fresh As Raspberry powder to the other half for a quick raspberry jelly. Delicious!


Photos and Recipes by Alessandra Zecchini ©

Friday, March 4, 2016

Plum jam with brown sugar


In New Zealand it is still plum season in the Oratia orchards! But is it so hot that plums don't last long after picking, so I had about 1 kg that was far too ripe and soft for eating. I washed and then put the plums in a pot with a little water and boiled them, then I strain them to discard stones and leftover skin and tasted the paste. I usually add 50-60% of sugar (I don't like the 1kg fruit for 1kg sugar ratio they do in NZ), but this paste was already sweet! So I added just 2 tbsp of brown sugar and a pinch of citric acid (as a preservative) and, fearing that the jam wouldn't set, 1/3 tsp of agar agar. If I were to keep this jam longer maybe I would have added more sugar, but I only made 5 small jars and two are gone already!


Photos and Recipes by Alessandra Zecchini ©

Thursday, June 11, 2015

Picking, treating and preserving olives in brine, and olives marinated in olive oil and herbs


Preserving olives is a rewarding experience. If you don’t have an olive tree you may be able to forage olives from trees in community gardens and in parks.  Usually olives are ready around April-May (in New Zealand).
Pick the olives from the tree (never from the ground) and wash well in cold water. If you prefer sweet-tasting olives you can put them in a bucket of water for up to 40 days, or 20-30 days for very small olives, changing the water every 24 hours; the olives will become brownish in colour, and lose a lot of bitterness. After this period make a brine (recipe follows) and bttle your olives. If you prefer crispy green olives with a peppery taste, just wash them and soak them for a day, then preserve them in brine.

Brine for preserving olives

Before making the brine, be sure to have plenty of glass jars with lids, sterilised and completely dry.

Ingredients
Water
Salt

Prepare 10% salt brine (100 g of salt for every litre of water) by placing in a saucepan the water and salt.  Simmer until the salt is completely dissolved. Once the brine is cold place the olives into clean sterilised jars and cover completely with the brine.

To each jar add one more clove of garlic, a fresh bay leaf, a chilli pepper, or a fresh sprig of thyme.  Seal and put away in a dark place for three months. After this period the olives can be used in cooking or can be marinated with olive oil and your favourite herbs.
If you’d like to keep the olives for longer, prepare a new brine with an 8% solution (80 g of salt every for every litre of water) and put the olives into new jars with the fresh brine. Olives stored this way, and completely covered with brine, will last up to one year. Don't worry if you see white spots forming at the top of the brine, as this is natural — just remove them every time you open the jar, and always rinse the olives before using. Below is a recipe for marinating your preserved olives with olive oil and herbs, starting with your olives in brine.


Olives marinated in olive oil and herbs

I suggest you use a delicate olive oil for this recipe, like an extra virgin olive oil from the supermarket. Expensive olive oil is far too precious to marinate olives, unless you have your own press.

Ingredients
300 g olives in brine (green or dark)
1 sprig fresh thyme
1 sprig fresh oregano
1 sprig fresh rosemary
6 peppercorns
200 ml extra virgin olive oil


Drain the olives well from the brine, and give them a little rinse if necessary. Place in a large jar, add the herbs and pepper corns, and cover with the oil. Leave to rest for at least one day, and then serve. Store in a cool place and use within two weeks.

Photos and Recipes by Alessandra Zecchini ©