Friday, February 24, 2012

Plant a tree for your blog


Today I want to let you know about this initiative (in Italian, but you can find something in English here).
If you have a blog and you would like to join in and have a tree planted for your blog, write a post about it, use the logo and let the Doveconviene.it team know by sending them an email here, and then they will plant a tree for your blog.
So far they have planted 927 trees, but if they get to 1000 trees by the end of February iPlantatree.org will plant 100 more trees for them.


Wednesday, February 22, 2012

Two Vegan and Gluten Free recipes with onion weed: Yudofu, and Chickpea Fritters


I have been telling friends about onion weed these days, everybody seems surprised (and happy) that you can eat it, especially those who gave up growing spring onions because they seem to take so long for what you get. And onion weed is free and plentiful! I kept telling everyone to use it as a spring onion without realizing that most people here use spring onions just chopped in salad, and that'a about all! 

On the top left my nabe (pot) with simmering Yudofu, one of my favourite tofu meals for chilly evenings:
In a capable pot I put water with some dried kombu (about a large sheet broken into 3-4 pieces), and a few dried shitake mushrooms to simmer, and after 20 minutes I added some soft tofu cut into squares, salt (I have a nice Japanese unrefined salt for it) carrot sliced to look like flowers, and onion weed (bulbs, stalks and leaves cut into 'longish' pieces). I added the flower just before serving. To tell the true the tofu should be then taken out of the broth and eaten with a sauce and relishes, but as a family meal we eat the lot in bowl, broth and veggies too, except for the kombu seaweed, which I discard.

The other three photos are of chickpea flour fritters: I chopped the onion weed (the whole plant, but kept a few flowers for decoration) plus I added some finely chopped spinach, chickpea flour, salt, water and a drizzle of olive oil. When the batter was ready I remember that I have lots of pitted black olives to use, so I chopped up a few and added those too. I fried the lot and the fritters were incredibly tasty! I will make them again, in the next few days, they are incredibly easy and the kids loved them.
These meals are vegan and gluten free.


Photos and Recipes by Alessandra Zecchini ©

Saturday, February 18, 2012

Salad Sushi rolls and Ume topped Onigiri


Salad Sushi Rolls

Wash the sushi rice (or Japanese rice) several times in cold water, until the water runs clear, and then cook it by absorption. The doses are about 1 and 3/4 (three quarters) cups of sushi rice for 2 cups of water, but that depends on the type of pot. You need a pot with a good lid, or you will loose too much steam. I kind of regulate myself by ear now, since I know my pots and pans. Bring the pot to boiling point, lower the heat and simmer until all the water has been absorbed. Once the rice is ready pour it into a bowl and stir it with a wooden spatula, cooling it with a fan if you can. I then add some ready made sushi vinegar, about 2 tablespoons, but this is my personal taste. If I don't have sushi vinegar I use 2 tbsp of rice vinegar, a little sugar and a little salt (to taste, and I don't like to use too much sugar or salt!). Roll the rice with nori seaweed and the filling of your choice: I used carrots, takuan (Japanese pickled daikon) and rocket salad.


Clockwise from top left: Salad sushi with pickled ginger, edamame beans, plates for lunch, plum sake to drink and mandarins for dessert


 Onigiri


To make the rice balls cook some Japanese (or sushi) rice as explained above but do not dress with rice vinegar, leave it plain. Start working it when it is still warm: wet your hands with water, and rub them with just a little salt, then shape the balls with your palms, sticking a whole ume (Japanese pickled plum) in the middle while you are working. This time I didn't put the ume inside but on top, for visual effect, and added a violet (edible) for decoration.


Photos and Recipes by Alessandra Zecchini ©


With this recipe I take part in the contest VegetariaMo (Ricette Vegan) hosted by


Saturday, February 11, 2012

Kumara dip


Kumara, the New Zealand sweet potato, is a very Kiwi winter staple. There are different types of kumara, but the most common are the gold/yellow/orange ones, and the red ones. The reds look prettier, but if you peel them inside they are white, while the orange ones are still colourful under their skins.


Kumara are sweet and they mush and blend so well that I used them a lot when I was making baby food, years ago. The kids have progressed from baby food now, but I haven't stopped blending kumara: I am just adding more seasonings to it now :-).


Kumara dip


I used the orange kumara here, peeled. This is not a recipe as such, you can add what you like to your blend. Peel and boil the kumara, or roast them for more flavour. Blend with a couple of garlic cloves (peeled), salt and pepper, olive oil, lemon juice, and a fevourite spice (some examples are smoked paprika, cumin, coriander, or a mixture of all of the above if you like). Serve as a dip or with a plate of meze.

Photos and Recipes by Alessandra Zecchini ©

Saturday, February 4, 2012

Cooking Taro


Taro is the Polynesian staple, usually baked or boiled, it is quite starchy and very filling. Being Italian I like to use olive oil, so after cleaning, peeling, cutting and boiling my taro, I dressed it with olive oil, salt flakes and chopped spring onions. It was truly yum!!!


Photos and Recipes by Alessandra Zecchini ©

Sunday, January 22, 2012

So many ways to eat a coconut!


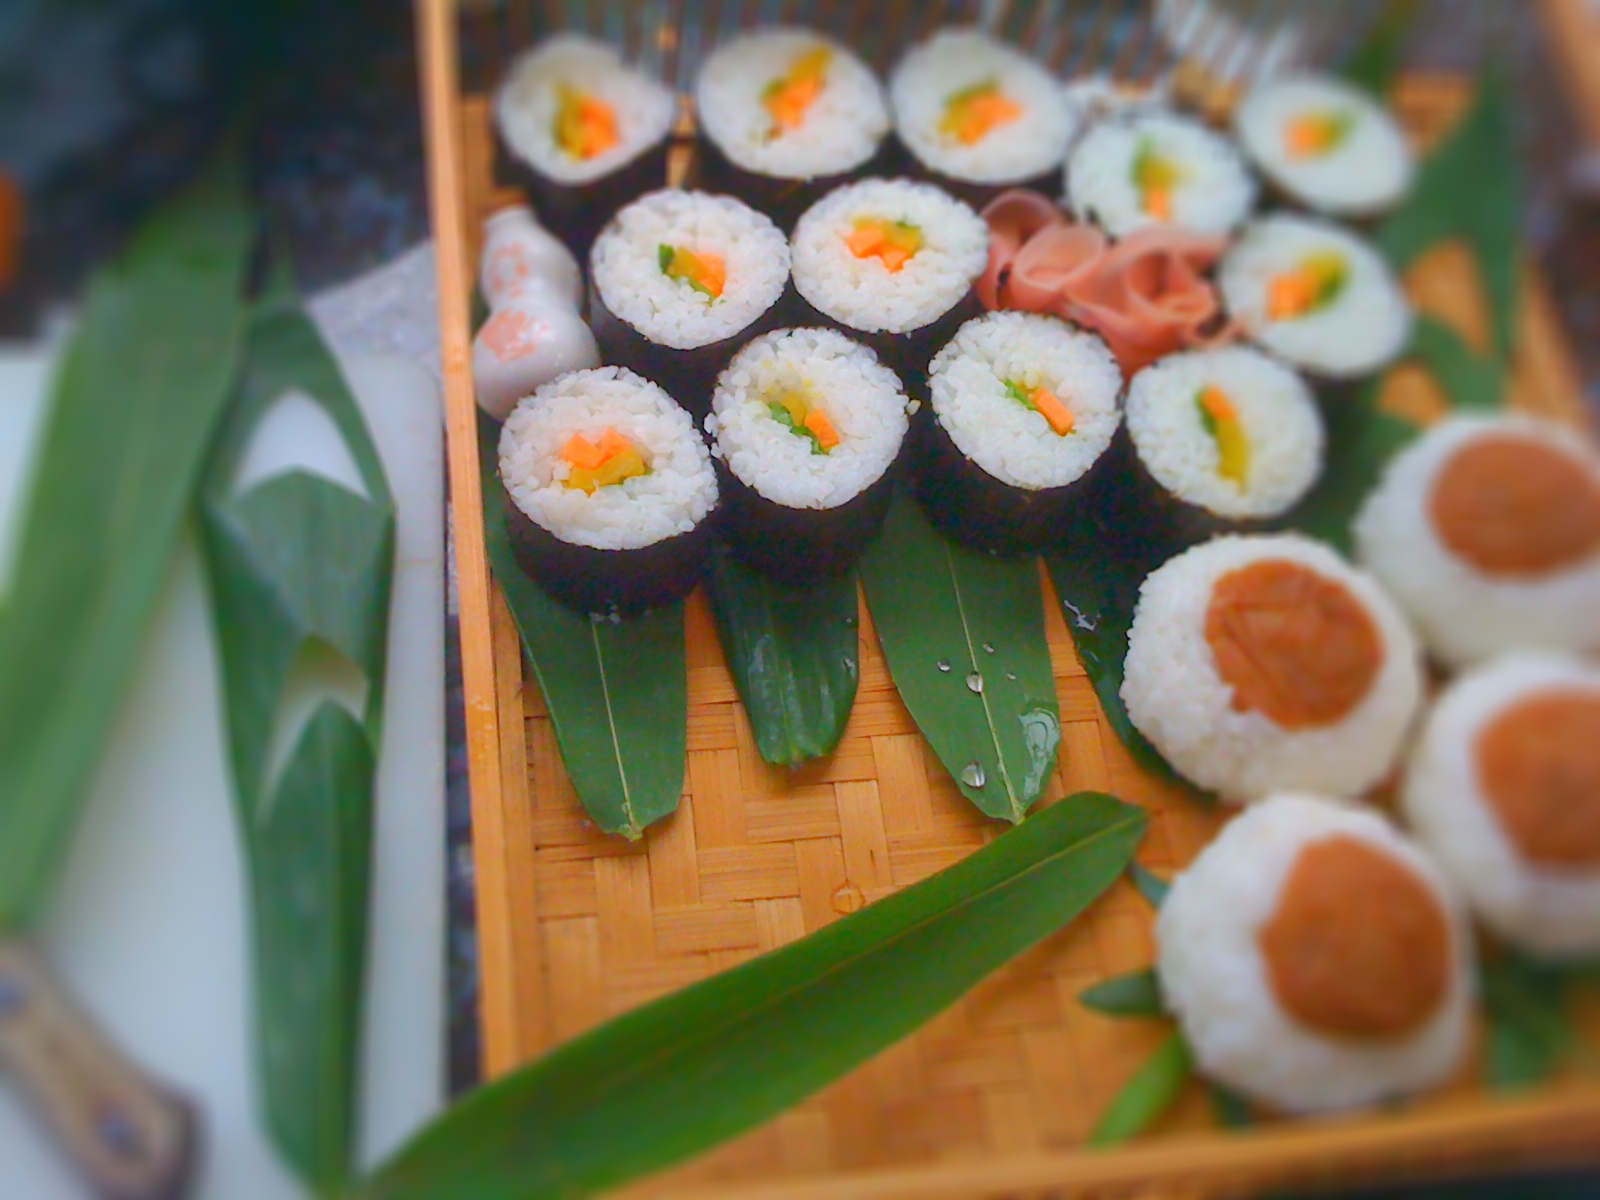
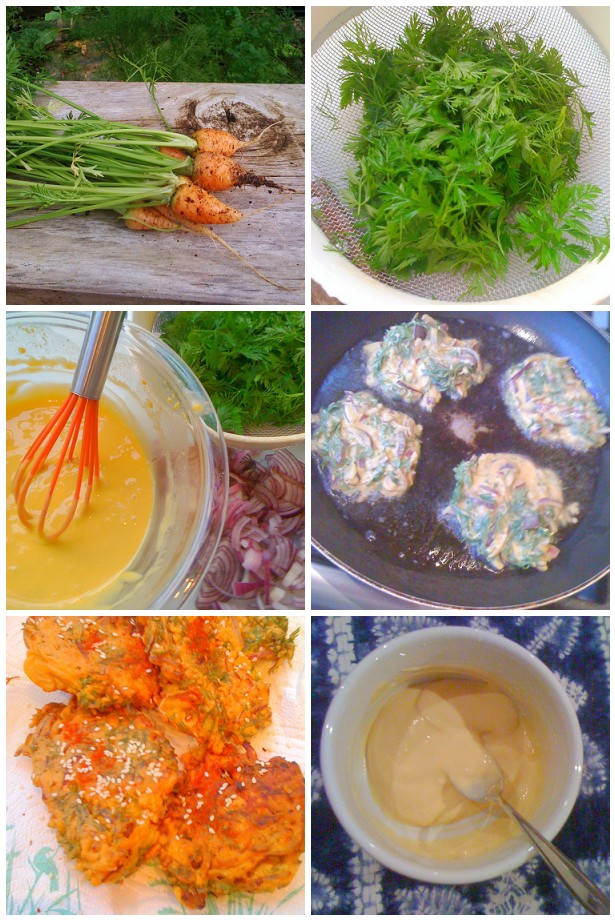
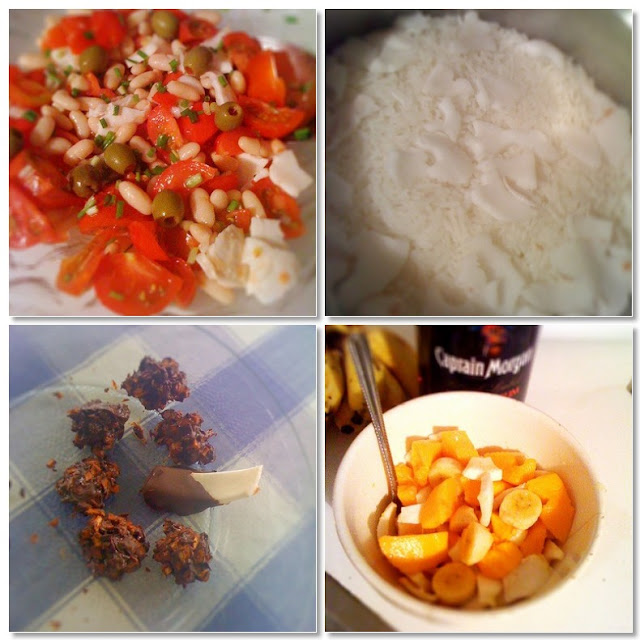
When we were in Niue Charles and Colleen came for dinner. Of course I made pasta, but I also made a variety of dishes with the fresh coconuts they brought me the day before. A tomato and coconut salad with cannellini beans, spring onions and olives, dressed with olive oil, lemon juice and sea salt flakes. Coconut rice (just boil the rice with coconut pieces in it, fantastic!), coconut chocolates: I dipped slices of coconut in melted 72% dark chocolate, and also mixed freshly shredded coconut in the remaining chocolate to make choco-coco balls. I made a big tray of these but I forgot to take a photo, se here were the leftovers... and the fruit salad with local papaya, banana, and coconut, a little brown sugar, lemon juice and rum. This I made a few times actually, it was too good! Charles and Colleen couldn't believe how many things I made out of their coconuts, they said that usually the drink the juice and then give the rest to the pigs. They have plenty of coconut. But I guess that for me this was luxury!


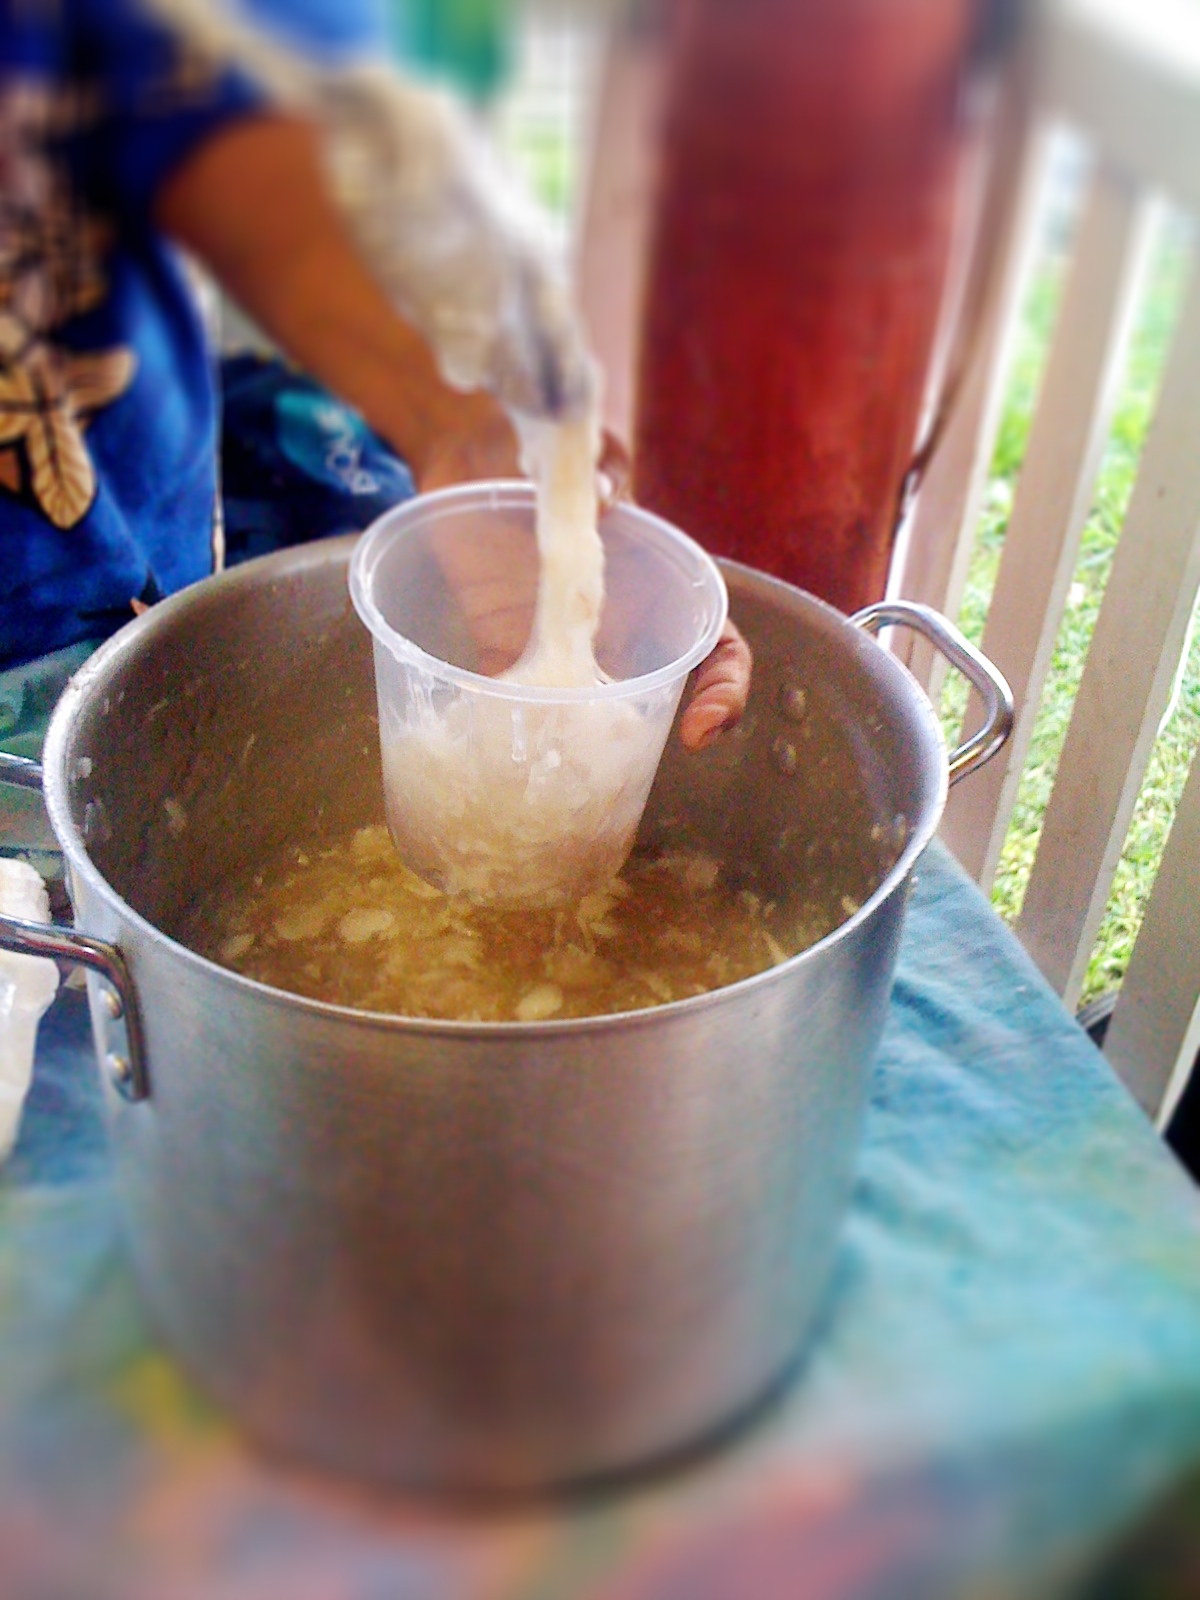
So what is a typical dish with coconut in Niue? In the market we tried the local coconut porridge, a warm mixture made with coconut, arrow root and a little sugar. It was different, not bad but not even my breakfast of choice. I preferred coconut bread, which is sold in all the bakeries.


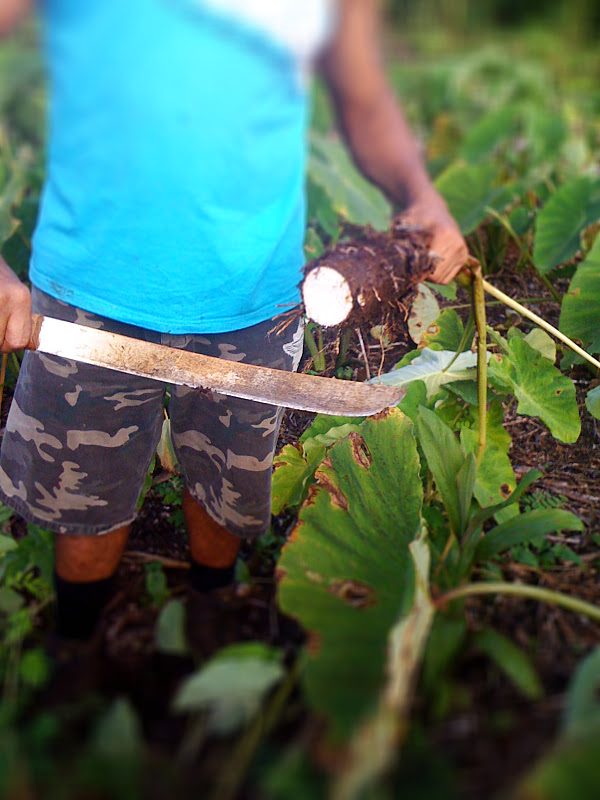
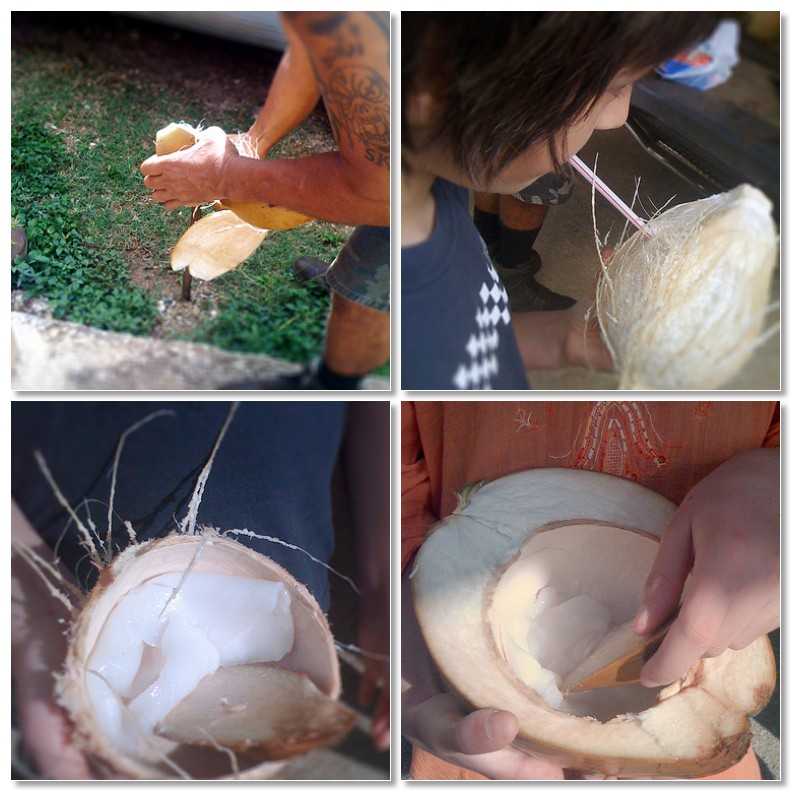
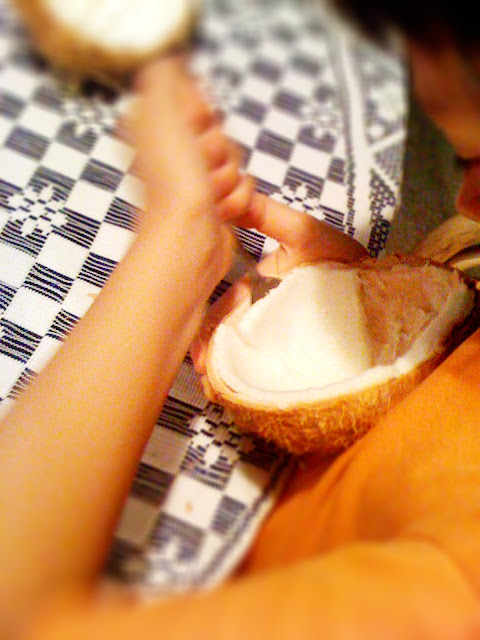
But the best experience for me was to learn how to open and eat coconut at different stages of maturity, so if one day I will be ever stranded on a desert island I will be able to survive... as long as there are coconuts around! On our plantation tour Tony firstly gave us a coconut each to drink, these were very young coconuts and the water tasted different from the one we collected from Charles' coconut. Then Tony opened up some coconuts for us and cut some spoons out of the coconut shells. The younger the coconut the softer the flesh.


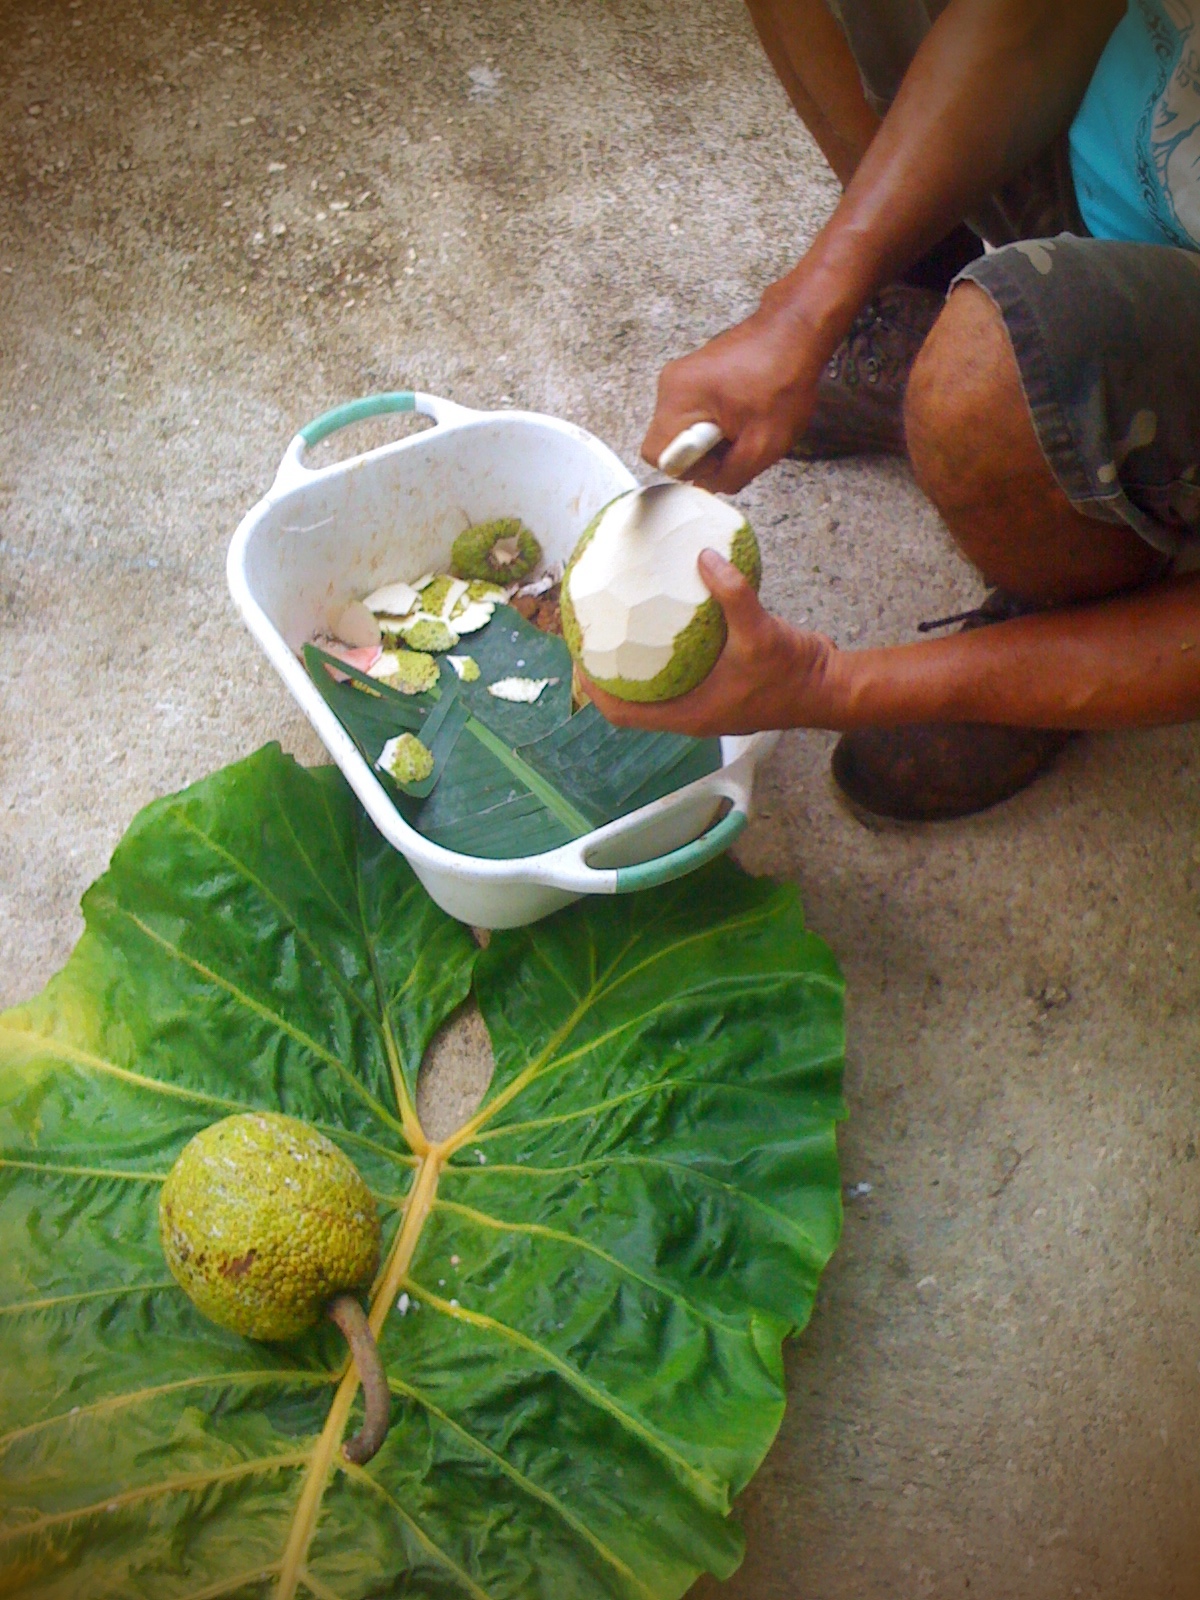
I was really surprised to learn that you can also eat coconut when the leaves appear: Tony called it coconut marshmallow, and in fact it was soft (but not as soft as a marshmallow) white and spongy, with a delicate sweet taste, a bit like eating a gigantic soft macadamia nut. This was a favourite with the kids. My favourite was the the stalk of the young coconut plant: Tony peeled and passed it over, crunchy, fresh and a bit like a coconut celery. I have eaten this before, it is called heart of palm, and in Argentina I ate it in sandwiches (it is called palmito there), in Asia I ate it in a variety of dishes, and in New Zealand I went on a foraging trip with a Maori forest ranger and ate the heart of a young Nikau palm (but much smaller than this stalk of coconut!). Nikau heart too taste a little like coconut.


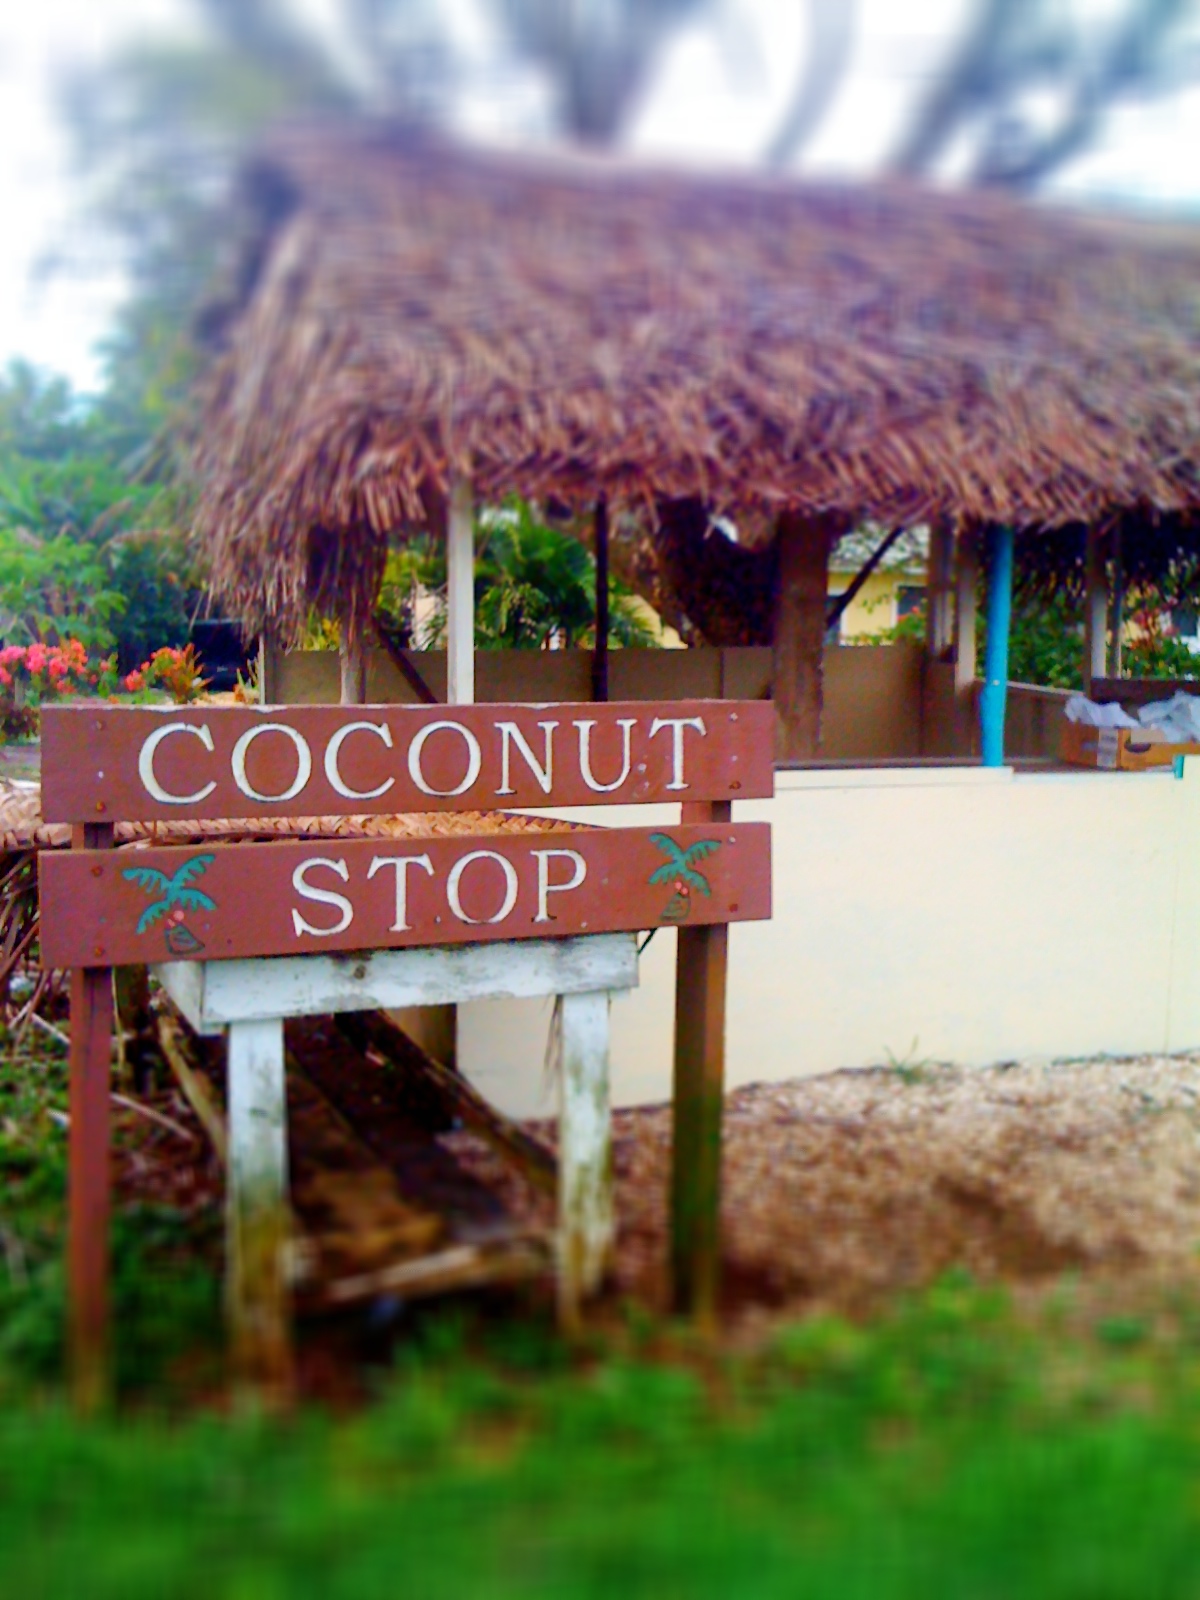
So if you visit Niue make sure that you visit a plantation, the market, or have friends with lots of coconuts, otherwise just  stop at your nearest coconut stall.


Photos and Recipes by Alessandra Zecchini ©

Monday, January 16, 2012

Breadfruit Chips


When we were in Niue Tony took us to a plantation tour, which was amazing (I will post more about it in the next few days). We returned to our guesthouse with a good stock of locale produce and the first recipe that I am proposing is with breadfruit. I heard a lot about this fruit but never cooked it (although I ate it before and found it quite bland).
Tony told me that I could bake it, boil it or make chips, and since I travelled with olive oil and some luxury salt flakes I decided to go for chips.


Breadfruit needs to be peeled and sliced, Tony peeled it with a machete for me. I cut it into thin slices and pan fried them with a little olive oil (not deep fried) and added some Welsh sea salt flakes. I served it as an appetizer, everybody love it so much that I made it again the evening after. First breadfruit experiment: successful!


Photos and Recipes by Alessandra Zecchini ©

Tuesday, January 10, 2012

Carrot leaf fritters


Since chickpea flour can be mixed with just water and it will still bind like eggs do it is perfect for vegan recipes. For my Vegan fritters I used another overlooked green from my garden: carrot leaves. I always end up planting carrots to close, and fail to thin them when I should (I just don't have the heart to do it...) so I had to pick up a few little ones to let their sisters grow in peace. Baby carrots are great anyway, and all those pretty leaves are edible too! 


Carrot leaf fritters

 I washed and roughly chopped the carrot leaves, made a batter with chickpea flour, water, salt and pepper, added a chopped red onion, and fried my fritters. In the end I topped them with some smoked paprika and a few sesame seeds. Good hot or cold, as a main or appetizer.


Photos and Recipe by Alessandra Zecchini ©

Tuesday, January 3, 2012

Mango and Berry Vegan Jelly


Something bright and colourful: I started with my fool proof recipe for mango and agar agar pudding (recipe here), and then I just added a few mixed berries to the mixture. It looked so pretty that I will definitely make it again. 

Photo and Recipe by Alessandra Zecchini ©

Monday, December 19, 2011

Roasted New Zealand Yams


Sometimes I am really happy to be a vegetarian: it means that I don't have to try wild specialties like huhu grubs. Not that many New Zealaders would either, you can't buy them in shops (I think) and you have to forage for them in the bush (they eat rotten wood) or go to special wild food festivals like the Hokitika Wild Food Festival. But I found a better, and vegetable alternative, with New Zealand yams.


Yam are much bigger than huhu grubs, and I got the red and the apricot colour varieties, I thought that they looked really pretty. After boiling them the colours had faded, a lot, and the look was... well, like in the photo above. I left them on the kitchen bench and went to get the kids from school. As soon as they arrived home the went" "Huhu grubs????". No, they have never eaten them, but they saw them and know what they look like. They giggled a lot, they said that yams really looked like gigantic huhu grubs.


Just boiled they didn't appeal to me, so I roasted them with olive oil, smoked garlic, smoked salt, coriander seeds and a few chili flakes, and they went down a treat. In this household my husband is the only one that has ever eaten huhu grubs, I asked him if the flavour was similar to these yams, he said: "No, these  taste much better!"

Photos and Recipes by Alessandra Zecchini ©

Thursday, December 15, 2011

How to Make (Vegan) Hazelnut Turkish Delights, and pistachio, and lavender, and...


I have already explained how to make Rose Turkish Delight (Lokum) at home, it is pretty and pink, but I must confess that my favourite Lokum of all is hazelnut, so today I will show you this variations, and a few more. To start follow the recipe here.


Rose Turkish Delight


While the cornflour and sugar syrup are cooking shell and toast a couple of handfuls of hazelnuts. It is better to use fresh hazelnuts and toast them just before making Lokum, for a full hazelnut flavour. Years ago I also had a hazelnut essence which was great, but I cannot find it here, I think that one of the best places to buy it would be in Piedmont, in Italy. Anyway, even without hazelnut essence you can get the best out of hazelnuts if you toast them and use them within a few days. When they are still hot from the oven put them in a clean tea towel and shake and rub them well so as to discard the peel. If some peel stays on don't worry, it is edible, just not as nice. Crush the nuts roughly (I have a nut crusher that my Mother-in-law gave me as a present, very handy for these jobs), and when the Turkish Delight mixture is ready, instead of adding rose water and berries, add the chopped nuts. Mix well and then follow the same steps as for the basic recipe.


A few variations:

Pistachio: same as hazelnuts, but it is also possible to blanch the nuts to remove the skin (for greener pistachio). Almonds could go too!

Orange Blossom: Same as Rose, but add Orange Blossom Water instead or Rose Water, and no need to add berries to colour these: they should be clear.

Lavender: when you make the syrup add a few lavender leaves (yes leaves) and then remove them before pouring the syrup into the cornflour mixture. Your Turkish Delights will smell and taste like lavender. For colours add a few blueberries, they will melt in the hot mixture and give you a light lavender colour.

Lemon and other citruses: Easy, add lots of lemon juice and/or zest (or the juice of your favourite citrus fruit) when you make the sugar syrup (there is also lemon essence, if you like).

And then... endless, there is mint (but I am not keen on that one) and so many more, let me know if you make a special one.


Hazelnut Turkish Delight


Photos and Recipes by Alessandra Zecchini ©

Friday, December 9, 2011

How to make (Vegan) Rose Turkish Delights (Lokum) step by step


Before I start I would like to say that I don't have a sugar thermometer, essential if you are really into confectionery, and that I didn't use much sugar for these Turkish delights. Many recipes use much more sugar, and it is not that I wanted to make a low sugar treat here (it is still pretty sweet), it is just that making it at home really makes me realize how much sugar there is already in my diet, and if I can have something with a little less... well, why not!

This method is 'home friendly' i.e. these can be made at home with very little effort and equipment, and the recipe comes from my book Sweet As... where I also have the recipe for lavender and orange blossom Turkish Delights.

Ingredients

1 l water
300 g sugar
2 tbsp lemon juice
100 g cornflour
1 tbsp frozen raspberries
1 tbsp rose water
icing sugar (very little) and cornflour (lots) to dust.


In a pot put half of the water (500 ml) with the sugar and lemon juice and bring to the boil. Boil it down until you get a light syrup (here those with the sugar thermometer will go to about 240 degrees, I just waited for the mixture to thicken a little). In another pot mix the remaining water with the cornflour, then bring to the boil and simmer, stirring, until the mixture thickens. Add the hot sugar syrup and stir well.


Now let the pot simmer, without stirring, for at least 30 minutes. More would be good, if you are patient, 45 minutes to one hour is more like the shops do it, but in a home kitchen looking at a bubbling mixture is a little worrying. Still, the more you cook it the harder your Turkish Delights. At the end add a tbsp of rose water, and to colour it, since I try not to use artificial colouring, a few raspberries. The berries will 'melt' in the hot mixture and the little seeds are quite pretty, I think. If you don't like the seeds, just pass the berries through a sieve, and adde the juice only. Pour the hot mixture into a square or rectangular tupperware or similar plastic container (easy to detach the solid block after it sets) and let it cool down and set overnight.


The day after tip out your 'candy' block and cut into pieces. I now understand why when you buy lokum it is full of white powder: it takes lots of cornflour to keep it! To dust it I use a mixture of cornflour and very little icing sugar: if you use too much icing sugar the sweet may 'sweat' and become all sticky! Another problem is humidity: it is very humid here in the Auckland bush, if your sweets seems too 'wet' after cutting them, place them on a oven tray and bake them at 50 on fan for a little to dry. Store them in layers divided with paper, and dust regularly with a mixture of cornflour and icing sugar to keep them dry. Eat within a few days. Turkish Delights are Vegan and Gluten Free. Next post will be about hazelnut Turkish delights :-).


Photos and Recipes by Alessandra Zecchini ©