Showing posts with label Cucumber. Show all posts

Monday, 30 May 2022

Cucumber, Feta & Herb Salad

It's still greenhouse cukes, of course. We're only just planting ours today. Mint, parsley and cilantro are all up and useable by now, however. I didn't use any cilantro here, but you could. Other optional additions: a few chives and/or radishes now, melon or watermelon later in the season.
 
4 servings
20 minutes prep time
 
Cucumber, Feta & Herb Salad
 
Make the Dressing:
the juice of 1/2 lemon
3 tablespoons olive oil
a pinch of salt
freshly ground black pepper to taste
1/4 to 1/2 teaspoon Aleppo pepper
 
Mix all the ingredients in a small bowl or jam jar. 

Make the Salad:
2 or 3 small greenhouse cucumbers
100 grams (4 ounces) feta cheese
1/4 cup chopped fresh mint
1/4 cup chopped fresh parsley
2 or 3 tablespoons toasted pumpkin seeds (optional)
 
Wash, trim, and chop the cucumbers. Crumble the feta and mix it into them. Wash, dry, and chop the mint and parsley.  

Toss the salad with the dressing. This can be done up to an hour ahead to allow the flavours to blend, then sprinkle the salad with pumpkin seeds just before serving it. 


Last year at this time I made Potage Argenteil - Asparagus Soup.

Monday, 17 January 2022

Korean Sweet Potato Noodle Salad

This is a perfect salad for the summer, being cool and refreshing yet relatively substantial without being heavy. But it is also a perfect salad for the winter, since it can be made with readily available winter vegetables. Carrots and cucumbers make a good foundation, then add such things and green onions, celery or celeriac, turnip or winter radish, bean sprouts or cabbage. I used a little cabbage; I had been thinking bean sprouts but whottasurprise, my local grocery store had none. 

If you can't find sweet potato noodles (which generally seem to come in bundles of about 200 grams) then you could use mung bean thread noodles. They tend to come in bundles of about 50 grams, so you will need 3 or 4 of them. The treatment is similar, but do check the cooking time - I think they might need a little less. 

I did not get around to making this as quickly as I intended (so just as well there were no bean sprouts) and my shiitakes got a little dried out. Therefore, I fried them briefly in a smidge of oil before adding them.
 
4 to 8 servings

Korean Sweet Potato Noodle Salad

Make the Dressing:
1/4 cup rice vinegar
1/4 cup soy sauce
1 to 2 teaspoons sugar
1 to 2 teaspoons gochujang OR chile-garlic sauce
1 tablespoon toasted sesame oil
2 tablespoons sesame seeds 

Put the rice vinegar, soy sauce, sugar, hot sauce, and sesame oil in a small bowl or jam jar and stir until the sugar is dissolved. 

The sesame seeds don't go directly in the dressing, but now is the time to toast them - a few minutes in a dry skillet over medium-high heat. Stir them as they toast and be prepared to scrape them out at once onto a plate to cool - they will go from perfect to scorched very quickly.
 
Make the Salad: 
150 grams to 200 grams sweet potato noodles (dangmyeon)
10 to 20 grams (1/2 ounce) dried wakame
8 to 10 shiitake mushrooms
1 medium carrot
1 or 2 small greenhouse cucumbers
1 cup other prepared vegetables (see introductory notes)
 
Put a fairly large pot of water on to boil. Boil the noodles as instructed on the package (probably for 5 minutes). LIFT them out of the water, keeping the water. Put the noodle in a strainer and rinse under cold water until cool. Drain well. Chop slightly to make them more manageable, if you like.
 
Meanwhile, put the wakame into the boiling water and boil for 3 minutes. Turn it over as it cooks several times, to allow it to re-hydrate evenly. You will need about a 3" x 8" sheet. Drain the wakame well, shred it into long thin "noodles", then cut it into bits about 2" or 3" long. 
 
Mix the noodles and wakame in a serving bowl. 
 
Remove and discard the shiitake mushroom stems, and shred the caps into thin julienne strips. Peel and slice the carrot very thinly, then slice the other way thinly to form fine julienne strips. Wash and trim the ends from the cucumber(s), and slice in the same way. Any other vegetables used should also be cut in fine julienne pieces. Toss them all with the noodles. 
 
Toss the dressing into the salad. Let it rest for 10 minutes before serving (it can be kept for longer in the fridge) then sprinkle the toasted sesame seeds over it and serve. 


Last year at this time I made Jerk Sweet Potatoes.

Monday, 2 August 2021

Unsweetened Cucumber Relish

Since this is a canned for storage recipe, it won't surprise you to hear that I made it last summer, and have been eating it through the winter and up to now. I'm very pleased with how this has come out! 

Sweet relishes are no longer a good idea for me, so I came up with one that has some good, zingy flavours but no sugar. For my first bite, I have to admit I was disappointed. It looked like a classic sweet relish, after all. But pretty quickly I was judging it on its own merits, and once I adjusted, I thought it was really delicious. I put it in my tuna salad (see below!) but it is also excellent on hot dogs or other sausages, or hamburgers, or wherever you think some relish ought to go. 

The cucumbers don't need peeling as long as they are young and reasonably tender, and if they were not I would not go to all this work. I modeled this somewhat on my Bread & Butter Pickle recipe, and I suspect you could slice the cucumbers for pickles instead of relish if you preferred. I would also try it with zucchini (which have worked successfully for the Bread & Butter Pickles) but you should do a couple cups extra as they shrink down more when drained.
 
7 x 500 ml
1 hour to prepare plus 3 hours to drain 
about 1 hour to can


Unsweetened Cucumber Relish

Start the Relish:
16 cups finely diced pickling cucumbers
3 cups peeled and finely diced onions
1 cup finely diced red OR orange pepper
1/3 cup pickling salt

Wash, trim, and chop the cucumbers. Peel and dice the onions. Wash, cored and de-seed the peppers, and dice them. Layer them in a large strainer with the salt, and place in a cool spot to drain for 3 hours.

Finish the Relish:

1/4 cup peeled and minced fresh ginger
2 large heads of garlic
2 tablespoons mustard seed
1 tablespoon coriander seed
2 teaspoons ground turmeric
1 teaspoon red chile flakes
2 1/2 cups white vinegar
1 1/4 cup water

Put the jars on to boil, in a canner with water to cover them by at least an inch.
 
Peel and mince the ginger. Peel and mince the garlic. Mix them with the remaining ingredients in a canning kettle. 
 
When the water in the canner (with the jars) begins to steam, bring the spices to a boil. Boil for 2 minutes, then add all the vegetables. Bring them up to a boil, stirring regularly. 
 
Drain the jars, half into the canner and half into the sink. Place them on a heat-proof board and ladle the relish into them. Wipe the rims of the jars with a bit of paper towel dipped in the boiling water, and seal them with lids and rings which have been boiled for 1 minute (according to manufacturers instructions). 

Return the sealed jars to the canner. Boil them for 10 minutes. Allow them to cool, then test the seals and label them. Keep in a cool, dark spot for up to a year; refrigerate once open. 


Last year at this time I made Zucchini Tuna Melts.

Monday, 7 June 2021

Chinese Cucumber & Radish Salad

There isn't too much to say about this; it's a quick and easy fairly traditional Chinese salad... perfect in both the making and the eating for long hot days in the garden, which is definitely what's on the agenda at the moment. Radishes should be out and about; cucumbers will still be greenhouse ones but nothing wrong with that. Cilantro coming up like the weed that it is.
 
4 servings
40 minutes - 10 minutes prep time
 
Chinese Cucumber & Radish Salad

10 to 15 radishes (1 bunch)
2 or 3 small greenhouse cucumbers
1 teaspoon sugar
2 teaspoons soy sauce
2 teaspoons toasted sesame oil
2 tablespoons rice vinegar
a little chile-garlic sauce, to taste, optional 
a few sprigs of cilantro to garnish

Wash and trim the radishes and cucumbers, and slice them (or break them into chunks, by smashing them lightly with the bottom of a glass). Put them in a serving bowl. 

Mix the sugar, soy sauce, sesame oil, and vinegar (and chile-garlic sauce, if using) in a small bowl until the sugar is dissolved, then pour it over the salad. Let sit for 30 minutes before serving. Sprinkle with a little chopped cilantro if you like it. 


Last year at this time I made Tofu & Mushroom Patties.
 

Wednesday, 28 April 2021

Vietnamese Style Noodle Salad

It's not necessary to serve this with Nem Nuong, but we did, and together they made a complete and excellent meal. 
 
Bean thread noodles are also known as cellophane noodles, or glass noodles. You can now get them at the local grocery store, amazingly enough. They are a resistant starch so have a low glycemic load. I've always felt serene and happy after eating them, partly because I love them but partly because I think they don't mess with my blood sugar. 
 
4 servings
30 minutes prep time
 
Vietnamese Style Noodle Salad

Make the Dressing:
2 tablespoons fish sauce
the juice of 1 large lime
1 or 2 teaspoons toasted sesame oil
2 tablespoons mild vegetable oil
1 teaspoon sugar
1 clove of garlic
1/4 teaspoon hot red pepper flakes
 
Whisk or shake all the ingredients together is a small bowl or jam jar. 
 
Make the Salad:
2 rolls (100 grams) mung bean noodles
1 cup finely shredded cabbage
1 cup grated carrot
2 or 3 green onions
2 small greenhouse cucumbers
1/4 of a large red or yellow greenhouse pepper
1/2 cup chopped cilantro
1/4 cup chopped mint leaves
 
Bring a pot of water to a boil, then drop in the noodles and let them soak for 8 minutes. (If your package has other directions to prepare them, follow those directions.) Rinse them in cold water and drain them well. Snip them into shorter lengths and put them in a mixing bowl. 

Meanwhile, wash, trim, and shred the carrot. Peel and grate the carrot. Wash, trim, and finely chop the green onions. Wash, trim, and grate or finely chop the cucumbers. Wash, core, and finely chop the pepper. Wash, dry, and mince the cilantro and mint leaves. All of these go in with the noodles. 

Toss the salad, then add the dressing and toss again. Serve as-is, or with Nem Nuong; both can be wrapped in rice wrappers as spring rolls if you like. 


Last year at this time I made Gone-to-Seed Carrots.

Monday, 28 December 2020

Cheeseburgers Wellington with Burger-Topping Salad

Here's have some fun and festive food to finish the year! A lot of us are perfectly happy to see the back of  2020, although of course it remains to be seen if 2021 will be any better. Let's hope!

I've never been too interested in making a classic Beef Wellington; the proportion of beef to pastry seems unpropitious, and slicing it successfully, never mind gracefully, looks like a thing that will not happen in real life. These on the other hand were just the right size and the bits inside came out perfectly cooked when the bits outside were also perfectly cooked. Phew! And really, who wants to futz around with liver paté and duxelles when you could have a cheeseburger? 

Premade puff pastry makes these really stupidly easy to put together; they are not much trickier to do than a hamburger in a bun. Put in whatever selection of mustard, ketchup and relish seems good to you (but not too much of any of them), and use a good strong cheese to stand up to all the other flavours going on. 

To keep up the cheeseburger theme, I served these with a salad of typical burger toppings, and used Thousand Island dressing on it. I have never been a big fan of Thousand Island dressing, but it seemed appropriate here, and as is so often the case the home-made version is a million times better than anything you can buy, even if it too is made with commercial products from the back of the fridge door. As with the Wellingtons, you can tweak the condiments to reflect your own preference. 

Happy New Year! See you then...
 
4 servings
1 hour prep time 

Cheeseburger Wellington with Burger Topping Salad

Cheeseburger Wellington Cut Open with Burger Topping Salad
 
Make the Wellingtons:
225 grams (1/2 pound) frozen puff pastry
500 grams (1 pound) lean ground beef
salt & freshly ground black pepper to taste
mustard
ketchup 
relish
125 grams (1/4 pound) old Cheddar cheese
1 small egg
2 teaspoons sesame seeds
 
Thaw the pastry according to package instructions - usually 8 hours in the fridge or 2 hours on the counter. 

Season the ground beef with salt and pepper, and divide into 4 equal portions. Form each portion into a patty. I fold the meat over itself several times to distribute the seasonings, but otherwise try not to work it too much. Patties should be fairly flat - about 4" across when done. 

Brown them for 2 minutes on each side in a skillet or griddle over high heat - the goal is to brown them, but not to cook them through. Remove them at once to a plate and let them cool. If not proceeding immediately, cover them and put them in the fridge. 
 
Preheat the oven to 375°F. Line a baking pan with parchment paper. 

Meanwhile, cut the pastry into 4 equal portions and roll each one out to increase its size by an inch or so in each direction. Put a little bit of mustard, ketchup, and relish in the middle of each piece, and top with a 30 gram (1 ounce) slice of cheese. Top with a cooled burger. Fold up 2 opposite corners of the pastry to meet at the middle of the patty. Wet the corners and edges of the pastry with cold water to allow it to stick together. Fold up the other 2 corners and press the edges into the previously folded up, moistened edges. You are likely to get little sharp corners at the bottom; fold and press them in too, to make a neat, roundish, and sealed packet. Turn the encased cheeseburger over and poke a few small holes in the top with a fork. Place it on the prepared pan and repeat with the remaining 3 Wellingtons.

Whisk the egg and brush the Wellingtons with it. Sprinkle them with the sesame seeds. Bake for 30 minutes if going straight into the oven, or for 40 minutes if they were refrigerated. (Still a good idea to take them out of the fridge 10 minutes before baking). Let rest 5 minutes before serving.
 
Make the Thousand Island Dressing:
1/3 cup mayonnaise
1 tablespoon lemon juice
1 tablespoon ketchup
1 tablespoon Dijon mustard
2 tablespoons relish
1 teaspoon Worcestershire sauce
freshly ground black pepper and sweet paprika to taste

Whisk everything together in a small bowl. This can be made up to 24 hours in advance.

Make the Salads:
1 head hydroponic lettuce
1 or 2 hydroponic tomatoes
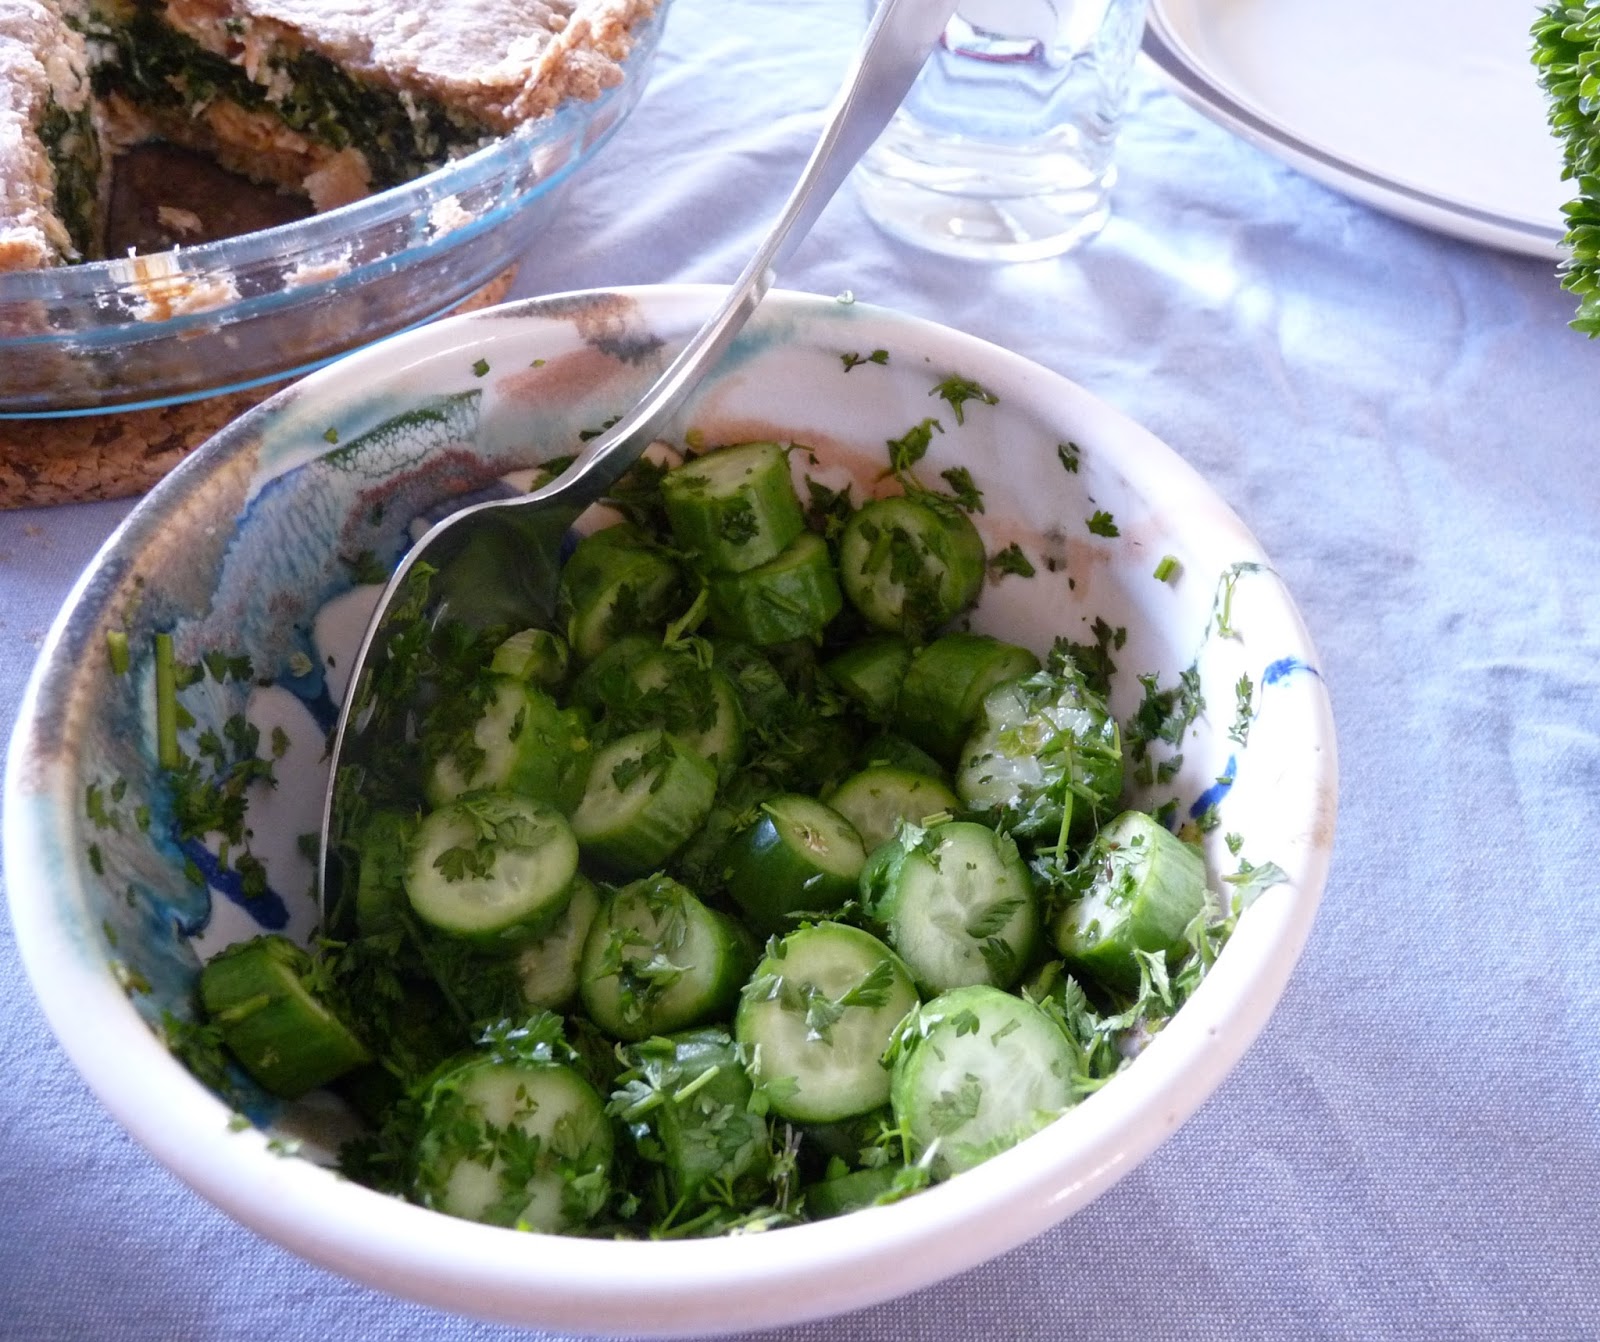
1 or 2 hydroponic cucumbers
3 or 4 slices of dill pickle
3 or 4 slices of red onion, sprinkled with salt and drained

Core the lettuce, and discard any damaged leaves. Wash and drain the rest. Arrange them divided amongst 4 plates. Core and slice the tomato, and arrange over the lettuce. Wash, trim, and slice the cucumber and arrange over the lettuce. Chop the dill pickle and arrange over the salads. Slice and quarter the onion, sprinkle with salt, and drain in a strainer for 15 minutes before rinsing and and draining well, and arranging it over the salads. Drizzle with the salad dressing. 


Wednesday, 1 July 2020

Shirazi Salad (Chopped Salad)

This is a pretty universal salad, eaten everywhere in the Middle East on into Iran, from whence comes the name Shirazi and the pull towards extra sourness from sumac and lemon juice. At its most basic, it consists of onions, cucumbers, and tomatoes, with a lemon juice and olive oil dressing. We saw it a lot in Turkey, where it is called Chopped Salad. In Israel it gets called Israeli salad, which is a bit of chutpah, given how everyone else in the region was already making it for yonks.

At this time of year I used green onions and threw in radishes, because they are around. I also still have some nice herbs. You don't have to use all of them; whatever you can get will be fine. You don't have to put in any of them really; the dried mint will be enough. You might want to apply it with a slightly heavier hand if you can't get any fresh herbs.

Lettuce does not officially go in this salad, but if there is one the garden is churning out right now, it's lettuce, so when this hit our plates it went onto a bed of chopped lettuce. Otherwise, I suspect this is too much dressing for the amount of salad and you may want to save some for another day.

4 to 6 servings
45 minutes prep time

Shirazi Salad, also known as Chopped Salad

Make the Dressing:
1/4 teaspoon cumin seed
1/2 teaspoon coriander seed
1/4 teaspoon salt
freshly ground black pepper to taste
1 1/2 teaspoons sumac
3 to 4 tablespoons olive oil
the juice of 1/2 large lemon

Grind the cumin and coriander well, and mix it with all the other spices. Mix in the oil. Add the lemon juice. Set aside to rest while the salad is made.

Make the Salad:
3 green onions OR 1 red onion
3 small greenhouse cucumbers OR 1 long cucumber
salt
8 to 12 radishes AND/OR 2 or 3 tomatoes
2 tablespoons minced fresh mint
2 tablespoons minced fresh parsley
2 tablespoons minced fresh dill
lettuce, optional 

Peel and finely chop the onions. Trim the ends from the cucumbers, and chop them in pieces just a bit bigger than the onion. Sprinkle them with about half a teaspoon of salt and leave them in strainer to drain for 20 to 30 minutes.

Wash, trim and slice the radishes. Core and chop the tomatoes. Wash, dry, and mince the herbs. Mix the radishes, tomatoes, and herbs in the salad bowl.

Rinse and drain the onions and cucumbers well, and add them to the tomatoes, etc. Toss with the salad dressing. Serve as-is or on a bed of lettuce.


Last year at this time I made Haskap-Raisin Pie.

Friday, 12 June 2020

Vaguely Thai Chicken Salad Cups

Really, this is more than vaguely Thai - it's Laab (or Larb) Gai, only I've removed the traditional roasted and ground Thai sticky rice - which I didn't have - and replaced it with bulgur, which I did have. I'm sure it changes both the flavour and the texture, but that's just how it goes sometimes, especially when you live in the boonies and are avoiding rice. I'd also say that made it faster and easier to make, and I never complain about that. If you are even more driven to avoid carbs than I am, you could replace even the bulgur with some very finely chopped/ground nuts or seeds.

Not sure this is traditionally served in lettuce cups as a Thai dish either, but it seems to have become a popular way to present it in North America, and since I didn't want to eat it with rice, it's a very convenient way to have it. I thought it needed a touch of colour so I wedged up a tomato which did the job and added a nice element to it. 

Served by itself, the two of us ate all of this and still wanted some dessert, but as ever with different eaters and more dishes served with it, it would go further.

2 to 4 servings
1 hour - 30 minutes prep time

Vaguely Thai Chicken Salad Cups

1/4 cup bulgur
450 grams (1 pound) ground chicken OR skinless boneless chicken thighs
the juice of 1 large lime
2 tablespoons fish sauce
1 or 2 fresh OR 6 dry makrut lime leaves
2 cloves of garlic
2 shallots
1/2 teaspoon red chile flakes
2 tablespoons mild vegetable oil
1/3 cup finely chopped fresh mint leaves
1/3 cup finely chopped cilantro
1/3 cup finely chopped green onions
1 small greenhouse cucumber
OR 3 or 4 red radishes
12 or 16 large, slightly cupped lettuce leaves

Boil some water to cover and soak the bulgur. Meanwhile, chop the chicken very finely, or if it is already ground, jut put it in a mixing bowl. Add the lime juice, fish sauce, and makrut lime leaves - whole if they are dry, very finely shredded if they are fresh. Mix well and set aside to marinate as you proceed.

Peel and mince the garlic and shallots, and set them aside with the chile flakes.

Heat the oil in a large skillet and add the chicken, with the marinade. Drain the bulgur well and it as as well. Cook over medium heat, stirring regularly, until the marinade has evaporated and the chicken is sizzling, lightly browned, and cooked through. Add the garlic, shallots, and chile flakes and mix in well; cook for another minute or so longer. Remove the mixture from the pan to cool, if you think it is hot enough that it will keep it cooking for too long; but the main point is that it should be cooled to room temperature or near it. Remove and discard the dry makrut lime leaves, if used.

Wash, trim, and mince the herbs and green onions. Trim and chop the cucumber or radishes finely. Wash the lettuce leaves and drain and dry them well. They should be as even in size as you can manage, which means it's best to have 2 heads of lettuce at hand and put the remains away for a more conventional chopped salad.

Mix the herbs, onions, and cucumber or radishes into the chicken once it is cool. Divide it evenly in little mounds amongst the prepared lettuce leaves, and pick 'em up and eat them like little tacos, which is to say that it's a good idea to have plenty of serviettes on hand. 


Last year at this time I made Rhubarb Ile Flottante

Friday, 17 January 2020

Beet & Cucumber Salad with Horseradish-Caraway Dressing

Horseradish with beets is classic, and also with cucumbers which also go really well with beets. As does caraway. How have I not put them all together before? Anyway, here they are with some lettuce which fits in with the crowd very well.

Winter salads! They can be done. And for once, I managed something decorative that was not a big nuisance to eat. I'm slow but I get there.

4 to 6 servings
about 1 hour to cook the beets
20 minutes prep time for the salad

Beet & Cucumber Salad with Horseradish-Caraway Dressing

Cook the Beets:
250 grams (1/2 pound; 3 medium) beets
1 tablespoon sunflower OR olive oil
1 tablespoon apple cider vinegar
salt & freshly ground black pepper

Wash and wrap the beets in foil, and bake for 1 1/2 to 2 hours until just tender, or wash the beets and put them in a pot with plenty of water to cover them, and boil them for 45 minutes to an hour, until just tender.

Let them cool enough to handle, then peel them and grate them. Toss them with the oil and vinegar, and season lightly with salt and pepper. Cover and keep refrigerated until you make the salad, up to 24 hours later.

Make the Dressing:
1/2 teaspoon caraway seed, crushed
2 tablespoons mayonnaise (light is fine)
2 tablespoons sour cream OR yogurt
1 to 2 tablespoons prepared horseradish

Crush the caraway seed and mix it in a small bowl or container with the remaining ingredients; best to do this a bit in advance of assembling the salad to allow the flavours to blend. Horseradish is very much at your discretion, depending on how much you like it and how strong yours is.

Finish the Salad:
1 small onion, red or pink for preference
1/2 bunch greenhouse lettuce
3 or 4 greenhouse mini cucumbers

Peel and slice the onion thinly. Put it in a strainer and sprinkle it with salt. Let it drain while you assemble the rest of the salad. 

Wash and dry the lettuce. For best presentation, cut off the tips of the leaves and arrange them around the outside of a shallow serving bowl. Chop the remaining lettuce. Wash, trim and slice the cucumbers.

Rinse the onions and drain them very well. Mix them with the lettuce and spread them in the middle of the salad bowl. Arrange the beets and sliced cucumbers over them. Drizzle with the salad dressing; you may opt not to put it all on, but to pass some of it for people who like extra dressing.


Last year at this time I made Polish Dill Pickle Soup.

Monday, 5 August 2019

Blueberry Cucumber Salad with Feta

Well, it's a salad. Made with stuff that was around. Because, you know, it's in season. I can't say I have very much to say about it, beyond the usual cries of "Tasty!" I like cheese and fruit in salads; it is known. 

4 servings
20 minutes prep time

Blueberry Cucumber Salad with Feta

Make the Dressing:
2 teaspoons honey
the juice of 1/2 medium lime
1 tablespoon sunflower or nut oil
salt & freshly ground black pepper to taste

Mix the honey and lime juice in a small serving bowl. It may be helpful to warm the honey first; the microwave is the easiest way, for just a few seconds until liquid. Mix in the oil, and salt and pepper to taste. 

Make the Salad:
1 medium cucumber
1 cup blueberries
2 tablespoons small mint leaves
1/4 cup finely chopped parsley
90 to 125 grams ( 3 to 4 ounces) feta cheese

Wash, trim, and peel - if you like - the cucumber, and cut it into bite-sized chunks.  Add it to the bowl with the blueberries, washed and drained well. Wash, dry and finely mince the herbs, and add them. Cube or crumble the feta cheese and add, then toss the salad and serve.


Last year at this time I made Zucchini, Beans & Onion Japanese Style.

Wednesday, 6 March 2019

Beet & Cucumber Salad

Isn't it pretty!? It looks so like spring. Unlike the great outdoors. If we were a little further along in the season, the onion could be replaced with some finely chopped chives, which would be even prettier, although just as tasty either way I would think.

Other than the need to cook the beets in advance, this is as simple a little salad as they come. The proportions given will serve one person, maybe 2 if you have light eaters. It is fairly substantial in comparison to its apparent volume. Scale it up according to how many people you are serving.This can be made a little in advance and leftovers, if well covered and refrigerated, will be not quite as good the next day, but respectable, which is more than you can say for most salads.

per 1 or 2 servings
15 minutes prep time

Beet & Cucumber Salad

1 small cooked beet
1 tablespoon finely chopped onion
1 small greenhouse cucumber
1 tablespoon sour cream
2 teaspoons dill pickle brine OR 1 teaspoon lemon juice
salt & freshly ground black pepper to taste

Wash however many beets you like and put them in a pot with water to cover. Bring to a boil and boil for 40 minutes, until tender. Check the water and add more from a boiling kettle if it gets too low. Let them cool; this can be done a day in advance.

Chop the onion finely and put it in a sieve with a sprinkle of salt. Let it drain until you are ready for it.

Peel the beets and chop them. Wash, trim, and chop the cucumber. Rinse and drain the onion well. Mix the vegetables in a small bowl.

Add the sour cream, brine or lemon juice, salt, and pepper. Mix gently but well and serve.


Last year at this time I made Oatmeal Farls (Soda Bread).

Monday, 21 January 2019

Strawberry - Endive Salad

We've been settling very nicely into sturdy winter comfort foods, but now it's time for something completely different. Fresh Ontario strawberries! Yes they are from a greenhouse and no they are not quite as good as field-grown berries in June, but they are really not bad and better than imported ones. What an amazing salad to have in the middle of winter!

Honey and lime juice add a touch of sweet and sour to complement the sweet-tart berries, soft smooth lettuce, and slightly bitter endive. So good! You could add a little apple or cucumber if you had some, to make it even fruity-er or even salady-er, whichever you prefer.

4 servings
20 minutes prep time

Strawberry - Endive Salad

Make the Dressing
the juice of 1 lime
1 teaspoon honey
1/2 teaspoon fennel seed, ground
1/2 teaspoon coriander seed, ground
salt & freshly ground black pepper to taste

Squeeze the lime juice and mix it with the honey in a small bowl or jam jar. Grind the fennel and coriander seeds, and add them along with salt and pepper to taste. Mix well.

Make the Salad:
1 head greenhouse Boston lettuce
1 head Belgian endive
1 small greenhouse cucumber, optional
1 medium apple, cored and chopped, optional
225 grams (1/2 pound) greenhouse strawberries

Wash, tear up, and dry the lettuce and arrange it in a salad bowl. Wash, trim, and chop the endive and sprinkle it over the lettuce. Wash and chop the cucumber or apple (core it) if using. Wash, trim, and slice the strawberries. Arrange everything over the salad, and drizzle with the dressing.


Last year at this time I made Sweet Potato, Lentil & Feta Salad.

Wednesday, 16 January 2019

Polish Dill Pickle Soup

Yes, I said soup. With milk in it, even. I admit to having a prejudice against milk with pickles - I even know from whence it came; see L. M. Montgomery's The Story Girl - but in fact they work very well together, at least in this soup. These are, do I have to say, Dill Pickles by the Jar, but good purchased non-pasteurized (refrigerated) dill pickles will do in a pinch.

If you don't have any parsnips and don't want to buy a bag just to get one little one, you can lean more heavily on the carrot instead. (But go for it - then you'll have parsnips and parsnips are great.)

If you add the pickles and brine sooner, the soup will be more mellow. If you add them right towards the end, it will be much pickle-ier. It's your choice. You could also be indecisive and add some earlier and some later to steer a very pleasant middle course.

4 servings
30 minutes prep time

Polish Dill Pickle Soup

3 cups (500 grams; 1 pound) diced potatoes
1 medium carrot
1 small parsnip
3 cups unsalted chicken or vegetable stock
1 bay leaf
2 cloves of garlic
2 tablespoons unsalted butter
2/3 cup finely diced dill pickles
1/3 cup dill pickle brine
1 tablespoon arrowroot or cornstarch
2/3 cup milk or sour cream
freshly ground black pepper to taste

Wash, trim, and dice the potatoes. Peel and grate or finely dice the carrot and parsnip. Put them in a heavy-bottomed soup pot with the stock and the bay leaf. Bring to a boil, and boil for 15 minutes until the potatoes are very tender.

Meanwhile, peel and mince the garlic. Melt the butter in your smallest pan and cook the garlic gently in it until just showing signs of turning colour. Transfer butter and garlic to the soup pot at once.

When the potatoes are tender (or sooner; see the note above) add the dill pickles to the soup. Measure the brine and mix in the starch. Mix well into the soup.

Just before serving, stir in the milk or sour cream (I used a mixture of both and recommend it) and season generously with coarsely ground black pepper. The soup should be served steaming hot but do not let it simmer (or boil) or it will curdle. 


Last year at this time I made Chicken in Goat Cheese, Mushroom, & Dried Tomato Sauce.

Friday, 15 June 2018

Strawberry Cucumber Salad

One of my earliest recipes on this blog was for a salad with strawberries and cucumbers. This take is a little lighter and simpler; a side salad rather than a meal in itself. Still, although I have omitted a great deal of cheese and replaced it with a sprinkling of toasted pumpkin seeds, I was surprised to take a look back and see how similar my thought about strawberry-cucumber salad are still, eleven years later. Some things are classics for a reason, I guess.

We are picking massive quantities of strawberries at the moment, as well as haskaps. We came home from 2 days away to discover that we got 7 millimetres of rain while we were gone, and it went a long way towards reviving the garden and gave the fruit a final push into ripeness. I expect to be very busy over the weekend dealing with it all. 

4 servings
20 minutes prep time

Strawberry Cucumber Salad

Make the Dressing:
1 tablespoon honey
the juice of 1/2 a lemon
1/8 teaspoon salt
1/8 teaspoon Aleppo pepper
freshly ground black pepper to taste
3 tablespoon olive or sunflower oil

Whisk or mix the above ingredients in a small bowl or jam jar.

Make the Salad:
3 to 4 small greenhouse cucumbers
6 medium-large leaves of lettuce
1 cup sliced strawberries
2 to 4 tablespoons toasted and salted pumpkin seeds

Wash the cucumbers and cut them into very thin slices; I used a vegetable peeler and was happy with how that turned out. Salt them and put them in a strainer. Let them drain as you prepare the other ingredients.

Wash and dry the lettuce, and arrange it in a salad bowl. I cut off the top thirds and arranged them around the edge of the bowl, then chopped the remainder into bite-sized pieces and spread them over the bottom of the bowl. It did make the salad a little easier to eat.

Wash and drain the strawberries. Hull them and slice them.

Rinse the cucumbers and pat them dry with a towel. Strew them in layers over the lettuce with the strawberries and pumpkin seeds. Drizzle with the dressing. 


Last year at this time it was Blogaversary week. Guess that means the blog is now eleven years old!

Monday, 7 May 2018

Cucumbers with Chervil

Oh, here's a difficult recipe. Actually, given that you probably have to grow chervil yourself in order to have it, it's more difficult than it looks at first glance. But if you can get that part down, the rest of it is a doddle.

Cucumbers and chervil go together most amazingly well. This is an extremely refreshing little spring salad - it's worth growing chervil just for this (although there are lots of other things to do with it too!)

And hurray - I think this is the first really spring-like dish of the year. The cucumbers will come out of a greenhouse, but the chervil is from the garden.

4 servings
10 minutes prep time


2 cups sliced small cucumbers (4 to 8)
1/4 cup finely minced fresh chervil
1/2 teaspoon sugar
1/4 teaspoon salt
3 tablespoons apple cider vinegar

The little middle-eastern greenhouse cucumbers are ideal for this. Wash and slice them thinly - you could peel them, but they're such delicate little things it hardly seems necessary - and put them in a bowl. Wash, dry, and chop the chervil and add it.

Sprinkle the sugar and salt over the cucumbers and chervil. Drizzle over the vinegar, and mix gently.


Last year at this time I made Spinach with Chervil.

Wednesday, 14 March 2018

Red Cabbage Slaw in Cucumber Boats

Cucumber boats filled with red cabbage slaw make a simple but very visually striking salad and they combine very nicely in the mouth too.

It's a bit hard to say how many cucumbers this amount of slaw will fill; it will depend on the size you get and to some degree you will have to eyeball it. I only had enough to fill 3 cucumbers (6 halves) but mine were unusually large for greenhouse cucumbers. This made them easier to stuff probably, but also meant they made rather large servings. That's okay if they are your salad at a meal, but if you want them as an appetizer or hors d'oeuvre, it would be better to get smaller ones.

makes 6 to 12 servings (boats)
1 hour - 30 minutes prep time

Red Cabbage Slaw in Cucumber Boats

2 cups finely chopped red cabbage
1 teaspoon salt
3 to 6 small greenhouse cucumbers
1/4 to 1/3 cup chopped pea shoots or parsley
the juice of 1/2 lemon
1 tablespoon olive oil

Wash, trim, and finely shred the cabbage. Massage it with the salt until it feels quite wet, then place it in a strainer and drain for about 1/2 hour.

Meanwhile, slice the cucumbers in half lengthwise. Use a grapefruit spoon or other thin-edged spoon to scoop out the cucumbers; all of the seedy area should bring you to within a quarter inch of the sides, which is good. Chop the scooped-out flesh and mix it in with the draining cabbage.

Salt the insides of the cucumbers, and set them aside. 

Wash, trim, and chop the pea shoots or parsley, and mix them in with the cabbage.

After half an hour, rinse and drain the red cabbage, etc., well. Rinse and drain the cucumbers well. Toss the cole slaw with the lemon juice and olive oil, and use it to stuff the half cucumbers.


Last year at this time I made Duck Terrine Roasted in the Duck Skin.

Wednesday, 14 February 2018

Spring Roll Salad with Chicken

It seems I've gotten a bit out of the habit of making salads, so I am trying to do more of them this winter, which is never the easiest time for salads but it can be done. It helps that I've been really quite impressed with the greenhouse lettuce I've been getting this winter. There is a lot more variety of types than there used to be, and the quality seems better too - more substantial. The price is still higher than imported lettuce, but given how the droughts down south have been driving up prices, the differential is better there too than it used to be.

At any rate, this salad has been a regular this winter. All the flavours of a Vietnamese fresh spring roll in a salad, with a little grilled chicken to make it a meal. You could replace the chicken with beef, pork, or tofu for a change if you liked.  

1 hour prep time
4 servings

Spring Roll Salad with Chicken

Make the Dressing: 
1 clove of garlic
the finely grated zest of 1/2 lime
the juice of 1 lime
2 tablespoons fish sauce
1 teaspoon honey
1 teaspoon chile-garlic sauce

Peel and mince the garlic and put it in a small bowl or jam jar. Wash the lime, and grate the zest into the container with the garlic. Add the rest of the ingredients and mix well. Set aside.

Make the Salad:
2 bundles cellophane noodles
2 cups bean sprouts
1 medium carrot
2 mini greenhouse cucumbers
1 cup finely shredded cabbage
1/4 cup chopped fresh mint
1/4 cup chopped fresh cilantro
500 grams (1 pound) skinless, boneless chicken breast
1 tablespoon bacon fat or mild vegetable oil
1/2 cup finely chopped peanuts (optional)

Prepare the cellophane noodles according to instructions, or soak them in boiling water for about 10 minutes, until there are no white bits left and they are completely translucent. Drain well, and cut them with scissors into manageable pieces. Put them in your salad bowl.

Wash and drain the bean sprouts very well.

Peel and grate the carrot. Trim and grate the cucumbers. Trim the cabbage and shred it finely. Rinse and drain it well.

Wash, dry, and chop the mint and cilantro.

All these vegetables go into the salad bowl, being sure to leave the sprouts and cabbage until well drained. Toss well and divide amongst individual plates.

Cut the chicken into bite-sized strips. Heat the fat or oil in a large skillet over high heat. Add the chicken pieces and cook, stirring regularly, until done; about 5 to 7 minutes. Let them cool for a few minutes before arranging them over the salads. Drizzle over the dressing, sprinkle with chopped peanuts if desired, and serve.

Wednesday, 13 September 2017

Panzanella

This looks a lot like the Fattoush I made a while back, and why not? It's another Mediterranean salad based on the magical interaction between ripe tomatoes and stale bread. The Italian version is more basic, maybe even a little austere. Still, the Italians can get into fights over whether you use a bread made with salt or not, even while declaring that this is a versatile salad designed to use up whatever is around.  You are not so likely to have the luxury to choose the exact iteration of Italian style bread so I say use whatever you can get.

You can certainly use cherry tomatoes instead of the beefsteaks if you prefer or that's what you have. This salad doesn't always even have the cucumber in it, so you could omit it and add a bit more tomato to compensate. Personally I think the basil is pretty indispensable but you could replace it with fresh oregano or parsley.

4 servings
30 minutes prep time

Panzanella, an Italian Bread Salad

1/2 large sweet Spanish OR red onion
4 to 6 slices stale Italian bread
1/4 cup olive oil
1 English (long) cucumber
1 large or 2 medium beefsteak tomatoes

1/4 cup finely torn or shredded fresh basil leaves
1/4 cup balsamic vinegar
salt & freshly ground black pepper to taste

I do the onion first because I like to salt it to make it milder. Peel it and cut it in half from top to bottom, then cut into thin slices the other way. Put them in a strainer and sprinkle them with salt, then set them aside to drain for about 10 minutes or so. Rinse and drain well before adding them to the salad.

Your bread should be good and stale. Brush it with the olive oil on both sides, arrange it on a baking tray, and toast in the oven at 425°F until crisp but not more than lightly browned around the edges. Crumble it up and put it in your salad bowl.

Peel (if you like) the cucumber, and cut it into dice. Peel (if you like, by blanching for 1 minute in boiling water then dropping it into cold water) the tomato, and cut it into slightly larger dice. Mix them in your salad bowl with the bread.  Add the onion at this point. If you don't care to salt and drain it, wait until now to prepare it. Wash, dry, and tear up or shred the basil and add it.

Sprinkle the balsamic vinegar over the salad. If perchance you didn't use the full 1/4 cup of olive oil to brush the bread, sprinkle any remaining over the salad now. Season with salt and pepper to taste. Toss well. Let the salad sit for 10 or 15 minutes to soften before serving.


Last year at this time I made Versatile Chocolate Cake Dressed as an Owl, Because Why Not? which also made  use of Vanilla Pudding Frosting. And the chocolate version too, for that matter.

Monday, 4 September 2017

Melon, Cucumber & Feta Salad

This is a variation on a salad I made in first few months of this blog, only with apricots instead of melon. It is interesting (to me) to note that while I have never thought of myself as a reckless user of sweeteners, I called for a lot more honey then than I would think appropriate now. In fact, I think you could use less, or even none, although it does help play up the sweet-sour-salty flavour triangle here.

I had intended to put some mint into this but some annoying little critter had beaten me to it, leaving nothing but bare stems and a few very tattered, wilting leaves. Bah humbug. 

4 servings
15 minutes prep time

Watermelon, Cucumber & Feta Salad

1 cup peeled, diced cucumber
1 cup peeled, diced watermelon, muskmelon, or cantaloupe
1/2 cup drained, diced feta cheese
2 tablespoons finely minced fresh mint or basil, optional
the juice of 1/2 large lime
1 tablespoon honey
freshly ground black pepper to taste

Wash, peel (if you like) the cucumber, and cut it in dice; put it in your salad bowl. Wash, peel (I do recommend) your melon, and cut in similar dice and likewise put it in. Drain and dice the feta cheese; add it to the bowl. Wash, dry, and mince the mint or basil if you would like to add some and have not been visited by egregious pests.

Squeeze the lime juice, and mix it with the honey - I find it helpful to heat them together in the microwave for just a few seconds - then toss this dressing into the salad. Finish with a good, rather coarse, grind of black pepper.

... Aaaaand serve.


Last year at this time I made a Pasta Salade Niçoise.

Friday, 18 August 2017

Green Bean Greek Salad

What could be more summery than a Greek salad? Maybe one made with the liveliest, snappiest, fresh green beans. Otherwise, this is a pretty classic salad.

I didn't put in any green (or other colour) pepper because they have been very dilatory about producing this year, but if you had some and wanted some, about 1/4 of a typical pepper would be about right. I think a bit of yellow or orange pepper would add a touch of lovely colour. It was perfectly delicious without any though.

4 to 6 servings
45 minutes prep time

Green Bean Greek Salad

Make the Dressing:
2 cloves of garlic
1 tablespoon minced fresh oregano
OR 1 teaspoon rubbed dry oregano
a little finely grated lemon zest
1/4 teaspoon salt
freshly ground black pepper to taste
the juice of 1 large lemon
1/4 cup olive oil

Peel and mince the garlic. Wash the oregano and strip the leaves from the stems; mince the leaves finely to measure 1 tablespoon. Put the garlic and oregano into a small bowl or a jam jar and add the rest of the ingredients. You just want a few passes on the grater for the lemon zest, before you juice it and add the juice. Stir or shake and set aside until needed. 

Make the Salad:
250 grams (1/2 pound) green beans
1 medium sweet white or red onion
2 small middle eastern type cucumbers
1 medium to large beefsteak tomato
a good handful of parsley
100 grams (4 ounces) feta cheese
green or black olives to taste

Put a small pot of water on to boil for the beans. Wash and trim the green beans, and cut them into bite-sized pieces. Cook them in the boiling water for 4 to 6 minutes, according to your taste. They should be bright green and still quite crisp. Drain them, rinse them in cold water until cool, then drain again very well. Put them in a salad bowl.

Meanwhile, peel the onion. Cut it in half from pole to pole,then cut each half into half-moon slivers. Put them in a strainer, salt generously, and set aside to drain for about 10 minutes.

Wash, trim, and peel the cucumbers, to the extent that you would like them peeled. Cut them in halves or quarters lengthwise, then into slices. Add to the beans.

Wash the tomato. Blanch and peel it if you like, then chop it into bite sized pieces. Add to the salad.

Wash and dry the parsley, and chop it. Basically, use however much you like. I think a good half cup chopped is not too much, but I like parsley quite a lot. Add it to the salad.

Dice or crumble the feta cheese and add it to the salad.

Rinse and drain the onion well, and add it to the salad.

Toss the salad with the dressing, and garnish it with whatever quantity of olives you deem appropriate.


Last year at this time I made a Savoury Zucchini Roll.