Showing posts with label Spices Seasonings and Condiments. Show all posts

Wednesday, 25 May 2022

Rhubarb Chutney

This has been a very strange year for weather, so pretty much normal, then. Normal for now, anyway. As a result of the combination of mostly rather cool days interspersed with the occasional heat-wave level stinker, my rhubarb plants have only just reached a sufficient height to pick from them, but already they wanted to send up flowering stalks, which generally signals the end of rhubarb season. I pulled the flowering stalks out and put them in the compost and generally intend to pretend that never happened. 
 
The actual rhubarb I picked was not the most tender, but it is generally useable and tastes good. Once it got simmered into this tasty melange it was just fine. 

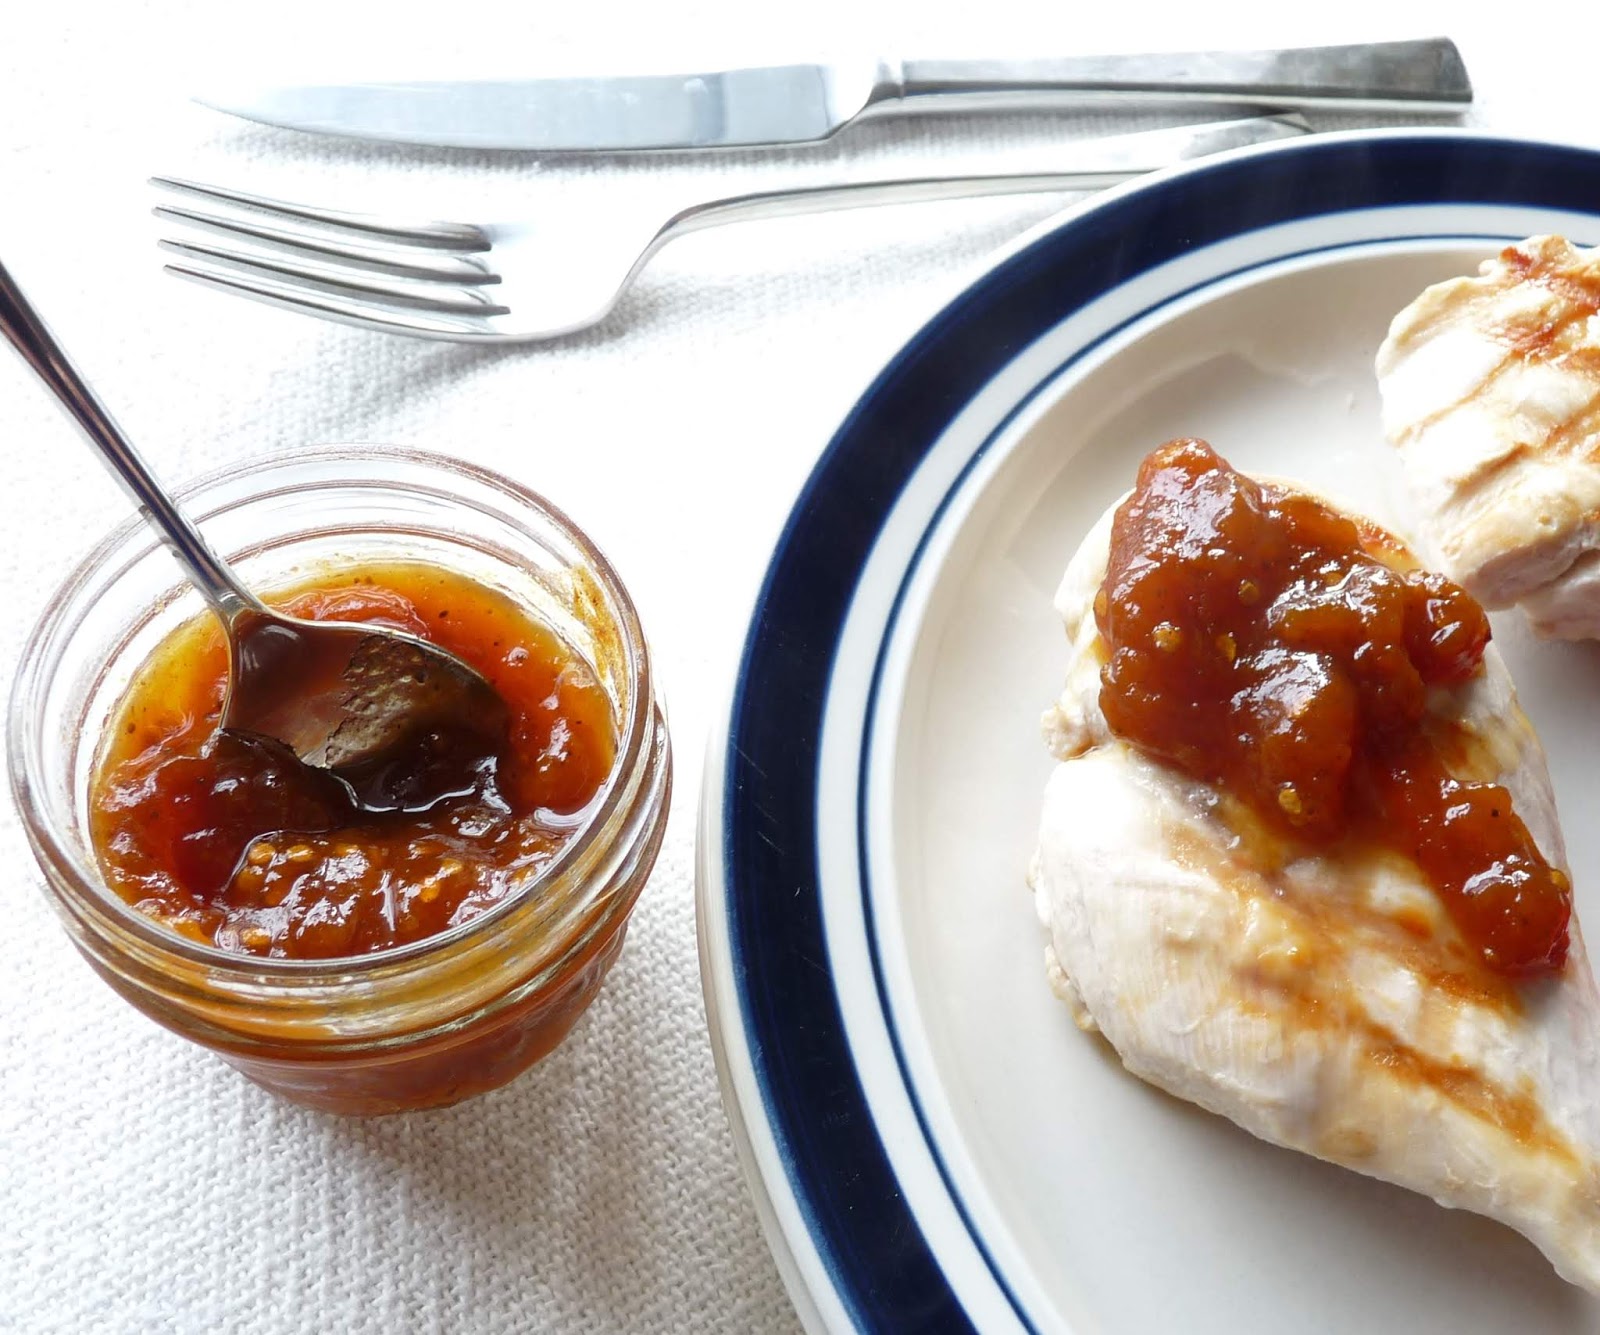
I'm sure there are a lot of things you can serve this chutney with, but I know that I will probably eat about 90% of it with good sharp Cheddar and crackers. 

One of the things I am finding is that as I reduce the amount of sugar that I put into things, the amount of spices must also go down, or they will be out of balance.
 
5 x 100 ml
1 hour 30 minutes - 1 hour prep time 
 
Rhubarb Chutney

4 cups diced rhubarb
2 cups diced onion
1/4 cup peeled slivered fresh ginger
2 cups raisins
2 cups vinegar, apple cider or white
1/2 cup Sucanat OR dark brown sugar OR coconut sugar
1 teaspoon pickling salt
1/2 teaspoon black peppercorns
1 teaspoon allspice
1 teaspoon cinnamon
1/2 teaspoon ground ginger
1/4 teaspoon freshly grated nutmeg
1/4 teaspoon ground cloves
 
Wash and trim the rhubarb, and cut it into short pieces. Put it in a canning kettle. Peel and chop the onions, and add them. Peel and slice the ginger thinly across the grain, then into thin slivers and add them.
 
Add the raisins, vinegar, and sweetener of your choice. 
 
Grind the pepper and allspice with the salt, then add them to the kettle along with the rest of the spices. Turn the heat on and bring the mixture up to a simmer, then simmer for 45 minutes to an hour, stirring regularly, until the rhubarb has completely disintegrated and the mixture has thickened. It will be fairly thin at the start as the rhubarb begins to break up, but it will be quite thick by the end and will need more frequent stirring the thicker it gets.

As soon as the chutney has been started, place 5 or 6 canning jars in the canner (along with a half-sized jar or 2, just in case) and cover them with water to cover them by about 1". Cover and bring to a boil. Boil for 10 minutes. This will take about 45  minutes, conveniently enough. Add a ladle and funnel to sterilize as well.

While the chutney cooks and the jars sterilize, prepare the lids and rings. They need go go into boiling water to cover them for 1 minute (or according to manufacturers instructions) once you are ready to bottle the chutney. 

Remove the sterilized jars from the canner with a jar lifter, draining them well and place them on a heat-proof board. Use the sterilized funnel and ladle to fill the jars with the chutney. Wipe the rims of the jars clean with a bit of paper towel dipped in boiling water and seal with the prepared lids and rings. Return them to the canner full of boiling water and boil for 10 minutes before removing them. Let cool and check that they have sealed properly. 

Jars should last for up to 1 year, unopened, when kept in a cool, dark spot. Refrigerate once opened. Use it to give a little verve to cheese, baked chicken or fish, samosas, or whatever else you can think of. 


Last year at this time I made Lentils with Sorrel & Poached Eggs.

Wednesday, 4 August 2021

Toum - Lebanese Garlic Sauce

Ever since we started visiting Windsor regularly, Toum has become part of our diet. This is the garlic sauce served in Lebanese restaurants with shawarma, and with lots of other things too. It's basically the technique for making mayonnaise, only without any egg and with garlic instead. Lots and lots of garlic. Lots. Since we are in garlic harvest time, I decided to try making my own.
 
Most of the recipes I saw make at least twice as much Toum as this. This is still enough for about 4 meals for the 2 of us, which is as much as I'm going to want on hand at one time. I'd maybe like even less, but I think it would be hard to make less because of needing there to be enough in the food processor to engage with it. Does it freeze? I don't know; I may try it at some time. It does keep well in the fridge (assuming you keep the spoon clear of the meat, *cough, cough*) 

I used about 1/3 extra-virgin olive oil to a more mild, neutral oil. Olive oil is traditional, but a more neutral oil will let the garlic really shine and make the sauce more versatile, and may allow for a better texture too. And really, given the amount of garlic in this, good olive oil will be a bit lost. 

It isn't necessary to chill the ingredients, but if the sauce gets too warm it may break. I found it helpful to peel the garlic the night before in order to speed up the process of making the sauce the next day. Next time I would put the other ingredients into the fridge along with the garlic. 

Fresh mint is a possible addition to this, or since I have a lemon in hand I'd be tempted to add a little lemon zest.
 
makes 1 generous cup - 8 servings
20 minutes to peel garlic
20 minutes to make sauce 

Toum - Lebanese Garlic Sauce on Grilled Chicken Salad
 
1/2 cup (about 3 large heads) peeled and trimmed cloves of garlic
3/4 teaspoon salt 
1 cup mild vegetable and/or olive oil
the juice of 1 lemon
 
Peel the garlic and measure it out. Put them into the fridge to chill, along with the oil and the lemon. 

To proceed, trim the roots and any bad spots off of the garlic. Put them in the small insert bowl of a food processor with the salt, and process to a paste. This will take about 5 minutes, and you should stop and scrape down the sides several times. 

Begin adding the oil, about a teaspoonful at a time. Let each spoonful be well blended in before you add any more. Continue this way until you have a smooth, light emulsion; probably a further 10 minutes. Slowly process in the lemon juice. Taste, and adjust the salt and/or lemon juice if you like. Transfer to a sealable container. 

It will keep in the fridge for at least a week and up to a month, although it will lose flavour as it sits. Given how strong it is when it is first made, this perhaps not a terrible thing; it may be desirable to make it a day or two in advance of when it is first wanted to allow it mellow somewhat. Keep it well sealed for the sake of the sauce, and also everything else in the fridge.

Serve with grilled meats, poultry, fish, or tofu; use it on salads and sandwiches. 


Monday, 2 August 2021

Unsweetened Cucumber Relish

Since this is a canned for storage recipe, it won't surprise you to hear that I made it last summer, and have been eating it through the winter and up to now. I'm very pleased with how this has come out! 

Sweet relishes are no longer a good idea for me, so I came up with one that has some good, zingy flavours but no sugar. For my first bite, I have to admit I was disappointed. It looked like a classic sweet relish, after all. But pretty quickly I was judging it on its own merits, and once I adjusted, I thought it was really delicious. I put it in my tuna salad (see below!) but it is also excellent on hot dogs or other sausages, or hamburgers, or wherever you think some relish ought to go. 

The cucumbers don't need peeling as long as they are young and reasonably tender, and if they were not I would not go to all this work. I modeled this somewhat on my Bread & Butter Pickle recipe, and I suspect you could slice the cucumbers for pickles instead of relish if you preferred. I would also try it with zucchini (which have worked successfully for the Bread & Butter Pickles) but you should do a couple cups extra as they shrink down more when drained.
 
7 x 500 ml
1 hour to prepare plus 3 hours to drain 
about 1 hour to can


Unsweetened Cucumber Relish

Start the Relish:
16 cups finely diced pickling cucumbers
3 cups peeled and finely diced onions
1 cup finely diced red OR orange pepper
1/3 cup pickling salt

Wash, trim, and chop the cucumbers. Peel and dice the onions. Wash, cored and de-seed the peppers, and dice them. Layer them in a large strainer with the salt, and place in a cool spot to drain for 3 hours.

Finish the Relish:

1/4 cup peeled and minced fresh ginger
2 large heads of garlic
2 tablespoons mustard seed
1 tablespoon coriander seed
2 teaspoons ground turmeric
1 teaspoon red chile flakes
2 1/2 cups white vinegar
1 1/4 cup water

Put the jars on to boil, in a canner with water to cover them by at least an inch.
 
Peel and mince the ginger. Peel and mince the garlic. Mix them with the remaining ingredients in a canning kettle. 
 
When the water in the canner (with the jars) begins to steam, bring the spices to a boil. Boil for 2 minutes, then add all the vegetables. Bring them up to a boil, stirring regularly. 
 
Drain the jars, half into the canner and half into the sink. Place them on a heat-proof board and ladle the relish into them. Wipe the rims of the jars with a bit of paper towel dipped in the boiling water, and seal them with lids and rings which have been boiled for 1 minute (according to manufacturers instructions). 

Return the sealed jars to the canner. Boil them for 10 minutes. Allow them to cool, then test the seals and label them. Keep in a cool, dark spot for up to a year; refrigerate once open. 


Last year at this time I made Zucchini Tuna Melts.

Wednesday, 10 March 2021

Pickled Red Cabbage

I've been getting into quick pickling a bit this winter. Red cabbage makes a very nice one, and is an excellent addition to salads, with its brilliant colour and crunchy, faintly spicy flavour. I'll be making use of it in the next post.

It's not much more work than cutting up some red cabbage for one salad, but then it's around for up to a dozen more. Just pick out the larger whole spices when you fetch it out of the jar; they are not particularly nice to bite into.
 
about 4 cups
2 days 20 minutes - 20 minutes prep time 
 
Pickled Red Cabbage, in a jar and in a salad

5 cups finely shredded red cabbage
1 bay leaf
2/3 cup filtered water
1/3 cup apple cider vinegar
1/3 cup red wine vinegar
2 teaspoons pickling salt
1/2 teaspoon mustard seeds
1/2 teaspoon black peppercorns
1/2 teaspoon coriander seeds
1/2 teaspoon allspice berries
1 teaspoon ground ginger
1 teaspoon sugar

Have a very clean 1 quart or litre canning jar on hand with a clean lid and ring. They do not need to be sterilized, but should be fresh out of the dishwasher or scalded with boiling water. 

Wash, trim, and finely shred enough cabbage to fill the jar, tamping it in as you go. Add the bay leaf when it is about half full. 

Put all the remaining ingredients in a pot and bring them to steaming hot. Pour the hot brine over the cabbage. Cap it and leave it on the counter for 2 days. Then, refrigerate it, and keep it refrigerated subsequently. It can be used at any point now, and should keep for several weeks. 


Last year at this time I made Rutabaga Gnocchi

Friday, 8 January 2021

Bread Spice Blend

This blend of spices will seem very familiar once you add it to a rye bread recipe... this is what gives certain types of rye bread that fragrant and delectable more-more-more flavour. Ummmm! 
 
You can adjust these spices to your own personal taste, but I have to say I thought this combo with these proportions was perfect. 
 
I plan to use it for more than rye bread, although that too. How about in Rye Spaetzle? I'm thinking cookies. Soup? Casseroles? And...? (Stay tuned.)
 
makes about 2 tablespoons
10 minutes prep time
 
Bread Spice Blend

2 teaspoons caraway seed
2 teaspoons coriander seed
2 teaspoons fennel seed 
1 teaspoon anise seed
1/8 teaspoon fenugreek seed

Measure out the spices into a small bowl. Heat an unoiled small skillet over medium heat. When it is hot, add the spices and cook, stirring regularly, until fragrant and very lightly toasted. Return them to the bowl to cool. 

Grind the spices as finely and evenly as you can, using a mortar and pestle, or electric grinder (coffee or spice grinder; Vitamix dry compartment, etc). Keep sealed in a cool dark spot until needed.

Monday, 30 November 2020

Sauce Soubise

Sauce Soubise is one of those recipes that shows up very often in mid-Victorian to Edwardian cook books, at which point it seemed to go thoroughly out of fashion. Instructions to make it varied quite a bit, although the main question seemed to be whether the onion got boiled or not before the pan cooking. I chose not, and I think that was the right choice. Boiling the onions would have made them very mild, but since I am not a delicate Victorian who faints (with horror, not delight) at a whiff of allium, that was exactly what I didn't want. 

That said, it's important to choose good, tasty onions, and to cook them quite thoroughly, even though they are not to brown. Not too surprisingly for a Victorian sauce, this will be best as an accompaniment to fairly plain cooked meats, poultry, and fish. Although, we had a fair bit left over and the next day I tossed it with pasta and vegetables, very successfully. It kept very well so this is something that could be made the day ahead and reheated easily.

So will this dish come back into fashion? Likely not. It was quite tasty, but it's still basically a creamed onion sauce, and one that is fairly slow and finicky to make. It's not a surprise that it went out of style at just the time when middle-class women in large numbers started having to do their own cooking.
 
6 to 8 servings
1 hour prep time
 
Sauce Soubise - French Onion Sauce
 
450 grams (3 large or 4 medium) onions
4 tablespoons unsalted butter
1/4 teaspoon salt
freshly ground black pepper to taste
a few good scrapes of nutmeg
1 tablespoon barley flour OPTIONAL
1 tablespoon sherry
1 1/3 cups whole milk OR light cream

Trim and peel the onions. Reduce them to a purée, either by grating them very finely, or processing them in a food processor. 

Heat the butter in a large, non-reactive skillet over medium heat. Add the onions, along with any juice they have exuded in the puréeing process. Simmer the mixture, stirring regularly, until the onions smell "done". This will be about 30 to 40 minutes. Reduce the heat after the first few minutes; they should cook very slowly and not turn brown at all, although by the time they are cooked the whole mixture may have darkened very slightly. While they cook, season with the salt, pepper, and nutmeg. 

If you wish to have a fairly thick sauce, sprinkle the flour over the onions at this point and mix it in well. Sprinkle over the sherry. Cook for another minute or two, then begin to add the milk or cream slowly, stirring well between each addition to ensure a smooth sauce. The onions will form a thick enough paste that flour may not be necessary; in that case just add the milk or cream in the same way as if the flour had been added. 

When the milk or cream is all in, and the sauce is smooth, transfer it to a serving dish, and serve. 


Last year at this time I made Poppy Seed - Bran Soda Bread.

Thursday, 12 November 2020

Polish Seasoning Blend

I've posted this before, but as part of another recipe. However, I find myself reaching for it frequently, and so it merits its own post. It's based on a commercial mix I found in a Polish grocery store, and it is extremely useful: good in beef and pork dishes, and it really shines with poultry and fish. It's just very versatile, and I recommend it highly. I usually make a double recipe. You can also expect me to post more recipes calling for it. 
 
10 minutes prep time 


1 tablespoon mustard seed
1 tablespoon coriander seed
4 teaspoons caraway seed
4 teaspoons sweet Hungarian paprika
1 tablespoon rubbed thyme OR savory
1/2 teaspoon Aleppo or similar not-too-hot chile/paprika

Grind the mustard, coriander, and caraway seeds. Sift them and regrind anything that didn't go through. When all is ground finely, mix with the remaining spices. Keep sealed in a jar in a cool, dark spot until needed.

Friday, 24 April 2020

Crisp Fried Pork with Parsley Sauce

This is almost - but not quite - the national dish of Denmark. Mr. Ferdzy and I joke that everything is better with bacon, unless it's better with whipped cream, with the exception being a few dishes - usually Danish - better with both.

Whipped cream is an exaggeration, but this is pork belly (i.e. uncured bacon) and it is traditionally served with a cream sauce with parsley in it. I could not quite face the idea and while I still made a parsley sauce, I toned it down and left out any cream. You could put in a bit if you like.

It seems to get translated as fried, but in fact the method of cooking is roasting, although this is such a fatty cut of pork that the difference in results is trivial. The pork should be sliced thicker than bacon, anywhere up to about an inch thick, although I would think half that thickness would be ideal. Since the outside should get nice and crunchy in the roasting, I don't think the time for cooking will change much, but do start checking it about 10 minutes earlier if yours is thin, just in case I'm wrong. 

2 to 4 servings
45 minutes - 20 minutes prep time

Crisp Fried Pork with Parsley Sauce

Cook the Pork: 
500 grams to 1 kilo (1 or 2 pounds) sliced pork belly
salt & freshly ground black pepper
sweet paprika

Preheat the oven to 400°F. Put a rack on a good deep roasting pan. Pat the pork dry, and season on all sides with salt, pepper, and paprika. Lay the slices in a single layer, spaced a bit, on the rack.

Roast for 25 to 30 minutes on the top rack of the oven. Turn the pieces over (with tongs) and return to the top rack. Roast for a further 10 to 15 minutes until the meat looks crisp and browned. Remove it to a serving plate and serve with the parsley sauce.

Make the Parsley Sauce:
1 tablespoon pork fat
1 tablespoon barley or other flour
3/4 cup chicken OR ham stock
1/2 cup finely chopped parsley
2 teaspoons lemon juice
2 tablespoons sour cream OPTIONAL

When you turn the pork, lift out 1 tablespoon of the fat to a small saucepan. Once the pork is back in the oven, stir the flour into the fat and heat until bubbly all through, stirring a bit. Slowly mix in the stock to form a smooth sauce. Let simmer gently for a few minutes until thickened.

Just before the meat is ready to be served, bring up the heat again and add the parsley, stirring it in until it is just wilted. Add the lemon juice and sour cream, if using, and stir them in. Remove from the heat and put in a gravy boat or drizzle over the pork. Serve at once.


Last year at this time I made Roasted Rutabaga Fries. Boiled potatoes are more traditionally served with this, but Rutabaga Fries cook at the same temperature as the pork and would be a good choice!

Monday, 13 April 2020

Chicken & Mushroom Stroganoff

This is a fairly simple chicken-in-a-creamy-sauce-with-mushrooms kind of a dish, but take a look at that spice blend. It's based on one I found in a Polish grocery store (one of the few highlights of having had to drive to Mississauga every N days this winter was the shopping) and I liked it enough to reverse-engineer it. I've been using it a lot, in all kinds of things, and in particular I thought this gave an unusual and delightful flavour to the proceedings here. It goes well with pork and fish, too.

Like the original beef version of Stroganoff, this is quite fast and easy to make but the slightly luxurious ingredients make it, well, slightly luxurious.

4 to 6 servings
1 hour prep time


Make the Spice Blend:
1 tablespoon mustard seed
1 tablespoon coriander seed
4 teaspoons caraway seed
4 teaspoons sweet Hungarian paprika
1 tablespoon rubbed thyme OR savory
1/2 teaspoon Aleppo or similar hot chile/paprika

Grind the mustard, coriander, and caraway seeds. Sift them and regrind anything that didn't go through. When all is ground finely, mix with the remaining spices. Keep sealed in a jar in a cool, dark spot until needed. This makes more than you will need, but don't worry. You'll find a use for it.

Prepare the Ingredients:
6 shallots
4 - 6 cloves of garlic
125 grams (1/4 pound) shiitake mushrooms
125 grams (1/4 pound) oyster mushrooms
225 grams (1/2 pound) button mushrooms
500 grams (1 pound) skinless, boneless chicken pieces

Peel and chop the shallots. Peel and mince the garlic. Clean, trim, and cut all the mushrooms into bite-sized pieces. Cut the chicken into bite-sized pieces. 

Cook the Stroganoff:
1/4 cup unsalted butter
2 tablespoons soft unbleached flour
3/4 teaspoon salt
freshly ground black pepper to taste
1 cup unsalted chicken stock
1 cup yogurt OR sour cream
2 tablespoons Dijon mustard
dill pickles, if desired

Heat the butter in a large skillet over medium-high heat until melted and sizzling. Add the chicken pieces and cook until seared all over; stir a few times. Add the shallots and mix them in well, then follow with the mushrooms. Cook for a few minutes, turning occasionally, until they are softened and slightly browned in spots. Add the garlic and mix in; cook for another minute.

Mix in the flour, 2 tablespoons of the spice blend, salt, and pepper. Cook until there is no white flour left showing. Slowly mix in the chicken stock to make a smooth sauce. Let simmer for a few minutes, until thickened and you are confident that the chicken is cooked. Mix in the yogurt or sour cream, the mustard, and one or two dill pickles finely chopped (if you like) and allow to heat through to steaming hot, but do not allow to simmer or boil. Serve at once, over noodles or steamed rice.


Last year at this time I made Butter-Infused Beans in Tomato Sauce.

Monday, 30 March 2020

Chicken Kerala Style

Very good! A little different from the usual "curry", having a simple but sprightly assemblage of spices made zingy with the addition of plenty of fresh ginger and lemon juice. It's cooked more like a stir fry than a stew, and should come out drier and crispier than I managed. I did not use a large enough pan, that was my trouble. It was delicious anyway.

I don't know where all that garlic went. I mean, it had garlic, but I wouldn't have guessed a whole head. The chile flakes, as ever, are to be applied according to your taste and theirs. Also, while you could serve this without the cilantro, I thought it brought a really important profile to the balance of flavours, so use it if you can.

4 servings
time to marinate: 15 minutes prep time plus 2 to 18 hours
time to cook: 20 minutes prep time

Chicken Kerala Style

Make the Marinade:
1-2 teaspoons hot chile flakes
1 tablespoon coriander seed
1 teaspoon cumin seed
1/2 teaspoon fennel seed
1/2 teaspoon salt
1 teaspoon sweet paprika
1 teaspoon ground turmeric
2 tablespoons red lentil OR chick pea flour
1 head (5 to 8 cloves) garlic
1 tablespoon finely grated fresh ginger
the juice of 1 lemon

Grind the chile flakes, coriander, cumin, and fennel with the salt. Put them in a container which will hold the chicken. Add the paprika, turmeric, and lentil or chick pea flour. Mix well.

Peel and finely mince or grate the garlic. Peel and grate the ginger. Add them to the spices, along with the lemon juice, and mix well. 

Marinate & Cook the Chicken:
500 grams (1 pound) boneless chicken pieces
 OR 750 grams (1 1/2 pounds) bone-in chicken pieces
1 medium onion
3 to 4 tablespoons mild vegetable oil
a few sprigs of cilantro to garnish, if possible

Have the chicken cut into pieces; bigger than bite-sized but small enough to cook fairly quickly. Three or four bites to the piece, maybe. Mix them into the marinade until thoroughly coated, then cover and refrigerate for 2 hours to overnight.

When ready to proceed, bring the chicken out of the fridge to lose its chill while you peel the onion and cut it into slivers.

Heat the oil in a large skillet over medium-high heat. Add the onions and cook, stirring frequently, until wilted and slightly browned. Remove them from the oil to a plate. Add the chicken pieces individually, but with their marinade, and cook, turning them as needed until they are cooked through. Scrape up the marinade regularly; I found it inclined to stick. To the pan, not to the chicken. Once the chicken is about half-cooked, add the onions back in.

While the chicken cooks, wash, dry, and chop a few sprigs of cilantro to sprinkle over the chicken once it is cooked and dished, with as much of the marinade as can be removed from the pan.


Last year at this time I made Ye'atakilt Wot (Stewed Vegetables).

Friday, 14 February 2020

Mr. Ferdzy's Family Pulled Pickled Pork

I got this recipe from Mr. Ferdzy's brother. Admittedly, it was simpler then: instead of the list of spices, it called for a packet of Club House pickling spice, the vinegar, and the meat. How and why he suddenly came up with this dish from his youth decades later, I am not sure.

I looked the ingredients up on line and reverse engineered the list below. I'm glad I did, because the package has been changed since then and I don't know if it is the same size or not. At any rate, there is no guarantee that commercial products will be around forever.

When I made this recipe the first time, it was for a family gathering with both of Mr. Ferdzy's brothers, and all three of them were aflush with nostalgia, so I think I must have the spice blend reasonably correct. Quite apart from the family history, this is a very simple and delicious way to prepare a shoulder pork roast. I've now made it both slow-cooked in the oven and in the Instant-Pot. As usual, the oven technique produces the better result, but the Instant-Pot is fine and even quicker and easier. Mr. Ferdzy's mom would have made it in a more old-fashioned pressure cooker, but that was, in fact, the original method of cooking this.

6 to 12 servings
about 15 minutes prep time
plus 1 hour per pound in the oven
OR plus 15 minutes per pound plus 45 minutes pressure cooked

Mr. Ferdzy's Family Pork Recipe

Measure the Spices:
1 2" piece of cinnamon
2 to 6 bay leaves
6 cloves
1/2 teaspoon black peppercorns
1 tablespoon whole mustard seed
1 tablespoon whole coriander seed
2 teaspoon dill seed
1 teaspoon fenugreek seed
1 teaspoon allspice berries
1 teaspoon ground ginger
1 teaspoon sweet Hungarian OR smoked paprika
1 1/2 teaspoons salt

Measure everything into a small bowl or directly into the pot in which the meat is to be cooked. Don't bother to grind anything. 

Cook the Pork:
2 to 3 kilo (4 to 6 pound) pork shoulder roast
1 cup white vinegar
1 tablespoon bacon fat or mild vegetable oil

Trim off and discard much of the skin and fat from the roast. Heat the oil in a large skillet over medium-high heat and brown the roast on all sides. You will need your ventilation fan set on high!

To cook the roast in the oven: put the roast into a cover-able roasting pan with the spices and the vinegar; cover. Use the higher number of bay leaves. Put it in the oven and bring the heat up to 225°F. Remove the lid about halfway through the process. Cook for approximately 1 hour per pound, but expect that it may take a little longer. The meat should be falling apart when done, and the bone will pull right out. Let rest for 15 to 20 minutes before serving.

To cook the roast in an Instant Pot: put the rack into the pot, and put in the roast. Pour in the spices, the vinegar. Use only 2 bay leaves. Seal the pot, and cook on "Meat/Stew" (high pressure) for 15 minutes per pound. Allow the pressure to drop naturally; 20 minutes to half an hour.

In either case it is not a bad idea to cook the meat in advance, cool it, and remove the bones and fat. It reheats very well, in a little of the cooking juices. They are, however, very intense being mostly vinegar, and don't really work too well as sauce. Serve the meat with enough to keep it moist and tasty, but don't think of it as gravy.


Last year at this time I made Haluski.

Monday, 19 August 2019

Broiled Trout with Furikake

We had a family gathering over the weekend and it was time for something special, but quick and easy. I made the furikake - which is a popular Japanese seasoning blend - ahead of time, and then the fish just had to broiled and served.

Furikake was originally developed as a nutritional supplement - it contained finely ground fish bones which added calcium - but it also gave a burst of salty, nutty excitement to rice, fish, vegetables, etc. My take is not particularly authentic, but we really enjoyed it sprinkled on some trout fillets. This should make enough to season up to 8 trout fillets, but don't worry if you are not cooking that many. Save it and use it on lots of other dishes.

I put in some fish sauce to mimic the original base, but if you would prefer to keep it vegetarian you could omit it.

up to 8 servings
15 minutes to make the furikake
15 minutes to cook the fish

Broiled Trout with Furikake

Make the Furikake:
2 tablespoons sesame seeds
2 tablespoons pumpkin seeds
2 tablespoons hemp hearts
2 tablespoons soy sauce
1 tablespoon fish sauce
2 sheets of nori

Heat a heavy skillet over medium heat. Add the sesame, pumpkin, and hemp seeds. Toast them gently, stirring frequently. Sprinkle with the soy and fish sauces and stir in until absorbed and dried onto the seeds. As soon as they are dry and lightly toasted turn them into a dish to cool.

Toast the sheets of nori over the stove burner, about 3" or 4" above the flame. They will shrivel slightly and curl up. They will also become quite crisp. Crumble them into the bowl of toasted seeds. Put the mixture into a blender or food processor and process briefly until it is a fine, even, crumbly mixture the texture of coarsely ground pepper.

Cook the Trout:
1 filet of trout per serving, 200 to 250 grams (1/2 pound) each

Put the trout fillets on a lightly oiled broiler pan. Cook under the broiler for about 5 to 8 minutes, until nearly cooked. Sprinkle each fillet evenly with about 1 tablespoon of the furikake mixture. Return to under the broiler and cook for another 2 or 3 minutes until the trout is cooked. Serve at once.


Last year at this time I made Meatball Pilaf with Green Beans & Peppers

Friday, 17 May 2019

Asparagus with Chervil Chive Butter

The asparagus is starting to flow! Our new asparagus bed is starting to produce, and I think we are on our third or fourth cutting now. The old bed is only just starting to show some signs of life in the highest spot, confirming that moving it is a very good decision.

Chervil is next to impossible to find, so I post this mostly to encourage people to grow some chervil. It is one of the licorice-flavoured herbs, along with fennel and tarragon, but with a sweetness and delicacy that both of those lack.

I have an old cook book that has a chart of cooking times for vegetables, and it starts with 20 minutes for asparagus. This honestly boggles my mind, as I once cooked some for 6 minutes by mistake, and it disintegrated - there is no other word for what happened. HOW do you cook asparagus for 20 minutes - I mean, okay; you cook it for 20 minutes. But how do you possibly serve up the results?

4 to 6 servings
20 minutes prep time


1/4 cup unsalted butter
1 teaspoon 10% cream

a pinch of salt
freshly ground black pepper to taste
1 tablespoon finely minced fresh chives
2 tablespoons finely minced fresh chervil

Be sure the butter is soft enough to work before you start. Put it in a small bowl with the cream, salt, and pepper.

Wash, dry, trim, and finely mince the herbs. Work them together until smoothly integrated. Pack them into a little bowl, cover, and refrigerate when wanted. Serve with steamed or boiled asparagus.

Steaming is generally considered a better way to cook asparagus, but I admit I generally boil mine. Trim the ends of any tough parts, and bring the water to a boil. Be sure they will all fit into the pan before you start - really long ones may need to be cut in half. Three to five minutes is entirely sufficient, and drain them well before serving.


Last year at this time I made Fiddlehead & Potato Salad.

Monday, 13 May 2019

Buffalo Chicken Burgers

I've been noticing a lot of recipes with a "Buffalo Chicken Wing" theme lately, and decided to join the party. I have to admit I have resisted for quite a long time, though. The trouble is that in my early twenties I had a job as night-cook at a bar, and what I mostly made was Buffalo chicken wings. It gave me a jaundiced view of them.

I find it thoroughly bizarre that Buffalo chicken wings have become a kind of fancy thing. They are the creation of working class bars (in Buffalo, duh) made with the sole aim of selling a little food and encouraging the consumption of beer. Consequently, the recipe needed to be made of ingredients available from the cheaper food service companies and simple enough to be assembled by stoned minimum-wage workers late at night.

I'll tell you the original "recipe": Throw chicken wings in the deep fryer until done to a golden brown. Meanwhile, mix hot sauce and melted butter in a bowl, the proportions to depend on whether the customer has ordered mild, medium, hot, or suicide. When the wings are fried, drain them and toss them in the bowl. Dish them up and serve with a little blue cheese dressing from a bottle, and celery sticks. I see a number of gussied-up recipes with garlic and paprika out there, and let me tell you, no. Nobody in a bar is going to mess around like that.

The hot sauce was either Franks or Tabasco, depending on whether your bar had any pretensions to gentility whatsoever. There was no "wing sauce" which is apparently a thing you can buy now; I don't know why. I guess so you can have yet another half-empty jar of gunk in the fridge. There was absolutely no sugar or honey in it, which is a thing some people add now because people add sugar to absolutely everything, ugh.

So, anyway! These were good, and I would definitely make them again. You do need to make the Blue Cheese Dressing in advance, because let's face it; bottled blue cheese dressing is nothing to write home about, even when you are on your third beer. And a nice burger with lettuce and pickle is way better than gnawing on some boney, greasy, over-priced wing. Once the dressing is made they are really no harder or slower to make than any other burger.

4 large or 6 small burgers
20 minutes prep time for burgers
15 minutes prep time for Blue Cheese Dressing

Buffalo Chicken Burgers with Blue Cheese Dressing and Vegetable Sticks

Make the Meat Mixture:
450 grams (1 pound) lean ground chicken
1/4 cup oat bran
1 large egg
1 to 3 tablespoons Tabasco or Frank's hot sauce
1/4 teaspoon salt
freshly ground black pepper to taste
1/4 cup rice (or other) flour

Put the ground chicken in a mixing bowl with the oat bran, egg, hot sauce, salt, and pepper. Mix very well.

Put the rice flour in a shallow bowl sufficiently large to hold each hamburger patty as it is formed.

Also you need to have your blue cheese dressing made by now or it is tooooo late. Probably a good time to cut up the veggies as well.

Make the Burgers:
1 recipe Blue Cheese Dressing
4 to 6 hamburger buns
4 to 6 sturdy lettuce leaves
4 to 6 slices dill pickle (optional)
4 to 6 slices sweet onion (optional)
2 tablespoons unsalted butter
2 or 3 medium carrots, peeled and cut into sticks
2 or 3 stalks of celery, trimmed and cut into sticks.

Slice the buns and set them on plates. Wash and dry the lettuce leaves and put them on the buns, along with a dollop of blue cheese dressing and a slice of pickle and/or onion if desired.

Heat the butter in a skillet (or two) of sufficient size over medium heat until sizzling. 

Meanwhile, divide the meat mixture into 4 or 6 equal portions. Form each into a patty and dredge in the rice flour. Add them to the sizzling butter and cook for 4 minutes on each side until done. Put them in the buns, close them up, serve them with celery and carrot sticks. If there's a little extra dressing, pass it for the vegetable sticks.


Last year at this time I made Turnips with Bacon & Onion.

Monday, 18 March 2019

An Ethiopian Feast - Berbere

We love Ethiopian food, but you can't get it around here, no surprise. Quite a few of the usual ingredients are also impossible to get. I've been thinking of trying to make an Ethiopian meal for a while, but up until now I've been put off by my inability to get certain things. I still can't get them, but I guess I have reached the stage where I am willing to forge ahead anyway and live with the less-than-perfect results. So, over the next 2 weeks I'm going to post recipes for our Ethiopian feast. Several of them start with the spice blend known as berbere, so here's a recipe for that.

Berbere traditionally contains rue seed. That's ruta chalepensis, which I have never seen. It looks, from the photos, very similar to ruta graveolens which is occasionally grown in gardens for its attractive lobed blue-green leaves. It's a member of the citrus family, oddly enough, and like citrus it is supposed to repel cats. I think it did keep cats out of my flower beds when I grew it. I frankly thought it had a very unpleasant odour, and it is a byword in bitterness. I see a lot of recipes on the internet don't even mention it. So, okay.

That's a lot of carrying-on about an ingredient that isn't in this recipe. In spite of the fact that it's a traditional ingredient in Ethiopian cooking, I'm not at all sure I've ever had any food which contained it - it sounds like it would be very distinctive to say the least - so I decided to let it go and not worry about it. I couldn't get the ajwan either, but that's a reasonably common ingredient in Indian and Middle Eastern cooking, and it should be available in more civilized locales.

Even without the rue, making berbere is a pungent experience. If you can set up a burner outside to do it, so much the better. And if you are in a place where you can actually buy pre-made berbere - well, go for it!

All the recipes I use in this set will lean heavily on a book called "Taste of Ethiopia - The Other Good Food" by Webayehu Tsegaye, although as always, I fiddle with them. Even when I don't know what I'm doing.

about 1/4 cup
20 minutes prep time

Berbere - an Ethiopian spice blend

1/4 teaspoon whole cloves
1/2 teaspoon (about 12 pods) cardamom
1 teaspoon coriander seeds
1/2 teaspoon black peppercorns
1 teaspoon ajwan seeds (IF you can get them)
1 tablespoon dehydrated onion
1 tablespoon ground cayenne OR dried red chile (cayenne) flakes
1 tablespoon sweet Hungarian paprika
1 tablespoon ground ginger
2 teaspoons rubbed basil

It is best to measure everything in advance and have it all standing by. Make this in a well-ventilated area, (*cough* outside *cough*).* Crush the cardomom pods and remove the husks before you get started.

Heat a small skillet over medium heat. Toast the cloves, cardamom, coriander, peppercorns, and ajwan until they begin to be fragrant. Add the dehydrated onions, cayenne and paprika, mix in well, and immediately tip everything out onto a plate to cool.

Put the cooled spices and everything else remaining (the paprika, ginger and basil) into a spice grinder and grind well. If you don't have one, grind the toasted spices first in a mortar and pestle. Sift, re-grinding the bits that don't go through the first time, then mix with the remaining spices. I actually used the "dry" attachment for my Vitamix, and that worked well.

When your berbere is made, keep it in a small, air-tight jar in a cool, dark spot until you are ready to use it. 


Last year at this time I made Baked Beans with Garlic, Lemon & Rosemary.


*cough... cough, cough. Cough. Sputter, choke. Cough.

Friday, 1 March 2019

Honey Mustard Roast Lamb

Essentially, this is the technique for Slow Roasted Lamb Shoulder, with the addition of a honey-mustard sauce. There's a lot of mustard in this, but it gets very mellow with cooking. If you want more of a bite - and I think it's a good idea - stir more mustard into the sauce just before serving it. I'm suggesting a tablespoon but adjust it to your own taste. 

As an aside, those Blue Lake beans sure do freeze nicely. They look just as good as fresh in the photo, and they almost are. 

6 to 10 servings
6 to 7 hours - 20 minutes prep time

Honey Mustard Roast Lamb on a Platter with Green Beans

3 or 4 cloves of garlic
1 teaspoon dry rosemary leaves, ground
1 teaspoon salt (but consider the mustard)
freshly ground black pepper to taste
2 tablespoons honey
1/4 cup Dijon mustard
1/4 cup sweet sherry
a 1.5 to 2.5 kilo bone-in leg of lamb
1 cup beef or lamb stock
1/4 cup beef or lamb stock
1 tablespoon arrowroot or corn starch
1 tablespoon Dijon mustard

Peel and mince the garlic. Grind the rosemary, and in a small bowl mix the garlic in with it, as well as the salt and pepper. Mix in the honey, then the mustard and sherry. Put the roast in a fairly snug roasting pan and rub/spread this mixture all over the roast. Cover it with a lid if the pan has on or foil otherwise, then let it rest for 45 minutes to an hour at room temperature.

Remove the cover or foil to allow the addition of the stock, then re-cover it.

After half an hour, preheat the oven to 250°F. Put the roast - with the lid on or covered in foil - into the oven and roast for 4 1/2 to 6 hours, until very tender.

Remove the roast to a carving platter and let it rest for about 10 minutes. The foil or cover should be loosely over it. If the roasting pan can go on a burner, leave the sauce (gravy) in it and put it on a burner over medium-high heat; otherwise it needs to be transferred to a saucepan first. Mix the starch up in the 1/4 cup of cold stock and mix it in well to the sauce. Simmer until thickened, stirring frequently - just a minute or two. Stir the mustard in just before serving.

Slice the meat and serve it with the sauce drizzled over it or passed in a gravy boat. Leftover meat is best re-heated in any leftover sauce.


Last year at this time I made a Bachelor's Omelette for the first time. Since then I have been making omelettes regularly, and they have been omelettes and not scrambled eggs! You can teach an old dog new tricks, apparently.

Wednesday, 28 November 2018

Poutine with Homemade Gravy

I saw this recipe for Poutine gravy and thought I had to give it a try. As usual I have put my sticky hands all over it, not to mention that I found the quantities required to be more than a little vague for certain key items.

I tried to intensify the meatiness of it by concentrating the stocks, and also flavouring them with shiitake stems. I keep them for stock making, since I did pay upwards of $12 per pound for them, but they tend to pile up. This was a good use for some but if you don't have them you can certainly leave them out. I also used toasted barley flour for the flour as I like the extra layer of flavour it brings to soups and sauces. My finished gravy was a bit thicker than the photos suggested, but I was okay with that. It may be that I was a little short on liquid (since I am guessing as to what constitutes une boite). For perhaps the same reason I found the amount of ketchup just a tad high so next time I intend to replace one tablespoon of it with a little paprika.

When all is said and done though, this was the most delicious poutine we have eaten in quite some time. Yeah, yeah, it's been quite some time since we have eaten any poutine. Next time is going to come a lot sooner though, because this is GOOD and not at all hard to do, in spite of the fairly detailed instructions.

4 to 6 servings
1 hour 15 minutes prep time

Poutine with Roasted Potatoes and Homemade Gravy

Make the Roasted Potatoes:
1 or 2 medium-large potatoes PER PERSON
mild vegetable oil, salt, & freshly ground black pepper to roast
50 grams (2 ounces) fresh cheese curds PER PERSON

Wash and trim - peel if you like - the potatoes and cut them into a thick classic French-fry shape. Put them in a pot with water to cover and boil them for about 8 minutes. Drain well but carefully so as not to break them.

Preheat the oven to 375°F. 

Spread them on a baking tray in a single layer and toss them in enough oil to coat them lightly. Season with a little salt and pepper but don't get too carried away as the cheese and gravy will have lots.

Roast them for about 1 hour, turning them halfway through the process, until browned and crisp. When done, sprinkle the cheese curds over them and return them to the oven for 5 minutes. Meanwhile...

Make the Gravy:
3 cups unsalted (or low-salt) beef stock
1 1/2 cups unsalted chicken stock
1 bay leaf
1/2 cup dried shiitake stems OPTIONAL
1 large clove of garlic
1/4 cup unsalted chicken stock
3 tablespoons corn starch
2 tablespoons tomato ketchup
1/2 teaspoon sweet Hungarian paprika
a few drops Tabasco OR chile-garlic sauce to taste
1/4 cup barley flour OR soft unbleached wheat flour
1/4 cup unsalted butter
salt & freshly ground black pepper as needed

Let the potatoes cook for about 20 minutes before starting the gravy.

Put the beef stock, chicken stock, bay leaf, and shiitake stems - if you have them - in a pot. Bring to a boil then reduce to a simmer and simmer until the volume has been reduced by 1/3 to about 3 cups. This should take 15 to 20 minutes. Strain out the bay leaf and mushroom stems.

Peel and slice the garlic. Measure out the last 1/4 cup of chicken stock and mix in the corn starch, ketchup, paprika, and Tabasco sauce. Set aside.

About 5 minutes or so before the stock is ready, toast the barley flour in a dry skillet until it is paper bag light brown. Remove it from the heat and add the butter and garlic slices, stirring well until the butter is completely melted and the flour is all combined. If you are using wheat flour, melt the butter first then stir in the untoasted flour.

Return the pan to the stove over low heat and cook, stirring, for about 2 minutes. Slowly mix in the hot, strained stock stirring constantly to form a smooth sauce. Give the remaining ingredients (chicken stock, starch, etc) a good stir and mix them slowly into the gravy.  Stir constantly until the gravy thickens, just a few minutes. Test the seasoning and add salt and pepper as required.

When the potatoes and cheese curds are ready, drizzle hot gravy over them ad lib and serve at once.


Last year at this time I made Cabbage with Leeks & Mushrooms.

Monday, 19 November 2018

Hungarian Seasoning Blend

I first mixed this up many years ago (not this batch!) from a description in I Hear America Cooking, by Betty Fussell. It listed the spices, without the proportions, but it sounded interesting enough for me to come up with a version. I think I added a few things too.

Use this with chicken, fish, or pork, or in soups and stews. I made it up to use on Roast Chicken in a Clay Pot, but there will be about half of it left over. It's not a bad idea to make it a few days in advance to allow the flavours to blend. Once made, keep it in a cool, dry, dark place for up to 2 months.

about 1/4 cup
15 minutes prep time

Hungarian Seasoning Blend

Grind Some Spices:
3 or 4 pods of green cardamom
1 teaspoon fennel seeds
1 teaspoon celery seeds
1 teaspoon dill seeds
1/2 teaspoon fenugreek seeds
1/2 teaspoon black peppercorns

Crush the cardamom pods and remove the papery green husks. Add the remaining spices and grind well until everything is fine. Put them in a small bowl or jar. 

Add Some Spices:
1 teaspoon rubbed tarragon OR basil
1 teaspoon rubbed thyme
1/4 teaspoon ground cloves
1/4 teaspoon ground cinnamon
2 tablespoons sweet Hungarian paprika

Add the spices listed above to the ground spices. Blend well.


Last year at this time I made Balkan Sour Vegetable Soup.

Wednesday, 26 September 2018

Great Aunt Verna's Tomato Jam Pickle

Last call to finish up the tomatoes! With all the hot weather we've been having, we are rolling into the end of the season with more ripe ones than usual, but it seems very clear the weather is about to turn. 

I've posted at least one recipe that I can recall from Treasured Recipes of the Mount Family before; here's another. It was described as  "a definite family favourite", and when I mentioned to Mom that I had made some, she said "Oh, yeahhh! I remember that! Tomatoes with lots of sugar, right?" That about sums it up, I'm afraid, but all that sugar combined with the acid tang of tomatoes and vinegar and just a touch of spice is surprisingly compelling. I've actually reduced the sugar a bit from the original, but not by much, as that syrupy texture is an important part of this.

"Tomato Jam Pickle" is what Aunt Verna called this, and it's an accurate enough description, although I suppose I would have called it a chutney. Not a very complex one though. As such, serve it with cheese, eggs, cold cuts, or light meats like poultry or pork.

5 x 250 ml
2 hours prep time


2 kilos (4.5 pounds) ripe beefsteak or plum tomatoes
2 cups sugar
1 teaspoon ground cinnamon
1 teaspoon ground cloves
1 teaspoon salt
2 cups white vinegar

Put a pot of water on to boil sufficient to blanche the tomatoes. Blanch them for 1 to 2 minutes, then transfer them to a pan of cold water. When they are cool enough, peel them and chop them quite coarsely. Put them in a maslin pan or other wide, deep pan with a heavy bottom. Add the sugar and simmer them for about 1 hour, stirring regularly.

Put the canning jars into the canner with water to cover them by at least one inch. Bring to a boil and boil for 10 minutes.

Meanwhile, add the vinegar and spices to the tomatoes. Continue simmering and stirring for another 45 minutes or so, until the jars have finished sterilizing. About 15 minutes or so before all is done, put the lids and rings into a pot with water to cover them and bring them to a boil. Boil for 1 minute.

Fill the jars with the jam pickle, and wipe the rims with a piece of paper towel dipped in the boiling water. Apply the lids, with the rims just firmly tightened. Return the jars to the canner of boiling water and boil for 10 minutes.

Remove them and let them cool completely. Test the seals, and label the jars. This will keep for up to a year in a cool, dark place.


Last year at this time I made Broccoli with Chile & Garlic and Grape, Arugula, & Spinach Salad with Goat Cheese & Walnuts.

Wednesday, 18 July 2018

Spicy Ginger-Garlic Cream Sauce

I really wrestled with what to call this. It is not quite the sauce used to make Butter Chicken. I consulted various versions at length, though; and if you cooked chicken in it and called it Butter Chicken it wouldn't be the stupidest thing anyone has ever said. I was aiming for something a little more lightly spiced, but with plenty of verve, and I wanted some vegetables.

If I made this again with chicken - and I very well may - I would use boneless pieces, and mix the yogurt and sour cream into the paste the day before cooking, and let it marinate in the fridge. Then I would melt the butter and scrape the whole mess in to cook. I can see putting this on fish too, but in that case I would cook the fish separately and pour the sauce over it. 

I'm saying this serves 4, because it really should, but 3 of us fell on this like starving jackals and finished with licking the bowl.

4 servings
45 minutes prep time

Spicy Ginger-Garlic Cream Sauce on Beans & Cabbage

Make the Paste:
1 tablespoon finely grated ginger
3 cloves of garlic, peeled and grated
3 or 4 pods of green cardamom
1 tablespoon sweet Hungarian paprika
1/4 to 3/4 teaspoon Aleppo pepper (or similar)
1/2 teaspoon ground cinnamon
a few scrapes of nutmeg
3/4 teaspoon salt
freshly ground black pepper to taste
1 tablespoon chick pea flour
3 tablespoons tomato paste
2 tablespoons apple cider vinegar
1 tablespoon honey

Peel and finely grate the ginger and garlic into a small mixing bowl. Crush the cardamom, and extract the papery hulls. Grind the remaining seed and add it to the bowl, along with the rest of the seasonings and the chick pea flour. Mix well.

Mix in the tomato paste, vinegar, and honey until smooth and well-blended.

Cook the Sauce & Vegetables:

500 grams (1 pound) vegetables of choice, about3 tablespoons unsalted butter
3/4 cup sour cream
3/4 cup yogurt

Wash, trim, and chop your vegetables in advance; I used yellow beans, cabbage, and an onion. I can also see this with snap peas or cauliflower. Put a pot of water on to boil or steam them, and start them cooking at the appropriate time - it will take about 20 minutes for the sauce to cook.

Melt the butter in a large skillet, over medium-high heat. Add the prepared paste and cook, stirring frequently, for a few minutes.

Stir in the sour cream and yogurt, reduce the heat to medium, and continue cooking for about 15 minutes, stirring frequently, until smooth and thickened. Don't worry if the dairy products look a bit curdled early on; the sauce will smooth out again as it cooks. If the sauce wants to stick to the pan, reduce the heat a little more.

When the sauce is ready and the vegetables are cooked, drain the vegetables very well and toss them with the sauce. Serve at once, with rice or pasta.