Wednesday, 13 August 2014
How to Store Vegetables & Fruits
Things are busy around here, but I would like to draw your attention to this very useful poster from UC Davis, on the home (short-term) storage of fruits and vegetables. I'll re-iterate the main points here, including a few indispensable non-Ontario ingredients, and some of my own observations.
Poor storage practises will not only make your produce last for a shorter period of time, but also impair the flavour to a large degree. (Some things, lemons for example, will keep better in the fridge, but lose a lot of flavour).
Mostly, people have a tendency to put things in the refrigerator that really shouldn't be there! Including far too many produce managers, grrr. Most people know not to put onions and potatoes in the fridge, but I would like to draw your attention to the garlic, sweet potatoes and tomatoes! NO NO NO! Unless you like bitter sprouty garlic, hard shrivelled flavourless sweet potatoes, and tasteless sacks of red mush.
Onions and potatoes should be stored between 6°C and 10°C (42°F to 50°F); winter squash between 10°C to 13°C (50°F to 55°F). Garlic and sweet potatoes should be kept at temperatures ABOVE 13°C (55°F), but still a cool room temperature. Potatoes in particular should be kept in a dark spot to avoid them turning green in spots, but they should all be kept in the dark, in a slightly humid spot but with good air circulation.
Once cut, many of the counter-stored items do have to go into the fridge, so try to avoid having too much of them on hand in the first place. Once refrigerated, those leftovers are almost always going to be better cooked than raw.
For items that need to go into the fridge, they should be kept loosely wrapped in plastic - I like to save those crinkly bread bags that keep bread fresh longer; they work on veggies too! I know there is a trick to keep celery longer, by wrapping it in foil, but I always go through celery so fast I have never tried it. What other tricks and tips do you have for keeping produce in top condition longer?
DO NOT Store in the Fridge:
* Apples, for less than 7 days
* Muskmelons (Cantaloupes)
* Watermelons
* (Most Tropical Fruit, including Citrus)
* Basil (keep in a glass of water, like a bouquet)
* Cucumbers
* Onions
* Eggplant
* Garlic
* (Ginger)
* Peppers
* Potatoes
* Winter Squash (aka Pumpkins)
* Sweet Potatoes
* Tomatoes
RIPEN on the Counter, Then Store in the Fridge When Ripe:
* (Avocados)
* Kiwifruit
* Nectarines
* Peaches
* Pears
* Plums
* Plumcots
* (Bananas - I will put very ripe bananas in the fridge for up to 24 hours if I think it will get eaten within that period; the skin will blacken but the fruit will be... okay. Also, they freeze well in their skins for baking.)
NOTE! These should all be stored in the fridge once ripe, but do not let them stay there for long! Use them quickly.
Store in the FRIDGE:
* Apples (if not using in 7 days)
* Apricots
* Blackberries (but use within 24 hours!)
* Blueberries (but use within 24 hours!)
* Cherries (but use within 24 hours!)
* Cut fruits
* Grapes
* Raspberries (but use within 24 hours!)
* Strawberries (but use within 24 hours!)
* Asparagus (but use within 24 hours!)
* Green Beans (but use within 24 hours!)
* Beets
* Belgian Endive
* Broccoli
* Brussels Sprouts
* Cabbage
* Carrots
* Cauliflower
* Celery
* Cut vegetables
* Green Onions
* Herbs (other than Basil)
* Leafy Greens (such as Arugula, Chard, Kale, & Spinach)
* Lettuce
* Mushrooms
* Parsnips
* Peas (but use within 24 hours!)
* Radishes
* Rutabaga
* Sprouts (use within a couple of days)
* Summer Squash (Zucchini)
* Sweet Corn (but use within 24 hours!)
* Turnips
Monday, 11 August 2014
Kamo Eggplant
So there it is; the first eggplant of the season, our just-about 1 pound Kamo eggplant. I feel a little badly, sometimes, that so many of the vegetable varieties that I grow in my garden and write about are pretty much completely unavailable, unless you grow them yourself. I'm afraid this is one of them.
Kamo is a kyo yasai, or traditional vegetable variety from Kyoto. It is named for an old village which is now part of the city, where these eggplants were grown for hundreds of years. As the old capital of Japan, Kyoto accumulated the best produce the country had to offer, and from them developed the varieties of vegetables that are now so highly regarded. The fact that it had a large Buddhist population, and less access to fresh seafood than most Japanese cities also contributed to the development of a large number of traditional Kyoto vegetable varieties.
This eggplant caught us by surprise. We did not even know it was coming along. We have been keeping our eggplants and peppers under hoop-houses quite a bit this summer, as it has been quite cool here, rarely making it past 25°C and getting down well under 20°C at night - often ridiculously close to 10°C. When we decided to have a look and discovered this one, I was amazed. They are usually not even this big, never mind so early in the season. The actor depicted on that wrapping cloth, by the way, is pretty much life-sized, to give you an idea of the scale.
Kamo is a solid, rather smooth fleshed eggplant. The flavour is very fine, but mild. It is supposed to absorb less oil than other, coarser fleshed eggplants, but I'm not so sure about that. Maybe it's true. I will have to cook another, and another, to be sure. At any rate, this eggplant is very suitable for making tempura.
Kamo is usually described as round, but it isn't, quite. I think of it as purse-shaped; it has a flattish bottom it will sit on, usually, and sometimes the top of the fruit is almost pleated into the calyx. The calyx tends to be quite thorny, so be careful when handling one. The colour of the skin is lovely; a rich purple when ripe, and shows almost a wood-grain quality to it before it is ripe.
Like all eggplants, it should be started indoors 8 weeks before last frost date, and kept as warm as reasonably possible all through its useful life. A hoop-house is definitely a good idea. Given good conditions, you should have eggplant about 2 months (65 days) after planting them out. I think our first eggplant hit that date almost exactly. Kamo will grow to about 2' tall, and should bear 3 or 4 eggplants around here.
Wednesday, 6 August 2014
Quinoa Salad with Eggplant & Cucumber
We got our very first eggplant from the garden this week, and it was spectacular! It was a Kamo eggplant, a classic eggplant from Japan, and it weighed in at just a few grams short of a pound. (Why yes, I am a Canadian of a certain generation; why do you ask?)
Anyway, a special eggplant requires a special dish, so I got to work! This was really delicious and it will be made again. I actually thought the only way it could be better was if it had a bit higher proportion of eggplant in it, so feel free to be generous with it. Of course you will need a bit more oil in that case too. I try to keep the oil down to a dull roar when cooking eggplant, but if it doesn't have enough, it doesn't cook to a nice brown, it just sits and sits in the pan doing nothing, then eventually scorching. Apart from the little bit of sesame oil, though, it does provide the oil for the salad.
6 to 8 servings
30 minutes advance prep time
plus 20 minutes assembly time
Cook the Quinoa & the Eggplant:
1 cup quinoa
1 2/3 cups water
pinch of salt
450 grams (1 pound) Japanese eggplant
1/4 cup mild vegetable oil
Put the quinoa, water, and salt into a rice cooker, and cook until tender. Let cool. This can be done up to a day ahead. You can also cook it in a pot by bringing it all up to a boil and then reducing the heat to minimum for 15 to 20 minutes. You will need to watch it more carefully, though.
Wash and trim the eggplant, and cut it into 1 cm wide slices. Heat 1 tablespoon of the oil in a large skillet over medium-high heat, and cook the eggplant slices on each side until the slices are soft through and well browned. Add more oil when you turn the eggplant slices. I found it easiest to brush each slice with oil as it went into the pan, if it was replacing one that was coming out.
As they are cooked, lay the eggplant slices on a plate to cool. They too can be kept, covered in the refrigerator, until the next day if you wish. Both quinoa and eggplant should be at least cool before you proceed.
Make the Dressing:
2 large cloves of garlic
1 tablespoon finely minced peeled ginger
hot chile flakes or powder to taste
1 teaspoon sugar
2 tablespoons peanut butter
1 teaspoon toasted sesame oil
3 tablespoons apple cider or rice vinegar
2 tablespoons soy sauce
Peel and mince the garlic and ginger very finely. Put them in a small mixing bowl and stir in the chile flakes, sugar, and peanut butter. When well mixed, stir in the remaining ingredients, 1 tablespoon at a time.
Finish the Salad:
1 medium slicing cucumber
1/4 cup finely chopped fresh mint
1/4 cup finely chopped fresh cilantro or parsley
Chop the cooled eggplant into bite-sized pieces. Trim and chop the cucumber. You can peel it if you like, but I tend to think this salad could use the boost of green from the skins, so better to pick one with a nice, tender skin and leave it on. Wash, dry, and finely chop the herbs.
Mix the eggplant, cucumber, and herbs with the cooled quinoa. Toss the dressing into the salad.
Last year at this time I made Green Bean & Apricot Salad.
Friday, 1 August 2014
Light & Tart Summer Borscht
We planted some beets this spring, in a spot that promptly got overtaken by weeds because we neglected it. Meanwhile, they are popping up all over near the spot where we grew some beets out to collect the seed last year. So now, as I wander around the garden weeding or doing other chores, I keep finding beets in odd spots. Once I had collected enough of them, I made this soup.
It's inspired by eastern European versions of borscht in which the beets are fermented for several weeks, in the same way as dill pickles or sauerkraut are fermented. I didn't want to get into fermenting my beets, so I just used the dill pickles I already have. Sauerkraut would be a little different, but should also work well. The goal is to have a thin, tart, refreshing soup. We ate some of it hot, and the rest of it cold the next day. It was good hot, but we agreed it really shone as a cold soup. I suspect that having it rest in the fridge overnight helped bring all the flavours together.
My beets are the offspring of 5 or 6 different varieties that we let cross, and I'm a bit surprised at how many are paler than expected. There were a good number of Chioggia and yellow beets in there, I suppose.
6 to 8 servings
30 minutes prep time - 24 hour chill time
500 grams (1 pound) beets
2 stalks of celery
1 medium onion
1 tablespoon mild vegetable oil
3 cups water
a fresh sprig of lovage or dill
1 cup pickle juice, or to taste
AND 1/2 cup finely chopped dill pickles
OR the same proportions in sauerkraut juice and sauerkraut
freshly ground black pepper to taste
Trim the beets, leaving an inch or so of the leaf end to hold onto. Peel the beets, then grate them fairly finely (while holding on to the end, which then gets discarded!) Wash, trim, and finely chop the celery. Peel and finely chop the onion.
Heat the oil in a large soup pot, and add the beets, celery, and onion, and cook gently for about 10 minutes, stirring regularly. Add the water, and a sprig of lovage or dill, and simmer gently for another 10 to 15 minutes. Remove the lovage or dill.
Add the pickle juice and chopped pickle (or sauerkraut). Taste the soup, and adjust the amount of brine or salt as needed, and seasonwith some pepper. Allow the soup to cool, and chill, covered, until the next day. Serve it with a dollop of yogurt or sour cream if you like.
Last year at this time I made Swiss Chard with Garlic, Chiles, & Cranberries.
Wednesday, 30 July 2014
Tatume Climbing Zucchini; Calabacita
April 23rd arrived this spring, as it does. That is the date we normally plant squash, zucchini, melons, watermelons, and cucumbers inside in little peat pots to go outside in late May. Unfortunately, this year April 22nd arrived first. As it does, too. That was the date I had my gall-bladder surgery. No problem, we thought. We'll just put off planting for a week. But then family disasters rained down upon us non-stop and are still ongoing. No cucurbits got planted indoors. Eventually, around June 7th, we were organized enough to plant all those seeds outside, in the hope that we would get something, maybe.
It looks like melons, watermelons, and cucumbers will be pretty much a bust. They are there, but struggling. The weather has been all over the map. Hot, cold, wet, dry; but never enough of any one thing. The squash are the only thing that look at all hopeful, but we are still waiting for 8 kinds of summer squash to produce something, anything. And then there is lucky number 9.
We got Tatume squash from Hawthorn Farm as our new summer squash to try this year. It's a climbing squash, a trait that has been bred out of most summer squashes grown in North America. Most home gardeners prefer bush zucchini, which produce a lot of squash in a very compact space. The appeal is understandable. Market gardeners like bush squash too; as they are also easier to find and pick. We were interested in Tatume because we have already built a sturdy trellis system, and we were hoping that by growing them upward we could avoid some of the problems we have had with cucumber beetles and squash bugs.
Well, it turns out that Tatume is very attractive to both squash bugs and cucumber beetles. The good news is, it doesn't care. It is so large and rampant a plant that quantities of bugs that would kill a lesser zucchini have no noticeable effect on it. My research suggests that it is also reasonably impervious to vine borers, a pest we have not yet (*knock wood!*) encountered, but which ravages cucurbits by, well, boring the vine and cutting off the flow of nutrients from the roots. Partly this is because the stem is tough and dense.
Also, Tatume, like many vining squash, will root itself at nodes along the stem as it grows along the ground, bringing more water and nutrients into the plant and insuring itself against having one part of the plant severed from another - once rooted, the stems can continue on on their own. This also makes it drought resistant and tolerant of poorish soils. Obviously, we have lost this advantage by trellising it. Still, our garden has decent soil and plenty of water, so trellising is working out fine so far. In spite of the large size of the plants, we have already picked about half a dozen little squash (calabacitas, in Spanish). They are about the general size and shape of a hand-grenade. We have found them dense and nicely textured, with a mild but very pleasant flavour. They are not quite the calabacitas I remember as a child in Mexico, but close.
I thought such a large plant would be later to produce, but it has beaten any other summer squash in the garden by at least a week; from seed to fruit in about 6 weeks!
My impression is that this sort of calabacita is extremely widespread in Mexico, Central America, and the southern U.S.A; South America too for that matter. There are no doubt a number of different strains of it, with slightly varying qualities and flavours. Tatume has been circulating under that name for a good few years - I remember seeing it listed in one of the first seed catalogues we got when we first started our allotment garden. I did not try it then as the advertising copy described it as "not as annoyingly productive as most zucchini". I'm afraid I did not regard that as a selling feature! I wanted annoyingly productive, as I had very little space. Too bad! I believe that properly trellised, Tatume will produce quite as much summer squash as any other zucchini in a similar space.
Tatume is also known for its' generous production of male blossoms. At first, I would not have believed that. I kept checking the plants, and seeing female blossoms forming, but no male blossoms. I was afraid all the female blossoms would abort; but no problem, they all swell up nicely. Eventually I realized that all the female blossoms were on the south side of the trellis, where by chance it is easy for me to check, and all the male blossoms were on the north side! That tidy division seems to be breaking down as the season progresses, but for a while it was remarkably consistent. Still, if you want to cook with squash blossoms, this is a good variety.
I have not yet had a chance to try it, but these are also used as winter squash. If you miss picking them as summer squash, leave them to mature completely. Or so goes the advice. My impression is that the mature squash will be somewhere between bland and dull, but maybe I am wrong. It looks like in some strains the flesh may be a bit spaghetti squash like, which would actually be nice because I have a very hard time getting spaghetti squash to survive the swarms of cucumber beetles and squash bugs. At any rate, I will certainly leave one or two to mature and try them out. I may be pleasantly surprised!
Monday, 28 July 2014
Raspberry Eton Mess
Traditionally, Eton Mess is made with strawberries, but it can be made with raspberries or blackberries equally well. How about blueberries? I would, perhaps with a bit of very fine lemon zest instead of the vanilla.
I have given proportions and there is nothing wrong with these proportions, but this is the kind of dish that consists of however much of each ingredient seems good to you. Do not hesitate to meddle.
And in case you were wondering, this is where some of the whipping cream from Miller's Dairy ended up. Do not let your meddling lead you into using anything but real whipping cream, consisting of whipping cream and whipping cream alone, without added gums, stabilizers, etc, etc.
4 to 6 servings
20 minutes prep time, 30 minutes rest time
2 cups raspberries
1 cup whipping cream
1 teaspoon vanilla extract
4 pre-made crisp meringue nests (about 60 grams)
OR 1/2 recipe homemade meringue nests
another 1/4 cup or so of raspberries to garnish
Pick over the berries, and rinse them briefly. Drain them very well.
Put the cream in a medium sized mixing bowl with the vanilla and beat it with an electric mixer until you can form soft peaks. Crumble in the meringue nests, then mash the 2 cups of raspberries quite lightly, and fold them in.
Set the mess in a cool spot for about half an hour for everything to come together as an ensemble. Don't leave it too long though, or those meringues will completely melt, and you will just have sweetened whipped cream with raspberries.
Garnish with the remaining raspberries just before serving.
Last year at this time I made a Peach Coffee Smoothie. Just saw peaches available today!
Friday, 25 July 2014
Black Cap Raspberries
I had never heard the term "Black Cap" until someone mentioned them on this blog, and I then realized that in fact, we have quite a few of them growing in our yard! These are wild black raspberries - not blackberries* - and their presence almost makes up for the fact that our woods are not full of wild leeks, as we had once hoped for.
According to Wikipedia, they are rubus occidentalis, closely related to rubus leucodermis, a western North American variety. It is somewhat amazing to me that I have never run across them before; our cottage was surrounded by red raspberries and blackberries, and I have rambled through a lot of Ontario countryside, but somehow I had never run across these. Yet they have a range that runs from Quebec through North Dakota, and south to Arkansas and Georgia. In the past they were extremely popular and there were numerous cultivated varieties. There still are some, and apparently out west they are still grown commercially.
My interest though, is in the wild ones to be found around here. They are a plainly wild plant; extremely prickly all over with small and rather seedy fruit. The flavour is marvellous, as it so often is in "unimproved" fruits which tend to get selected for size, ease of picking, disease resistance, and in fact anything but flavour. Rubus occidentalis is said to be prone to disease, but ours have been very healthy. It is recommended to keep them away from any commercial cultivars you plant, as they may pass on diseases.
Unfortunately, they do not seem to transplant all that well, but then we always seem to do it at the wrong time of year (midsummer!) and manage to have some success. Do it in the spring or fall, and keep them well watered, and you are likely to have more success. Here is some interesting advice on how to grow them in a cultivated manner that takes into account their natural growth habits.
We have a patch that comes up by our deck in full sun, and they do very well, but most of our berries come up under the north side of a long line of spruce trees planted many years ago to mark the property line, so they tolerate quite a lot of shade. These ones produce a week or more later, and not quite so heavily as the ones in the sun, but I'm always amazed by how much they do produce. We have picked about 8 cups so far in two pickings, and I expect we have another 2 picking to go before they are over. This is, admittedly, in quite a few plants. Still, I have probably pulled off 3 cups of berries from the 3' square patch by the deck alone so even a small patch is worthwhile.
Black caps are delicious plain, right off the plant, but there are many things to do with thm. They are the basis of Chambord liqueur. Put them in pie, eat them with cream, ice cream, or custard, make jam or jelly with them, or check out my berry recipes for other ideas.
To make a liqueur of them, mash them gently and place them in a clean, sterilized jar, so as to fill it about 2/3 to 3/4 full. Cover with vodka, and close it up. Set in a cool, dark spot for a month. Strain out and discard the berries, pressing them to extract as much juice as possible. Add sugar to the resulting liqueur, tasting it until you have added just enough sugar to counteract the rough flavour of the vodka. Seal it up again in attractive, sterilized bottles, and you have a lovely gift, or treat for yourself. It should keep for at least a year.
*Blackberries are related, but they are juicier, hairless berries, and the receptacle (interior support) comes off with the berry when picked, whereas black caps are hollow when picked, and have fine hairs between the drupelets.
Wednesday, 23 July 2014
Cucumbers in Crème Fraîche with Mint
Cucumbers with yogurt or sour cream and dill are a popular and well known dish. This is basically that, although with crème fraîche for the sour cream and mint and parsley for the dill. It makes a nice change although there is nothing wrong with the original; not at all.
Everybody I served this to liked it very much, possibly because of the crème fraîche. I didn't tell them about that part, though.
4 to 6 servings
15 minutes prep time
1 tablespoon finely minced fresh mint leaves (or perhaps a little more)
1 tablespoon finely minced fresh parsley
1/2 teaspoon cumin seed
6 to 8 coriander seeds
1/8 teaspoon salt
freshly ground black pepper to taste
1/4 cup crème fraîche
1 teaspoon lemon juice OR vinegar
2/3 of an English cucumber
OR 3 small slicing cucumbers
Finely mince the mint and parsley and place them in a small mixing bowl. Grind the cumin and coriander seeds, and add them to the herbs with the salt and pepper. Mix in the crème fraîche, and the lemon juice or vinegar.
Trim the cucumber; peel it if you like, and cut it into slices. I tend to partially peel them, myself - leaving alternating stripes of light and dark green. Fold them gently into the crème fraîche mixture.
Last year at this time I made Bean & Zucchini Curry.
Monday, 21 July 2014
Curried Devilled Eggs with Peas
These are probably the most angelic of devilled eggs, or at least the ones I made were. Because I was serving them to someone who does not like spicy food, I used Jamaican curry powder, and didn't add any heat. Of course, my Mom promptly said that devilled eggs have to have horseradish! You can put some in if you like, or add some heat with a little cayenne, or simply use a hotter curry powder. Or, make them the way I did! In spite of Mom's call for horseradish, these were eaten with great enthusiasm by everyone.
And I have to remark on how much these remind me of this dish. My friend who does not like spicy food also makes a lovely potato salad with lots of hard boiled eggs and peas; they are a great combination.
5 servings (12 egg halves)
20 minutes prep time; plus allow 30 minutes to cool the eggs
6 large eggs
1/2 cup shelled peas
2 tablespoons mayonnaise, light is fine
1 teaspoon mild curry powder
1/4 teaspoon salt
1 garlic scape OR 2 tablespoons minced chives
1/2 teaspoon horseradish OR 1/16th teaspoon cayenne pepper (OPTIONAL)
1/2 teaspoon sweet Hungarian paprika to dust
Put the eggs in a pot with water to cover them. Bring them to a boil and boil them for 1 minute. Turn off the heat and leave them, covered, in the hot water for another 10 minutes. Move them to cold water and cool them completely, for about 1/2 hour. Peel them and slice each egg in half.
While the eggs cool, shell the peas and cook them in boiling water for 3 minutes. Cool them completely and mash them in a small mixing bowl. As you slice the boiled eggs, add the egg yolks to the peas and put the egg halves on a serving plate. Mash the egg yolks into the peas.
Add the mayonnaise, curry powder, salt, and finely minced trimmed garlic scape or chives, along with any spicy condiment you wish to add. Mix well. Put about 1/12th of the mixture into each half egg, and dust with a little paprika.
Last year at this time I made Zucchini Hummus.
Labels:
06 June,
07 July,
08 August,
09 September,
Appetizers and Hors d'oeuvres,
Eggs,
Herbs,
Peas
Friday, 18 July 2014
Herbed Cream Cheese Dip with Lemon
I'm not too sure if this is a dip; perhaps it is a spread. It depends on how thick you make it. Either way, it's very easy, and very good! Make it later in the summer once the garlic scapes are gone with a clove of fresh garlic to replace each garlic scape.
8 servings
20 minutes prep time, plus 30 minutes resting time
250 grams (1/2 pound) cream cheese
1/4 to 1/2 cup crème fraîche, sour cream, OR yogurt
3 tablespoons finely minced parsley
3 tablespoons finely minced chives
3 garlic scapes, trimmed and finely minced
the finely grated zest of 1/2 lemon
1/4 teaspoon salt
freshly ground black pepper to taste
the juice of 1/2 lemon
Put the cream cheese in a small mixing bowl, and add 1/4 cup of the crème fraîche, sour cream, or yogurt. Mix it in well, and add more if you would like a thinner consistency.
Wash and drain the herbs thoroughly, then mince them finely. Mix them into the cream cheese with the lemon zest, salt, and pepper. Mix in the lemon juice. Let the dip sit in a cool spot for about half an hour to allow the flavours to blend. Serve with bread, chips, crackers, and/or crudités.
Last year at this time I made Saft, and Green Pea Pancakes. Actually, Green Pea Pancakes would be lovely served with just a little dab of this dip, instead of the bacon.
Labels:
06 June,
07 July,
08 August,
09 September,
Appetizers and Hors d'oeuvres,
Dairy,
Herbs
Tuesday, 15 July 2014
Miller's Dairy Open House
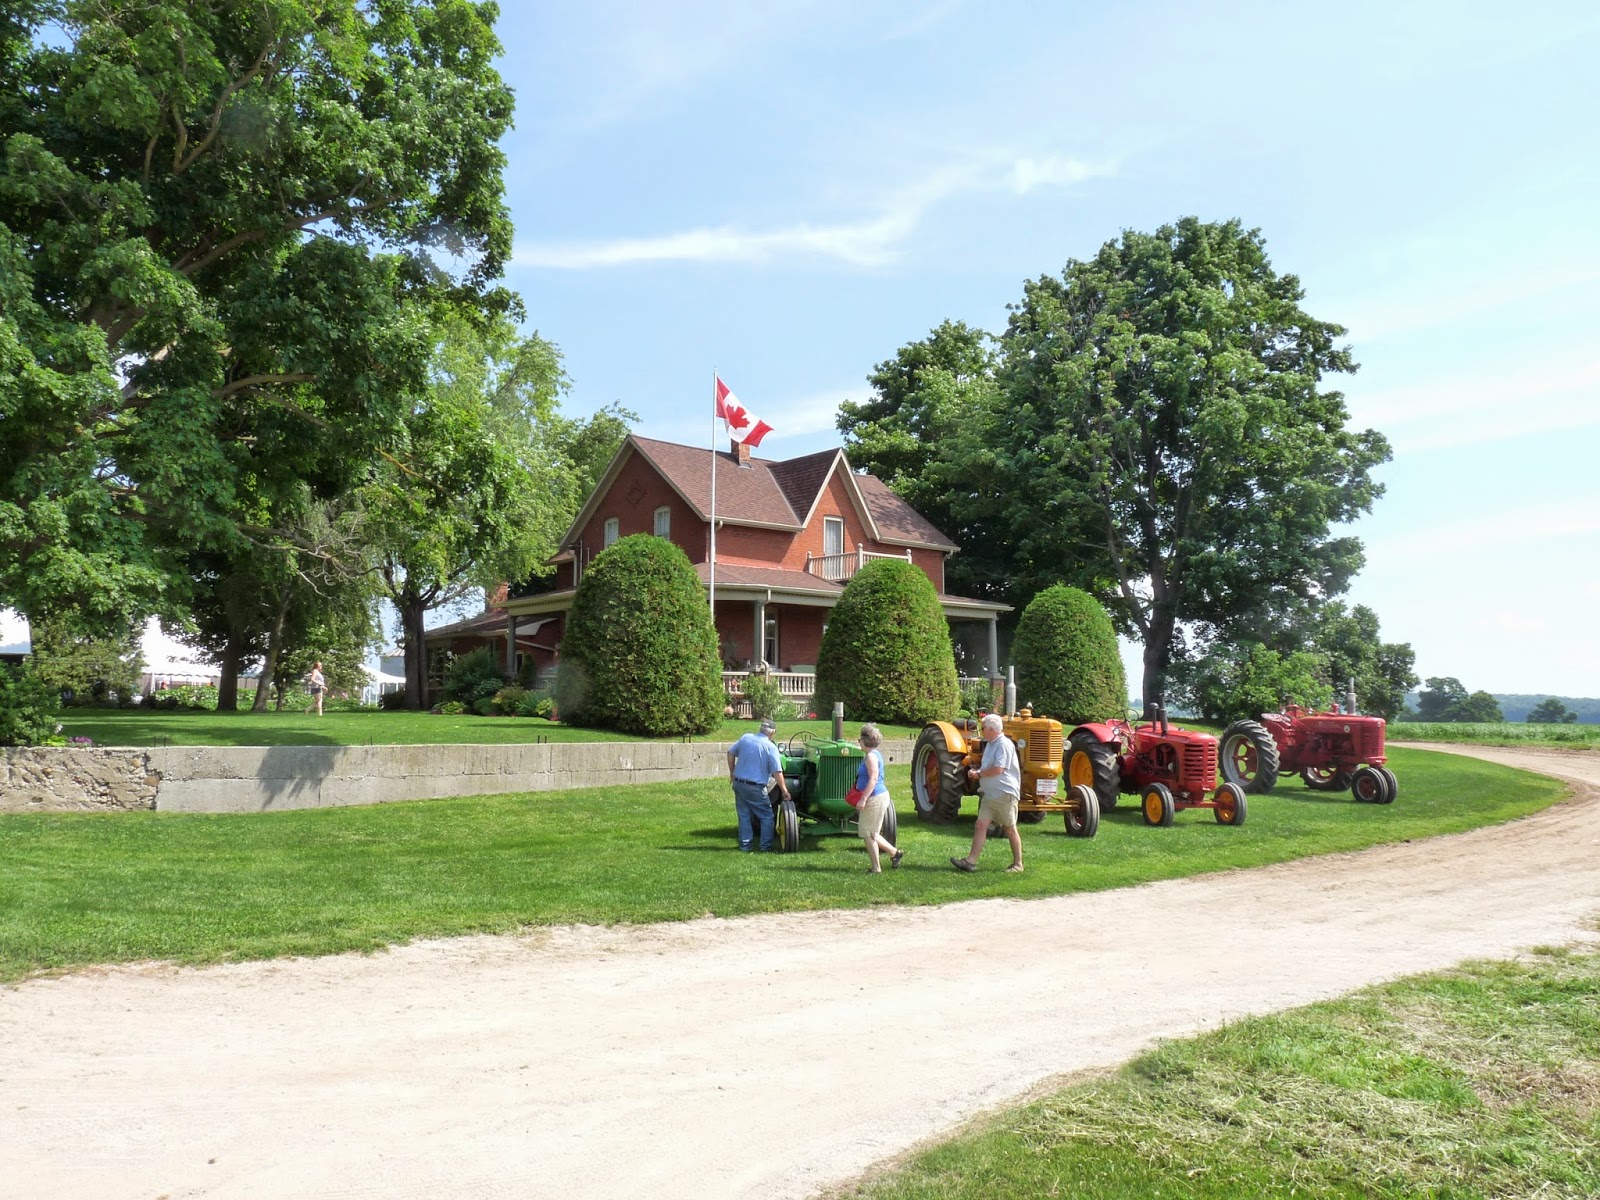
Last Saturday we headed out for a day of relaxation and to investigate a place I've been curious about for a while. Miller's Dairy, a farm just east of Creemore, was having an open house.
Miller's Dairy is housed right on the farm where the milk is produced.
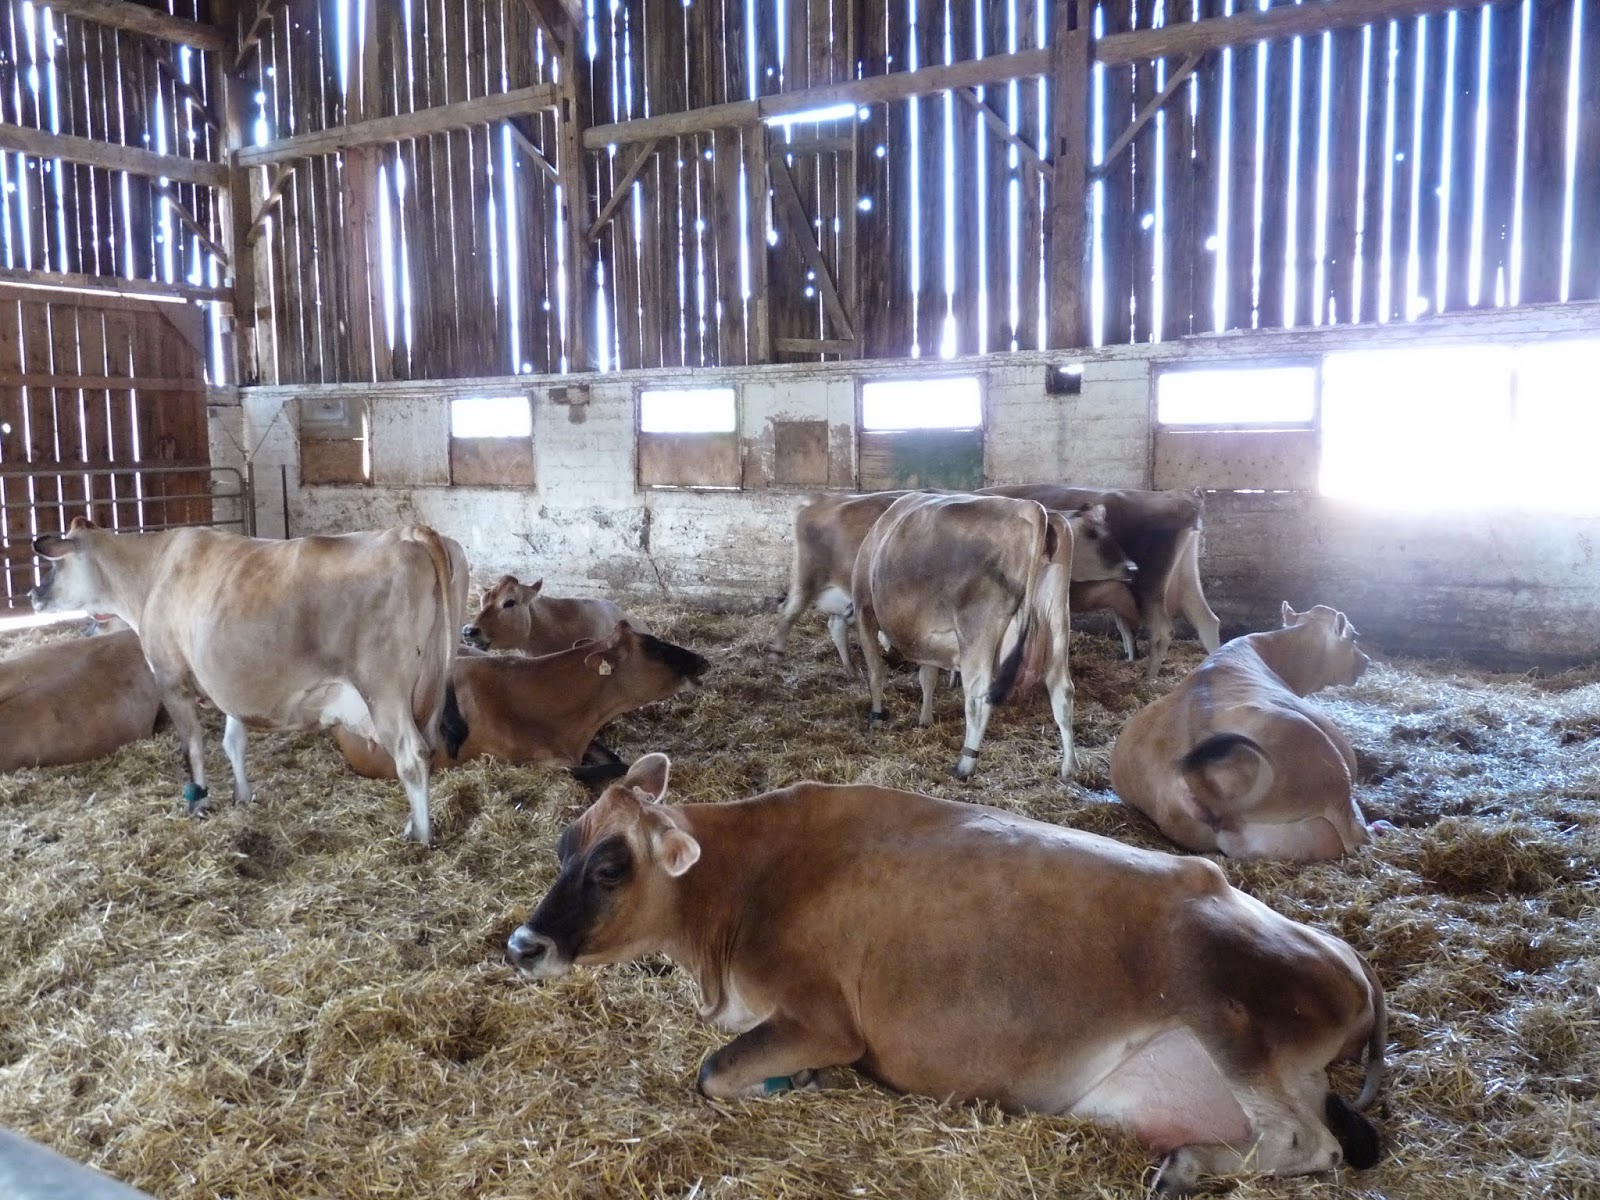
The milk comes from Jersey cows - a breed known for its very rich, creamy and flavourful milk. In the last decades, most milk comes from Holstein cows; Jerseys have become somewhat unusual. They can produce up to 30 litres of milk a day, compared to Holsteins which produce up to 45 litres. In addition, Jersey milk has a considerably higher percentage of fat (cream) than Holstein milk.
We entered the first barn, which was plainly the original barn of the farm. Jersey cows strike me as noticeably calmer and friendlier than most cows (or maybe I just mean Holsteins). They certainly seemed to take the mobs of visitors passing through very much in their stride.
They do have their funny ways, though. We noticed that the heifers (young cows, not quite yet of an age to calf and be milked) had rings with little spikes on them through their noses. Apparently they still have the inclination to nurse, but as they are away from their mothers, they try it on each other - an unsuccessful and possibly damaging activity, and the nose rings prevent it.
Visitors check out some calfs before they continue on to the next area.
Here's Richard Millsap, one of the 7 employees at Miller's Dairy. He was on hand to answer questions about the cows and the dairy. He told me that there are about 250 cows on the farm, of which about 110 to 120 are being milked at any one time. The dairy produces about 15,000 litres of milk per week, of which a little more than half is bottled on the farm. The rest goes into the standard commercial milk stream.
Next, we went out the back of the first barn and found the bottling plant.
It forms a little square with another building, which we will go into later...
... meanwhile, let's have a sample of chocolate milk. Huh. Tastes like chocolate milk. (I have to say, chocolate milk is not my thing, particularly. Give me... well, give me their 10% coffee cream, and their whipping cream. Yes, I'm all about the dairy fat, which is one reason I am a fan of Jersey cows.)
Inside the bottling plant, Dwight Bryan, the plant manager, was on hand to describe the bottling process. As ever, the process of moving, storing and processing milk involves large swaths of shiny stainless steel. The milk even comes into the plant directly from the milking barn in underground steel pipes.
The first place it goes is into this large storage tank. From there, the milk is separated into skim milk and cream. Then they go through the plate pasteuriser (heated to 168°F for 20 seconds) and the milk is also put through the homogeniser, which breaks down the fat globules so they are too small to coalesces and rise.
Some of the skim milk goes through the process first, then measured amounts of the cream are put back into the milk to create 1%, 2%, and "whole" (3.25%) milk, and finally the 10% cream that has made my morning coffee such a delight for the last few months since I discovered it. Dwight didn't say, but this must happen before the homogenisation (surely?) or the milk would separate, I would think. Someone please correct me if I'm wrong. Lastly they bottle the whipping cream.
Any cream left at this point goes to the Alliston Creamery, where it is made into my favourite local butter! Any extra milk also goes to other bottlers.
Most of their equipment is shiny-new, but there are few pieces of older equipment. It makes me smile to see them still in use!
Here's another older piece of equipment.This is the bottle steriliser, which then sends the bottles into the bottling room to be filled.
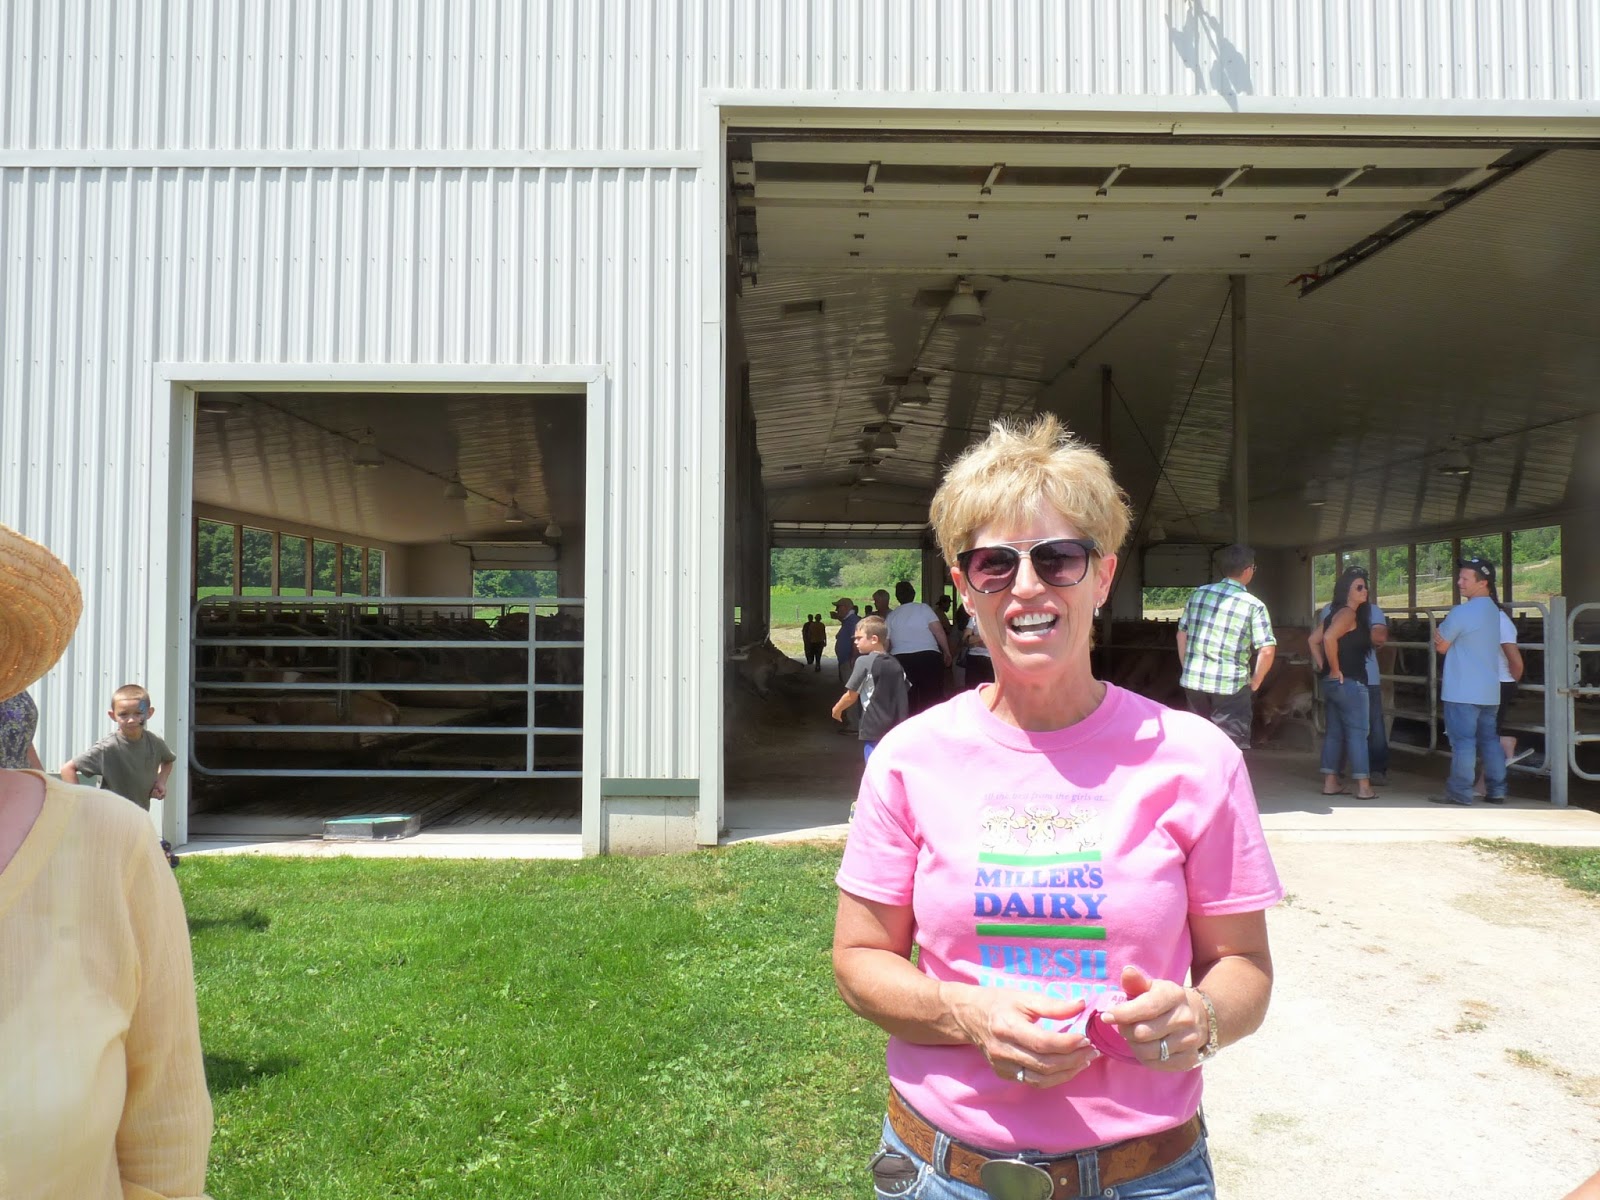
After we left the bottling plant, we went into the final building, the new grey building shown above. I was a little surprised to realise this is the milking barn, and the home of the cows currently being milked. Gage Hill, another employee, was on hand to describe the milking process.
There is space to milk up to 16 cows at a time, 8 on each side. The system is highly mechanised. As each cow steps onto the metal plate in the milking area, she is identified via an ankle bracelet. The amount of milk produced is measured - if it is lower than expected, a health check is done - and the temperature is taken, which can determine whether a cow is in heat or not.
In spite of the sophistication of the milking equipment, it is not robotic. The milkers are placed by hand, after the teats are dipped in an iodine solution to clean them. The milk is then tested before it makes it into the bottling plant.
A milk-producing cow is milked for about 1 year before she runs dry. At that point, she goes back into the dry-cow herd, and remains dry for about 9 months. A typical Jersey can expect a career of about 12 years. The milking cows live in a large, airy and very open barn, but don't go outside. At one point they had that option, but so very few of them ever went out that now they just keep the gates closed. I guess it's a lot of work hauling around 30 litres (kilos!) of milk!
More cows! I was interested to see the variation in them. Some had black mask like markings on their faces, some had an overall dark cast to the colour of their hides, and one even had a large white patch on her back. My mother, who went with us, thought they looked rather different than the Jersey cows she remembers from her childhood - she used to help collect the neighbours Jersey cows at the end of the day when she was on summer vacation at her Aunt's farm, and even had a cow named after her. I suspect though, that this is just a more genetically diverse group than the cows she knew.
Can't see it in the picture, but the bar in the lower left is moving, dragging manure towards a trench, from which it will presumably be moved out of the barn. The whole farm had obviously been scrubbed to shine for the tour, but we were certainly left with the impression that even on ordinary days it is impressively clean.
As we exited the barn, we had a chance to talk to Marie Miller, one of the owners of the farm. She told us that while Miller's Dairy products are not (yet?) sold in Toronto, they are available in about 95 stores at this point. They have been interested in keeping their market local. I know the milk is carried by Foodland stores in my area (and my local Valu-mart has it, but I suspect they are a bit of an anomaly.) Richard Millsap had earlier told us that that Miller's Dairy milk is available in Kincardine, Hanover, Meaford, Thornbury, and Owen Sound, and presumably a number of other places in that general range.
I was wondering how having your own dairy fits in with the Milk Marketing Board. Marie told us that the milk is transferred, on paper, to the DFO, and then they buy it back and bottle it. In spite of this extra layer of bureaucracy, Marie is a big fan of the quota system, which she thinks has provided stability to keep a lot of Ontario dairy farmers in business during hard times. Both Marie and her husband John, come from long line of dairy farmers. John Miller is 5th generation of his family to be dairy farmers, and they were also bottlers and makers of ice-cream in Goderich.
Alas, the farm was not set up to sell to their visitors, so after the tour we made a dash into Creemore to the 100 Mile Store there. I was able to score some whipping cream, with which I intend to make clotted cream. Because Miller's whipping cream is not homogenised - I confirmed that with Dwight Bryan - it should work perfectly.
Wednesday, 2 July 2014
Cream of Lettuce Soup
We love cooked lettuce! Well, no. No, we don't. Still, I thought I would give this soup a whirl (in the food processor) with the last of the lettuce and it was really quite good in spite of the fact that the lettuce has gone just a tiny bit bitter. But bacon makes everything better; what can I say? Cream doesn't hurt either.
Two heads of lettuce down; 47 left to go. Actually, I think we will just let them bolt. I'm too busy picking peas to worry about the lettuce.
4 servings
30 minutes prep time
200 grams (scant 1/2 pound) bacon
16 to 24 garlic scapes
2 heads Bibb or Boston lettuce
2 cups chicken stock
about 3/4 teaspoon salt
freshly ground black pepper to taste
1/2 cup 10% cream
Chop the bacon fairly finely, and put it in a large, heavy-bottomed pot over medium heat to cook slowly until quite crisp. Stir regularly.
Meanwhile, trim the hard, thin ends from the garlic scapes, and cut them into inch-long pieces. Wash and trim the lettuce, and drain it well. Chop it coarsely.
When the bacon is done, lift out the pieces with a slotted spoon, and set them aside. If there is too much fat in the pan - there should be somewhere between 1 and 2 tablespoons - drain it off until the right amount remains. Return the pan to the heat, and add the garlic scapes. Cook them until softened and browned in spots, stirring regularly; about 2 or 3 minutes. Add the well-drained lettuce, and mix it in until it is all evenly wilted.
Add the chicken stock, and simmer the soup for about 5 minutes. Add the salt and pepper. As usual, the amount of salt given assumes that you are using unsalted stock - be prepared to reduce that amount, possibly to zero, if you are using already salted stock.
Put the soup into a blender and blend until very smooth. Add the cream, and blend again. Return the soup to the pot and bring it back up to steaming hot, but do not let it simmer. Serve it with the bacon bits sprinkled over it.
Last year at this time I made Peas, Cheese & Egg Salad with Creamy Garlic Scape & Parsley Dressing.
Subscribe to:
Comments (Atom)
